Enable Hot Add Hot Plug
In this blog, I will provide you steps on how to increase VMware vSphere VMs RAM or CPUs (Enable Hot Add Hot Plug) without shutting down VMs. We typically add extra RAM and plug additional CPUs.
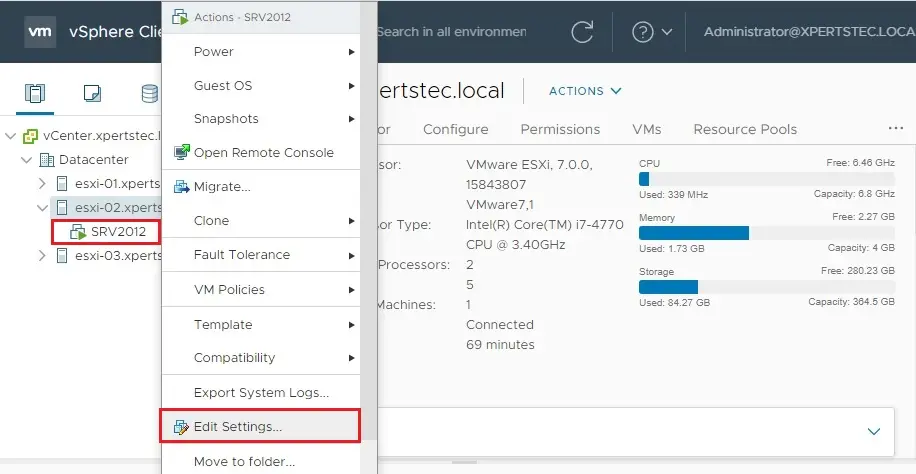
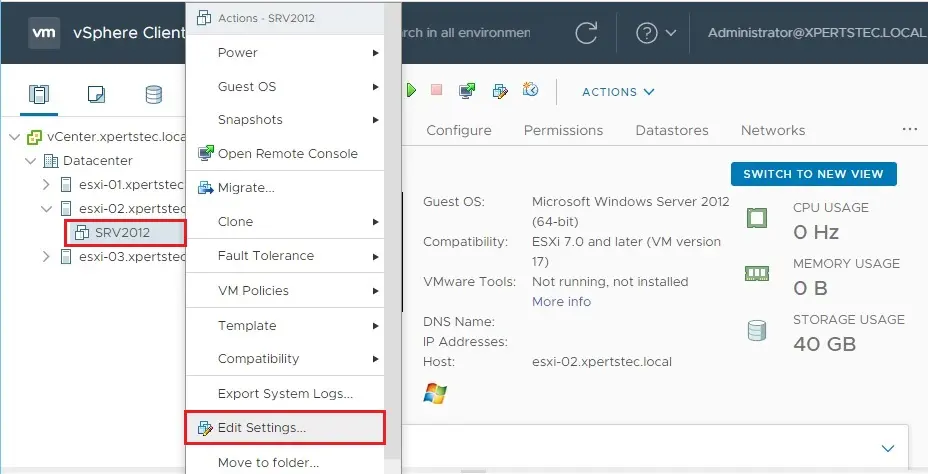
1- Right-click on Virtual Machine the one you want to increase ram, CPU, and then click Edit Settings.
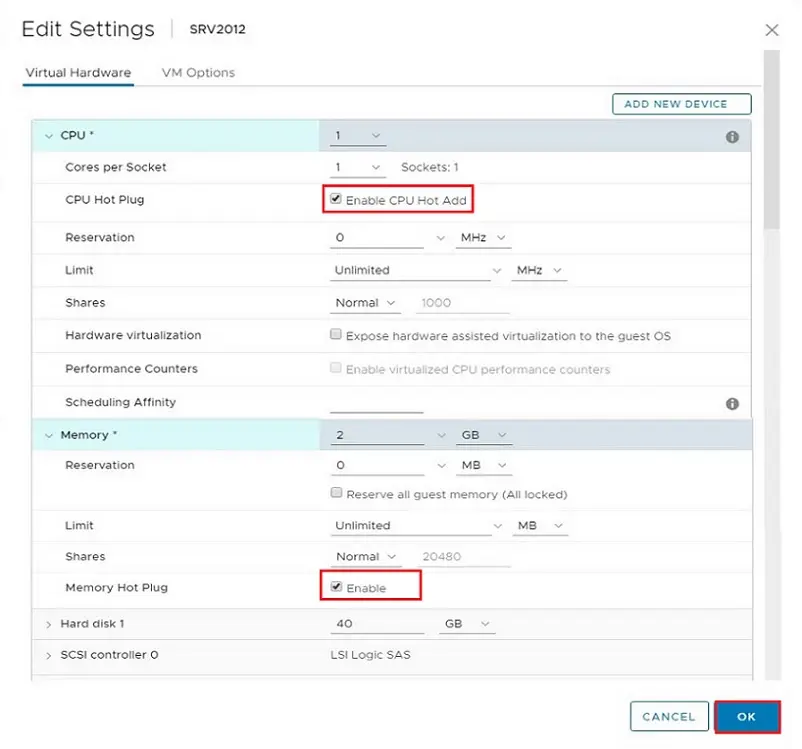
2- By default CPU Hot Plug and Memory Hot Plug features are disabled.
First, we need to enable them, so we need to power off of our virtual machine.
3- Right click on VM, select Power option and click Power off. (I am testing in my home lab if you are working in an environment then please do proper shutdown your virtual machine).
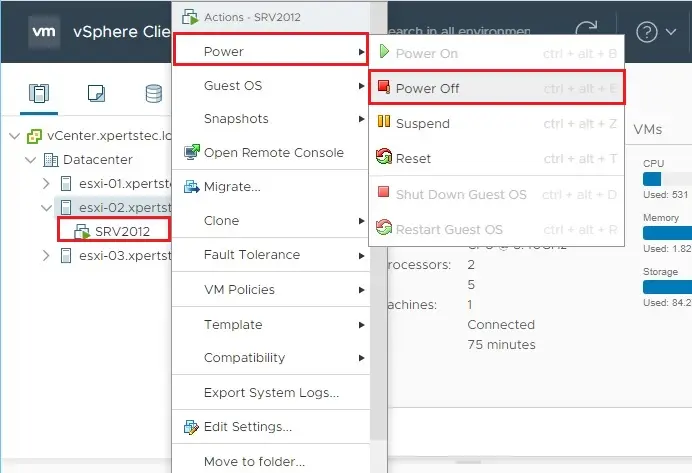
4- Click yes to confirm Power Off.

How to change VM configuration
5- Now VM is shut down, right-click on VM and select Edit Settings.
Before enabling Hot-Add/Hot-Plug, it’s a good time to know about requirements and limitations.
Requirements and limitations Please visit VMware
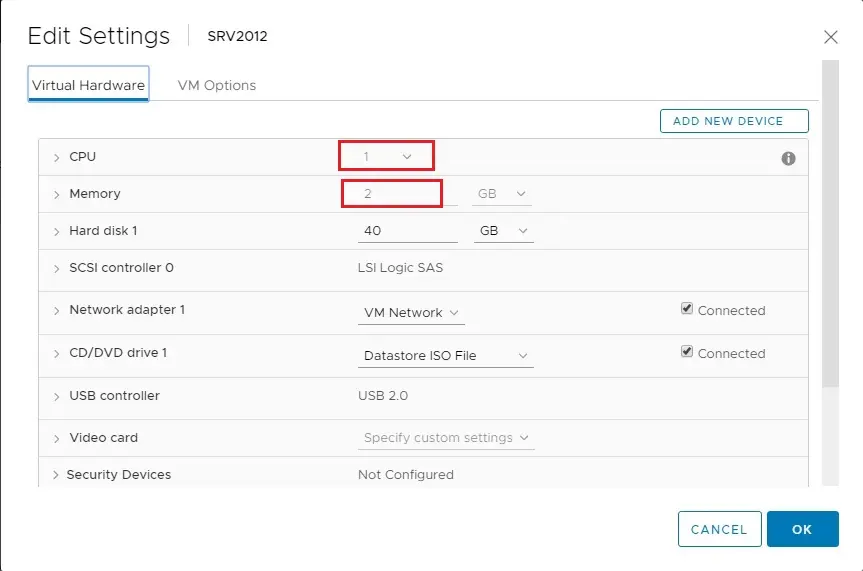
6- Virtual Machine Edit Settings, select the Virtual Hardware tab, and select the checkbox to enable CPU Hot Plug, Memory Hot Plug, and then click ok.
Note: – These features will allow adding more RAM (Memory Hot Add) and vCPUs (CPU Hot Plug) without shutting down the VM. In this way, there is no downtime if you need just to add some more power to your VMs.
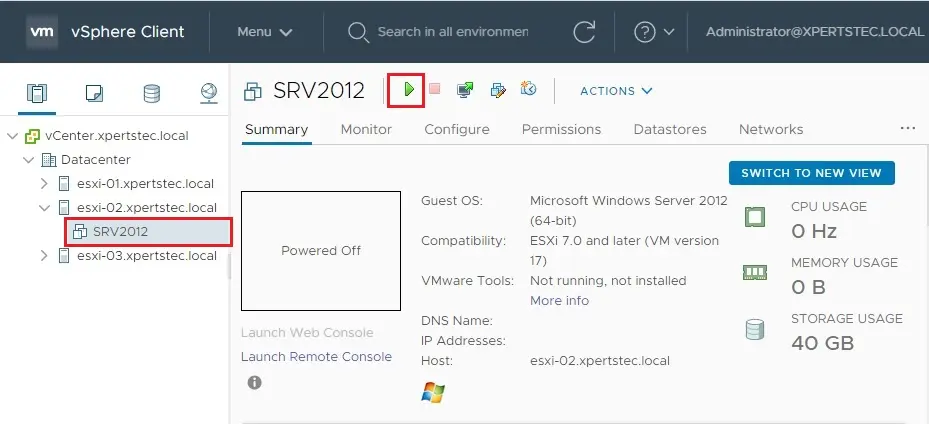
7- Select Virtual Machine and then select Power On button.
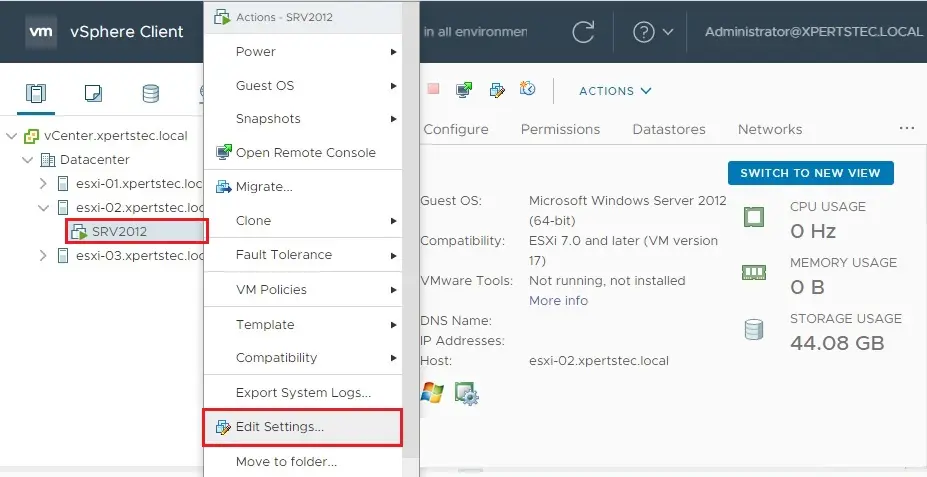
8- Now that the VM is powered on, right-click on it and select Edit Settings.
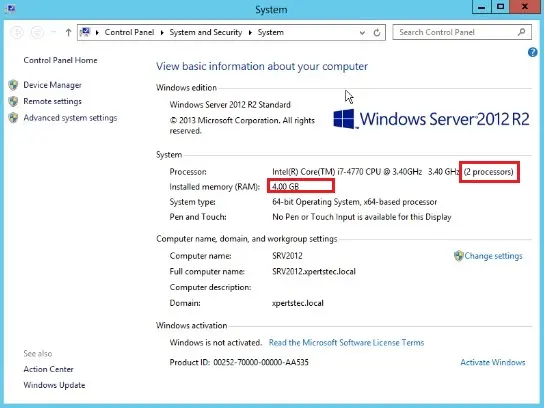
Windows Server 2012
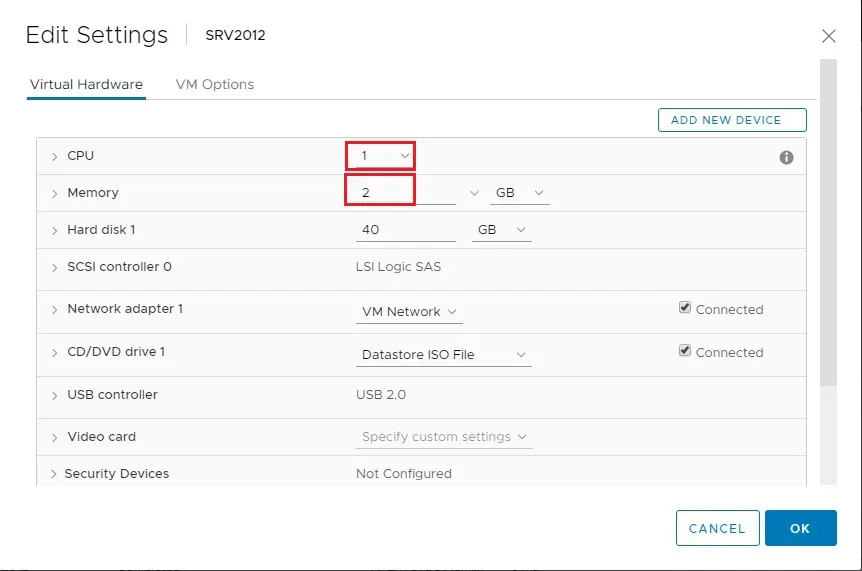
9- Let’s start with Windows Server. Here we can change VM configuration in Windows Server 2012.
Now CPU is 1 and Memory is 2 GB.
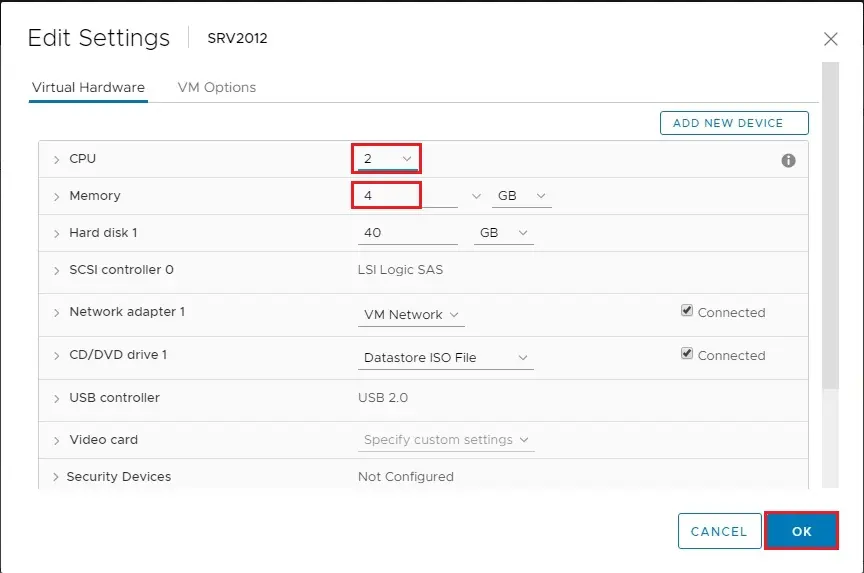
10- I increased the CPU 1 to 2 and Memory from 2 GB to 4GB and then click ok
11- Windows Server System properties.