Veritas Backup Exec allows you to restore virtual machine VMware data to either the situation from which the info was protecting or to a special location. Restoring data to a special location is mentioned as a redirected restore.
The Virtual Machine Disk Format .vmdk file for a virtual machine. Individual files & folders are protected from inside the vmdk file and individual items from Microsoft SharePoint, Exchange, SQL, or Active Directory.
How to Backup Virtual Machine
Veritas Restore VMware Virtual Machine
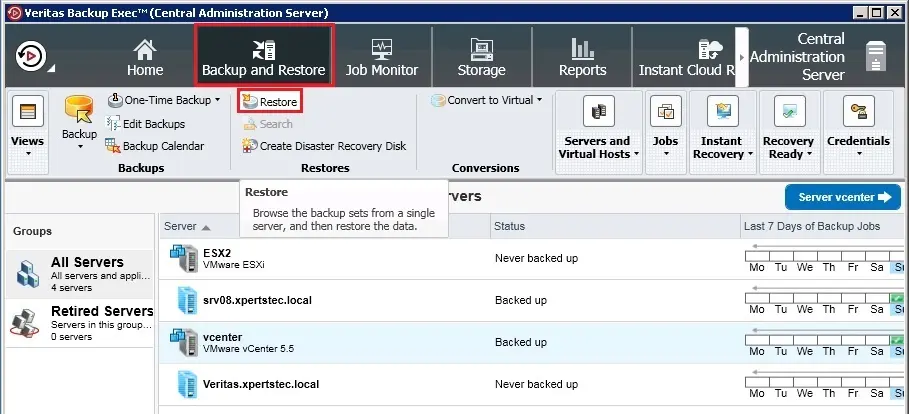
1- Select the Backup and Restore tab and then click Restore.
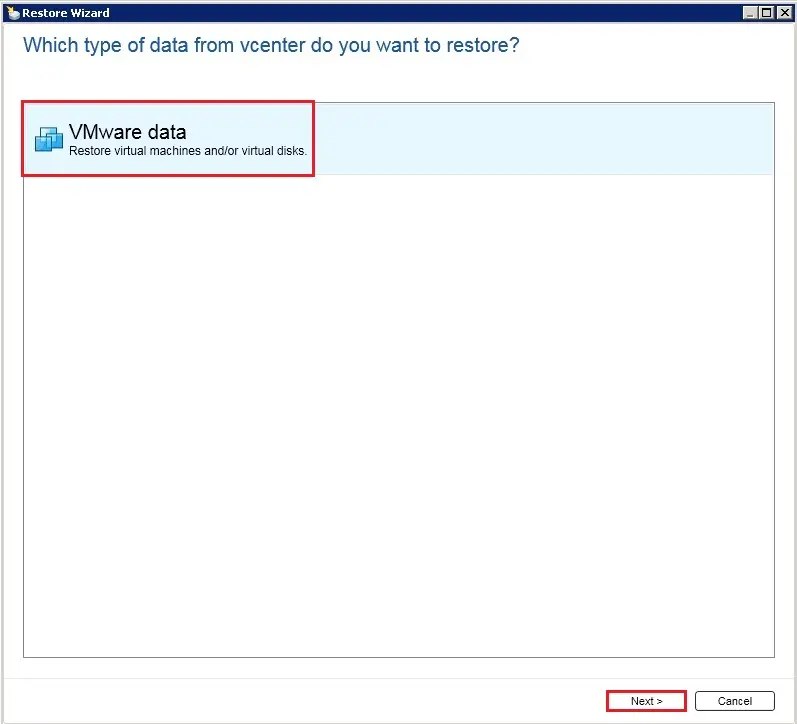
2- In the backup exec restore wizard select VMware data and click next.
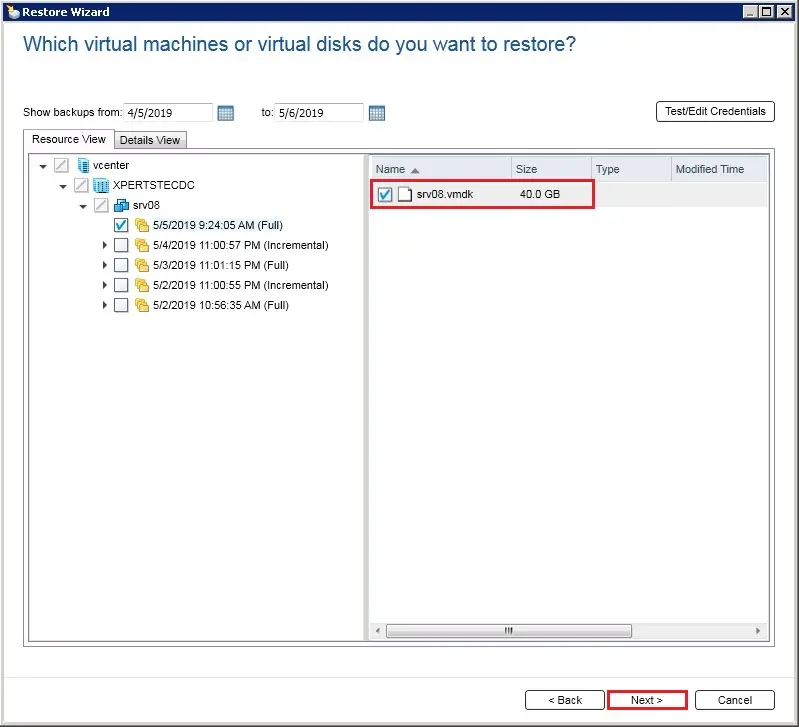
3- On the Resource View tab > expand the virtual host server name or the virtual machine name > select the items that you want to restore and then click next.
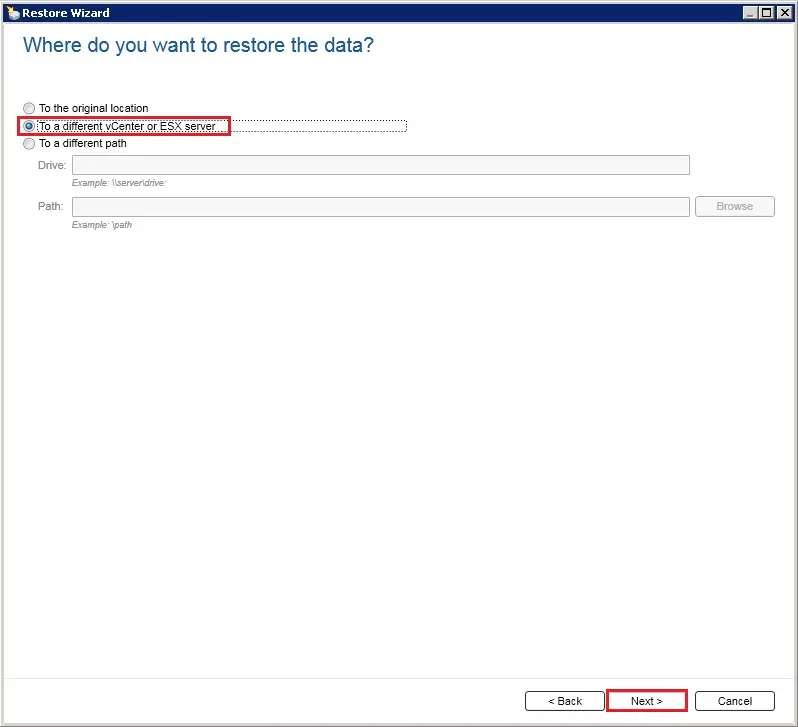
4- Select To a different vCenter or ESX server (you can also select to the original location) and then click next.
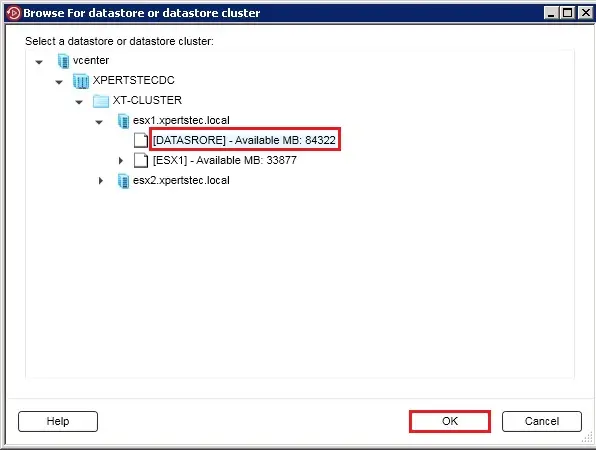
5- Expand the vCenter server and select the datastore where you want to save VM machine and click ok.
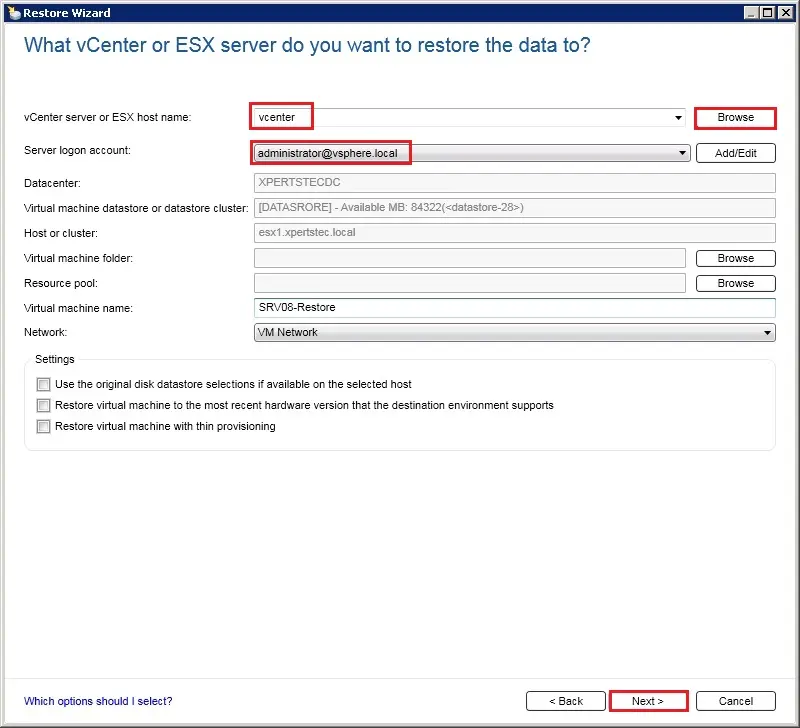
6- Type the name of the vCenter Server or ESX/ESXi host that you want to restore to, or click Browse to search for the server.
Select the right logon account for the server that you simply want to revive the info to.
Click Browse next to the Virtual machine folder to select the folder to which you want to restore.
Click Browse next to the Resource pool to select the resource pool to which you want to restore.
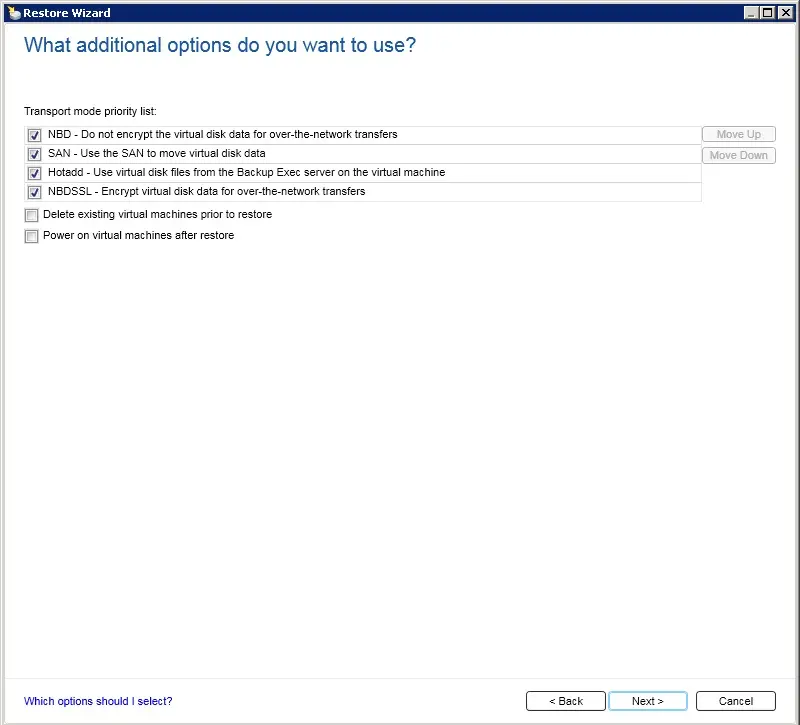
7- Here you can select what additional options do you want to use and then click Next.
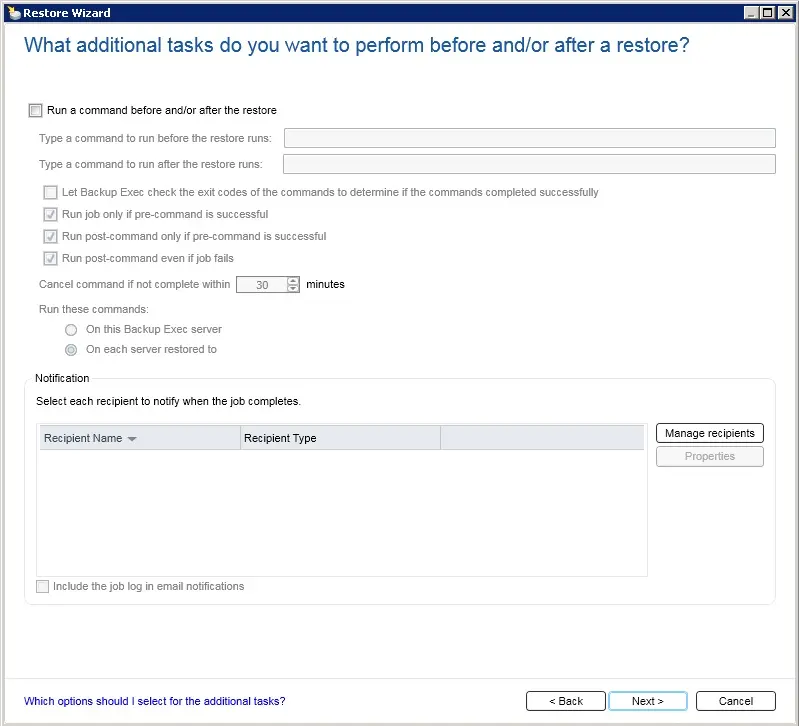
8- What additional tasks do you want to perform before and/or after a restore and then click Next.
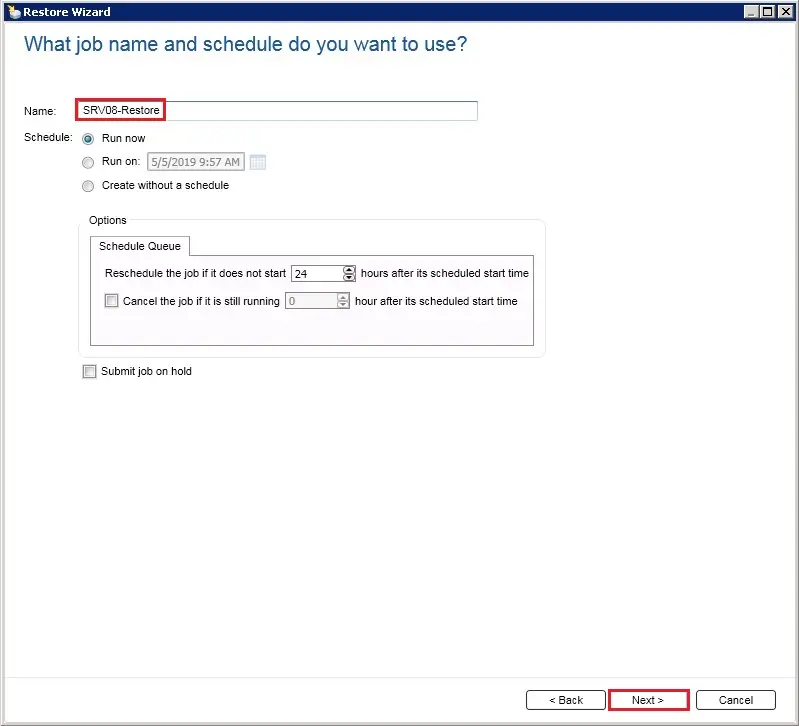
9- If you want to type a name for the virtual machine types it in the Virtual machine name field. And configure schedule or select Run now and then click next.
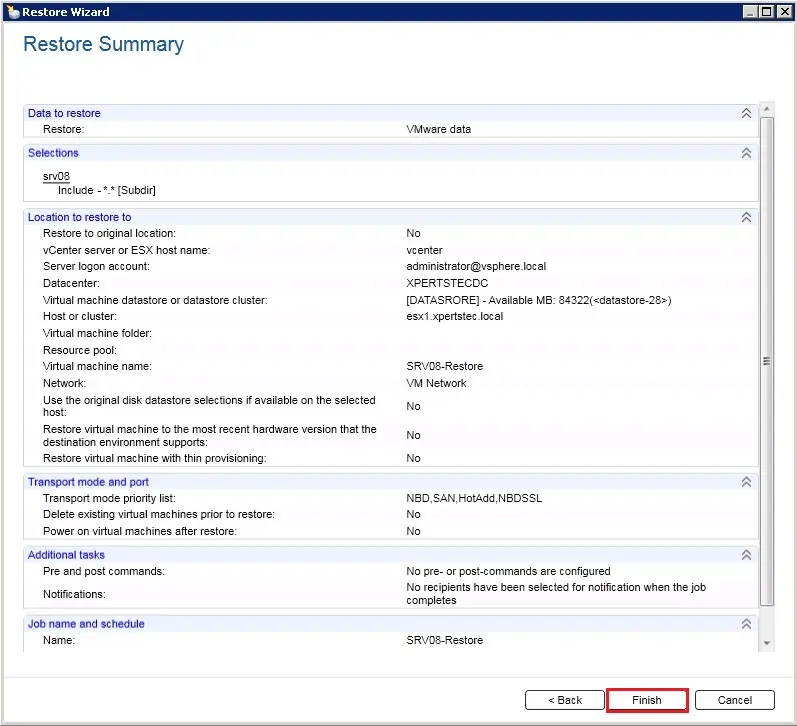
10- Review the restore summary and click Finish.
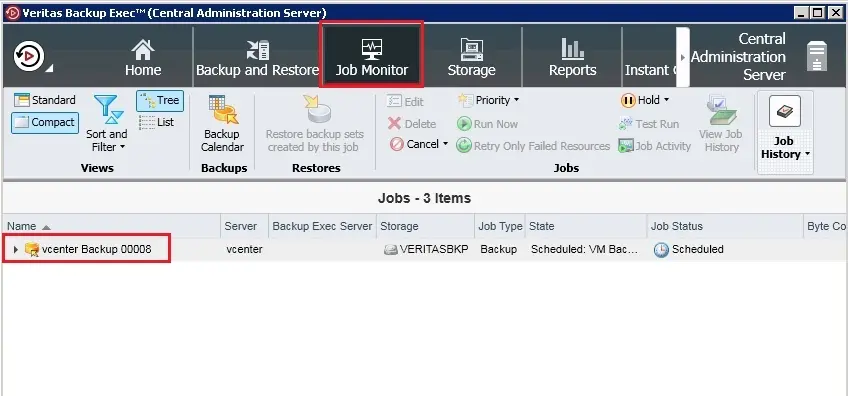
11- In Job monitor option you can monitor the job.
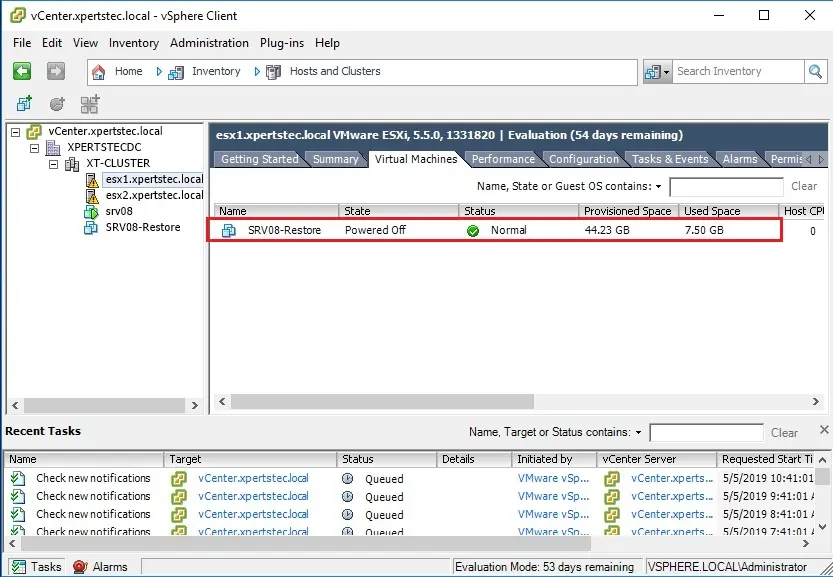
12- After completed restore, you can see the virtual machine in vSphere client.
For more details backup VMware Virtual Machine


No Comments
I’ve observed that in the world the present moment, video games are definitely the latest rage with children of all ages. Often times it may be unattainable to drag your family away from the activities. If you want the very best of both worlds, there are various educational video games for kids. Great post.
It’s really a great and helpful piece of information. I am glad that you just shared this useful information with us. Please stay us up to date like this. Thanks for sharing.
Thank you.
I’m really impressed with your writing skills as well as
with the layout on your blog. Is this a paid theme or did you customize it yourself?
Either way keep up the excellent quality writing, it is rare to see a great blog like
this one these days.
Thank you, its a paid theme