
In this article, I will provide instructions on how to add servers to Veritas Backup Exec 20.3 and higher Agent for Windows on a remote machine.
Add Servers in Backup Exec
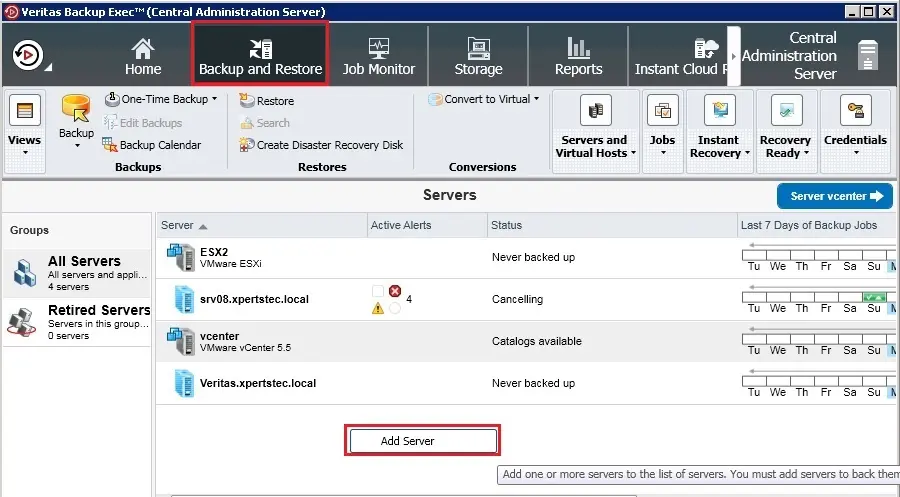
1- On the Backup and Restore tab in the Servers and Virtual Hosts group – right click and select add Server.
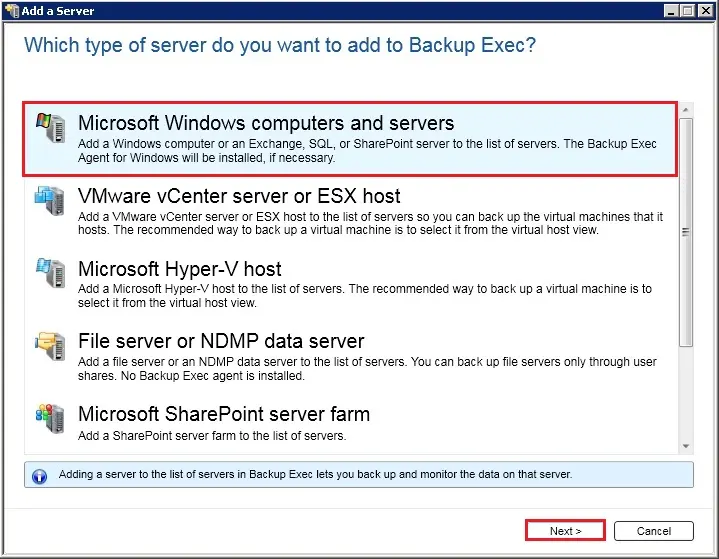
2- Select Microsoft Windows computers and servers and then click next.
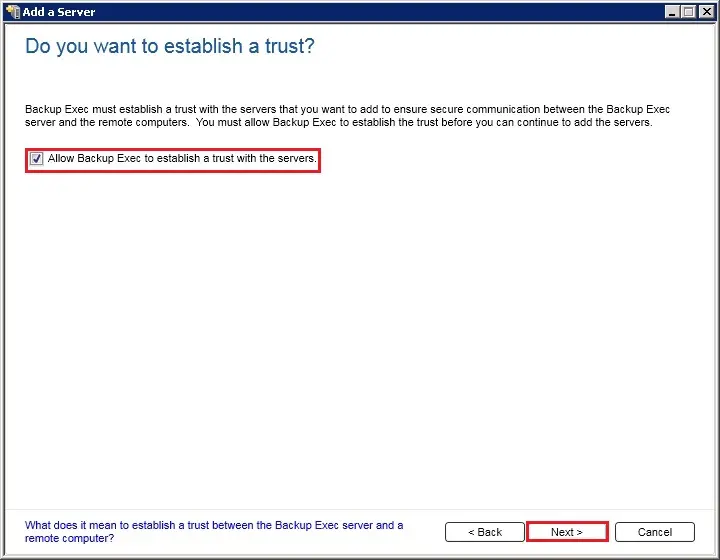
3- Select Allow Backup Exec to establish a trust with the servers and then click next.
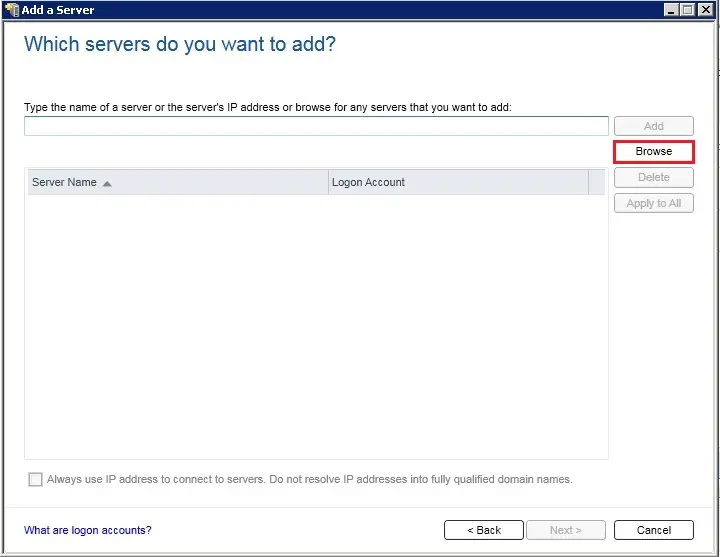
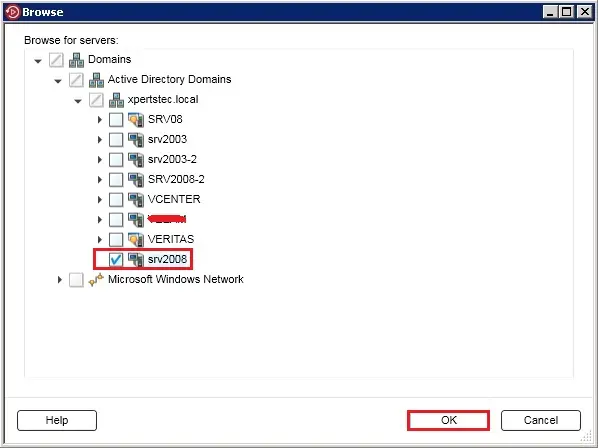
4- Browse for any servers that you want to add.
5- Expand Servers and Select the servers you want to add for Backup and you want to install the Agent for Windows and then click OK.
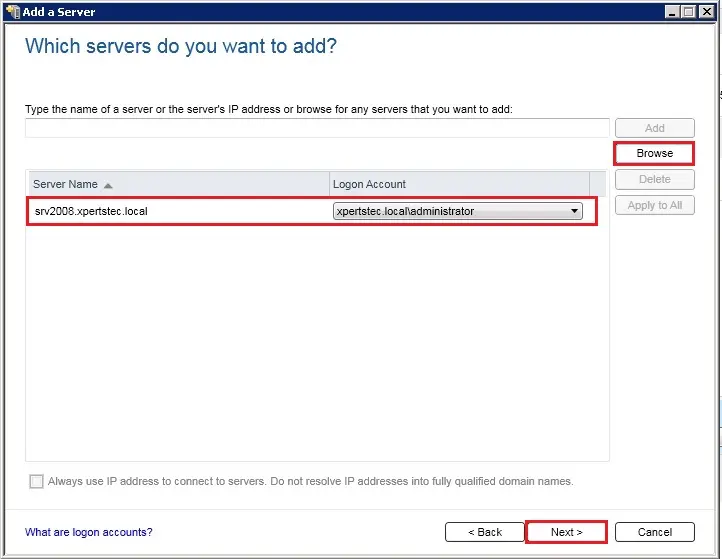
6- In the Logon Account field select the login account that you want to use to access each server and then click Next.
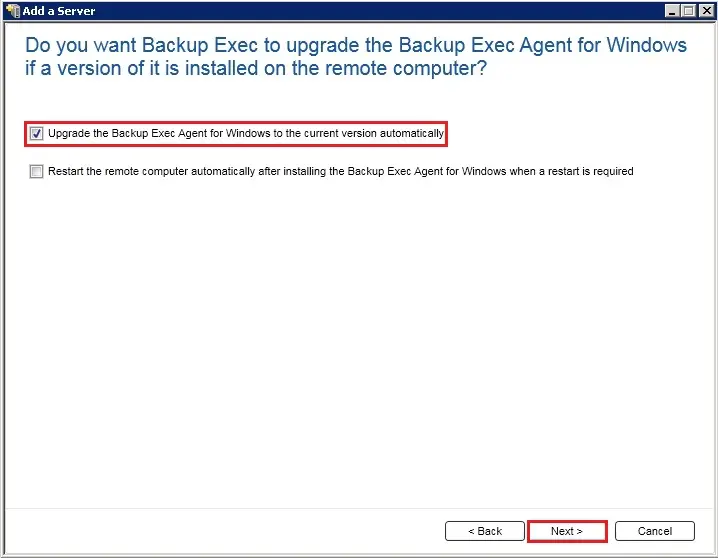
7- Select Upgrade the Veritas Backup Exec Agent for Windows to the current version automatically and then click Next.
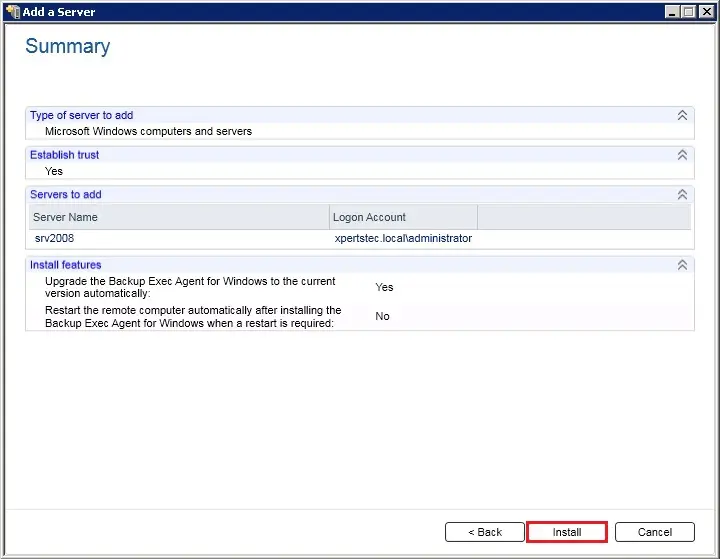
8- Review the summary and click Install.
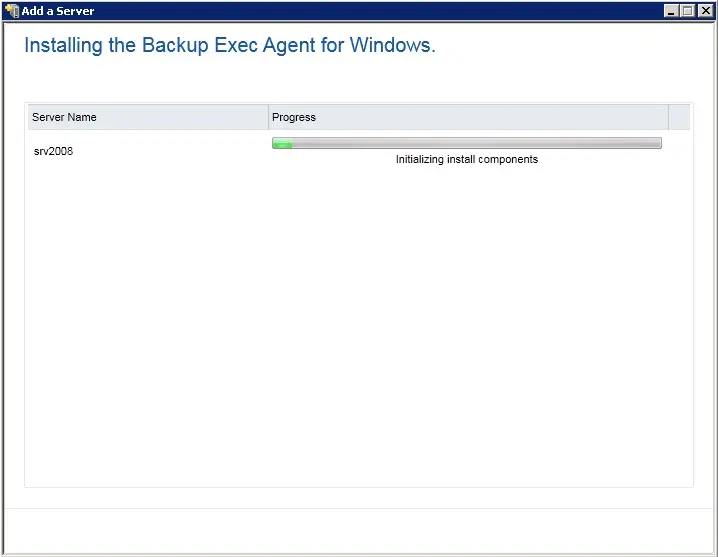
9- Installing backup exec agent for windows.
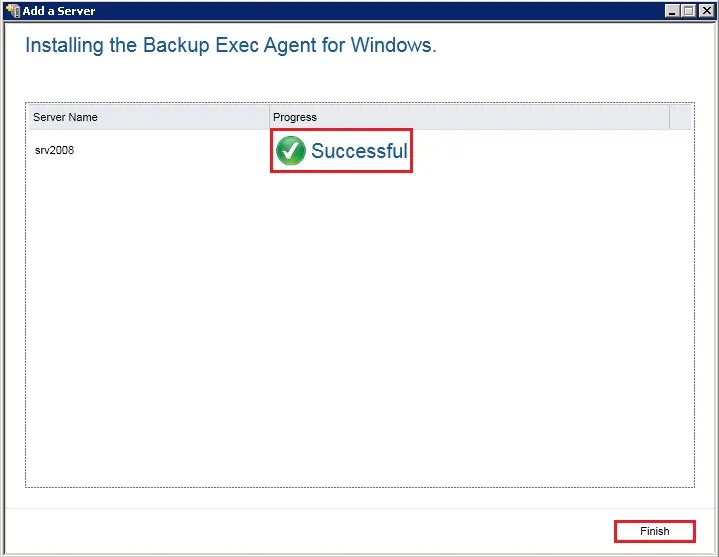
10- Backup exec agent Installed Successful and click Finish. (Restart Required)
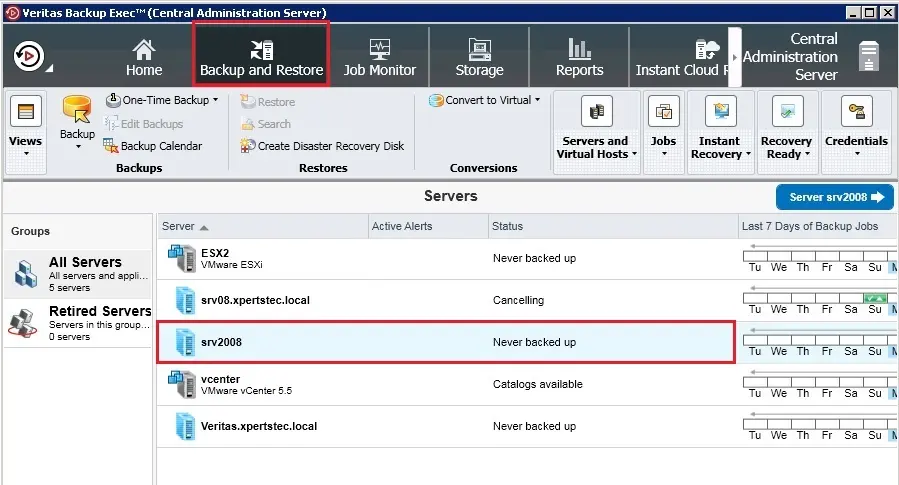
11- After you install the Agent for Windows the server is added to the list of servers in Backup Exec.
For more details click here