
In this article, I will explain to you how to create System Recovery Disk in Veritas system recovery 21. We can create a custom System Recovery Disk on a CD/DVD or on a USB device.
Create System Recovery Disk in Veritas
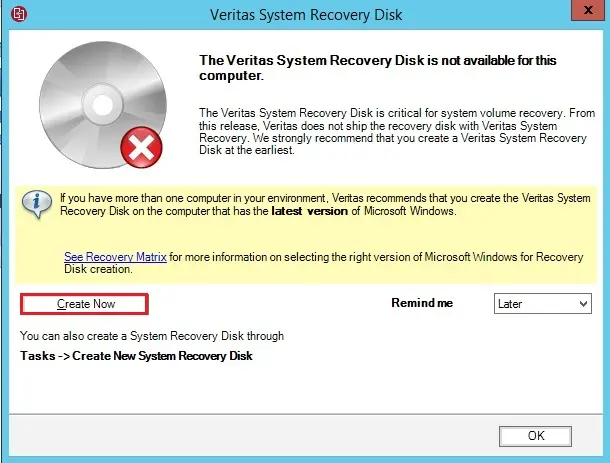
1- Click create new to create VERITAS system recovery disk.
Or in the VERITAS system recovery console, under tasks select to create a new system recovery disk.
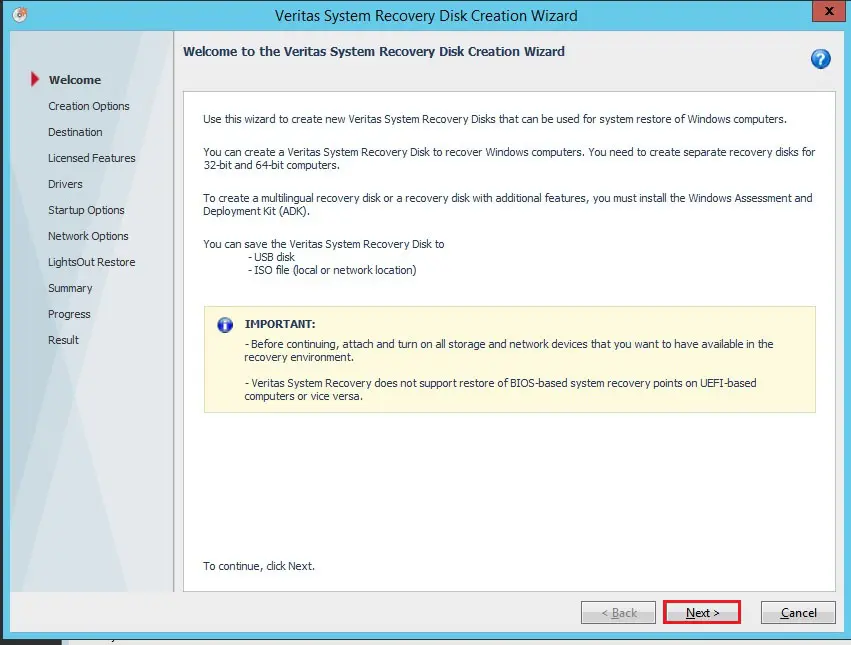
2- Recovery Disk Creation Wizard, then click next.
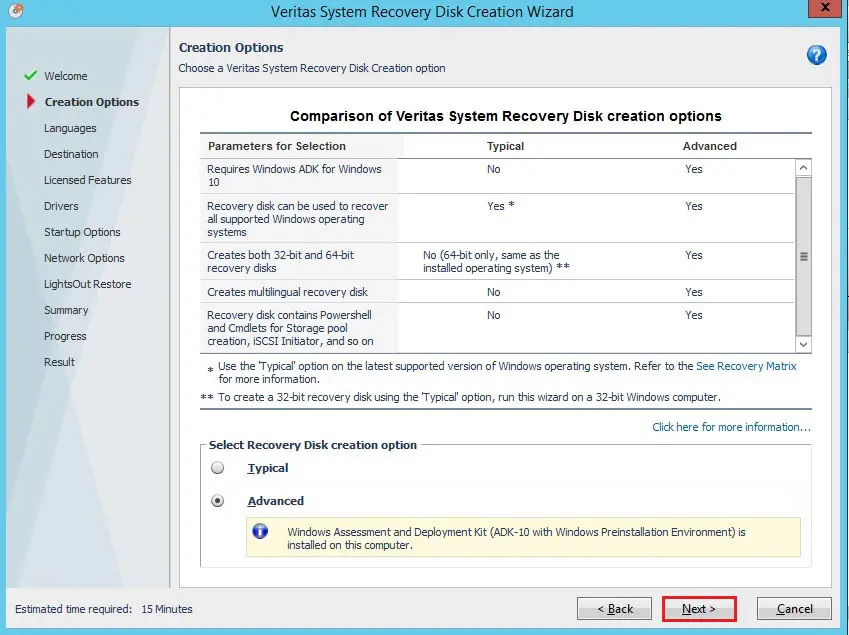
System recovery wizard, Creation Options.
3- Select the Typical option if you are going to perform a system restore to the same machine.
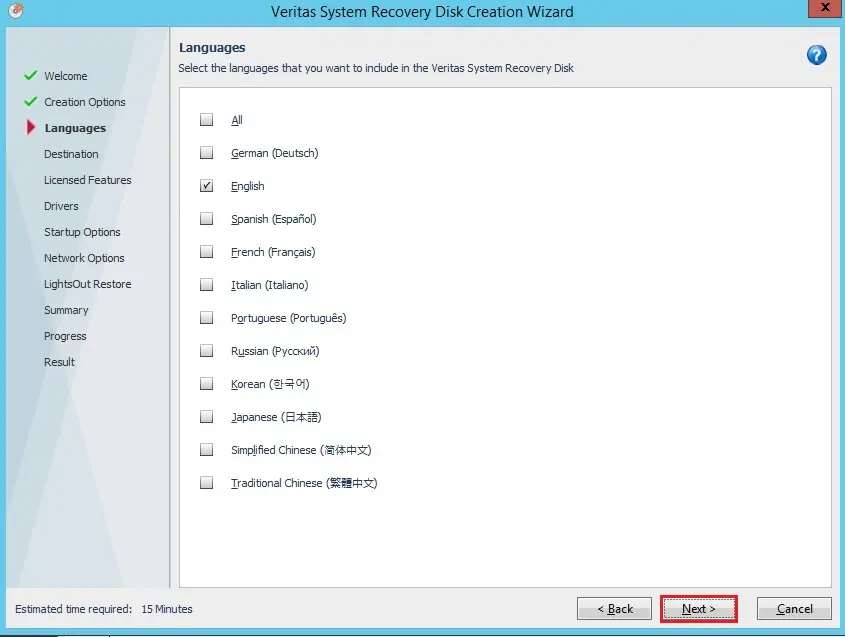
4- Select the language and then click next.
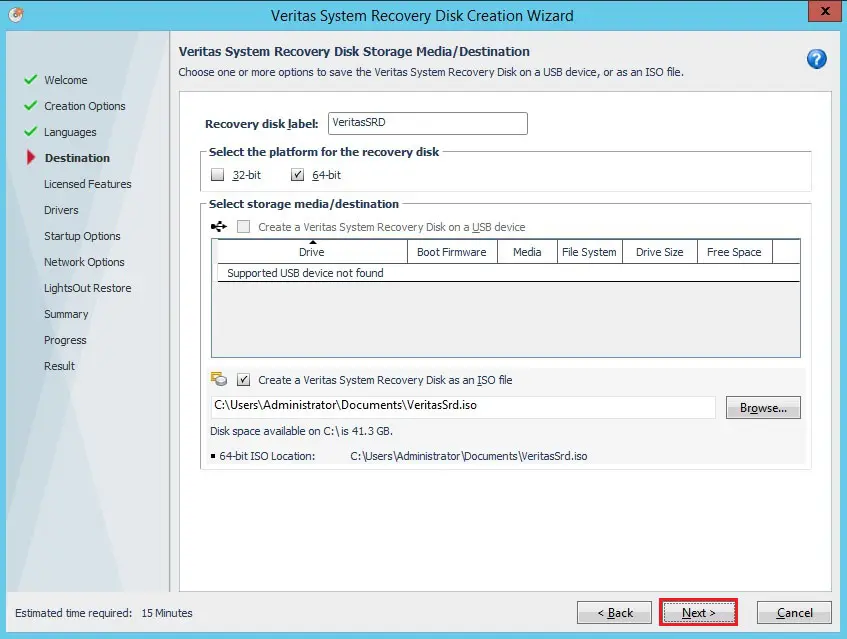
5- Recovery disk label,
Select the platform for the recovery disk
Recovery “Disk Storage Media/Destination”, specify the destination where you need the recovery disk created. Click Next
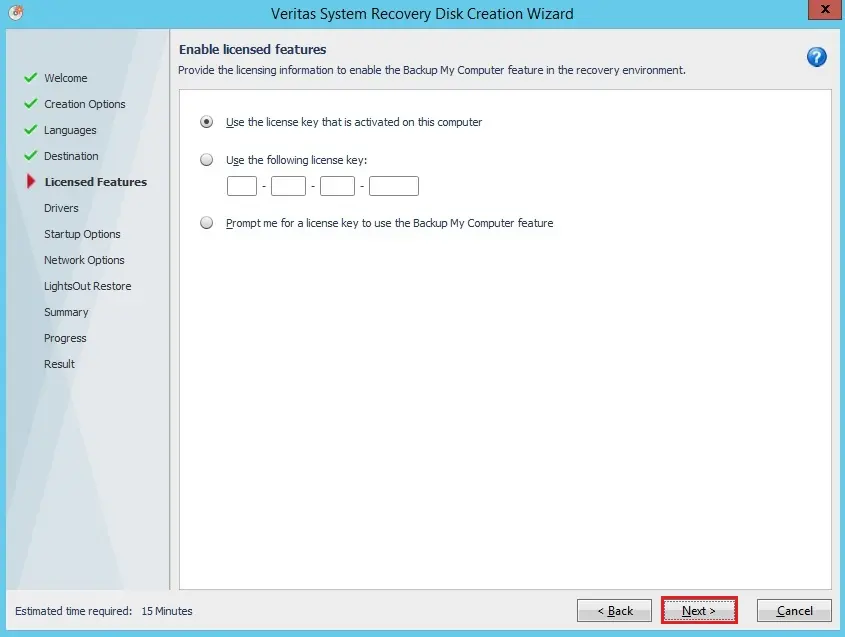
6- In the licensed features, please use the license key that is activated on this PC. Click Next.
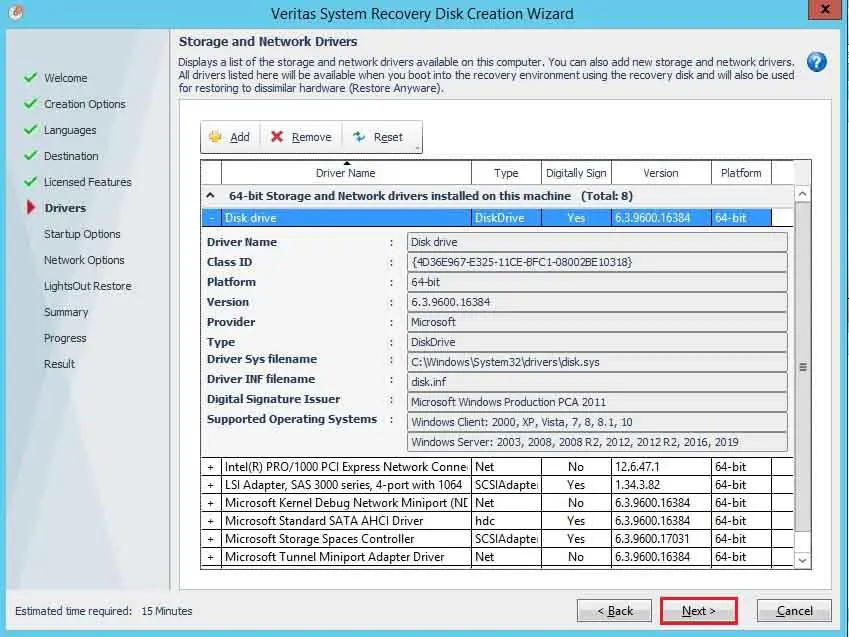
7- In the storage and network Drivers page you can add additional drivers for your dissimilar hardware. Click Next
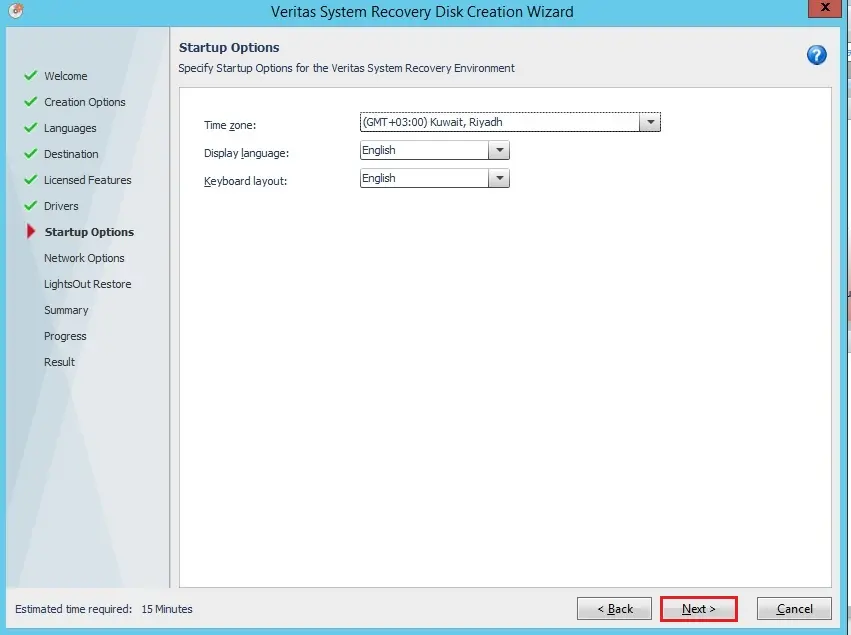
8- Select time zone and language and then click next.
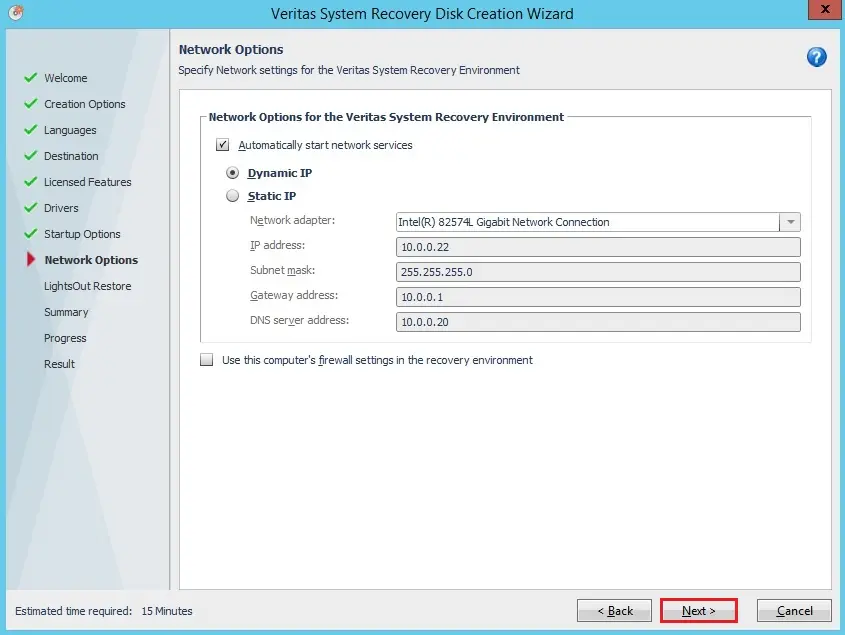
9- Specify the network options and then click next.
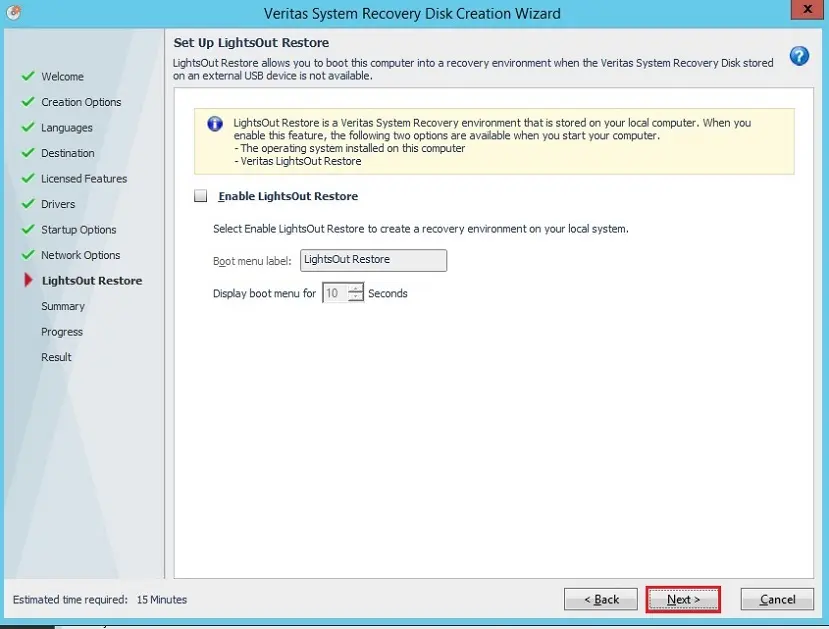
10- Setup lights out, restore, and then click next.
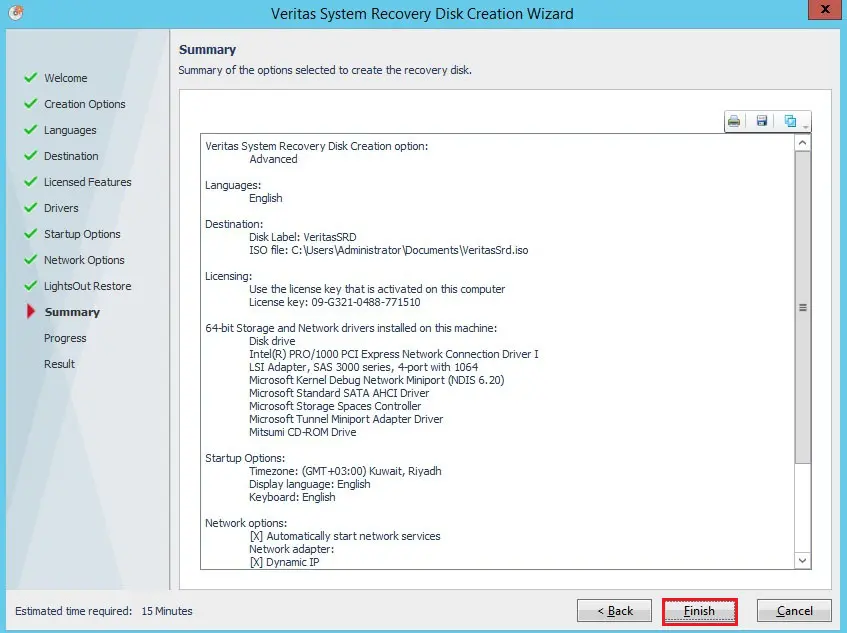
11- Review the recovery disk creation summary and then click finish.
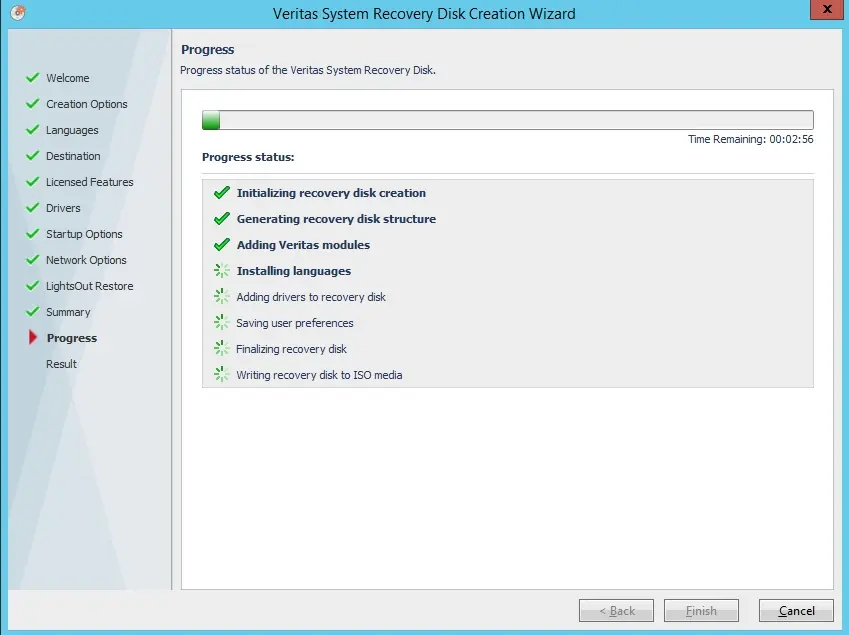
12- Veritas system recovery recovery disk in progress.
13- The status of the Recovery Disk creation will be shown on the Result page. Click Close.
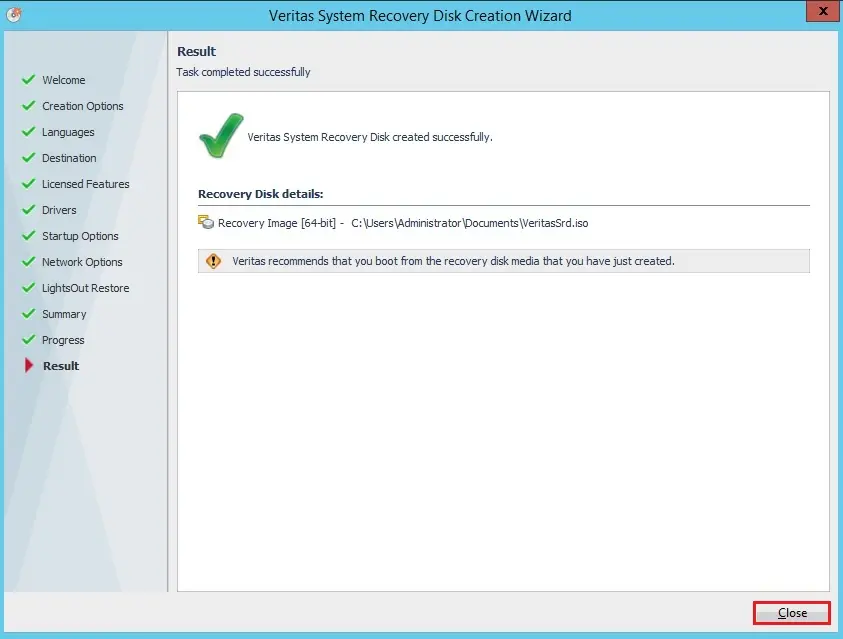
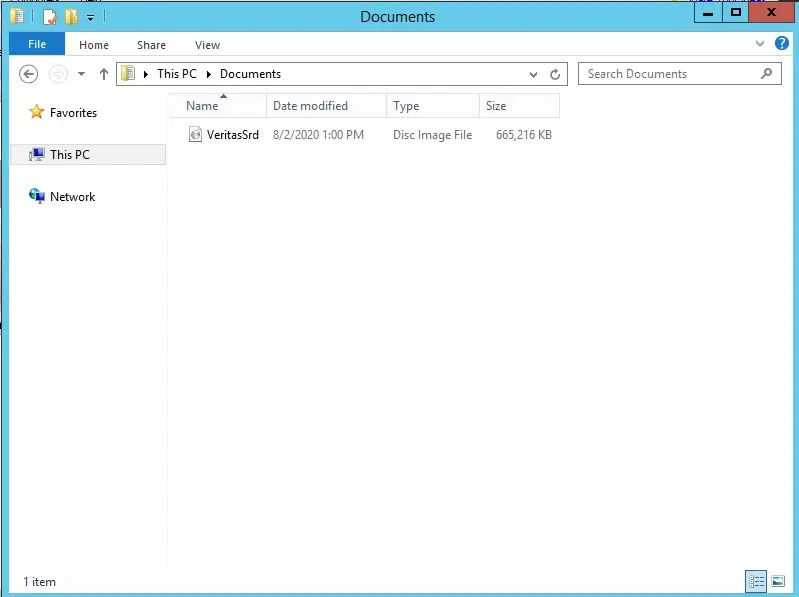
14- Now you can see the recovery disk successfully created.
For more details please visit VERITAS