
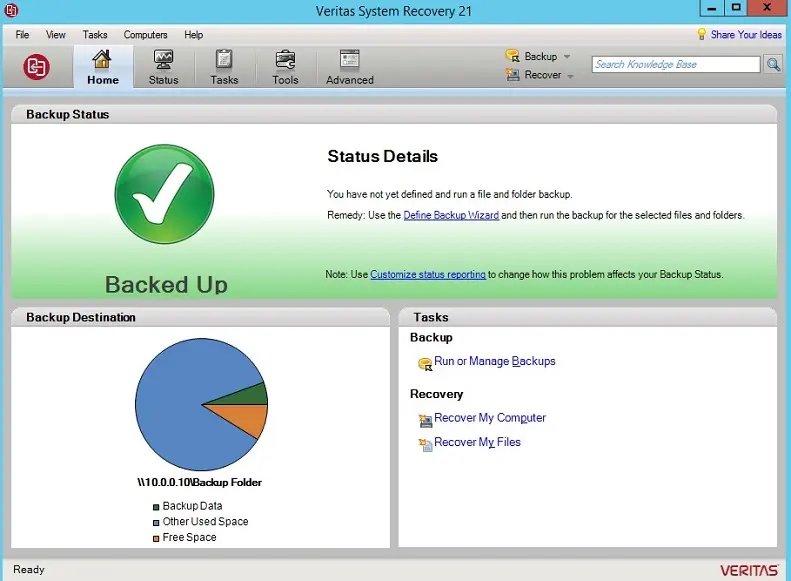
In this article, I will explorer how to backup windows server with Veritas System Recovery. I am using Windows 2012 R2 Server for backup. Although, the below steps can also be used for other supported operating systems (i.e. Windows 7/8/8.1/10/2008/2008 R2/2012/2016/2019).
Backup Windows Server with Veritas (Entire System)
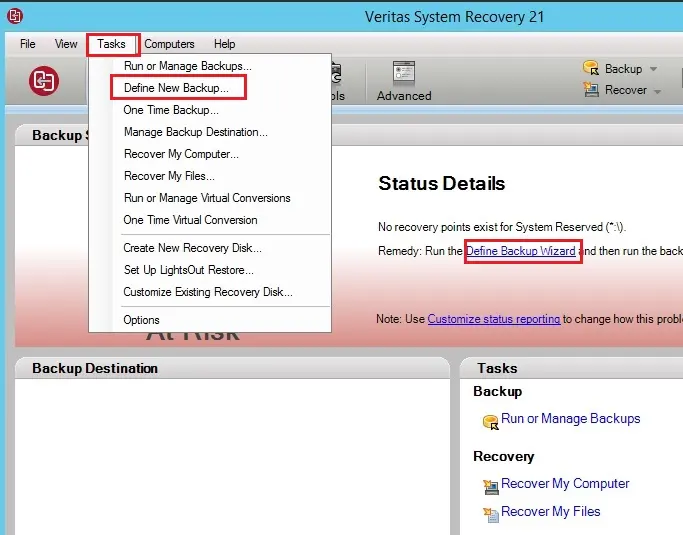
1- Open Veritas system recovery, select Tools, and then select define new backup or under status details click on define backup wizard.
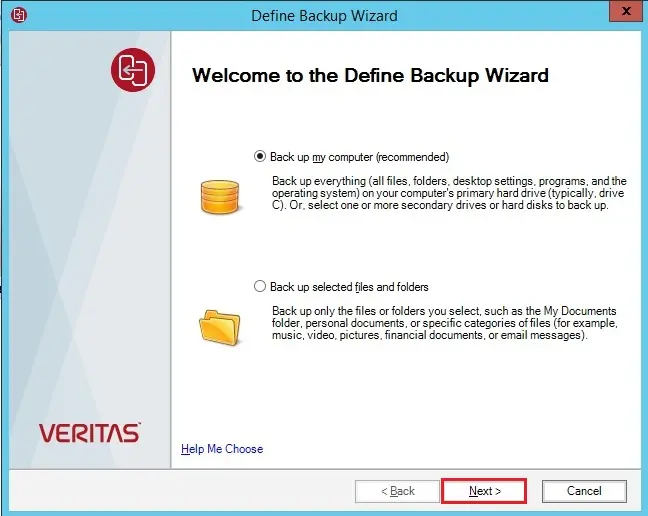
2- Veritas define backup wizard click next.
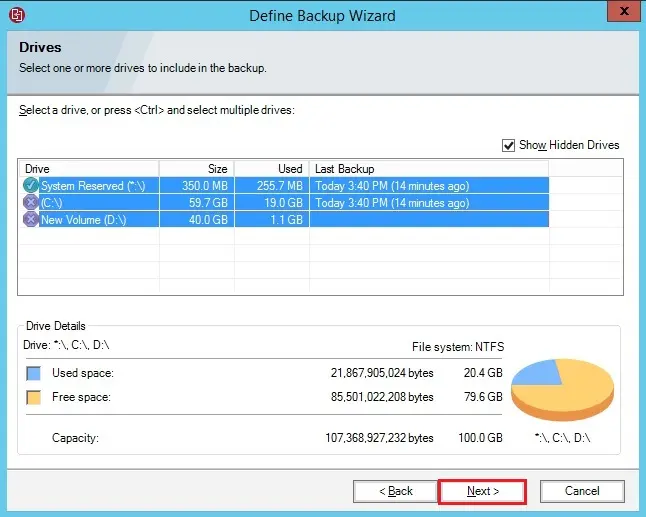
3- Select show hidden drives checkbox, select all drives and then click next.
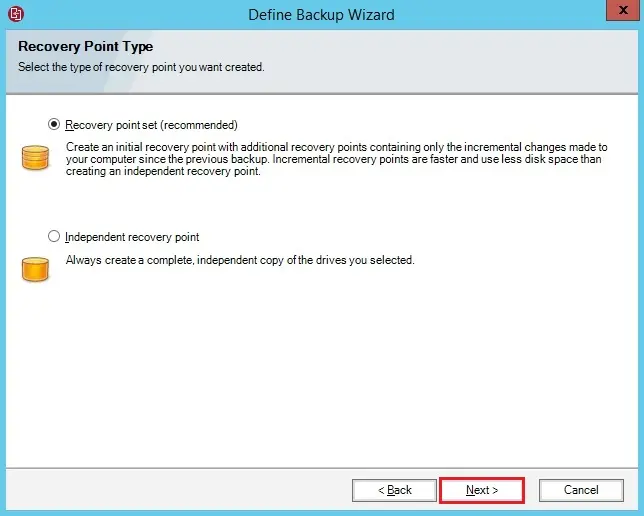
4- Select recovery point type and then click next.
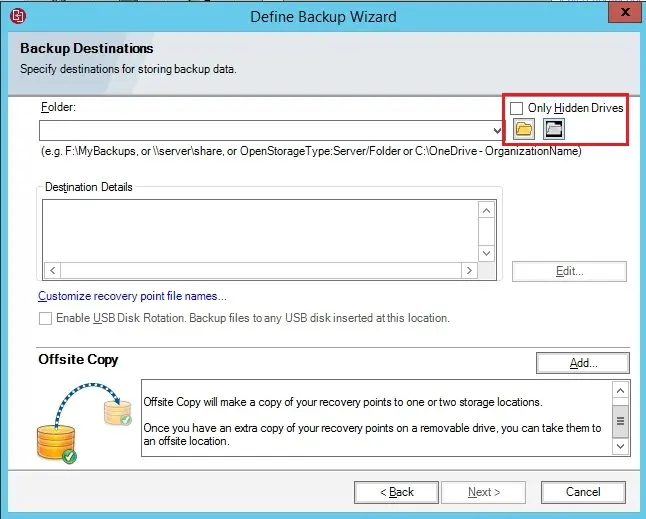
5- Backup destination, click on the folder icon.
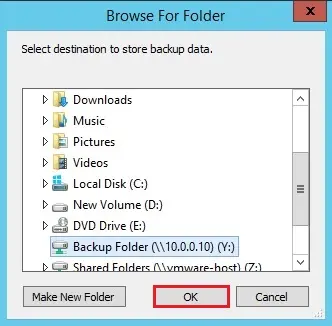
6- Select the folder where you want to backup and then click OK.
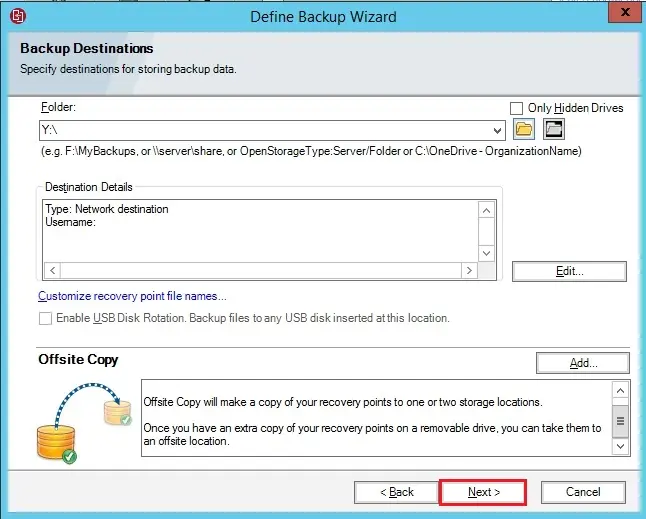
7- Click next.
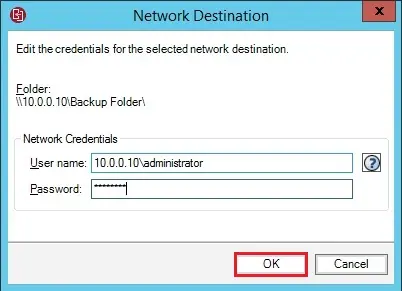
8- Type shared folder credentials and then click ok.
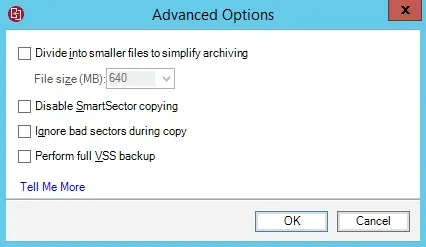
9- Select advanced and command file options.

10- Advance options.
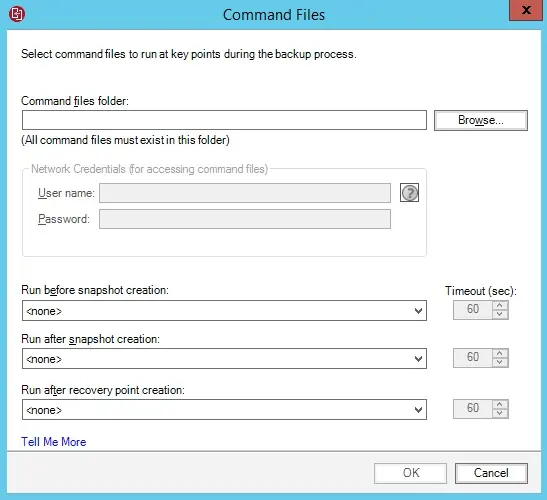
11- Command files options.
12- Select verify recovery point and a number of recovery points.
Type a description and then lick next.

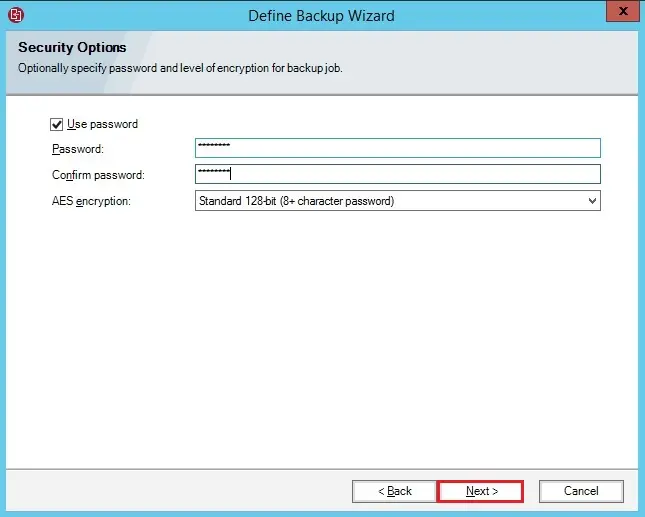
13- Specify a password and then click next.
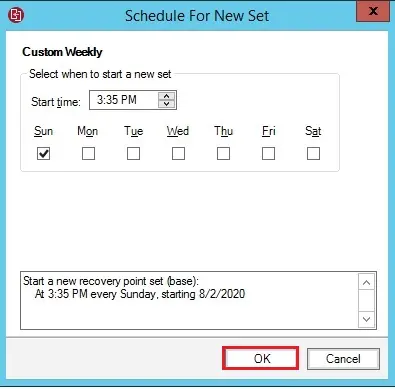
14- Start a new recovery point select customs.
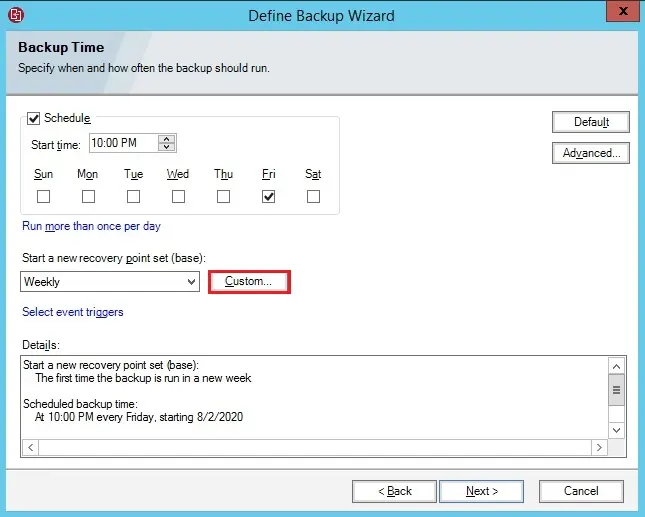
15- Schedule for the new set and then click OK.
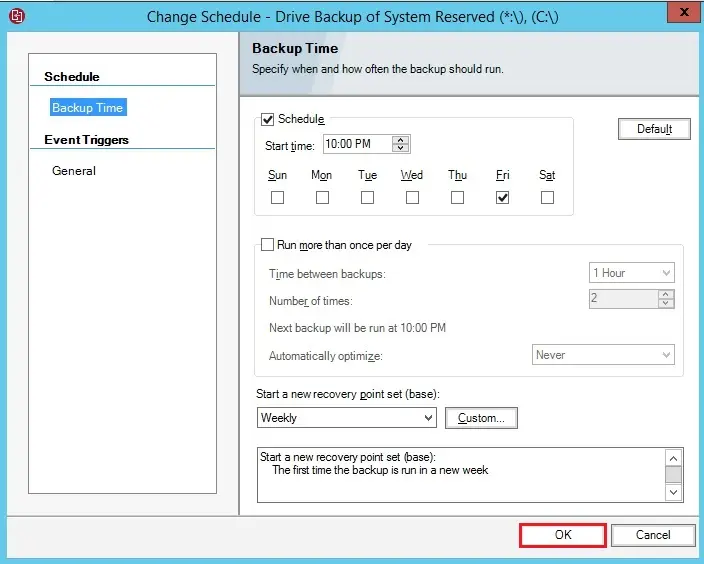
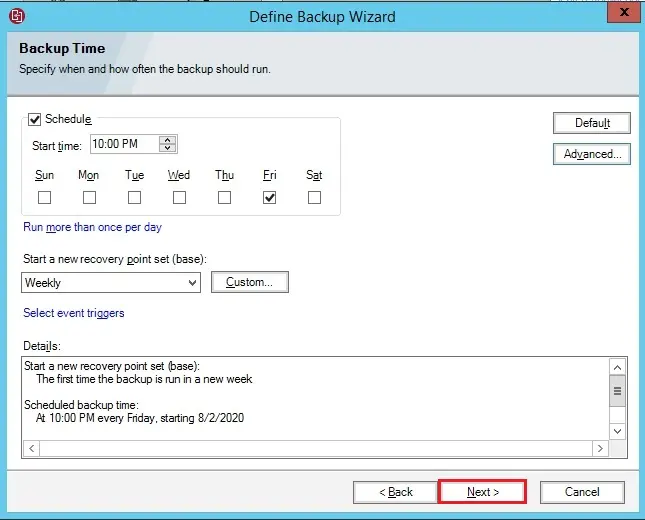
16- Backup Time schedule.
17- Click next.
18- Review the backup settings and then click finish.

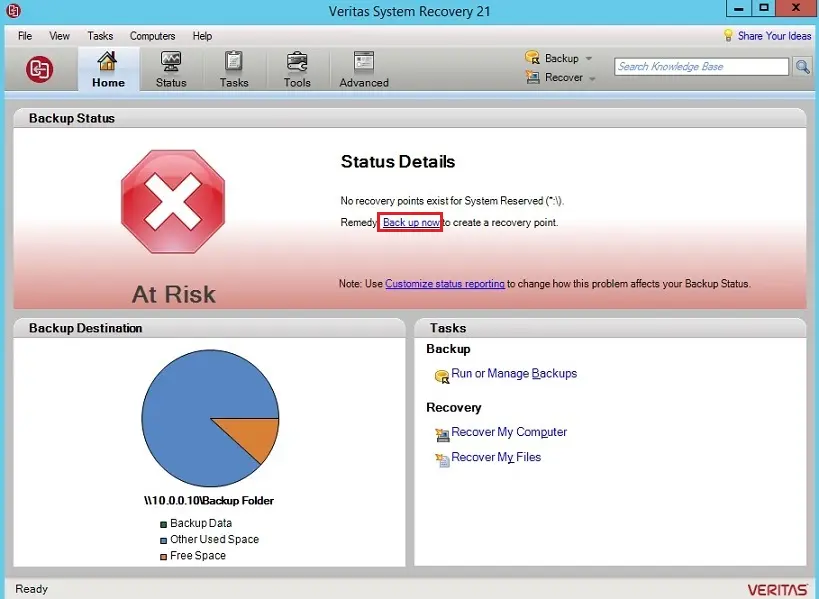
19- Click on back up now.
20- Backup in progress.
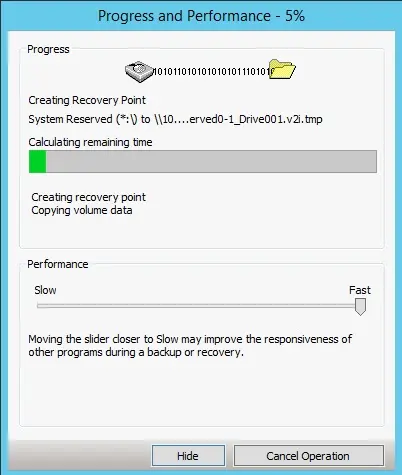
21- Progress and performance.
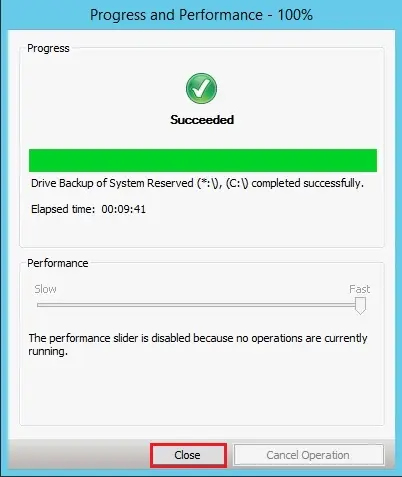
22- Backup successfully completed.
For more details please read Veritas System Recovery guide
No Comments
I am very grateful for the effort you have made, to help us, thank you very much for this article. it is very helpful, keep posting this type of article.
Thank you