Instant VM recovery Veeam, it will help you to improve recovery time objectives (RTO), minimize disturbance and downtime of production work burden. It is like having a temporary reserve for a workload: users remain productive while you can troubleshoot an issue with the failed workload.
When Instant VM Recovery is carried out, Veeam Backup & Replication uses the Veeam vPower technology to mount a retrieved VM image to an ESXi host directly from a compressing and deduplicated backup file. After that no need to extract the VM from the backup file and copy it to production storage, you can perform restore from any restore point in a matter of minutes.
Instant VM recovery Veeam
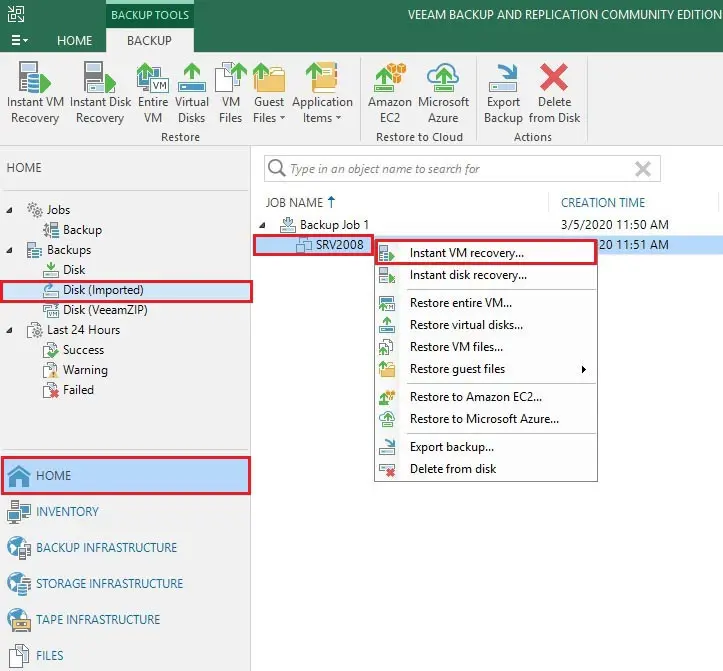
1- Run Veeam Backup and Replication console and select Backups and then select the backup job. Right-click on Virtual Machine then one you want to create instant VM then click on Instant VM recovery.
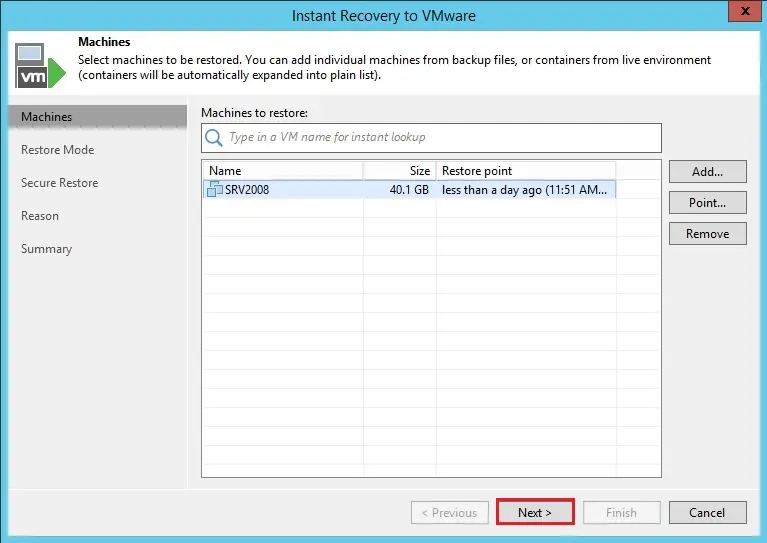
2- Instant VM recovery Wizard will open, so just select the Backup and click on the Next button.
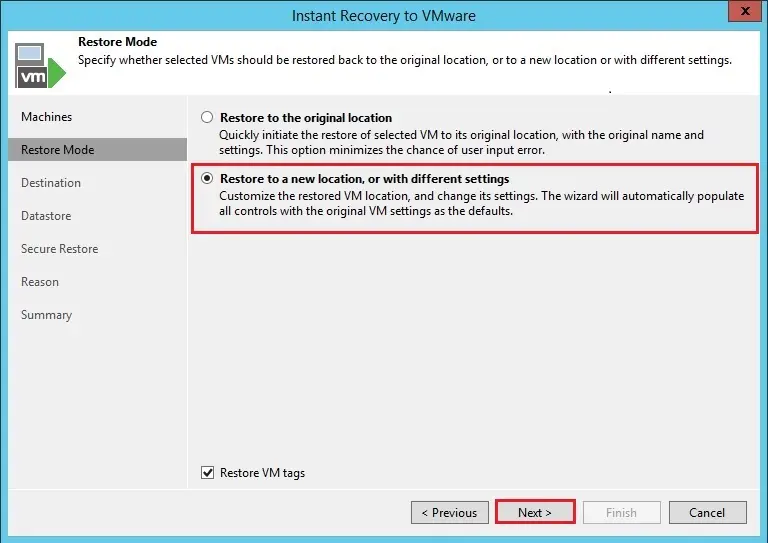
3- We are creating this instant Virtual Machine for testing purposes. Choose option Restore to a new location or different and click on the Next button.
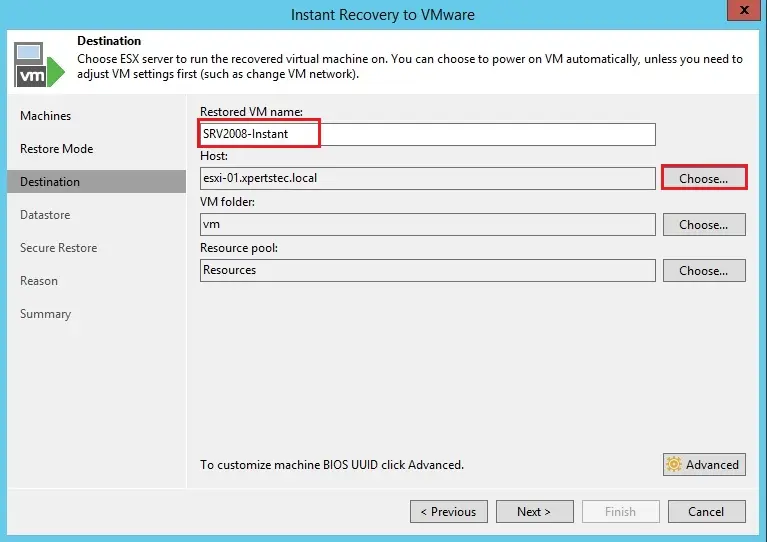
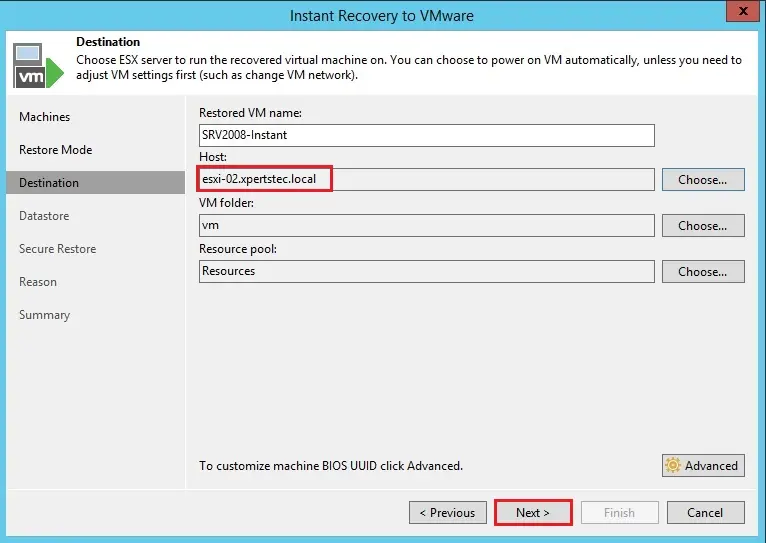
4- Now you can here define the name of instant Virtual Machine.
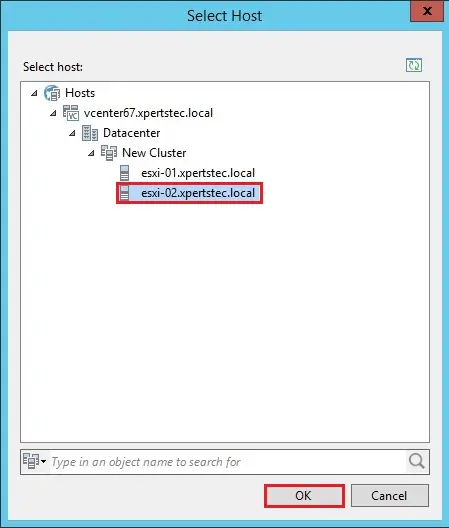
So we need to select the ESXI Host where we need to restore and then just click on choose Host button.
5- Now select the ESXi host here and then click on the OK button.
6- After selecting the ESXi host and then click on the Next button.
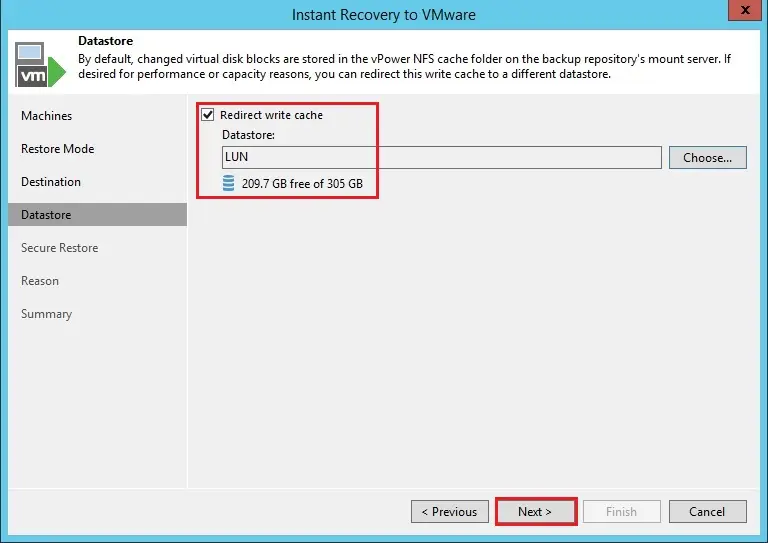
7- Select a Datastore where you need to restore. If you have multiple Datastore or leave it as default and click on the Next button.
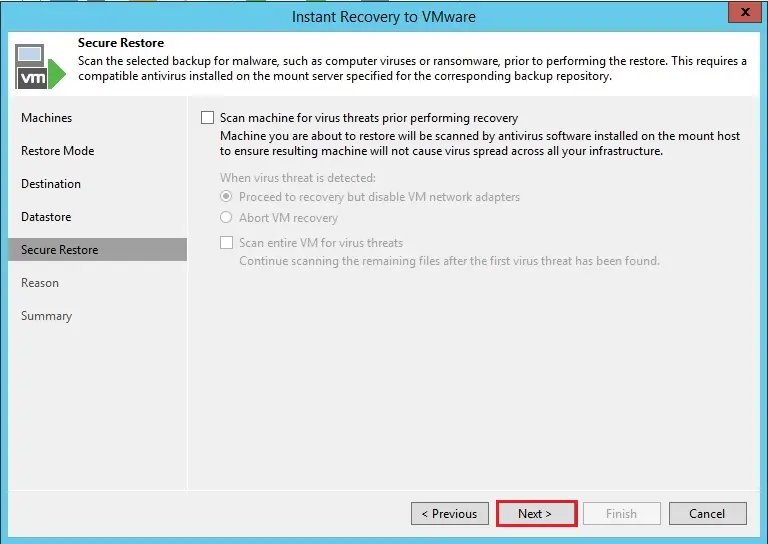
8- Select scan backup for viruses or else leave it default and click on the next button.
9- Type a reason why you are restoring the Virtual Machine for identification and click on the Next button.
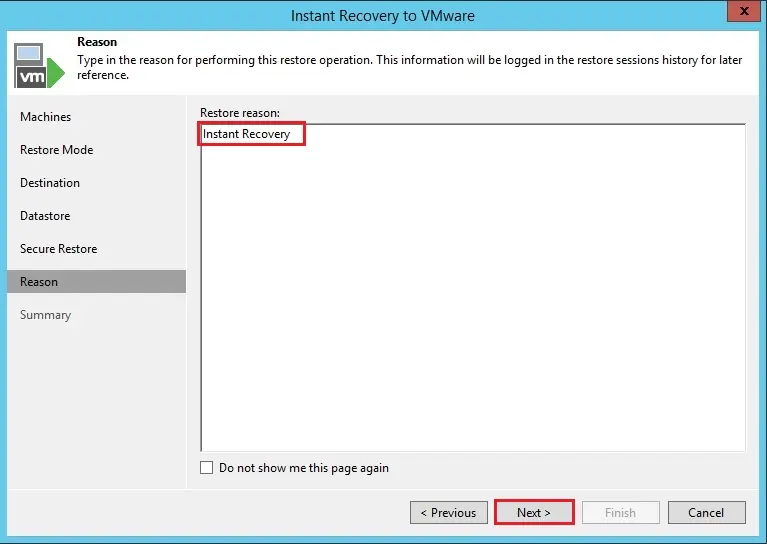
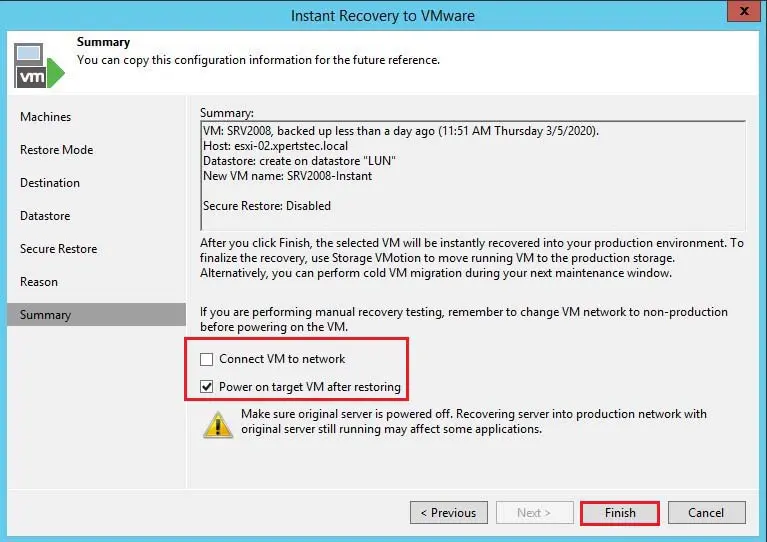
10- Now we need to select the following option very carefully so please don’t select connect VM to network for avoiding IP address conflict select only power on VM automatically option and click on restore and wait for it.
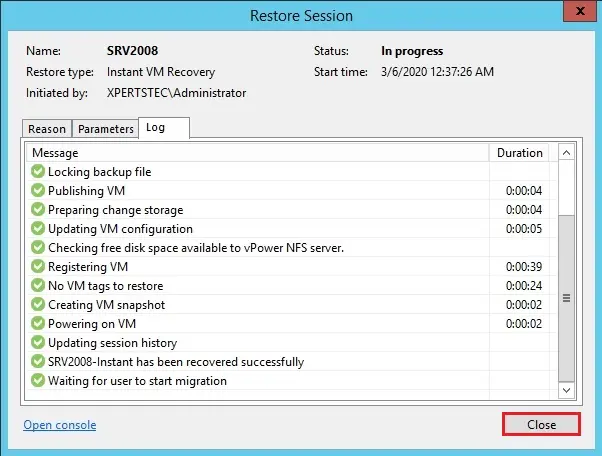
11- Instant VM recovery has been completed successfully so wait a few minutes to power on the Virtual Machine.
Testing Recovered VMs
Before migration recovered Virtual Machine to production, you can open VM consoles in Veeam Backup & Replication or in the VMware vSphere client.
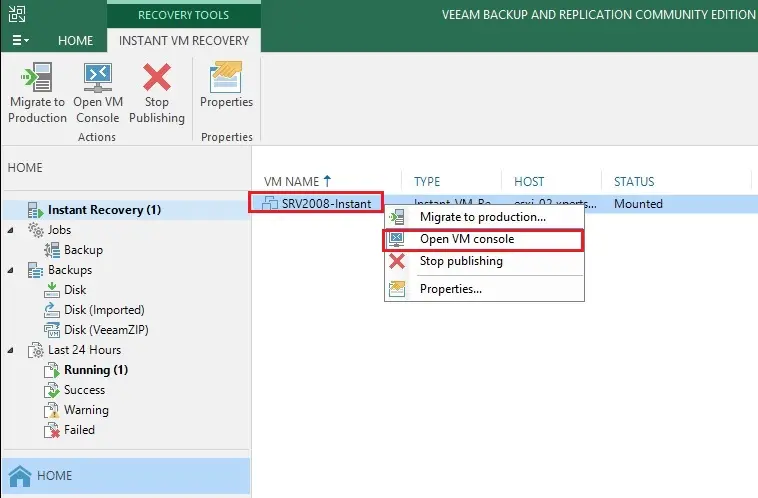
To open a Virtual Machine console in Veeam Backup and Replication:
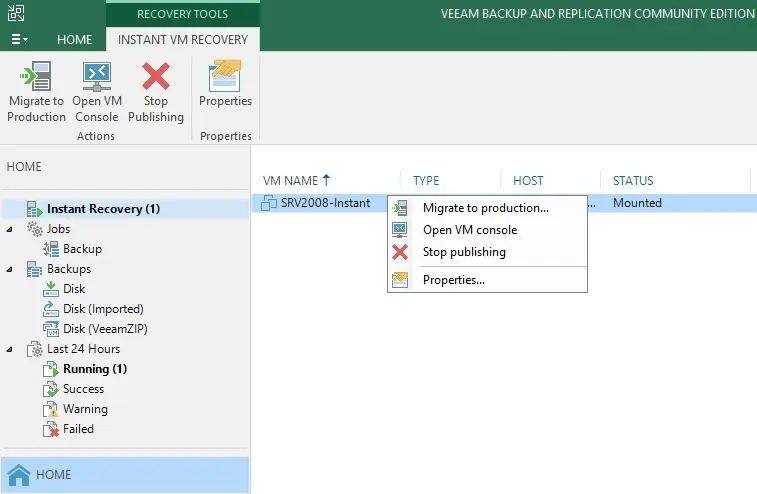
Select the Home tab, In the inventory pane, select the Instant Recovery option, In the working area, right-click a VM and select Open Virtual Machine console.
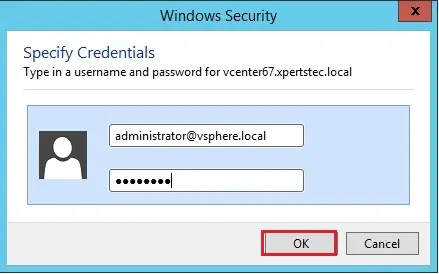
13- Type credentials and click OK
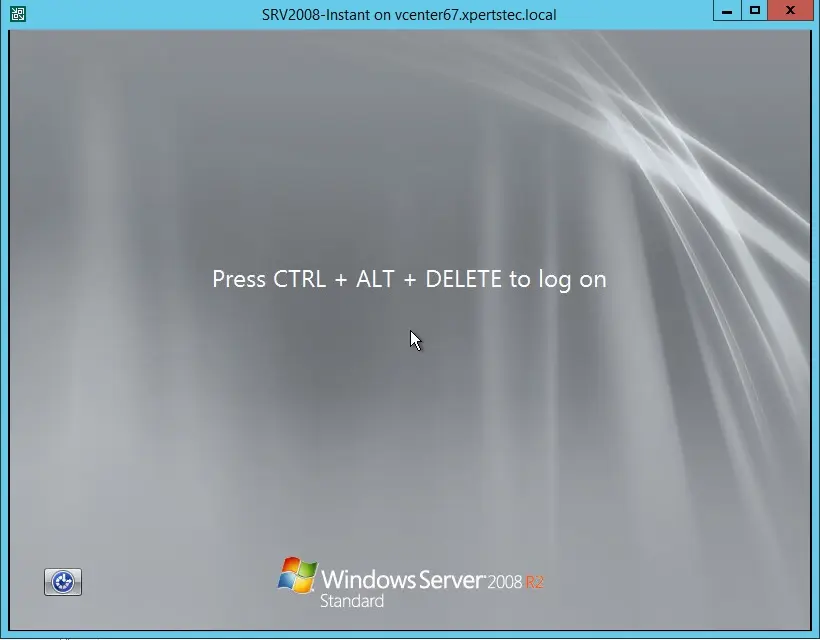
14- Now Instant Virtual Machine Opened
Migrating Recovered VMs
Migrate click Quick Migration (will be provide the link as soon as possible)
Stop publication Recovered Virtual Machine
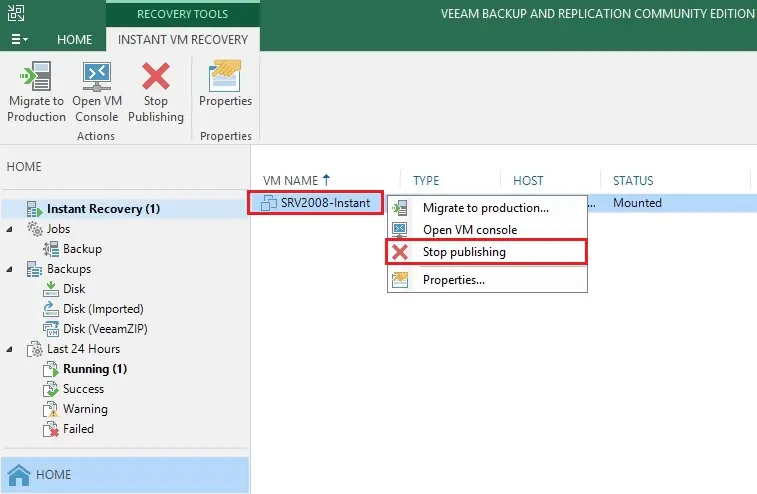
If the test has failed, you can stop publishing the recovered VMs. This will remove the restored VMs from the host that you selected as the destination for recovery.
Note that all modifications made in the recovered VMs will be lost.
To stop publishing a recovered VM
1- Select the Home view, In the inventory option, select the Instant Recovery node, In the working area, right-click a VM and click Stop publishing.
2- Click Yes

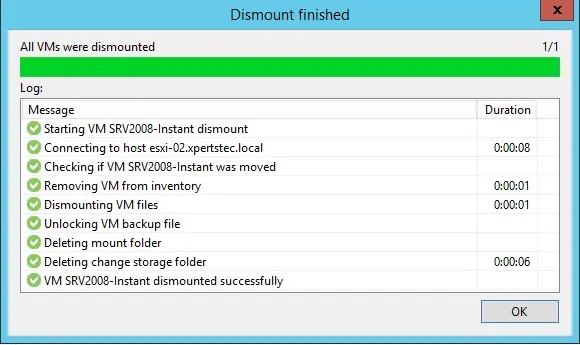
3- Now Instant VM dismount finished
For more details please visit Veeam


