In this blog, I am going to create an Android app with Android Studio Emulator. These steps will teach you the fundamentals of how to build an Android app via the Android Studio development environment.
As Android devices become progressively more common, demanding new apps will increase. Android Studio is a free and easy-to-use development environment to learn on.
It’s best if you have a working knowledge of the Java programming language for this article because it is the language used by Android. It will take approximately 20-30 minutes, it’s depending on your computer and internet you are able to download and install Android Studio. After following this article, you will be able to create your first Android app, you can promise a career in mobile development.
Table of Contents
- Download Android Studio
- Video
- Create a new Android Studio Project
- Installing Requested Components
- Creating Android Virual Device with AVD Manager
- Create Your Virtual Devices
- Android Virtual Device (AVD)
- Install Intel HAXM in Windows
- What is Intel HAXM?
- Open Your First Device
Download Android Studio
Download Android Studio Emulator from Android Studio
How to install Android Studio Emulator
Create a new Android Studio Project
You will need an Android Studio project to (design, develop, and build) your mobile app.
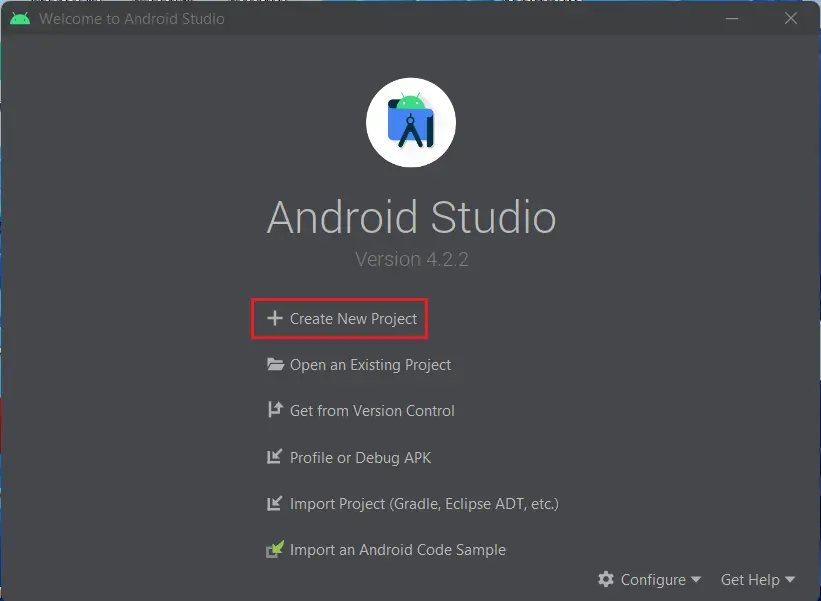
Welcome to Android Studio wizard, select Start a new Android Studio project.
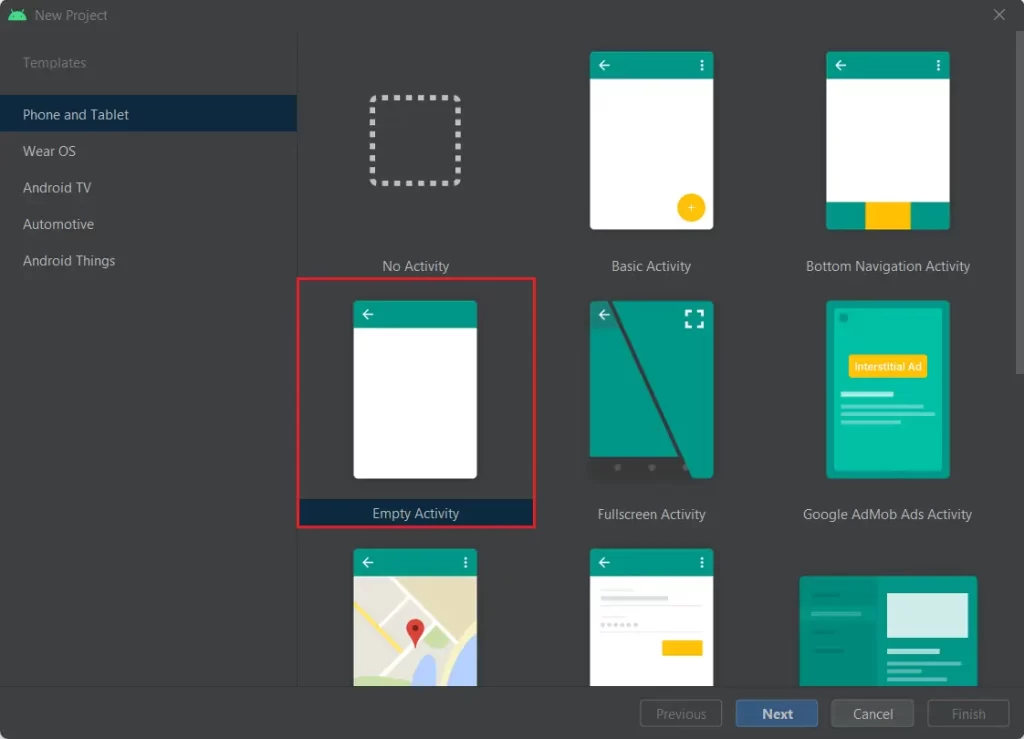
You can customize the Activity after you choose your template. For example, the Empty Activity choice provides a single Activity with a single layout resource for the screen, click next.
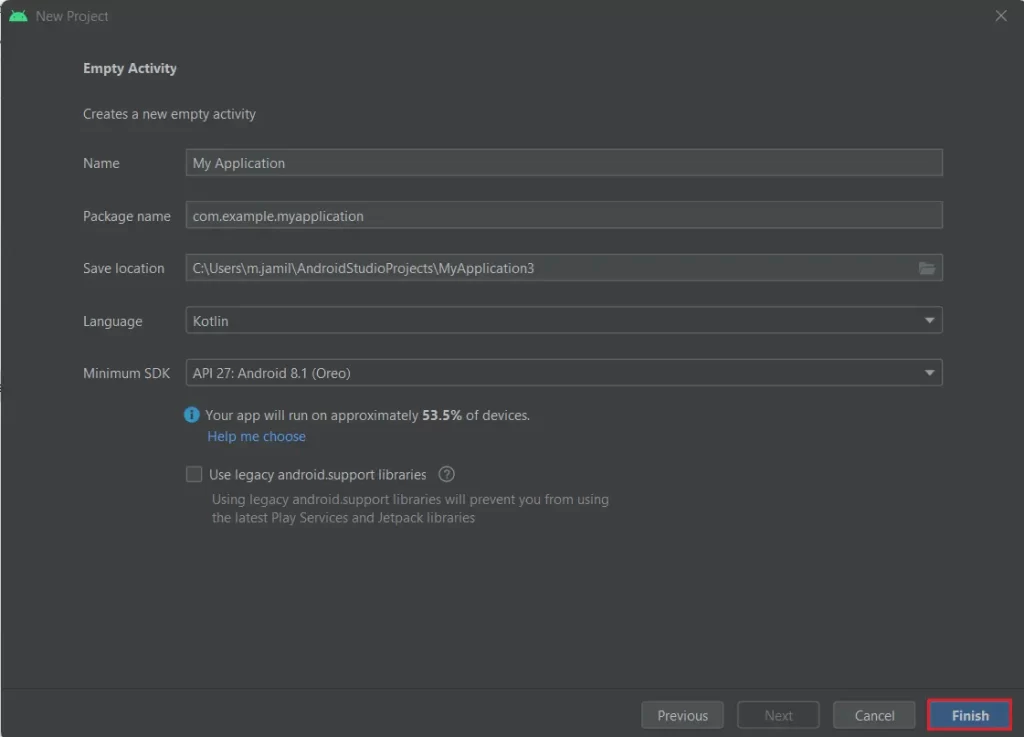
New project wizard, type a name that users will see on their Android phones when they install this app.
The package name is a unique identifier for your Android app on Google Play Store. In this article, the app’s name is my application and you work for a corporation their website address is (example.com), so the package name must ideally be com.example.myapplication.
Here you can decide the programming language you wish to use while coding the app. Click Finish.
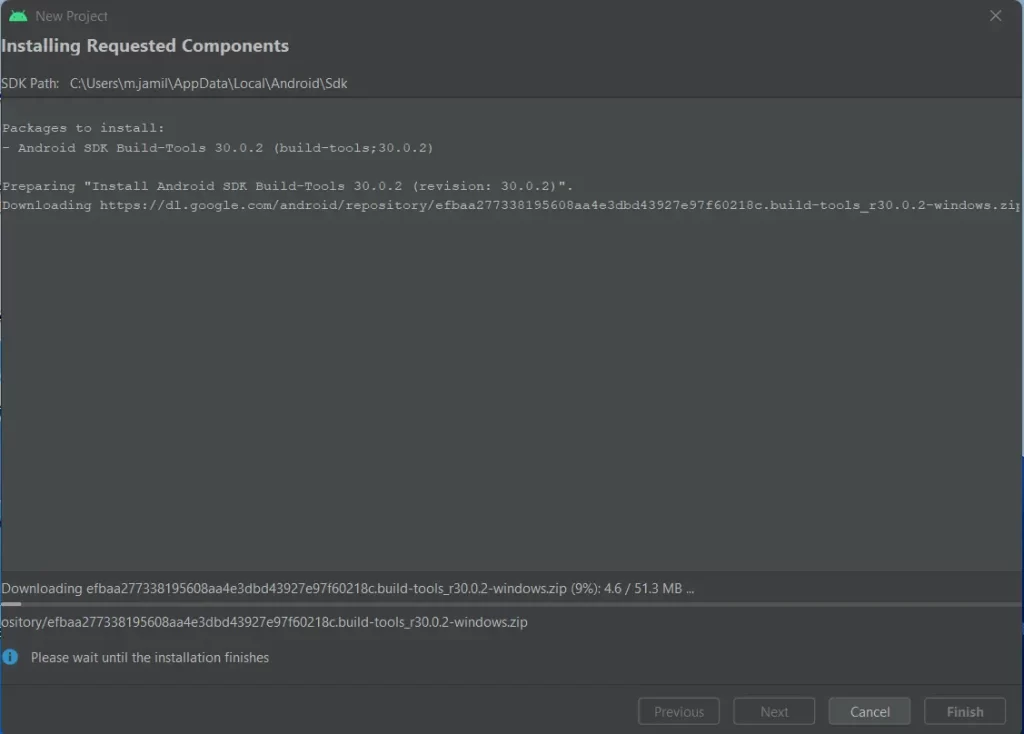
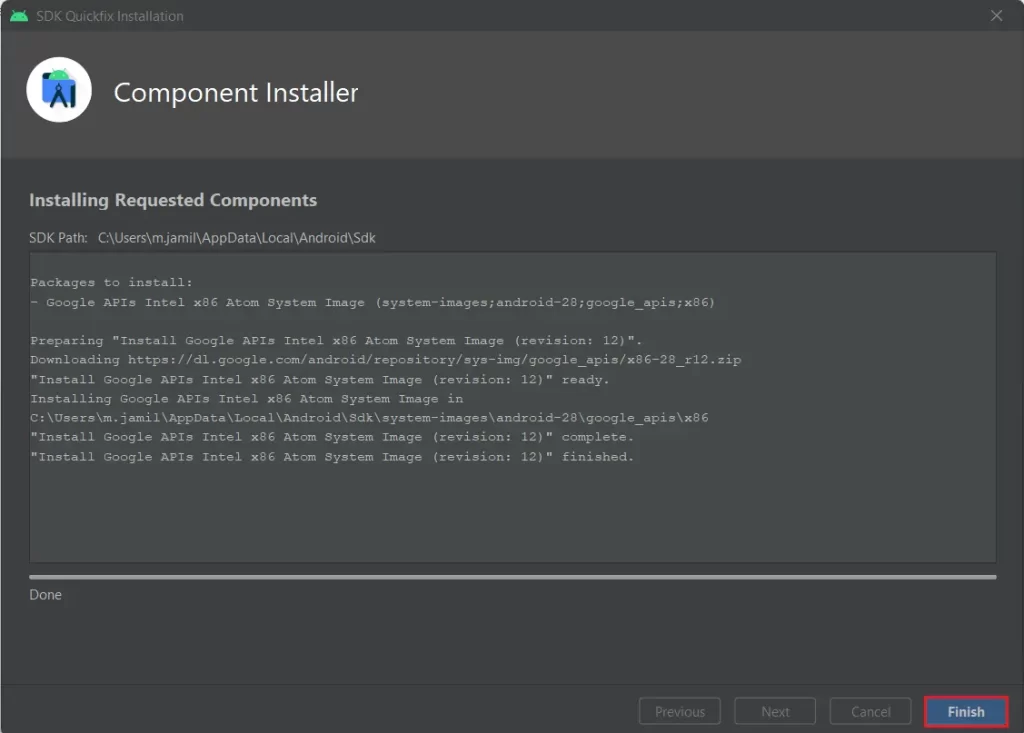
Installing Requested Components
Downloading the requested component for your first Android app.
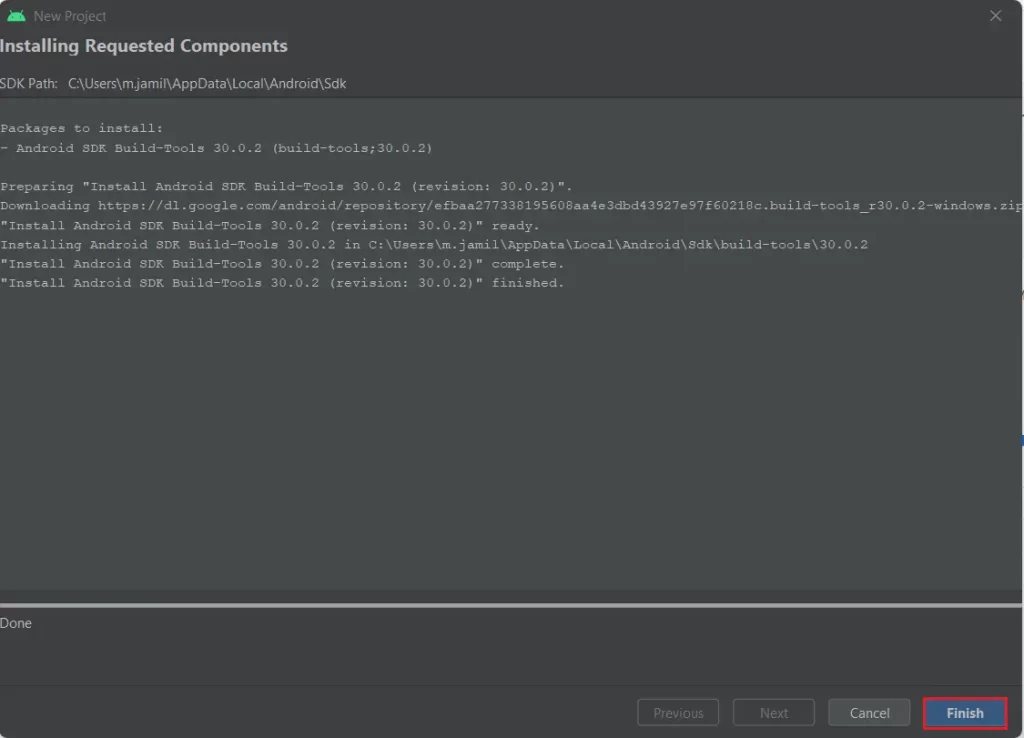
Android SDK builds tool successfully installed, click finish.
Creating Android Virtual Device with AVD Manager
In the below steps, you will learn what is AVD Manager and how to create an Android Virtual Device (AVD) to test our first android application.
The AVD (Android Virtual Device) is a device configuration that can run on the Android Emulator. It provides a virtual device specification, Android Environment where we can install and then test our Android Application. Android Virtual Device Manager is a part of SDK Manager to create and manage virtual devices.
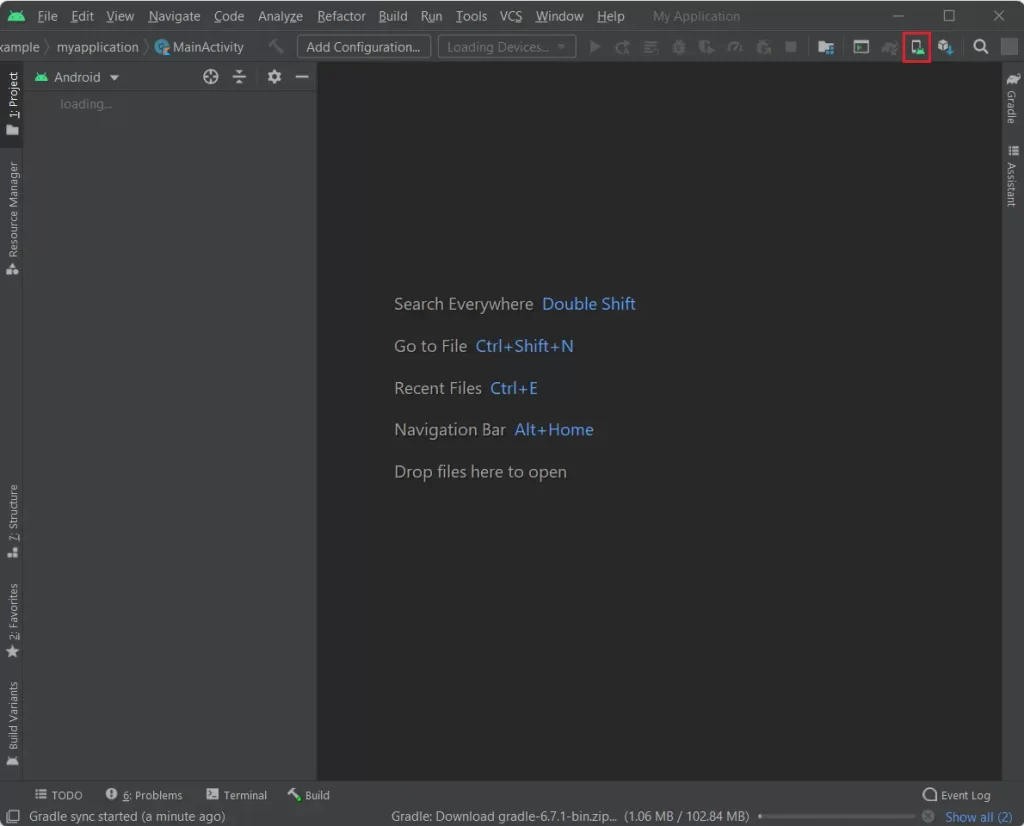
To launch AVD manager, go to your Android tools and then AVD Manager Icon as shown in the below image.
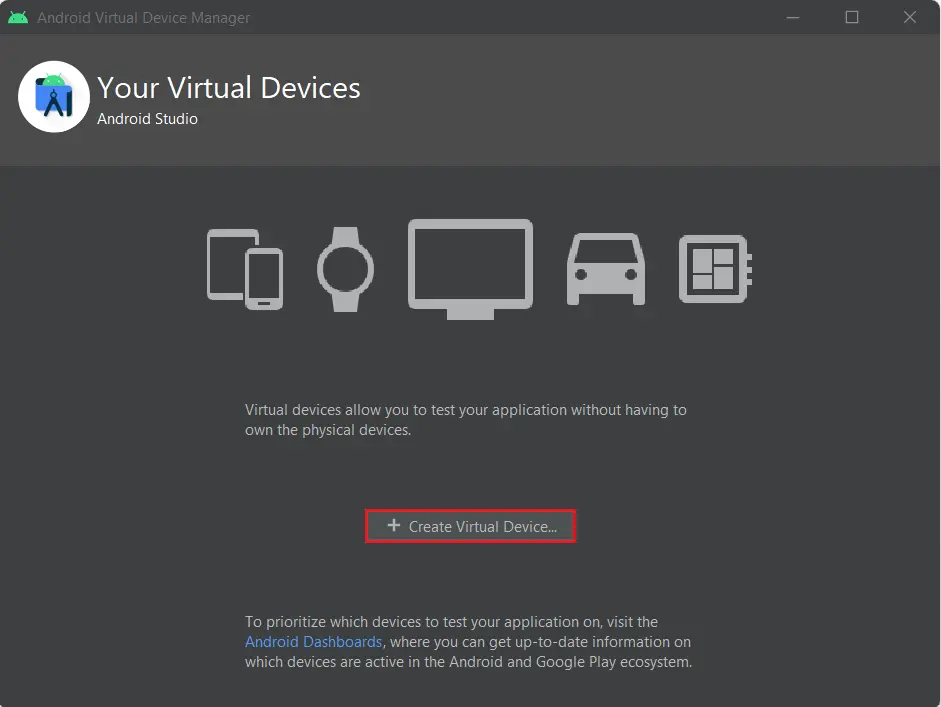
Android virtual device manager wizard, with a list of created virtual devices. It might be empty because we have not created any device yet.
Create Your Virtual Devices
To create a new device, select Create Virtual Device.
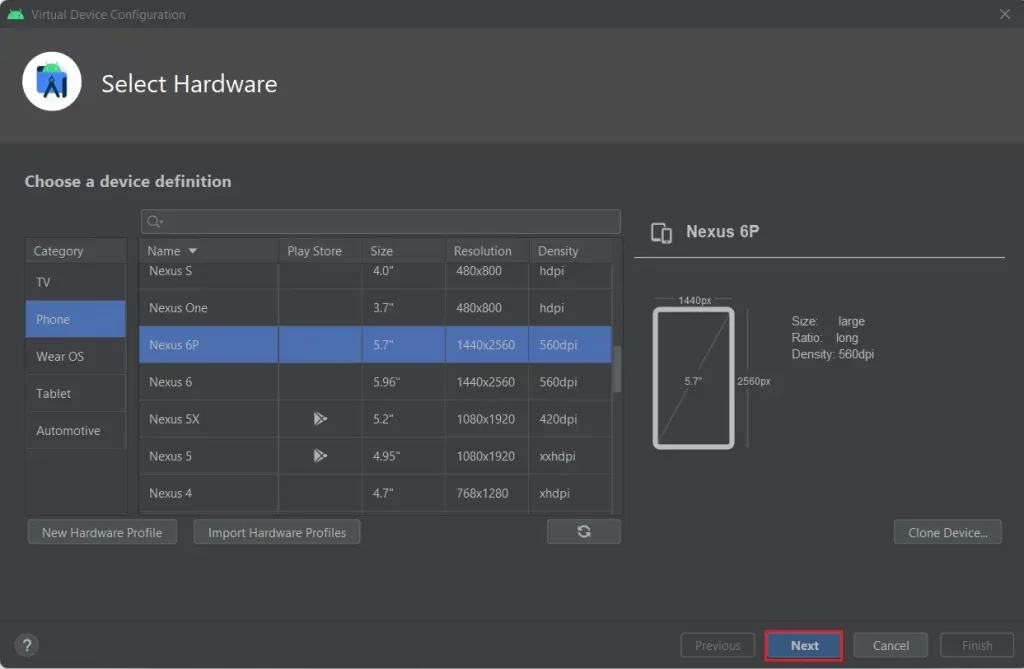
A new window pops up to Select Hardware type for your virtual device. This list comprehends almost all the Android devices with their individual settings. Choose one from the listed devices, with your required configuration (Size of the screen, Resolution, Density), and then click next.
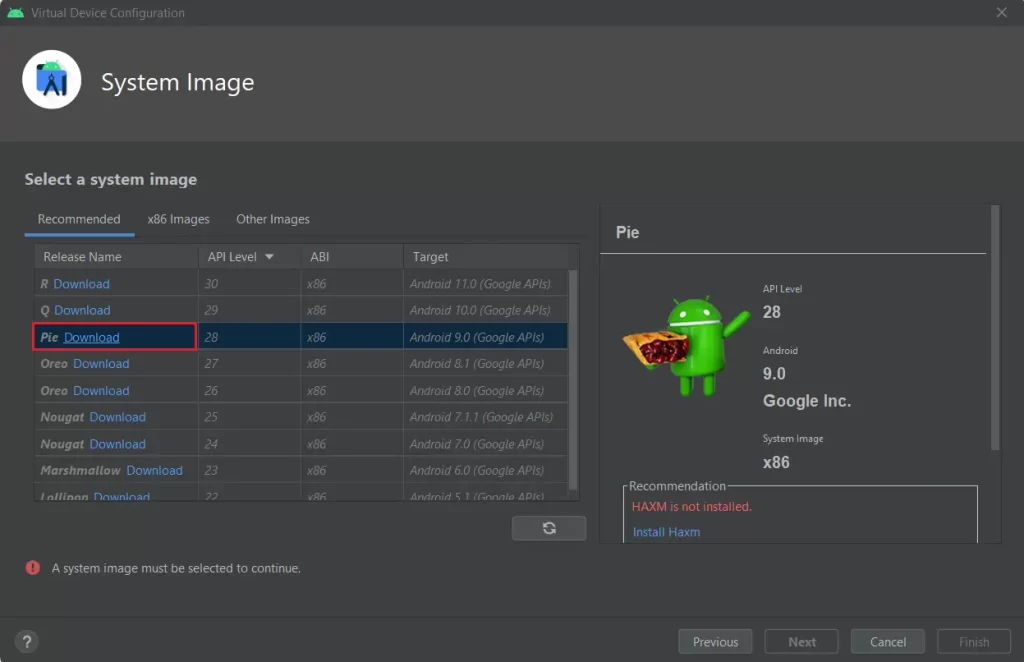
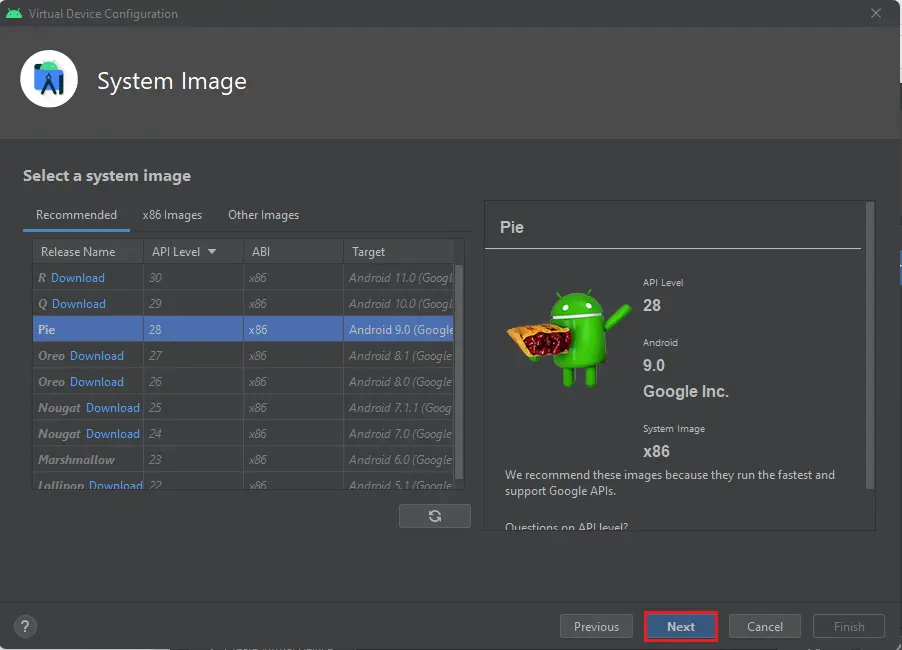
Select a System Image window opened that is running Android Version for your recently created virtual device. You can select any Android system images that are already available in the Android Studio, or you can download one, by clicking on the Download hyperlink available with the names. Under recommended section, the best choices are available as per the latest updates. The x86 Images are mostly used and the other Images are also listed Google Play Services.
Select one as per your Android app configuration and then click Next.
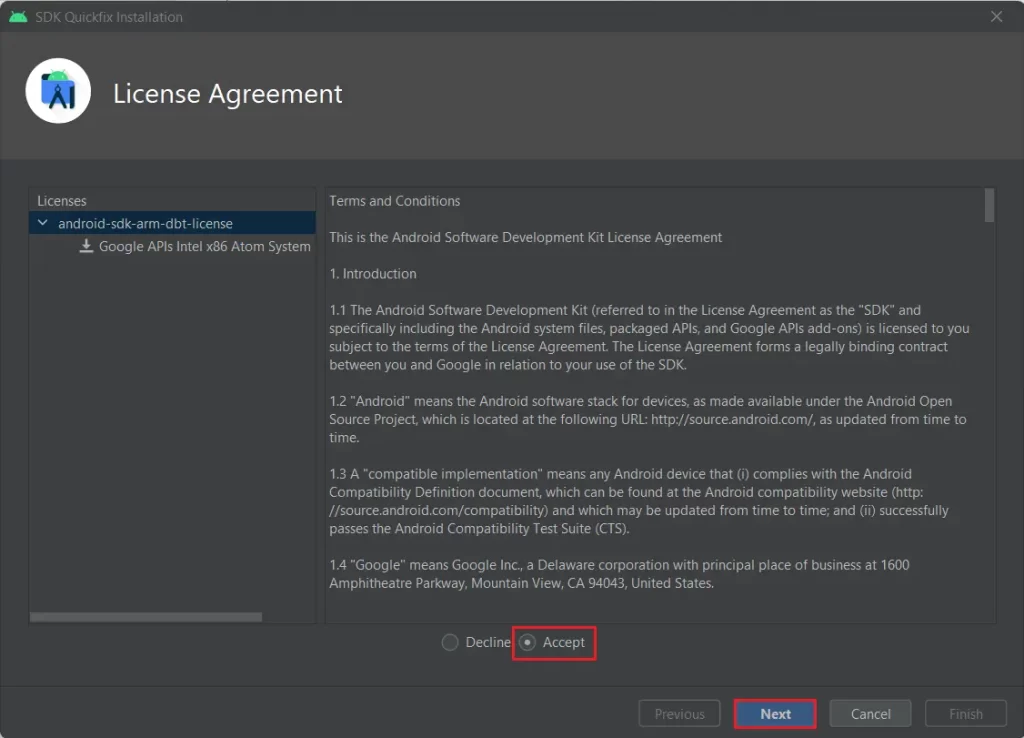
Android software development Kit License Agreement, select the Accept option and click next.
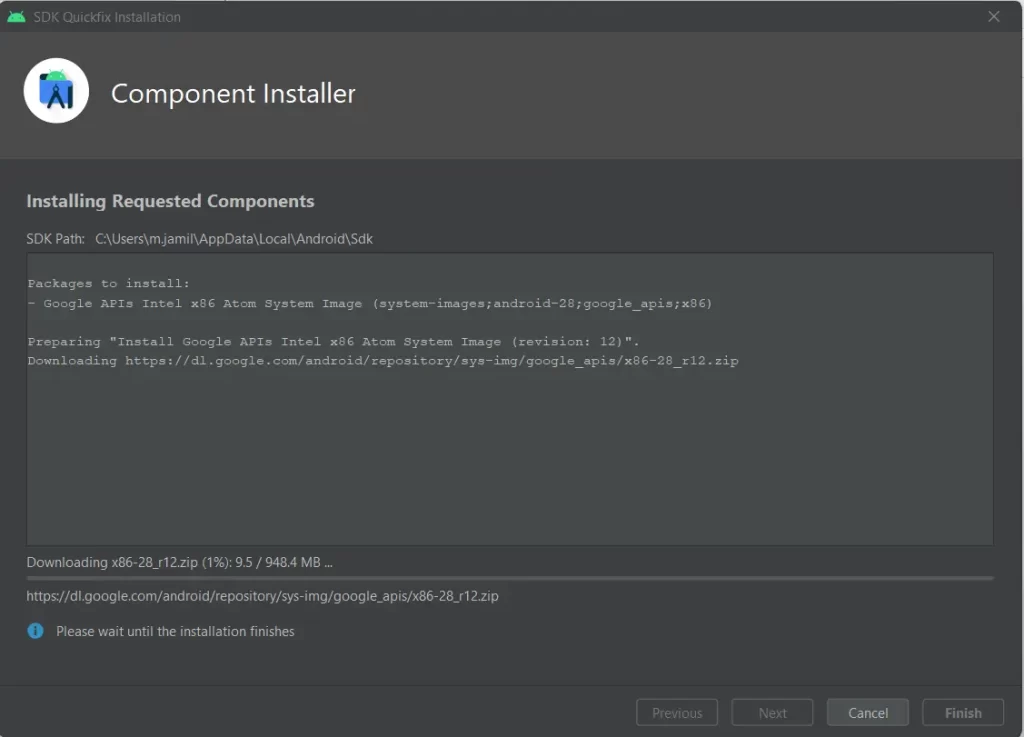
SDK quickfix downloading is in progress.
SDK requested component successfully download, click finish.
Select a system image and click next.
Android Virtual Device (AVD)
Enter your Android virtual device a friendly name for identification; you can change (the device type, API configuration, setup size, orientation, and Graphics) for your AVD.
You can configure your device as per your requirements and then select Finish.
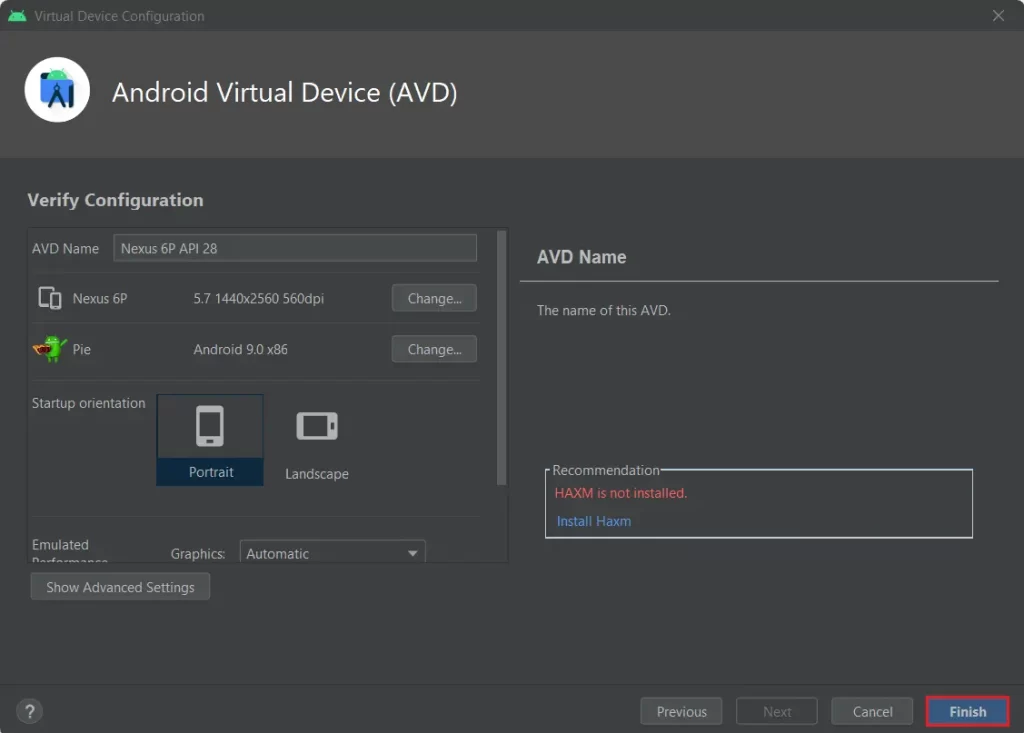
Android Studio will instantly start building AVD with the chosen configurations and it will take some time.
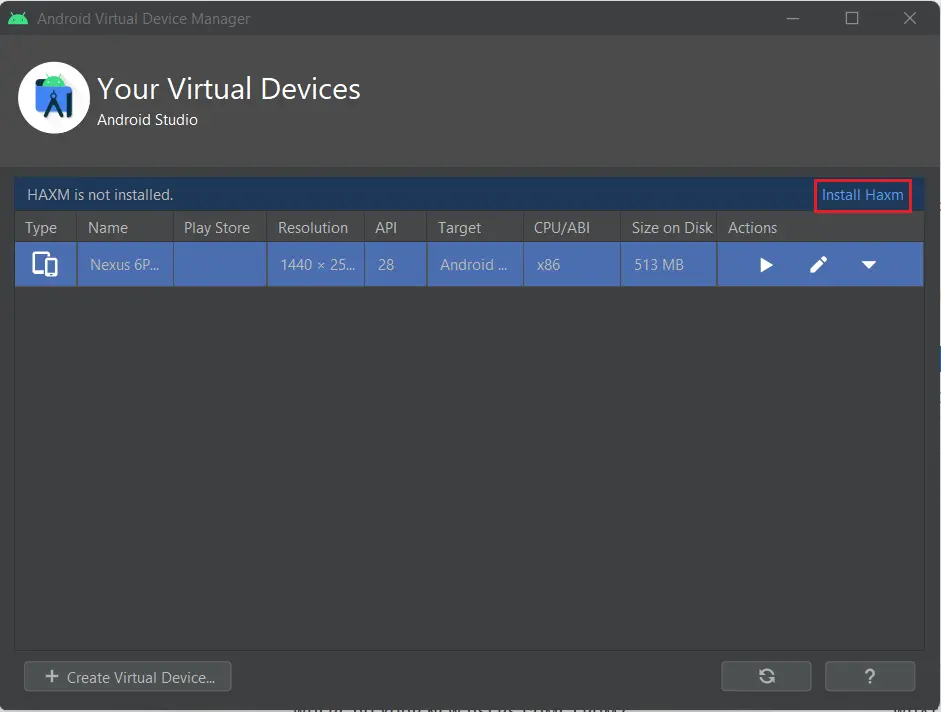
Once completed, you can see the AVD Manager window will list out the virtual device in the available devices list.
HAXM is not installed.
Install Intel HAXM in Windows
Click on the install Haxm hyperlink.
What is Intel HAXM?
The HAXM means is Hardware Accelerated Execution Manager. It is a cross platform hardware-helped virtualization engine. The Android Emulator uses Hardware Accelerated Execution Manager in Intel platforms to speed up and improve performance.
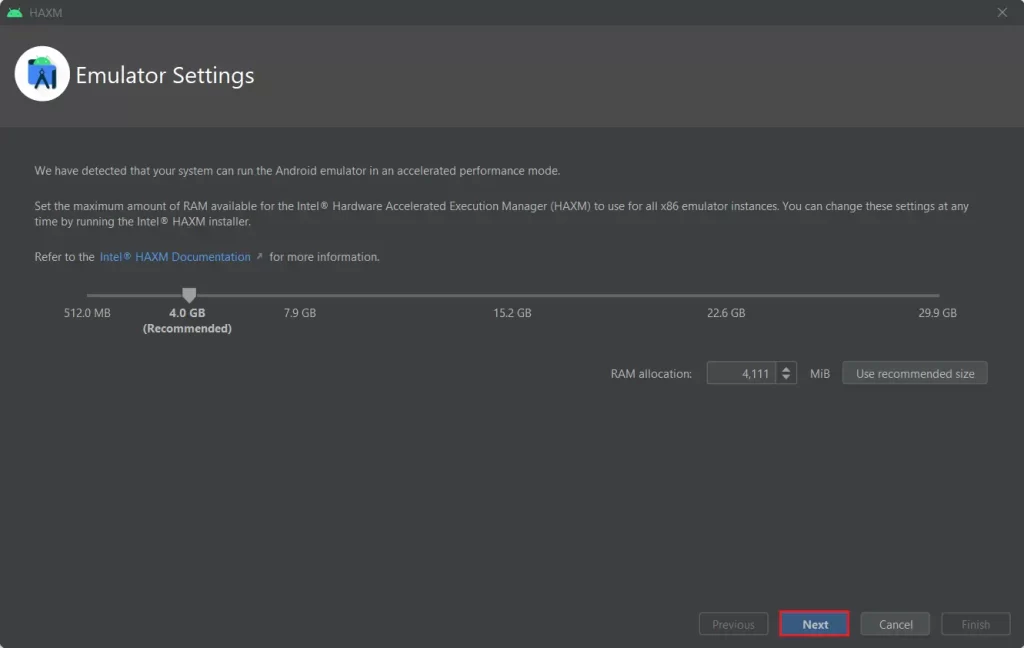
HAXM Android Emulator settings, click next
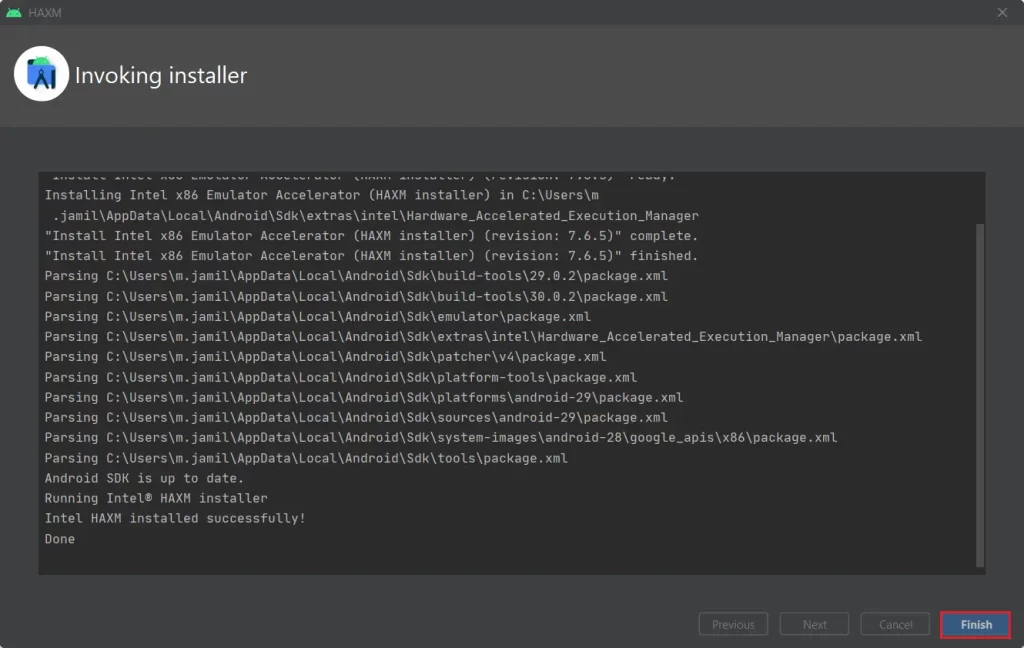
Intel HAXM installed successfully, click finish.
Open Your First Device
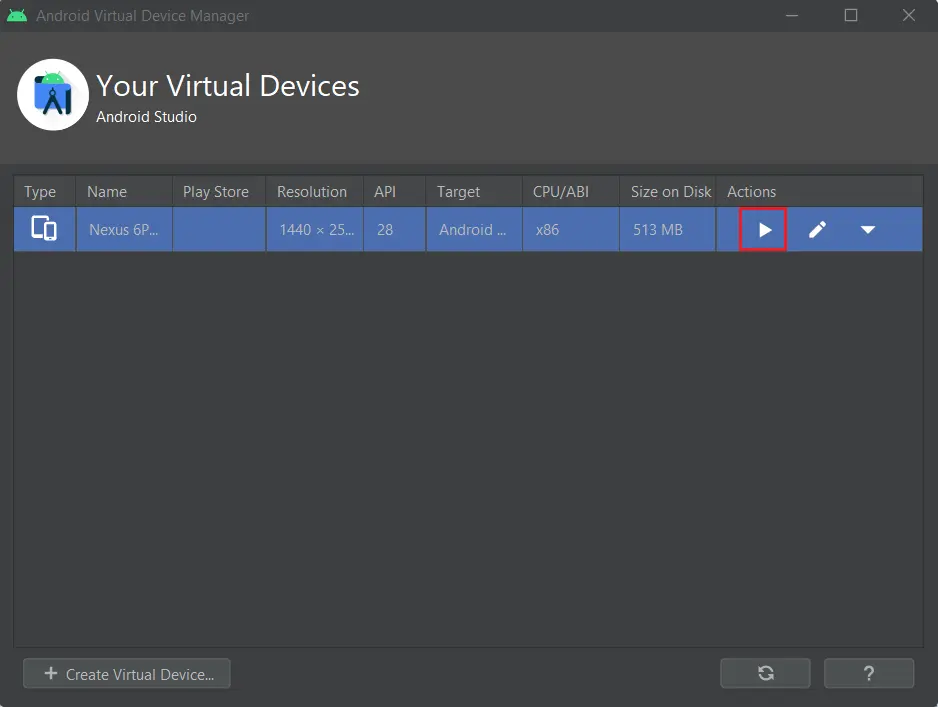
Android Virtual Device Manager, here are your Android Studio Virtual Devices, select one and then select the start button under the Action menu.
An Android Virtual Device started as shown in the below image. Side toolbar comprehends buttons to perform actions (like the power button, volume up-down, go back, go home, and more).
Android Studio virtual device Nexus 6P API.
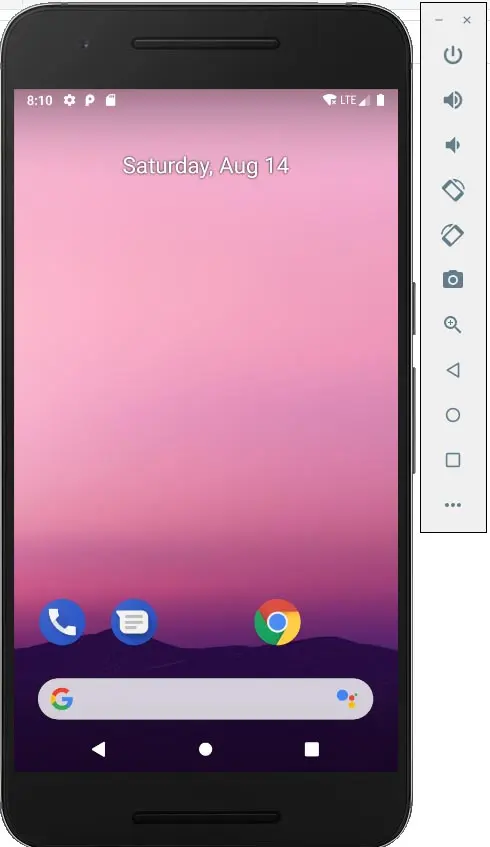
Now you can see your own Android Virtual Device running on your computer. In this device, you can test several Android Application Projects. Likewise, you can create AVD like Android TV and etc.


