In this article, we will learn how to update drivers in Windows 11. Everything you want to know about keeping your system drivers updated in Windows 11. A driver permits the Pc to effectively interact with hardware or a peripheral. If you open the Device Manager application, you would find drivers for the network, graphic card, Bluetooth, external headset, and some other devices.
To Update Drivers in Windows 11
First, if the current drives are working just fine, then we don’t need to update them. The installed drivers on your system are all tried, tested and would be most suitable for the PC. Therefore, it’s recommended you do no need to update them unless you found any issues with the current version.
Are not Drivers Updated Automatically
Whenever we connect a device to the computer, the Windows will automatically download the valid driver for devices, though in some cases, you will need to manually install it. Devices drivers are normally automatically updated when we Windows update, however, the process is not that simple.
To update drivers with Windows Update, hold the Windows+I key to launch Windows Settings.
In the Windows settings, scroll down select Windows Update, and then select Advanced options.
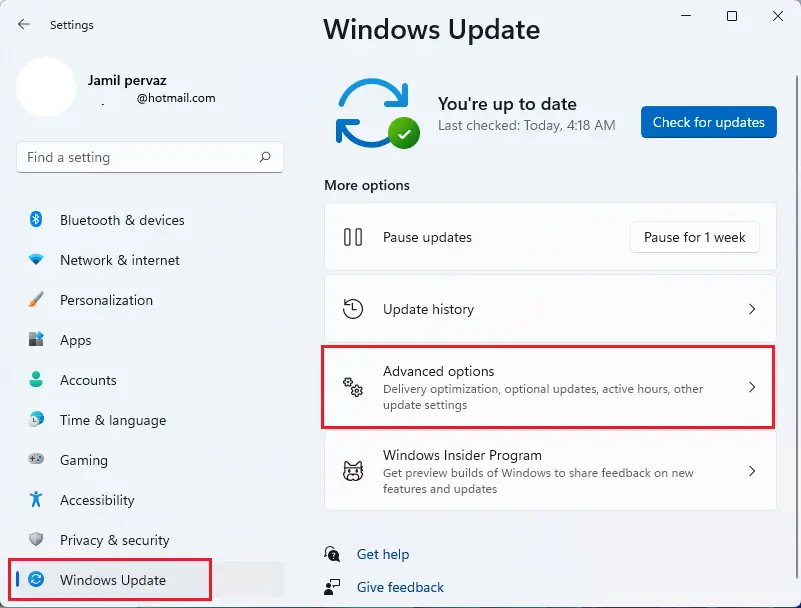
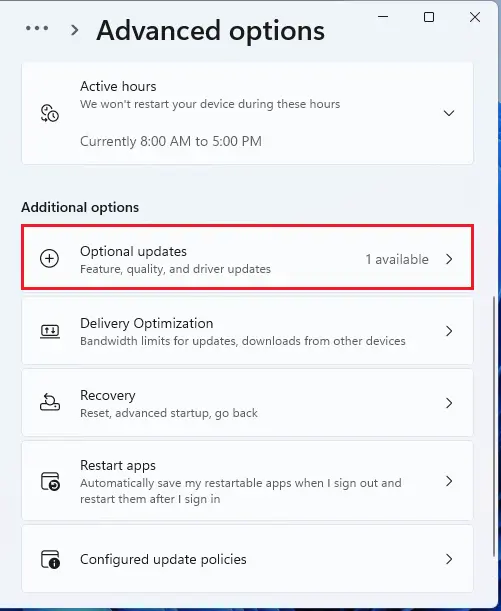
Select the Optional updates under the Additional options.
The driver updates will be listed here, Select the checkbox for the driver you want to install and then select the Download and install button.
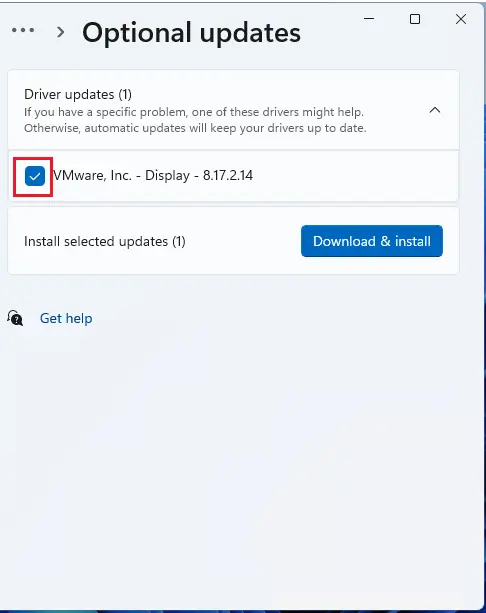
It will download, and install select update driver on the Windows Update page in Settings. You might get a pop-up after the updates are installed, restart the system for the update to fully come into effect.
How to Update Drivers via Device Manager in Windows 11
We can update the drivers using the Device Manager. In the Device Manager, we can update the driver, uninstall the device, view the driver properties, or rollback driver update. Here, we can see how to update the driver in the Device Manager.
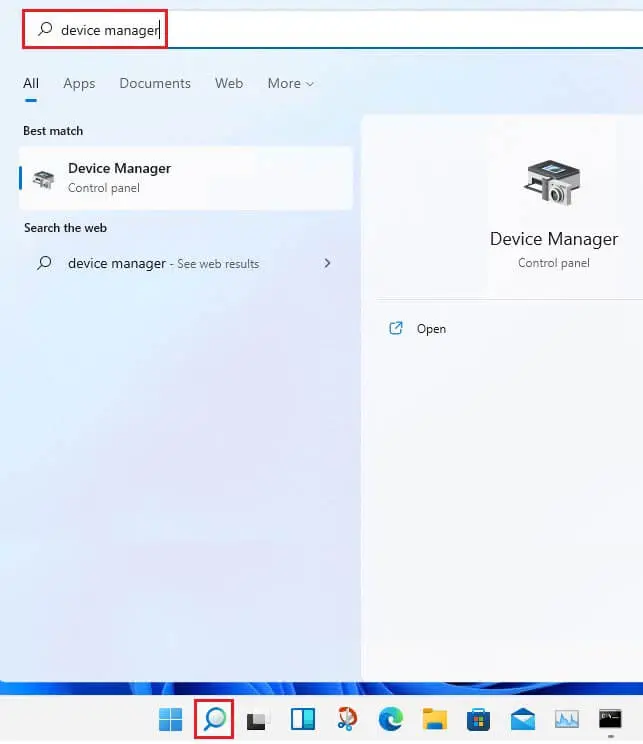
Click on the search button, type Device Manager in the search box, and then select the relevant search result to launch it.
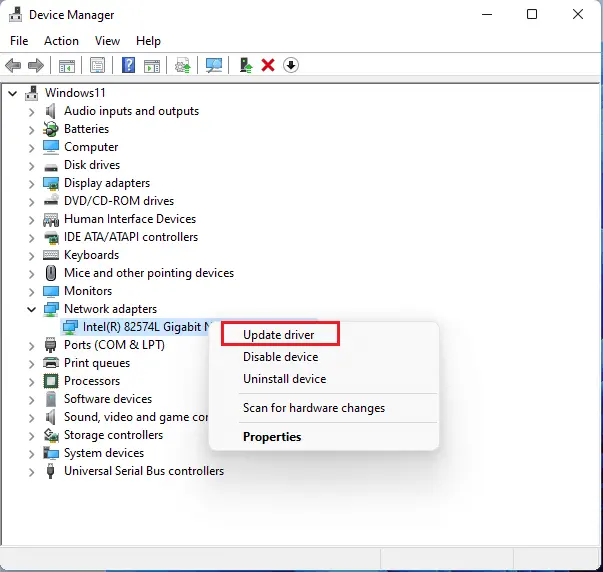
Device Manager Window, find the required device, right-click on it, and then click on Update Driver.
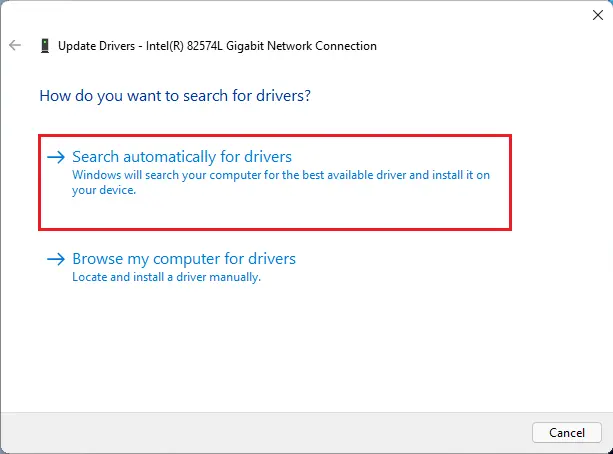
Click On Search automatically for the driver’s option, Windows will search for the best available driver and then install it on your system.
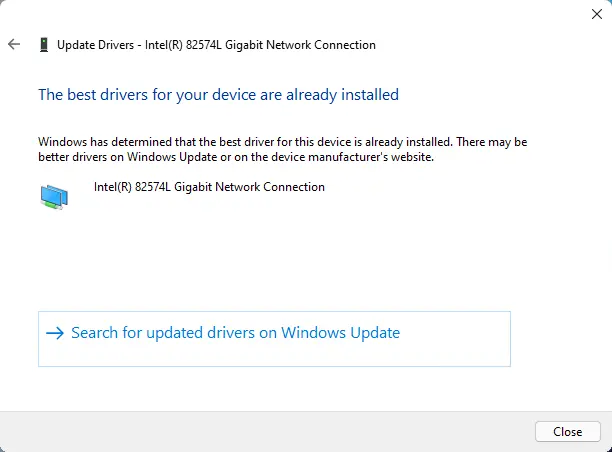
After selecting this option, Windows will find up a better driver and then install it on your system. Follow the instructions to complete the process. In this case, Windows doesn’t find any update.
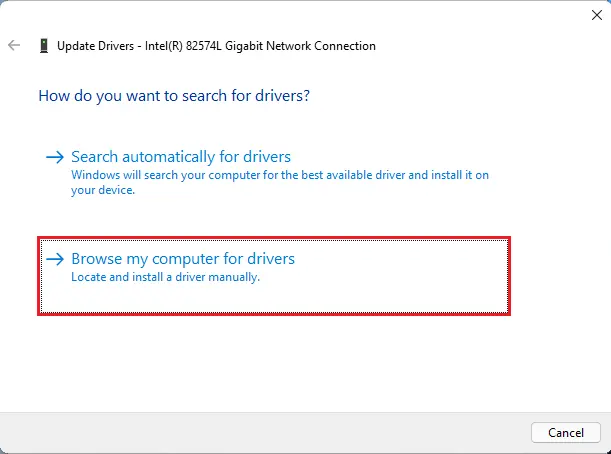
Select Browse my computer for drivers, it will permit you to browse the system, select the available driver and manually install it.
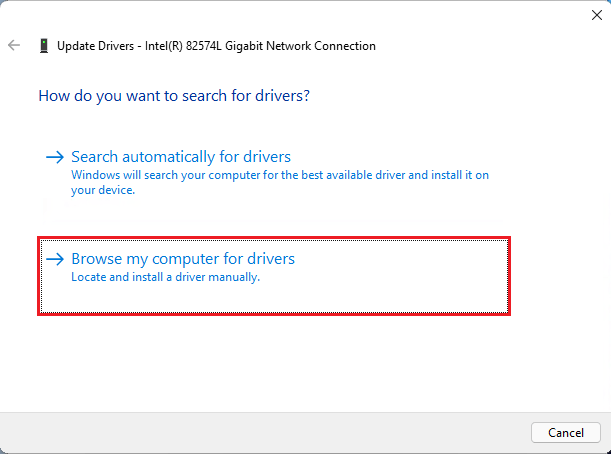
Select the Browse button, find the driver on the computer drive, and install it. You can also select Let me pick from a list of available drivers on the system.
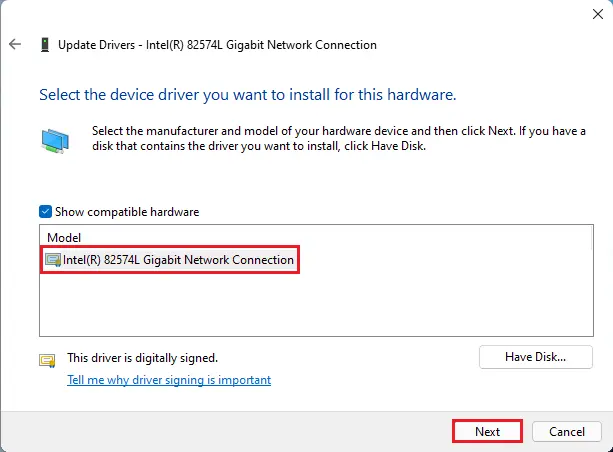
All the compatible drivers will be listed here. Select the driver that you want to install and then select the Next bottom.
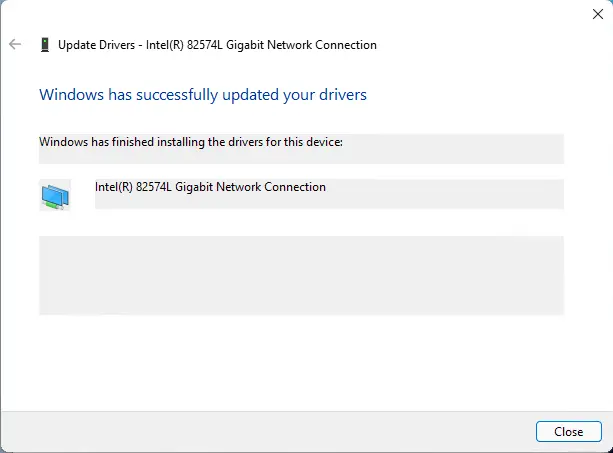
it can fix issues with the currently installed driver.
Manually Download and Update the Driver using Device Manager
If your system Windows is unable to find the updated version of the driver, it doesn’t mean that there isn’t one available. Several manufacturers release drivers on their official website and these drivers might not be available through Windows Update.
How to Find the Current Driver Version
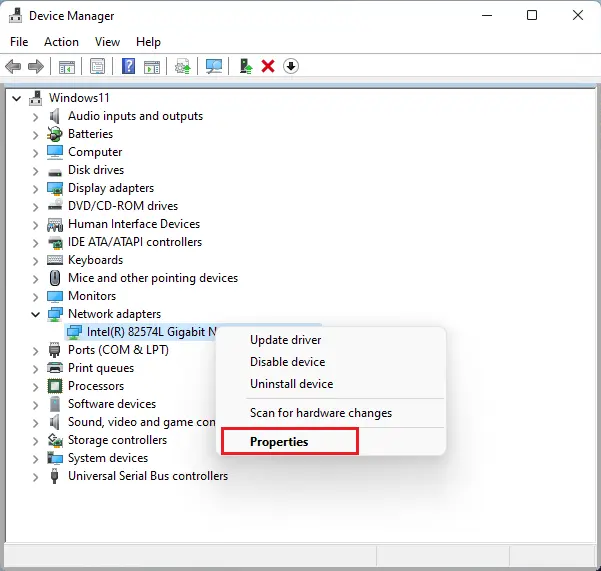
Open the Device Manager, track the required device, right-click on it and then select Properties.
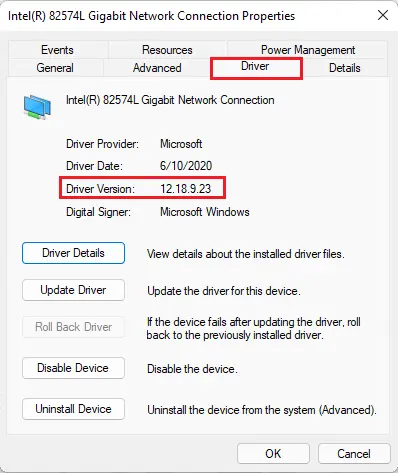
Select the Driver tab and then you can find the driver version.
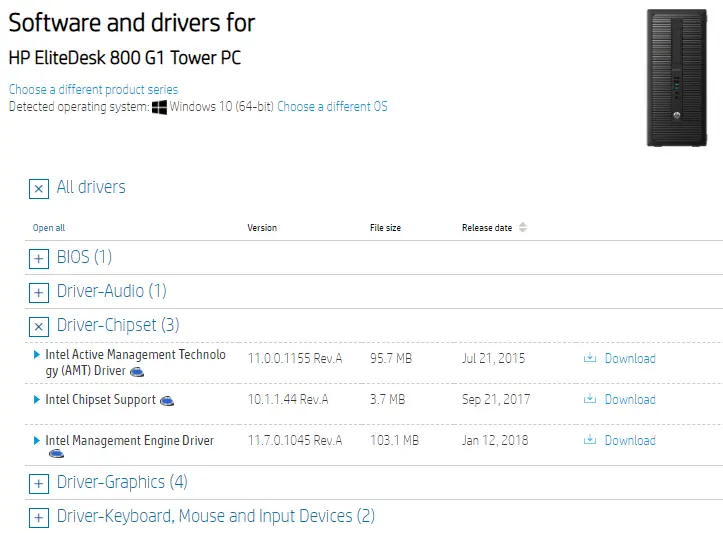
Now you can search on the web with your Computer Model, operating system, and driver name from the manufacturer’s official website.
Note: The below picture is of the HP official website. If you use a system from a different manufacturer, then visit the website according to your computer.
After downloading the driver, go to your Downloads folder and then double-click on the downloaded driver file to launch the installer.
Read more: How to Take a Screenshot in Windows 11.


