In this blog, we will have a look at how to log in Automatically in Windows 11. Do you find it unsuitable to type a password each time when you turn on your computer? If so, you can actually automate the entire login process on your Windows 11 PC. The Windows log-in screen is a security feature that assists protect your system from others. Someone will need to know your password before they are permitted to sign in. This automatic signing feature is built into the operating system, and all you wish to do is turn it on to get clear of login annoyance.
Before following the below steps, there are few things to note. You must have access to your Windows administrator account to makes changes and you must log in as the administrator and if you always decide to change the password for the account set to automatically log in, then you will need to re-do the steps.
Log In Automatically in Windows 11
How to Remove Your Windows Password
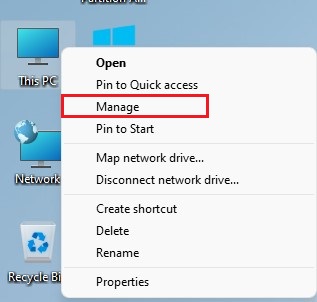
Right-click on This PC from your desktop and then select Manage.
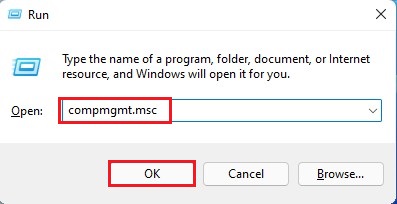
Or open run command by pressing Win + R keys, type compmgmt.msc, and then select ok.
Watch Video: How to Log In Automatically in Windows 11
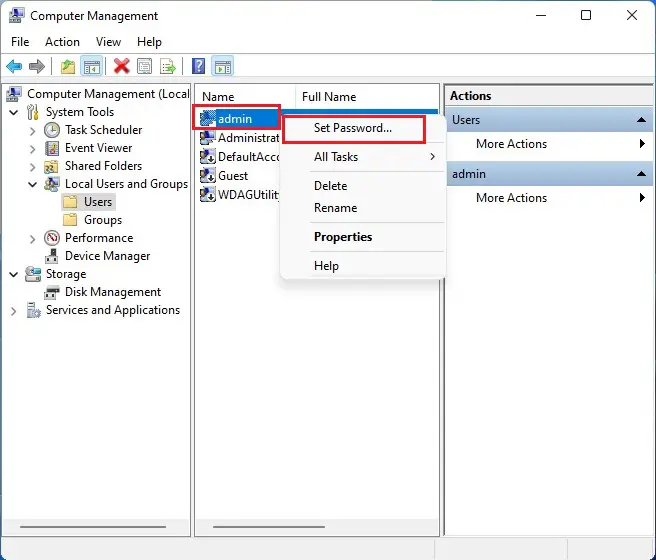
Expand local users and groups, select Users
Right-click on a user the one you want to log in automatically and then select a set password.
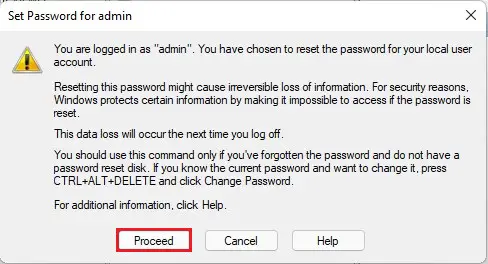
Select proceed
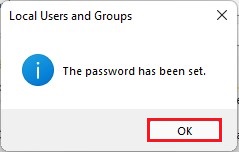
Click ok without typing passwords

Click ok
Allow Automatic Login via User Accounts
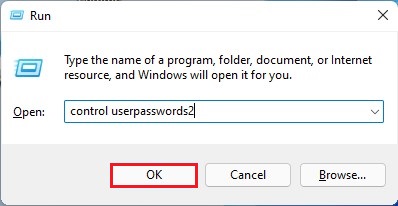
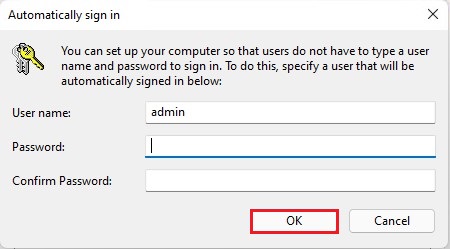
Hold Windows key + R to launch run box, type control userpasswords2, or type Netplwiz to Sign In to a User Account Automatically and then select ok. Click Yes if you get a User Account Control warning message that appears.
User Account window will open, deselect the checkbox Users must enter a user name and password to use this computer and then select ok.
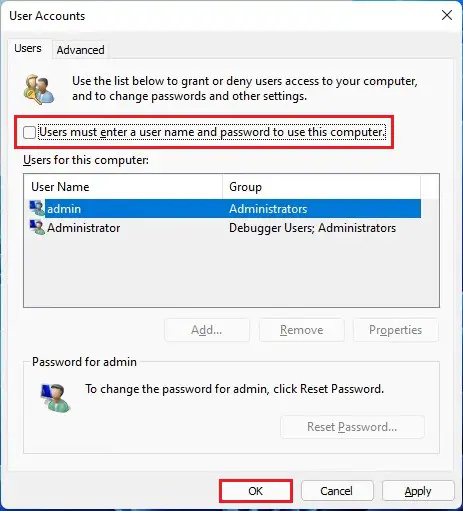
Click ok
Restart your computer, and you will find it no longer asks for a credential.
Using Windows Registry to Login to a User Account Automatically
Hold Windows Key + R, type Regedit, and then press Enter.

Once open the Registry Editor, go to the following path.
HKEY_LOCAL_MACHINE\SOFTWARE\Microsoft\Windows NT\CurrentVersion\Winlogon
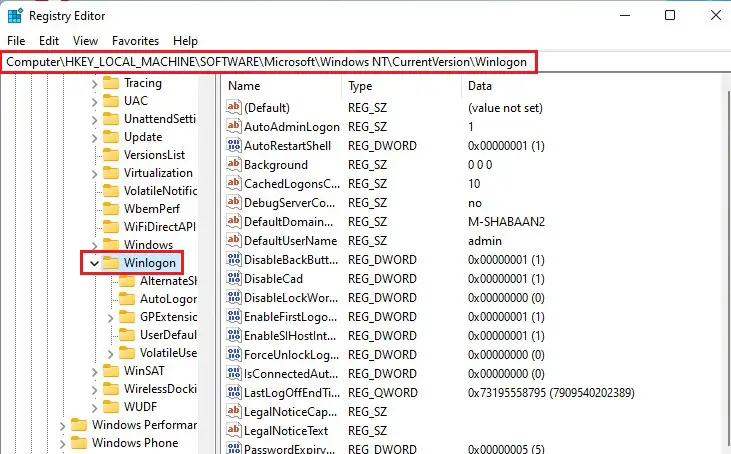
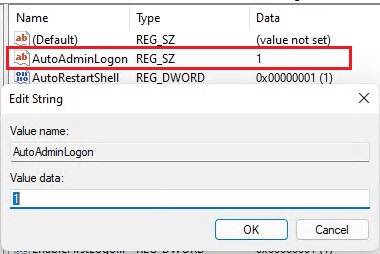
Find AutoAdminLogon from your right and double-click to open it
Enter 1 in the Value data box and then select ok.
Close the Registry Editor and then restart your computer
Now that you have set up the account to log in without typing a password, reboot your computer and you will notice Windows will sign you in without typing a password.
To turn off automatic login, change the value of AutoAdminLogon to 0
Conclusion:
This article showed you how to set up Windows 11 to automatically sign in without typing a password every time.