A VHD Virtual Hard Disk Recovery file is just like a physical hard drive that has elements like, file systems, disk partitions a boot record, saved data, etc. Loss or corruption of one such file means losing the entire data stored on the VHD. Here is everything you may want to know about how to recover or repair VHD Files.
Virtual Hard Disk Just like physical hard drives, VHD files are at risk for accidental deletion, corruption, virus attacks, and other reasons of data loss. The ability to restore data from a VHD image could be very valuable.
Step by step attach and Copy files from a VHD
I needed some important files that I had backed up as a WindowsImageBackup to the external drive. The only option I could retrieve data from my external disk was buried in system images that I had created. You might think my only way is to restore those system images.
VHD Virtual Hard Disk Recovery Mount a VHD File in Windows
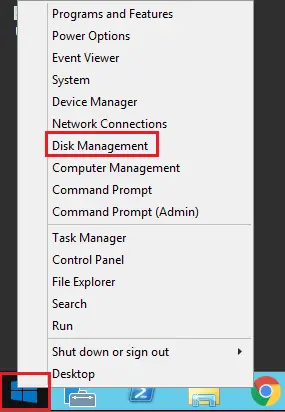
Please make sure you have your VHD file accessible. Right-click on the Windows start button and then select Disk Management.
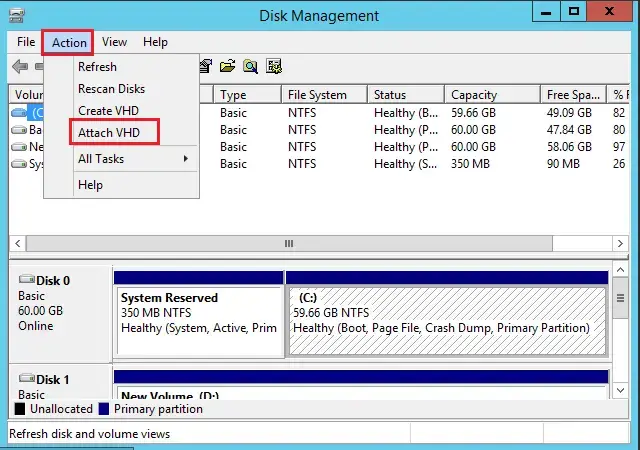
Select the Action menu and then Attach VHD.
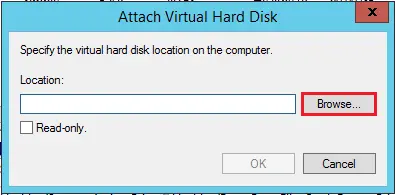
Select the browse button.
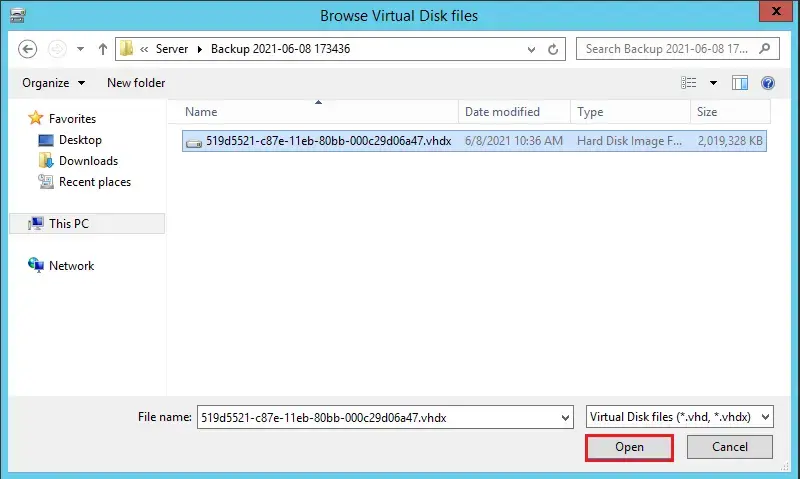
Browse the location of your VHD file. I am using a VHD file stored as a Windows System Image.
Click open.
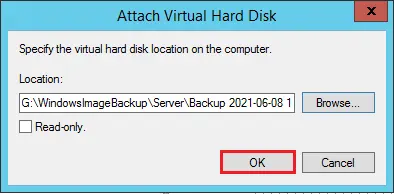
Select ok.
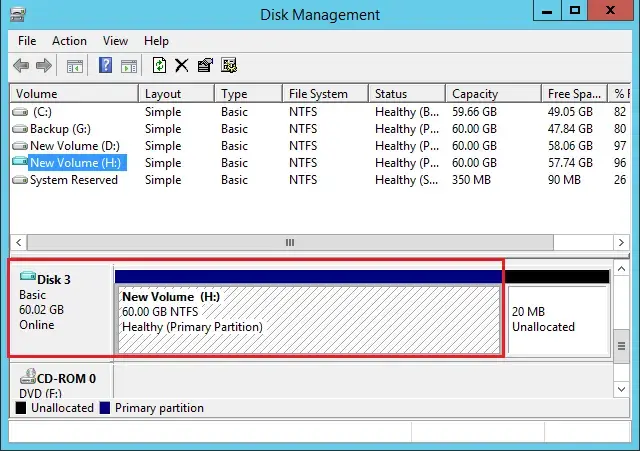
The virtual hard disk file is then mounted in Disk Management, just as a physical drive.
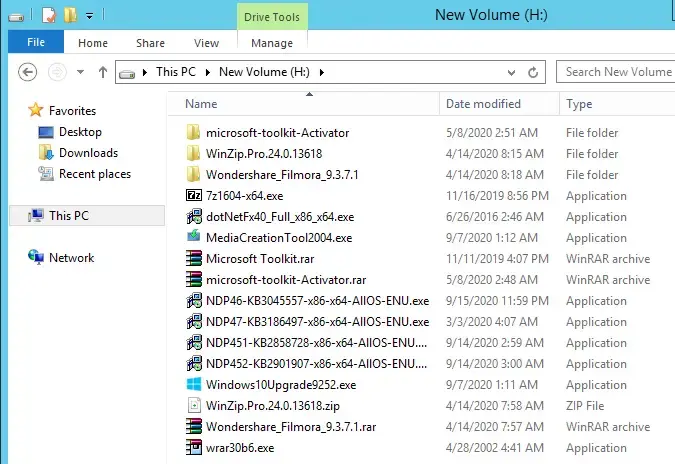
Browse your VHD disk volume to see your data.
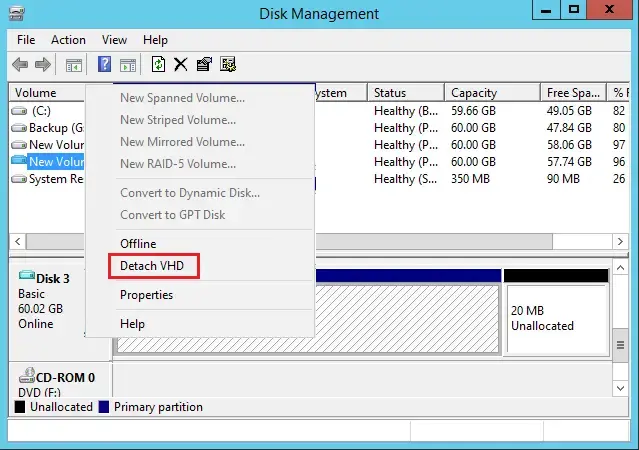
When you have done using the VHD, simply right click on VHD disk and then select Detach VHD.
What to do if your VHD is not assigned a drive letter
Sometimes your VHD might not have a drive letter assigned when you attach it, especially if it is the first time you are attaching the file.
Right-click the VHD and then select change drive letter and paths.
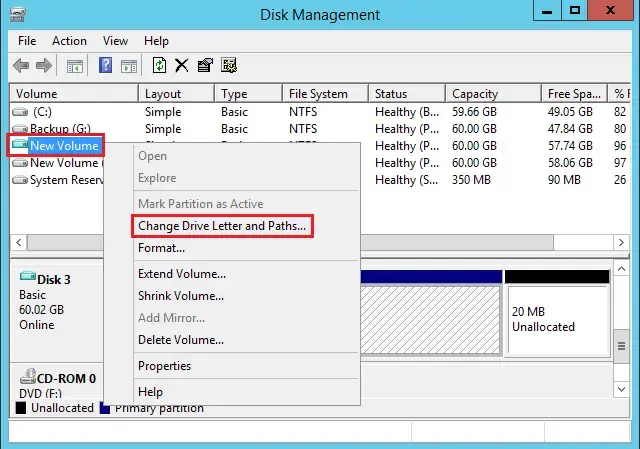
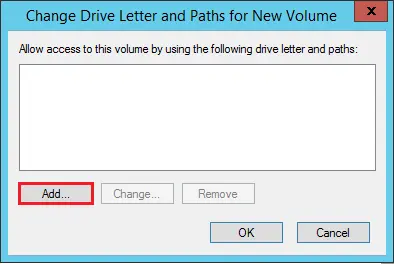
Click the Add button.
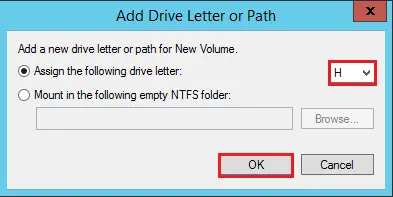
Choose the radio box Assign the following drive letter and then select in the drive letter list box. Choose an available drive letter and then click ok twice.
For more details click here


