In this article, I am going to show you how to setup and configure file history backup for Windows10. File History is a helpful tool that lets you backup files on your computer to any hard disk connected to it. You can use any external or internal hard drive for file history back up. You can also backup to a network location if any available.
File History will automatically back up your Favorites, Contacts, Desktop items, and etc.
All this data you want to back up can add up in a hurry, but you also can configure File History to exclude certain files, folders, and how often it saves copies of files.
How to turn on File History
By default File History is turned off. To start backup file history, you should connect a secondary drive to your computer or that a network is set up.
How to add drive to use with File History
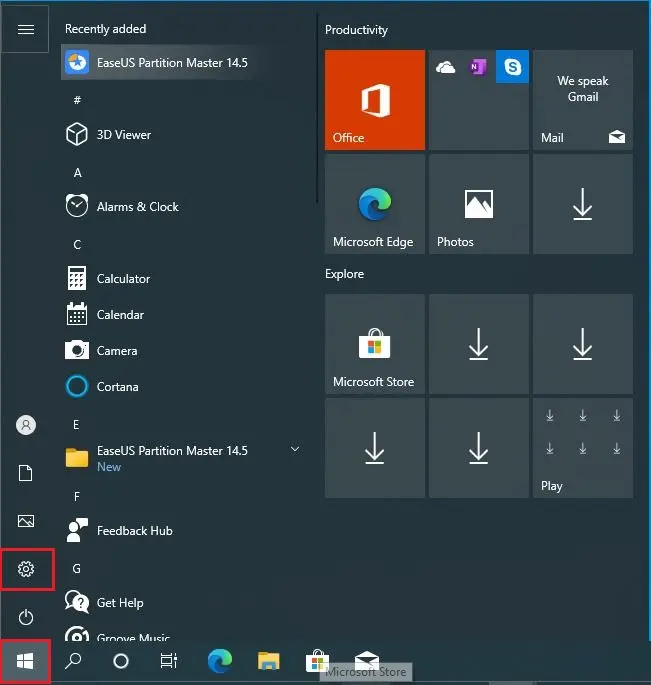
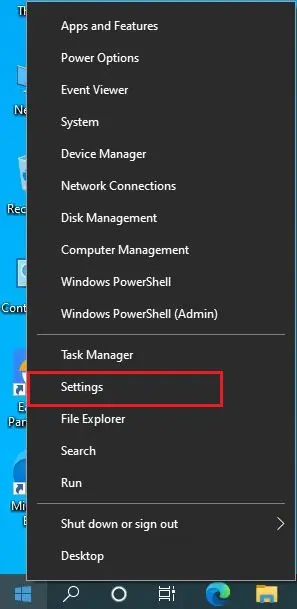
1- Click the Start button and then select Settings button.
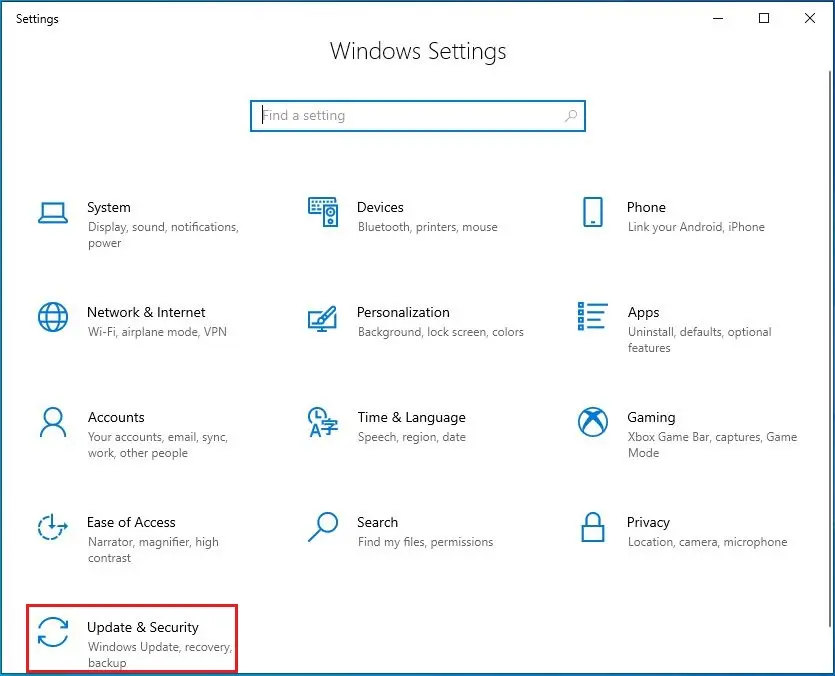
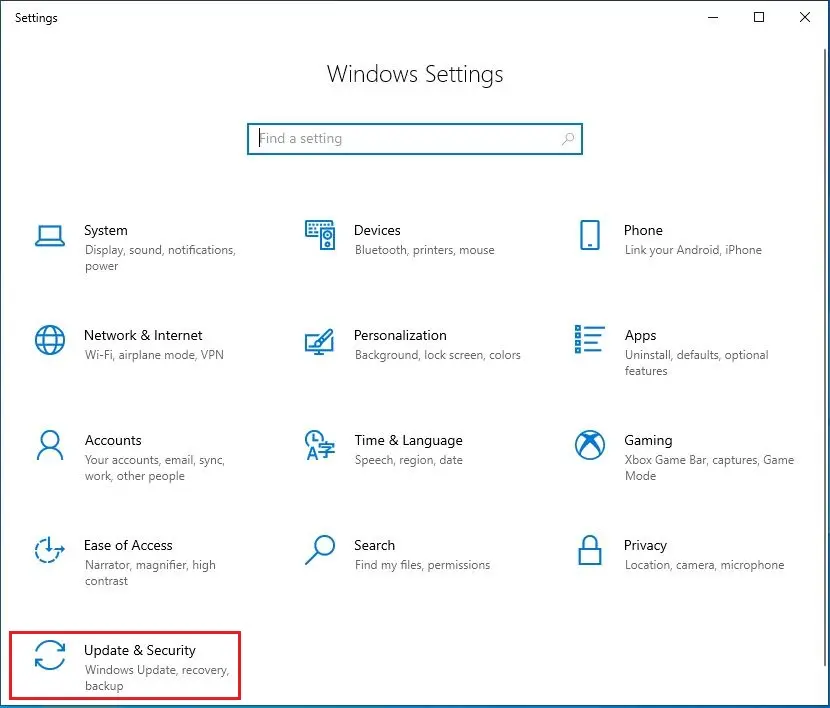
2- Select Update & Security.
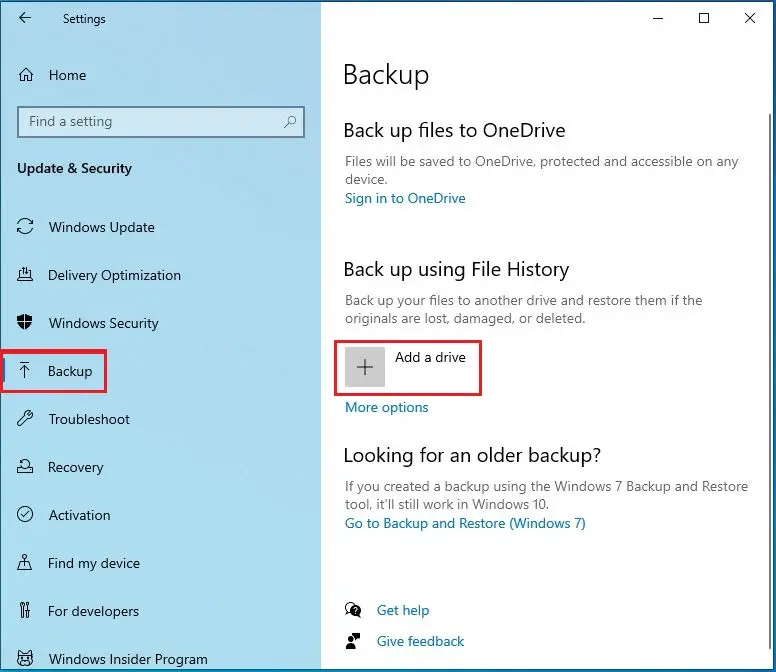
3- On your left pane, select Backup and then, select Add a drive under back up using file history.
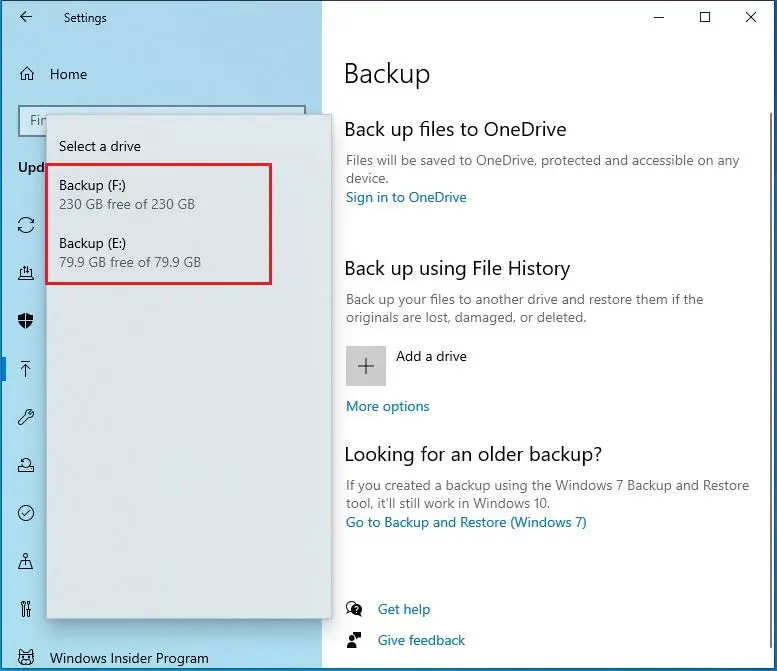
4- The available drives will displays on the left and select one you want to use.
How to Configure File History
5- After selecting the drive, Windows automatically turns on File History.
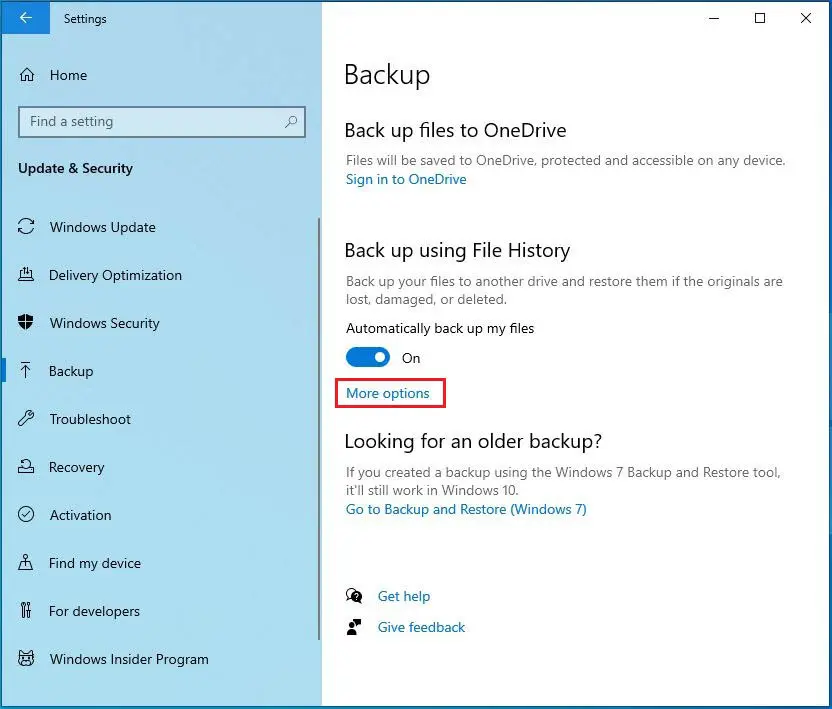
Select More options.
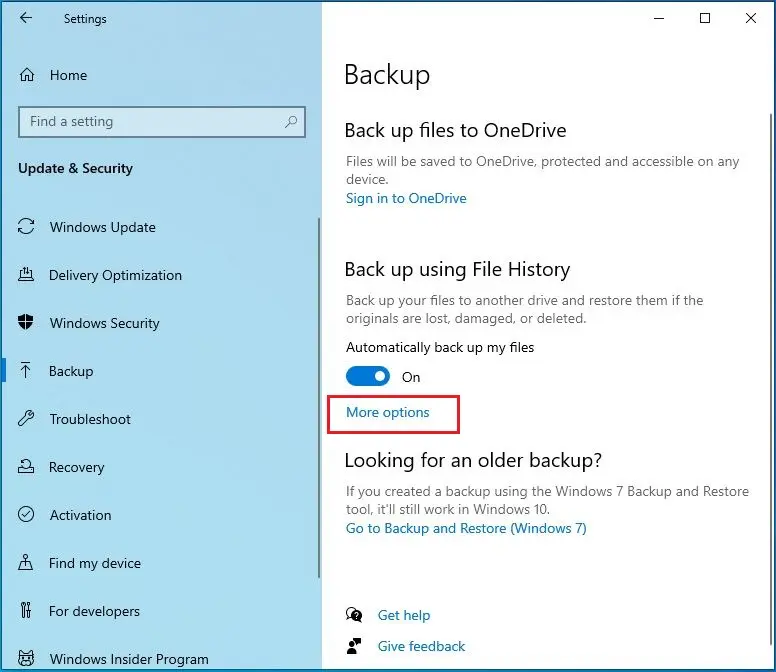
Setup and Configure File History Backup
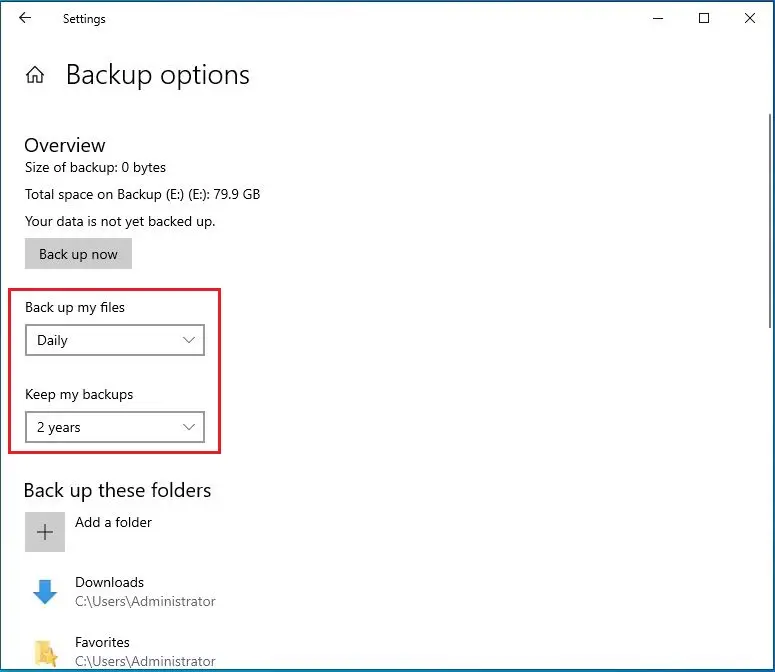
6- The Backup options windows permit you to set how often File History backs up your files, folder, and how long versions are saved. Choose back up my files options and then keep my backups drop-down lists.
File History will automatically add certain folders to the back up.
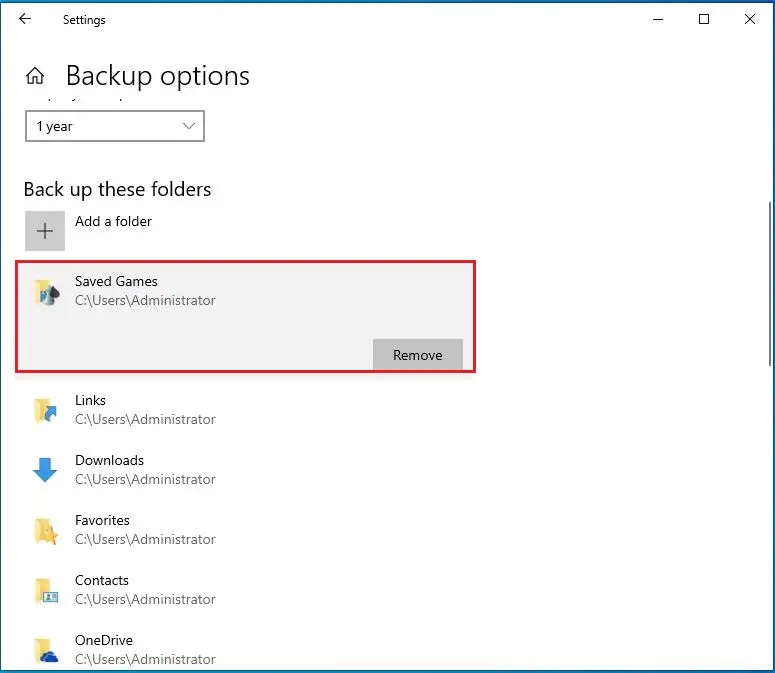
7- Before you start the back up process, you can remove files, folders that you don’t want to back up.
Select the folder you don’t want to Under the Back up these folders option, and then select Remove.
You can also particularly exclude folders. For instance, if there is a subfolder in one of the folders being backed up that you don’t need to backup, you can exclude that subfolder.
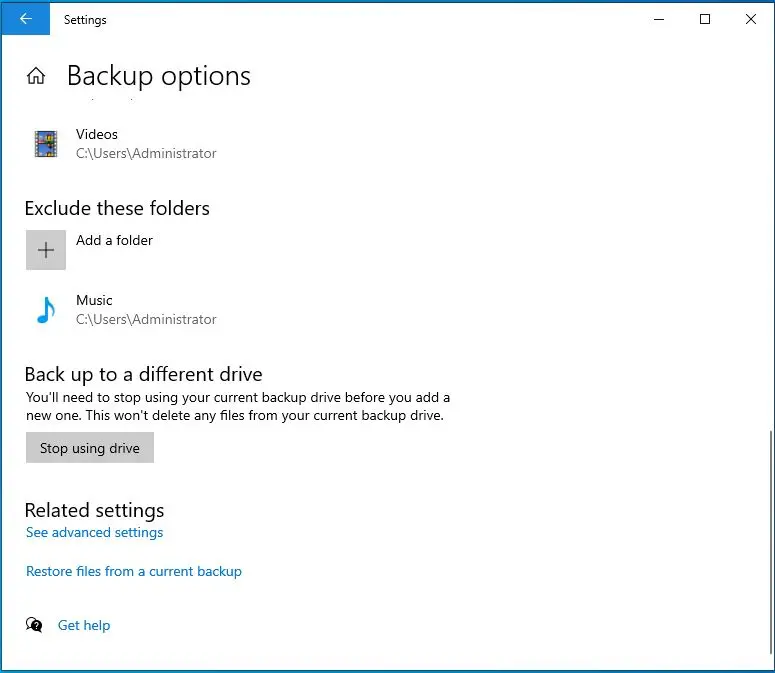
8- Select Add a folder, under the Exclude these folders option.
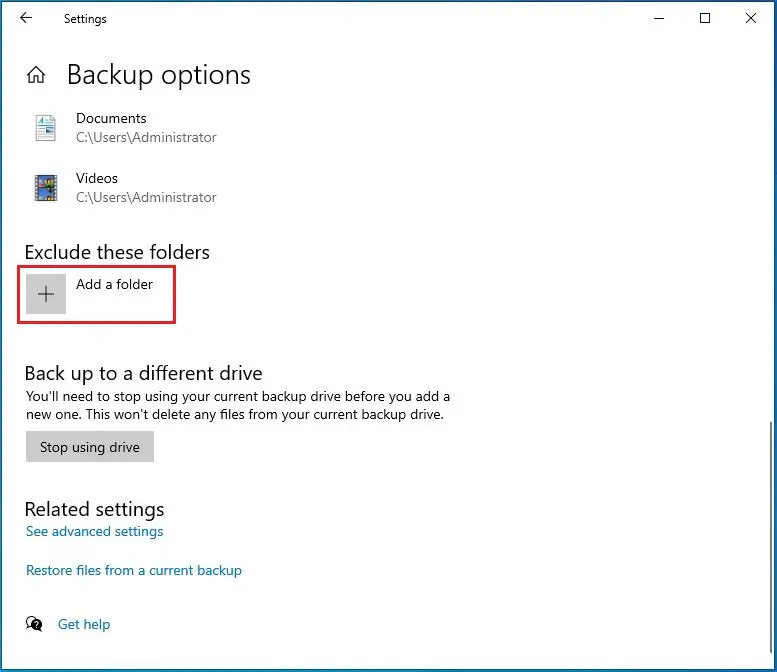
9- Choose a folder you want to exclude on the Select Folder dialog box and then select Choose this folder.
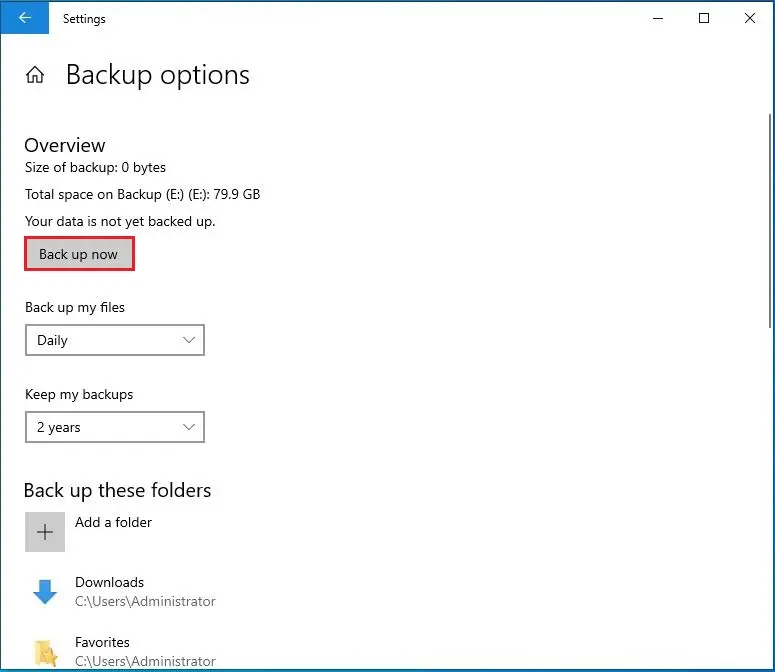
10- Select Back up now to start the backup under Overview.
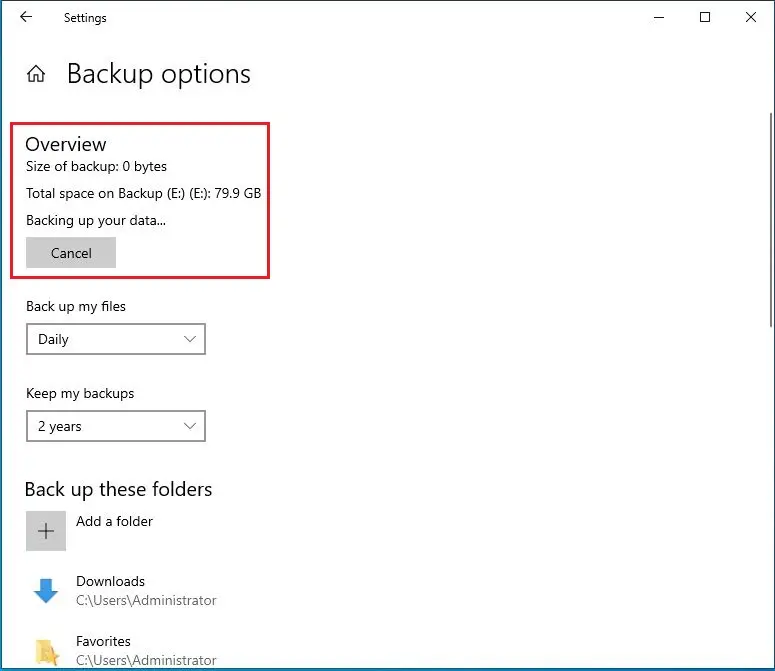
11- Now you can see backing up your data. But, unfortunately, there is no time limit listed. The initial backup may take little while.
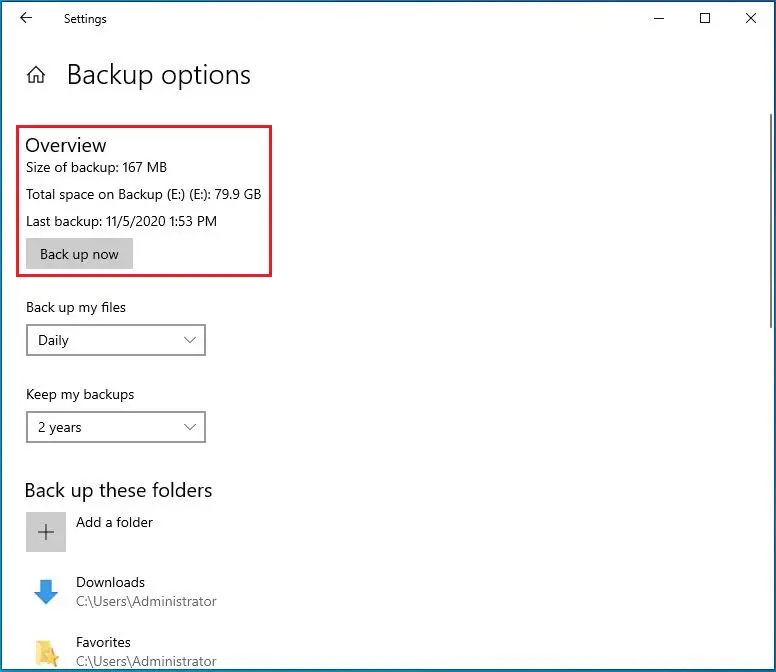
12- File history backup successfully completed.
Configure File History Back Up to a Network Location
As I mentioned above, we can use a network location for our backup as well. Maybe you have NAS ( network attached storage or a home server that you want to use.
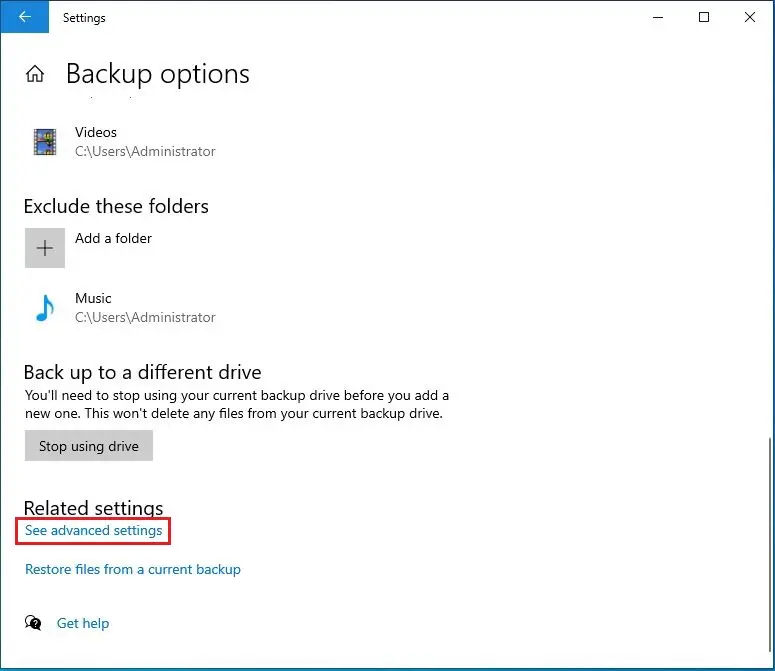
1- In the Backup options window, if did not setup, and the select See advanced settings.
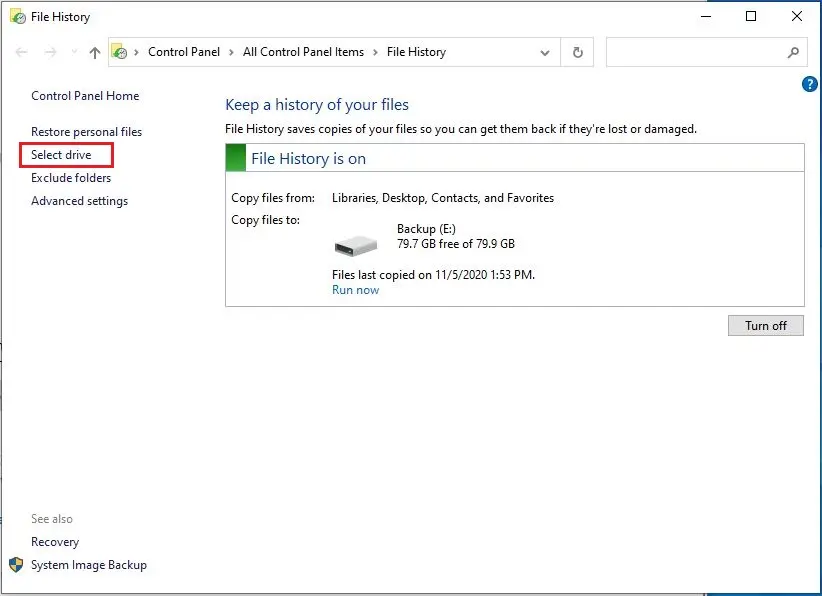
2- Under control panel home, click on Select drive.
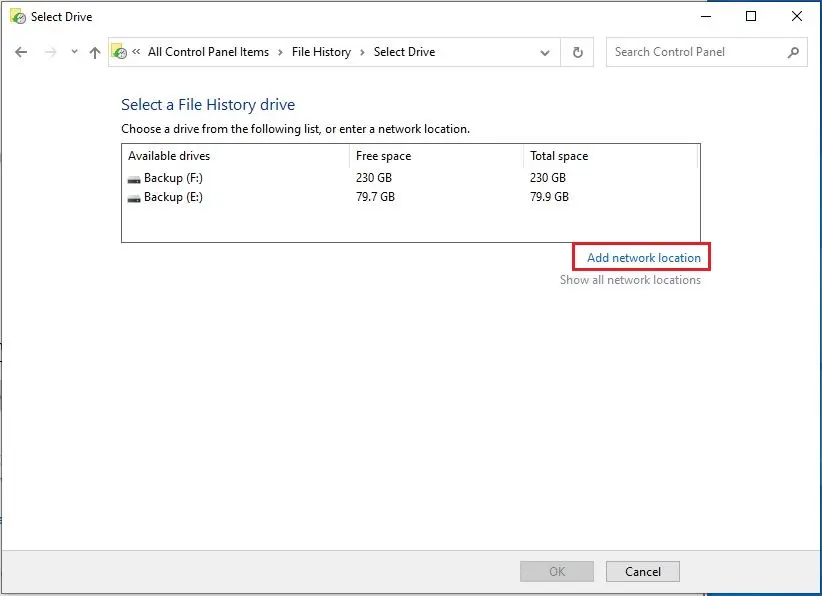
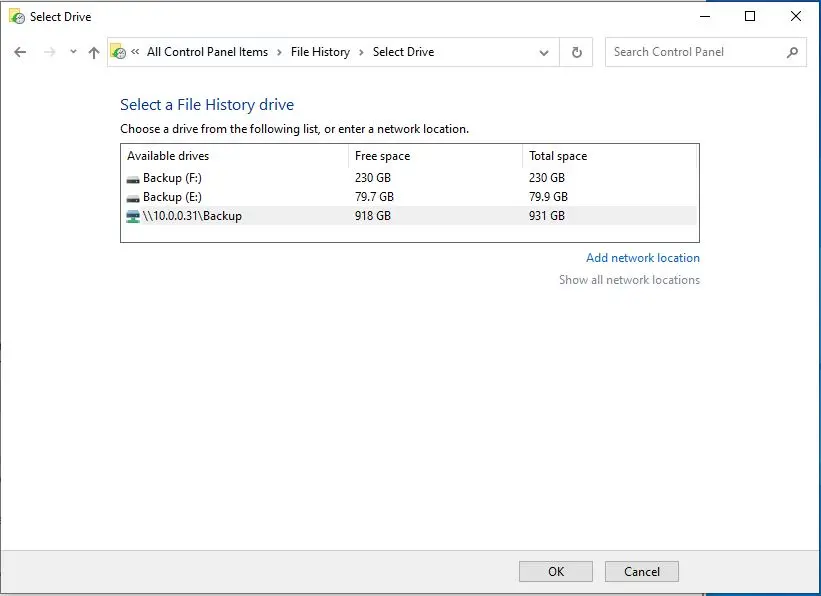
3- Select a File History drive screen appears, you can see local and network drives listed. If you don’t have a network drive you want to use, then select Add a network location.
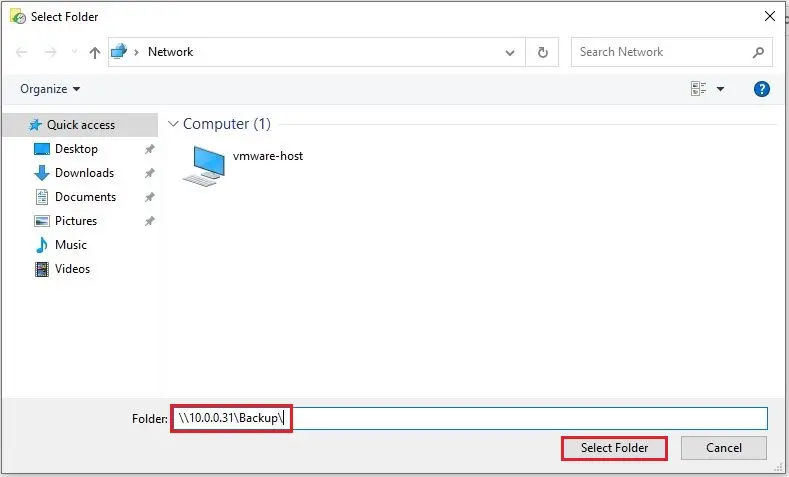
4- Type your network drive share folder path and then choose select folder.
5- Successfully added network drive.
How to restore files from File History
If anything goes wrong and you loss files, you can simply restore them from the File History backup. Ensure the disk that contains the backup is connected to your computer or on the network location is accessible.
Recover Files Using PC Settings
1- If you need to recover a file/folder or directory stored on a local drive (not cloud storage).
Select Windows start button and then choose Settings.
2- Select Update & Security.
3- Select the backup tab, and then click More options.
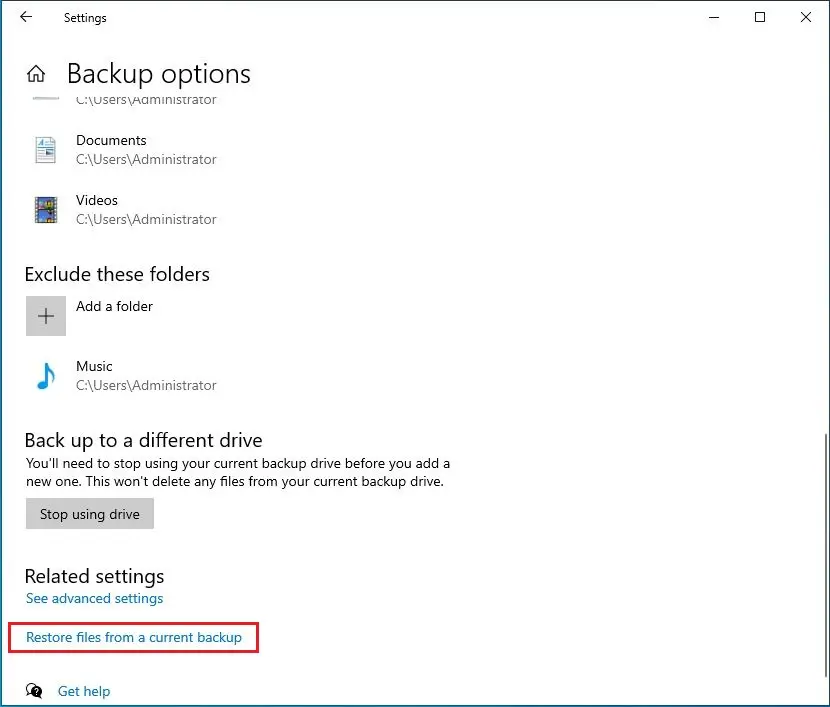
4- Under Related Settings, select Restore files from a current backup.
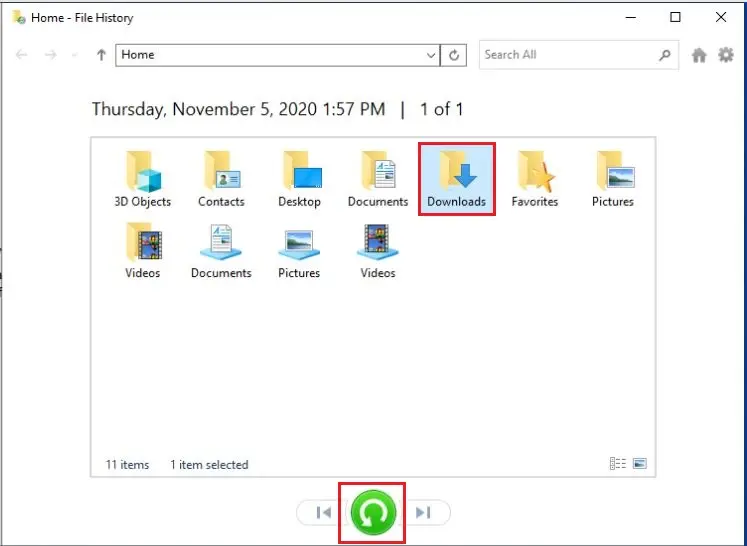
5- Go to the file you need to restore and the use the arrow buttons to choose a version of the file to restore.
Select the green Restore button.
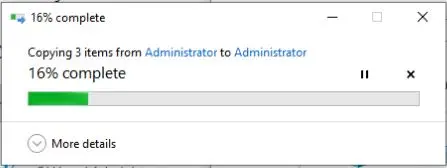
6- File history restoration.
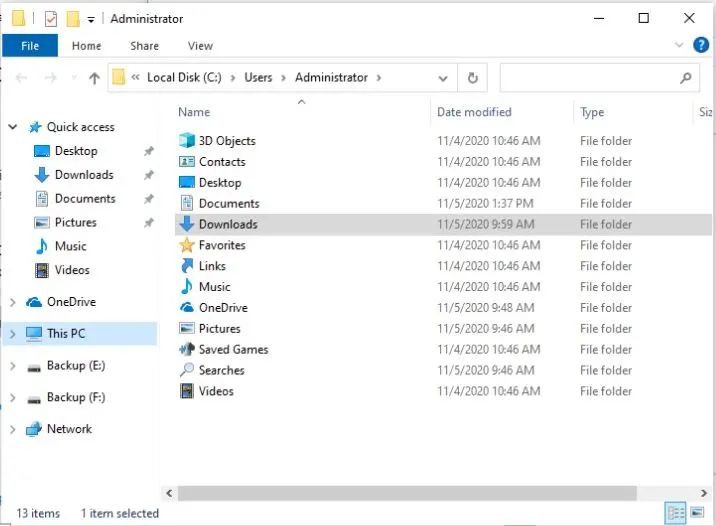
7- Recovered files.
Recover Files Using File Explorer
1- We can use File Explorer to recover a previous file version.
Open File Explorer window and then choose the file you need to restore a version of. Under the Home tab, click History.
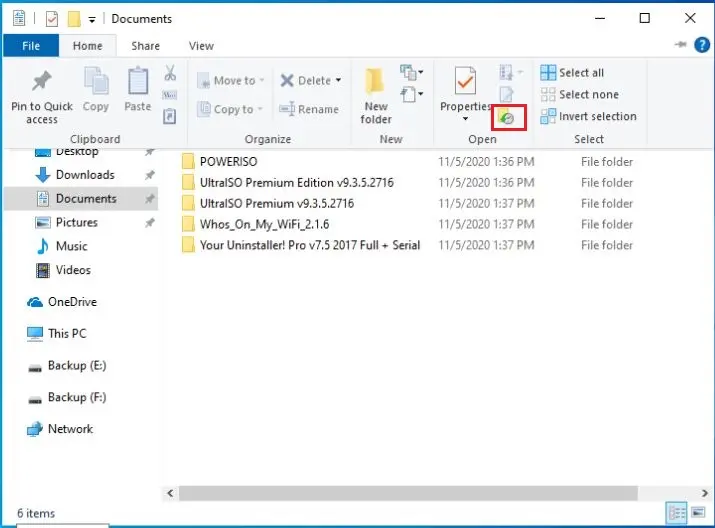
2- Select the folder you want to recover and then select the green button.
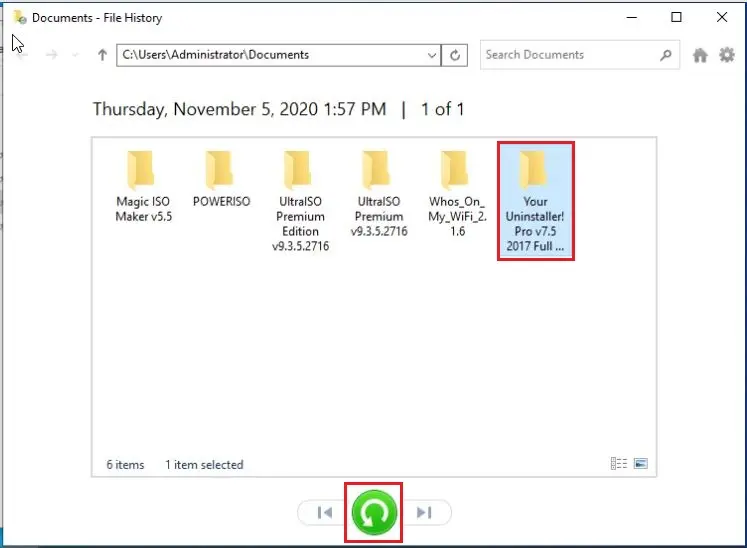
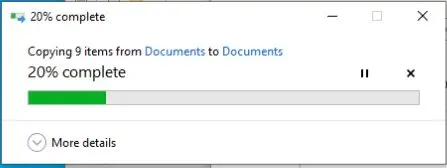
3- Recovery file history.
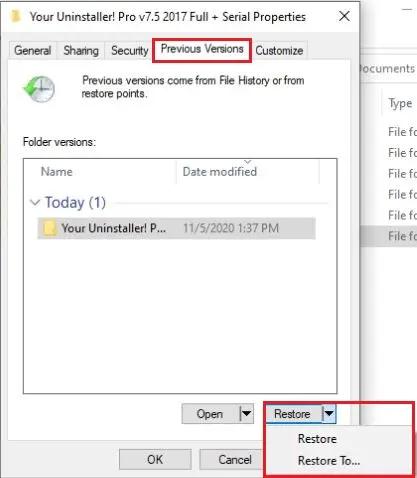
Restore files from Properties
1- Right-click a file and then select Properties.
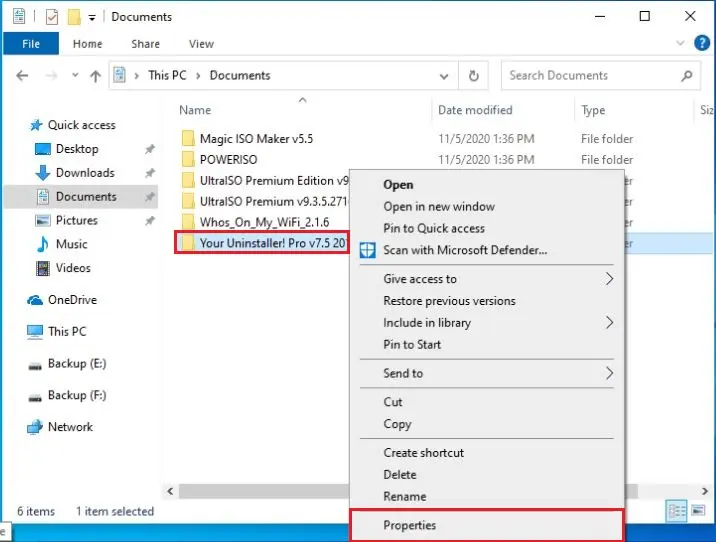
2- Select the Restore button to restore the version of the file to its original location. If you need to restore the file to a different location, then select the down arrow key on the Restore button and choose restore to.
How to Clean Up File History
After some time, depending on the disk size, and your configured settings, you may get a notification that you need to free up space on your File History drive.
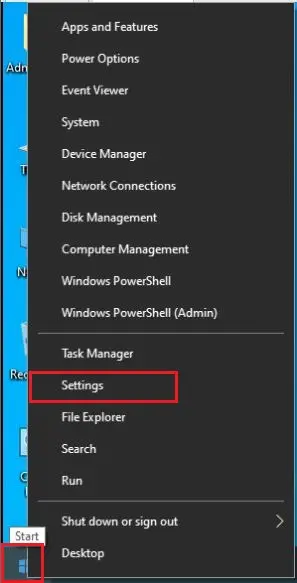
1- Select the Windows start button and then select Settings.
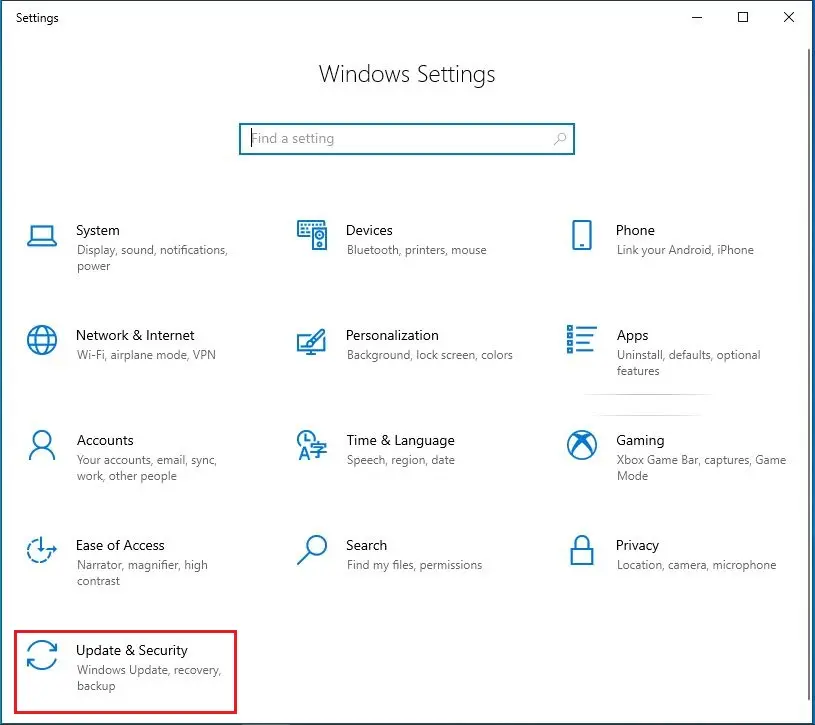
2- Select Update & Security
3- Select Backup tab and then More options.
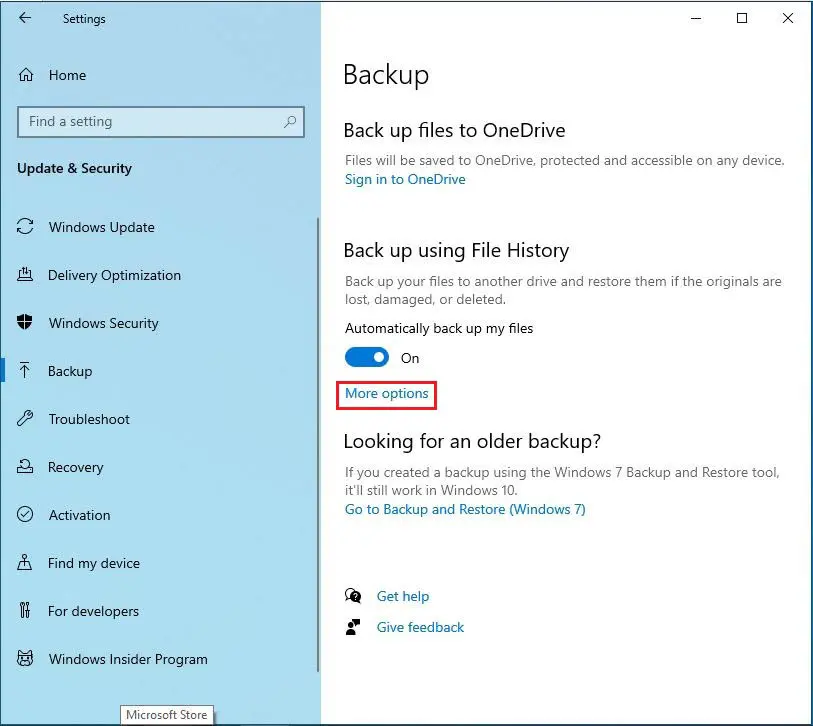
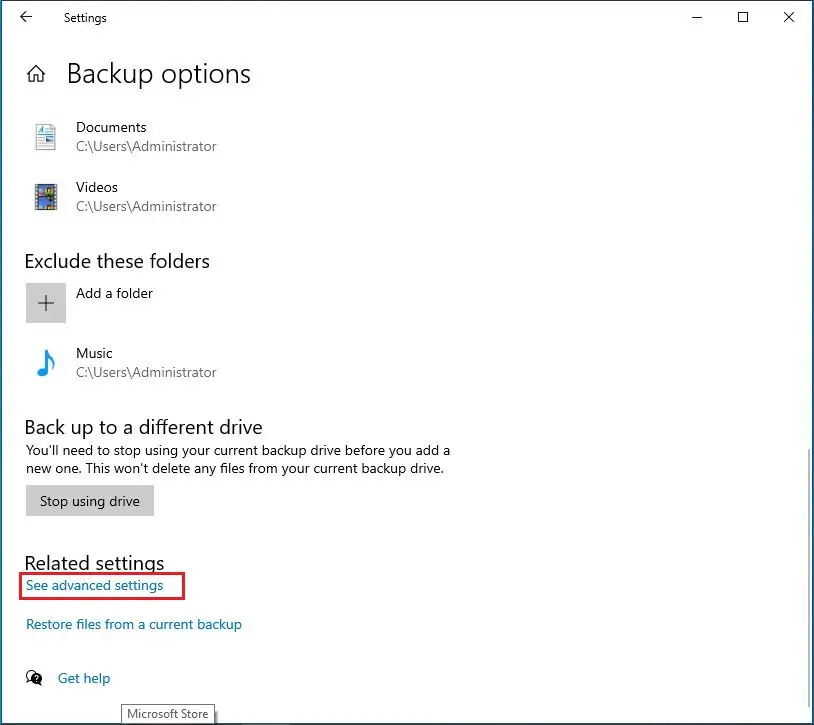
4- Under the related settings, select See advanced settings.
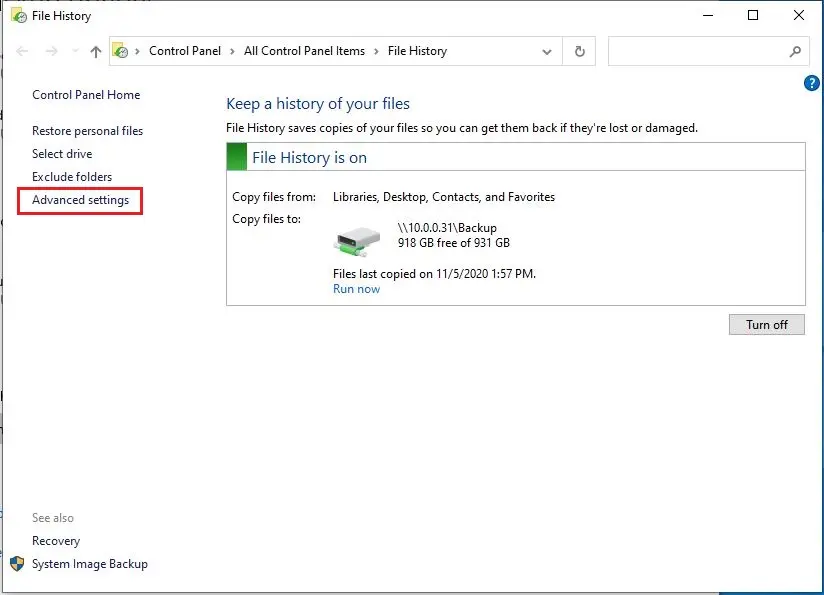
5- Select Advanced settings on your left.
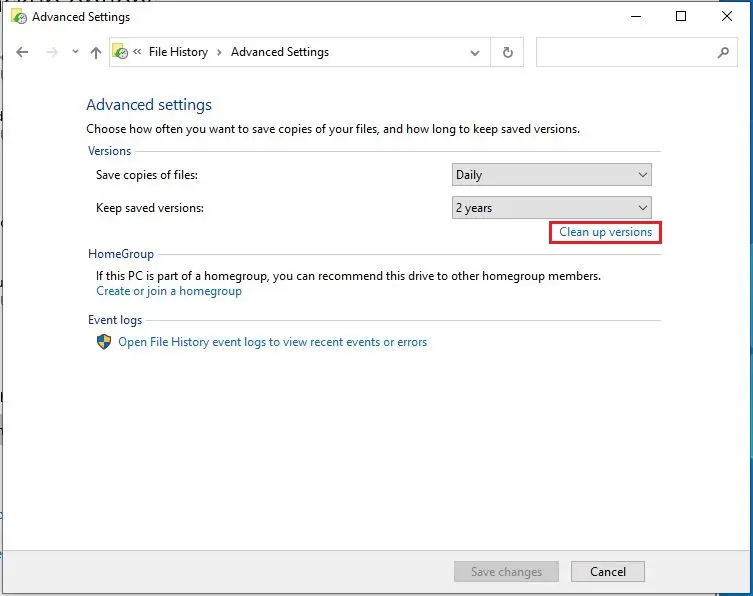
6- Select Clean-up versions under advanced settings.
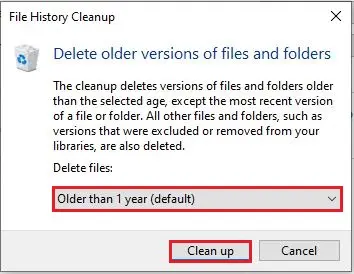
7- From the drop-down list select how far back you want to delete folders and files, then, select Clean up.
For more information, visit Microsoft


