This security option by default is disabled, so we have to perform various steps to enable it. In this blog, we will direct you through the whole process to enable & disable Secure Sign-in in Windows 10 using various security methods.
The default login page includes a small script to move your login details to the email system (user name and password). It’s indeed feasible that if somebody intercepted this packet delivery the user name and password will be breached.
On the other side, Secure Sign-in is an additional layer of security for your Sign-in screen to defend it from various attacks. A significant problem arises when a virus or malicious software program emulates a sign-in window to extract username, password credentials. In your instances, Ctrl + Alt + delete will guarantee you see the correct sign-in page.
There are three ways to enable & disable Windows 10 Secure Sign In
Using Netplwiz
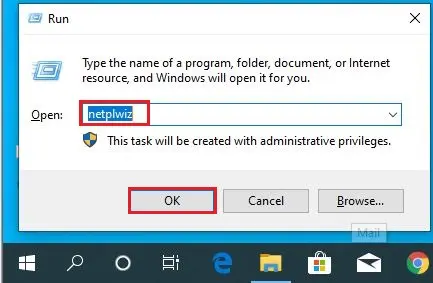
1- Press Windows key + R Type netplwiz in the textbox named Open and then click on the ok button.
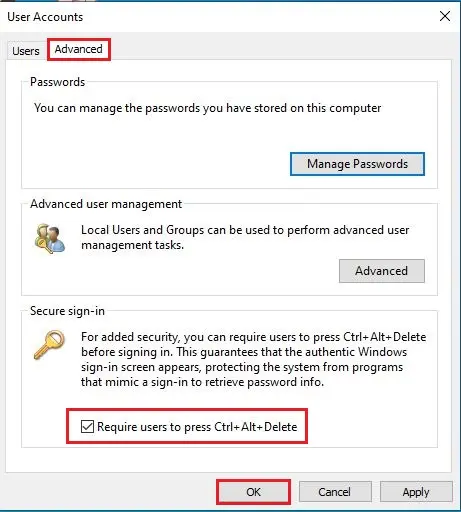
2- Choose the advanced tab and then checkmark the option of require users to press Ctrl + Alt + Delete right under the secure sign-in. Click ok. Secure Sign-in is enabled
If you need to disable Secure Sign-in just untick the option of Require users to press Ctrl + Alt + Delete.
Click ok. Secure Sign-in is disabled
Restart your Windows 10 to see changes.
Using Local Security Policy
If we are unable to change Secure Sign-in using the Netplwiz process we can try Local Security Policy Settings.
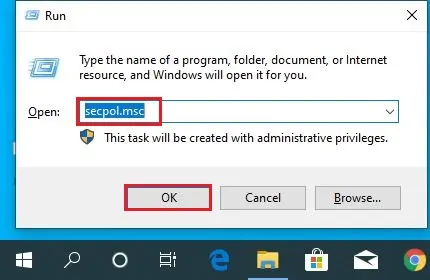
1- Press Windows key + R, A pop-up dialogue box will appear. Type secpol.msc in the textbox named Open and then click ok.
2- Local Security Policy.
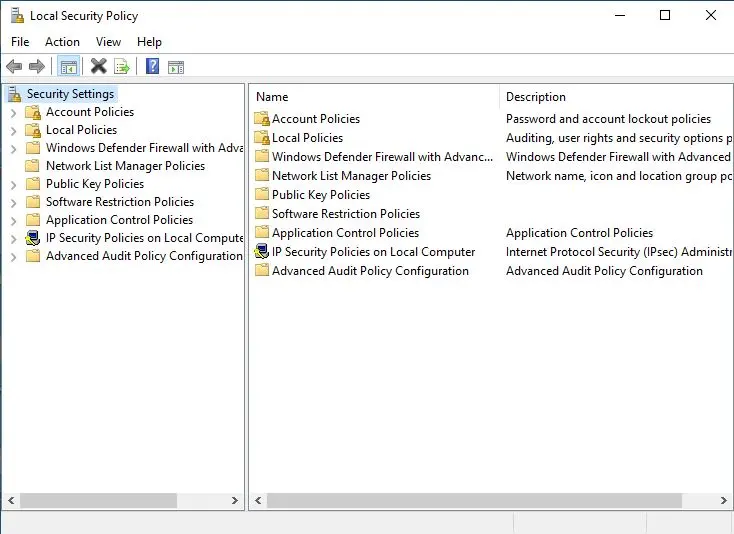
3- Expand Local Policies listed on the left side in the Local Policy Window and then select Security Options.
Afterward, scroll down to the right side, and double-click the entry Interactive Logon: Do Not Require CTRL+ALT+DEL.
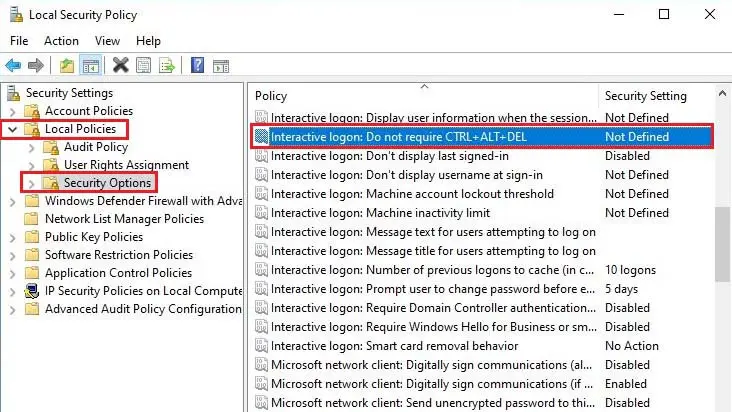
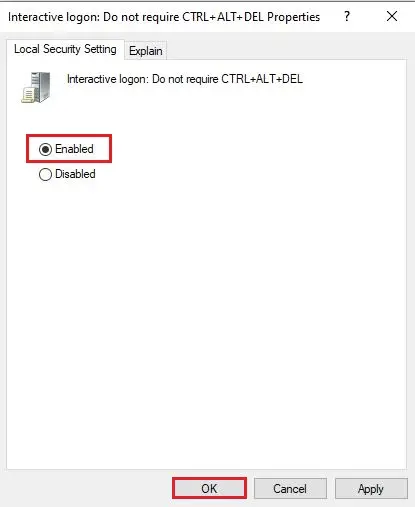
4- Click on the Enabled checkbox if you want to disable Secure Sign-in in Windows 10 and then click ok.
Select the Disabled checkbox if you want to enable Secure Sign-in in Windows 10 and then click ok.
Close the opened window and then restart your computer.
Using Registry Editor
In this 3rd step I will edit in Registry Editor Settings.
1- Press Windows key + R and type regedit and then click ok.
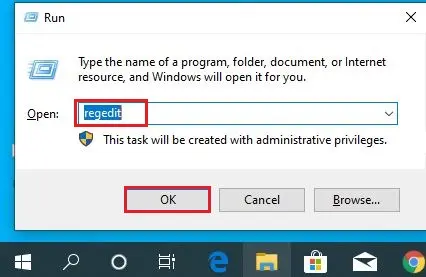
2- Registry Editor.

3- Expand HKEY_LOCAL_MACHINE listed in the Registry Editor window & navigate through the following subdomains under there.
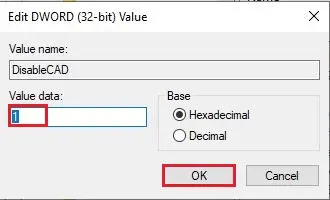
Select Winlogon, scroll to the right side, and double-click the entry DisableCAD.
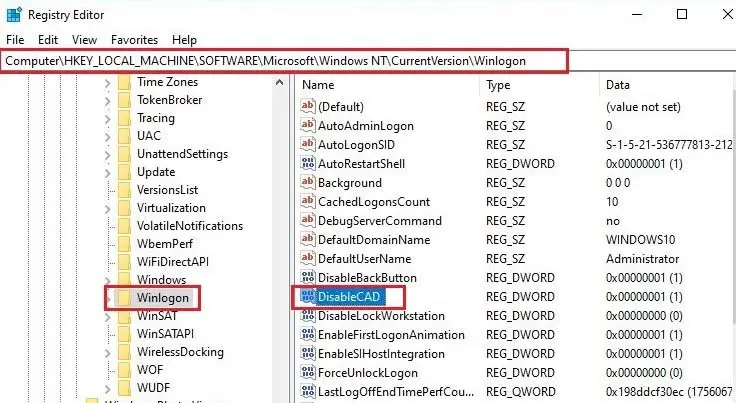
4- How to disable Secure Sign-in type 1 in the Value data box and click on the ok.
How to enable Secure Sign-in type 0 in the Value data box and then click on the ok
Close the Registry Editor window and then restart your Windows 10 to see changes.
For more details click here


