This blog will explore how to disable auto bullets numbering in Microsoft Word 365. Having said that, many people find these automatic bullets and a lot of pain.
You can disable automatic bullets and numbering in Word 365 by changing AutoFormat settings in the AutoCorrect dialogue box. Automatic bullets and numbering are switched on by default, but you can turn these options off or on when needed. If Word appears to be automatically formatting your document, there are other AutoFormat as you type options that can be turned off.
I appreciate the software’s efforts to make things easier for me, but it is usually incorrect. Fortunately, this feature can be switched off. Disable the feature in Word that automatically begins to enter numbered or bulleted text for you.
How can I set a default bullet in Word?
The primary bullet in Word is the black pointed bullet, and the easiest way to add a bullet to your list is to click the bullet button on the Home tab in the Paragraph group. You can add other bullets to your list in the Bullet Library section. You can also change the list level or define New bullets where you can insert new bullets using pictures or symbols.
Disable Auto Bullets, Numbering in Word
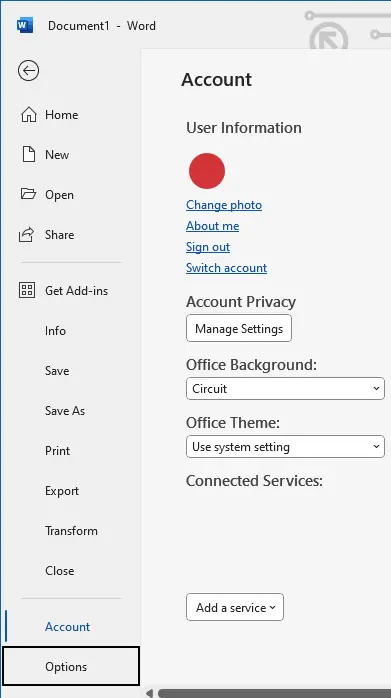
In Microsoft Word 365, select the File menu and then select Options.

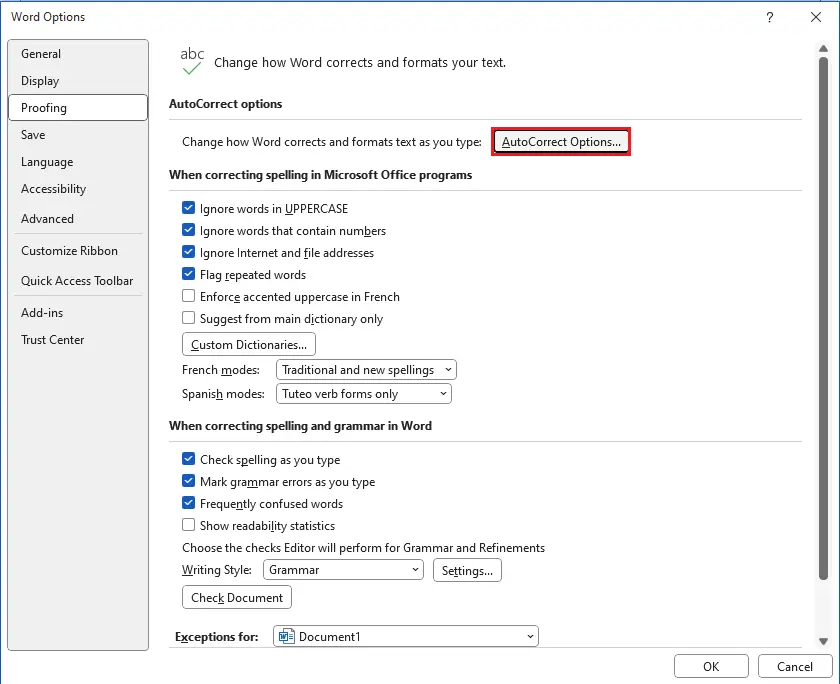
In the Word options page, select the Proofing tab from your left pane.
Select AutoCorrect Options….

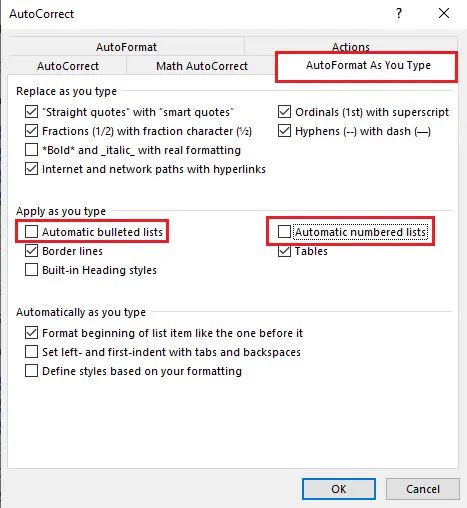
Click on the “AutoFormat As You Type” tab.
Uncheck the box “Automatic bulleted lists” and “Automatic numbered lists”. Click ok

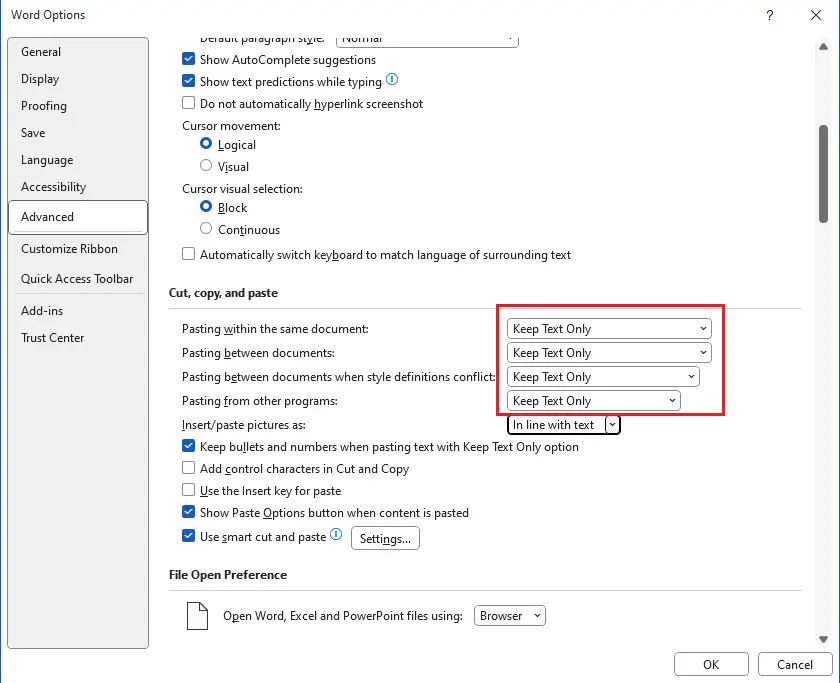
Some users may also want to look at the Advanced menu under Cut, copy, and paste.
“Pasting between documents”
“Pasting between documents when style definitions conflict”
“Pasting from other programs”
To “Keep Text Only”
Click ok.

Visit Microsoft to learn more about turning on or off automatic bullets or numbering.


