
Let’s have a look at Windows Server 2022 Failover Clustering iSCSI Target setup and configuration. The two-node failover cluster configuration operating Windows Server 2022 with shared disks mapped from the ISCSI san.
In this guide, I will cover the steps of the creation of a two-node Active/Passive Windows Server Failover Cluster. For the purpose of creating such a cluster it is necessary to have a few things in place, so I thought I should start from the beginning. This guide will brief connection to shared NAS storage using the iSCSI initiator.
I have experience involving in creating High Availability solutions for Enterprise products and based on that work have a short time ago worked with Windows Failover Clustering and network load balancing clustering in Windows Server 2022. I have built multi-node failover clusters for Hyper-V, SQL Server, different applications, and Network Load Balancing clusters.
Table of contents
Summary of Windows Server 2022 Failover Cluster
Enable Windows Failover Clustering features
Install Windows Failover Clustering PowerShell
Create Windows Cluster Configuring iSCSI Disk
Failover Cluster Validate Configuration
Summary of Windows Server 2022 Failover Cluster Deployment
The below steps are the high-level steps required for your Windows Cluster deployment.
Deploy two Windows Server 2022
Finish all Windows Updates
Join Servers to domain
Each Node will have two network interfaces
Production Network
Cluster Network
Add DNS records
Primary Server
Secondary Server
Cluster Server Name (My-Cluster)
Attach the same ISCSI disk (LUN) to the primary node and secondary node.
Install Failover clustering role on both nodes
Bring the disk online via disk management on the primary node.
Join nodes to the cluster
Virtual Machines Settings
Domain Controller – DC (WS2022-DC)
IP Address – 192.168.241.100
iSCSI Server – iSCSI-Shared
IP Address – 192.168.241.102
Node 1 – WS2022-01
Primary Network – Production – 192.168.241.104
Secondary Network – Cluster – 10.0.0.2
Node 2 – WS2022-02
Primary Network – Production – 192.168.241.108
Secondary Network – Cluster – 10.0.0.3
Cluster Name – My-Cluster
IP Address – 192.168.241.112
Two nodes Network Connections

Add DNS records for the Virtual Machines.

Windows Failover Clustering in Windows Server 2022
You can install failover clustering via GUI, In the server manager dashboard, click on Add roles and features.

Click Next to Continue

Choose Role Based Installation and then click Next.

Choose the server and click next.

Server Roles, click next

Tick the failover cluster checkbox.

Click on Add features

After selecting Failover Clustering, click next.

Click Install

Click close

After failover clustering successful installation, it appears in the Server Manager, select Tools, and then select Failover Cluster Manager.
How to Install failover clustering feature using the PowerShell
Open Windows PowerShell, type the command below, and then press enter.
Install-WindowsFeature Failover-Clustering –IncludeManagementTools

Now you can see Failover Cluster Manager in Server Manager tools

Creating Windows Server cluster – Using iSCSI to connect to shared storage
Follow the below steps to configure iSCSI.
Run the iSCSI Initiator from the first Node Server 2022 (WS2022-01).
Click on tools and then iSCSI initiator

Select the Yes button to start the iSCSI initiator service and enable it to start automatically every time when a server reboots. You want this service to start automatically so that your cluster nodes will be automatically connected to the shared storage when rebooting.

The iSCSI Initiator will pop up; click on the Discovery tab.
Click the Discover Portal button.

Type the IP Address of the iSCSI shared storage and then click on the Advanced button.

In the Advanced settings from the Local Adapter, the dropdown box chooses Microsoft iSCSI Initiator, and in the Initiator IP box, choose the IP Address of the NIC that is dedicated to your iSCSI connection. Click ok twice

Choose the LUNs you need to connect to and then click the Connect button.

Click ok

Now you are connected to your iSCSI target.

Follow the same steps for the secondary node
How to create Windows cluster configuring shared disk in the cluster node 1 (WS2022-01)
We will have a look at configuring the disks we have attached to our prospective cluster nodes.
Type DISKMGMT.MSC in the run box and then hit enter to open disk management.

Now you can see the shared disk (iSCSI) displayed as Offline, Unknown, and Unallocated.
Right-click on the disk representation and then choose Online.

Right-click on the disk and then choose Initialize Disk.

Click ok

Right-click on the disk and then choose New Simple Volume.

Click Next

Click Next

Assign the drive letter by selecting it from the dropdown menu. In this shared disk I am using E. Click Next

Provide a volume label and then click next.

Select the Finish button to complete the creation of the volume.

Now you can see the shared disk.

After configuring the disks on the first node, take them offline. Right-click on the disk and select Offline.

On the second cluster node (WS2022-02), open disk management by typing DISKMGMT.MSC in run command.
Right-click on the disk and then select Online.

The disk(s) appear and are formatted with the drive letter.
If the drive letter doesn’t show, select Rescan Disks from the Action menu.

If the drive letter is mismatched, it needs to match them.
How to Change Drive Letter
Failover Cluster readiness check on Primary Node (WS2022-01)
Now we have successfully mapped two nic’s to both servers added the same ISCSI san on both servers, formatted, and have a volume up on one server.
Let’s verify if everything is ok.
Under Server Manager, choose Tools and then select Failover Cluster Manager.

Under the Action menu, select Validate Configuration.

Click Next.

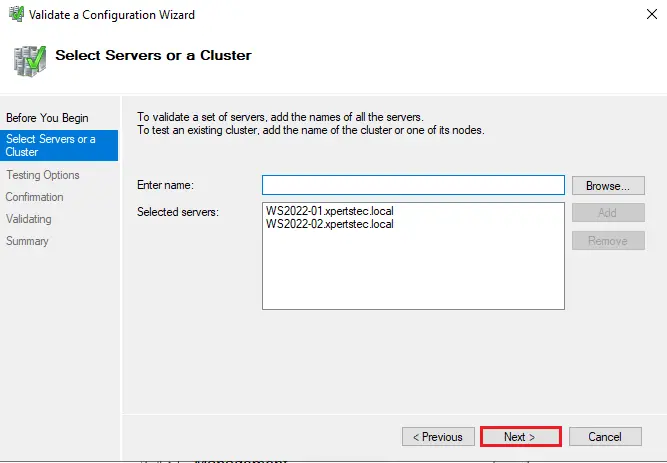
Click on the browse button.

Type a node name and then click check names.

Select both the nodes and then click ok.

Click ok

After selecting the two nodes for validation, click next.
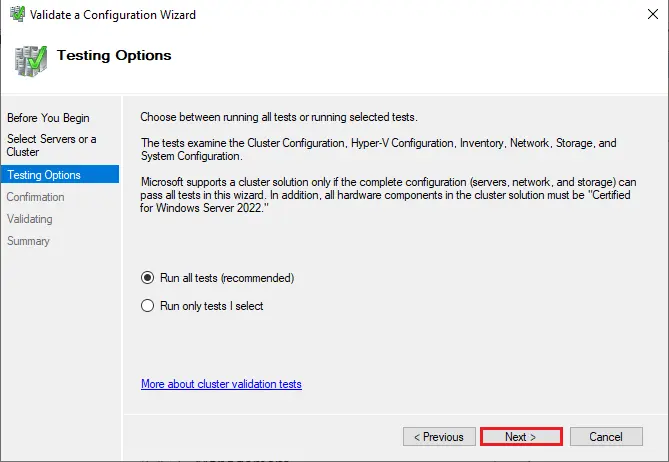
Select Run all tests and then click Next.
Review the configuration and click next.

Cluster validation tests will take a while

If you get any errors, correct them before you proceed. Once validation completes, view the report and then click Finish.

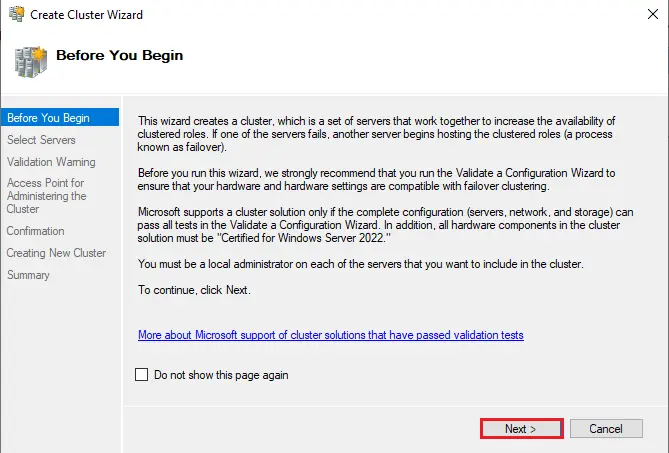
Creating Failover Cluster Server in Windows Server 2022
Click on Create Cluster.

Click Next.
Select the browse button to search the servers

Creating cluster wizard servers

Click next

Enter a cluster name, type the IP address, and then click Next.

Tick, add all eligible storage….. and then click next.

Creating New cluster

Once done, click Finish

Failover cluster manager.

Click on the nodes option and see that both the nodes are up now.

When you click on the Storage option, we can see the disk being mapped.

Verify the DNS Configuration.

Verify if the My-Cluster address is pingable.

For more details, please Microsoft