Migrate Active Directory Server 2003 to Server 2016, In this blog, I’m using my Server2003 (windows server 2003 STD SP2) and my Server2016 (new Windows Server 2016 Standard).
Before proceeding to migrate a lively Directory from Windows Server 2003 to Server 2016, you want to first install Windows Server 2016 on a replacement machine which can then be promoted to Active Directory Server 2016.
Migrate Active Directory Server 2003 to Server 2016
1- Windows Server 2016 Installation.
How to Install Windows Server 2016, Click here
2- Renaming Windows Server 2016.
How to rename Windows Server 2016, Click here
3- Configure the IP Addresses in Server 2016.
Windows Server 2003 Windows Server 2016
Computer Name: Server2003 Server2016
Domain Name: xpertstec.local
IP Address (Static): 10.0.0.20 10.0.0.25
Subnet Mask: 255.255.255.0 255.255.255.0
Default Gateway: 10.0.0.1 10.0.0.1
Preferred DNS Server: 10.0.0.20 10.0.0.20
Now we’d like to Rais the domain and forest functional level in Server2003.
How to raise Active Directory domain and forest functional levels in Windows Server 2003.
Raise Domain Function level Server 2003
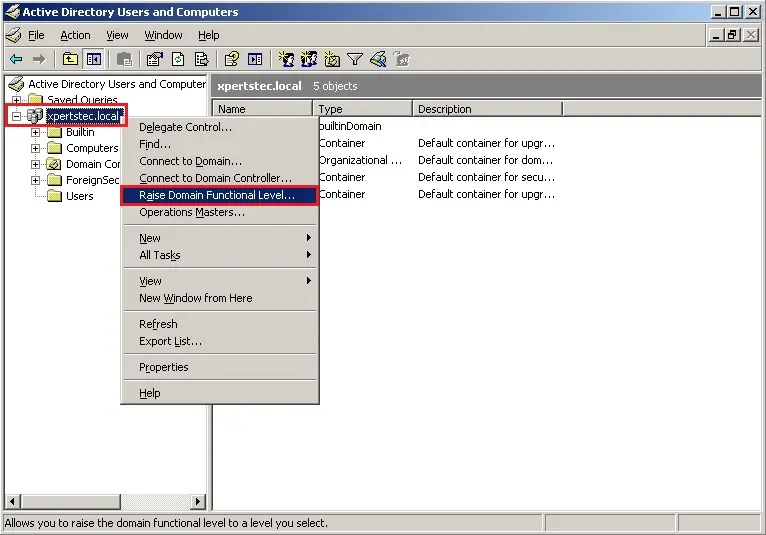
4- On the Server2003, open Active Directory Users and Computers, then right-click domain name (xpertstec.local), then click Raise Domain Functional Level.
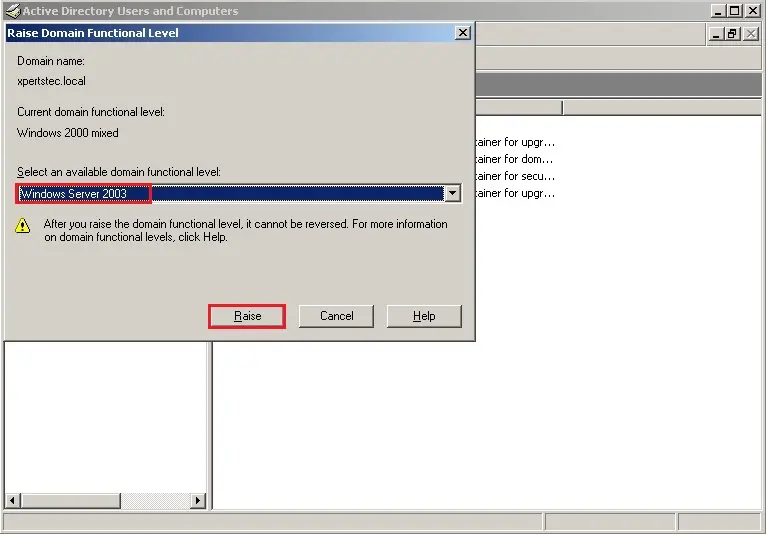
5- Raise Domain Functional Level interface, make sure you click on Windows Server 2003 and then click Raise.
Domain Functional Level must be found out to a minimum of Windows 2003 mode. this is often rock bottom required Domain Functional Level that permits a Windows Server 2012 Domain Controller installation.
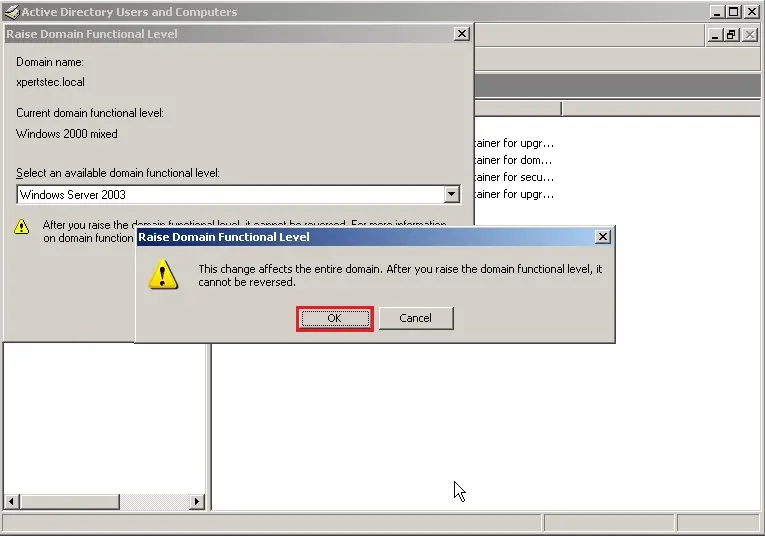
6- Raise Domain Functional Level, so click ok.
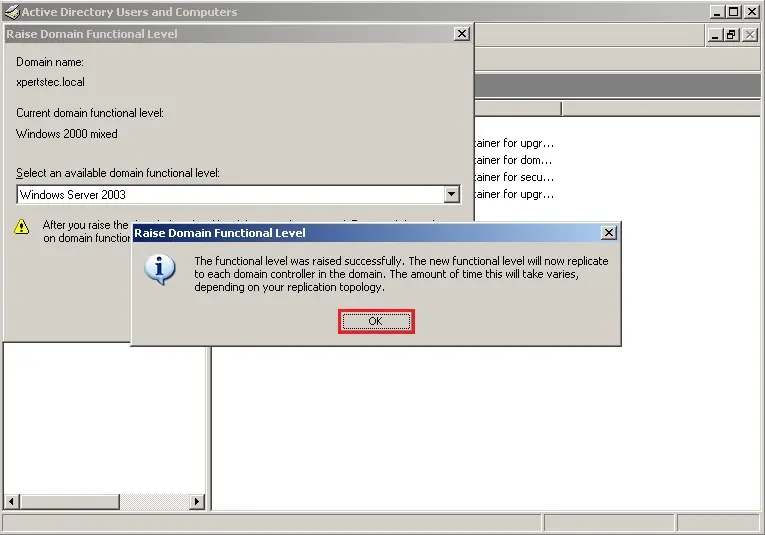
7- The Domain functional level was raised successfully, then click the ok button.
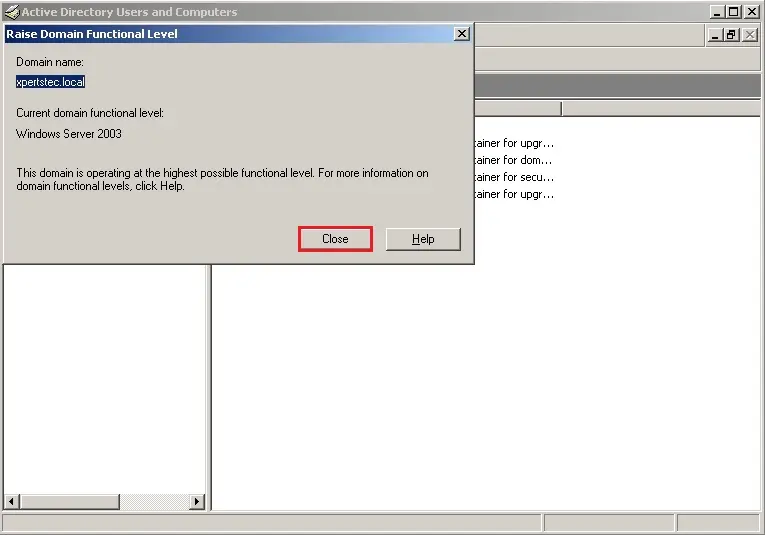
8- The current domain functional level is Windows Server 2003, so click close.
Raise Forest Functional Level Server 2003
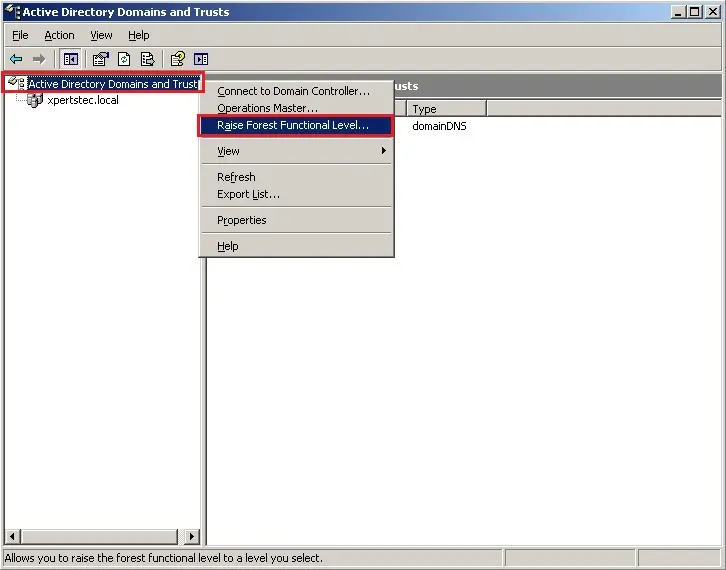
9- Open Active Directory Domain and Trusts right-click Active Directory Domain and Trusts and then click Raise Forest Functional Level.
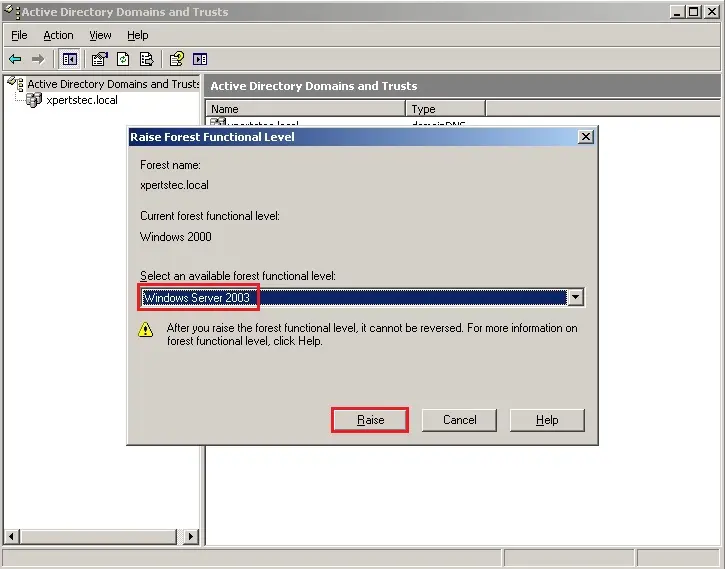
10- On the Raise Forest Functional Level select Windows Server 2003 and then click Raise.
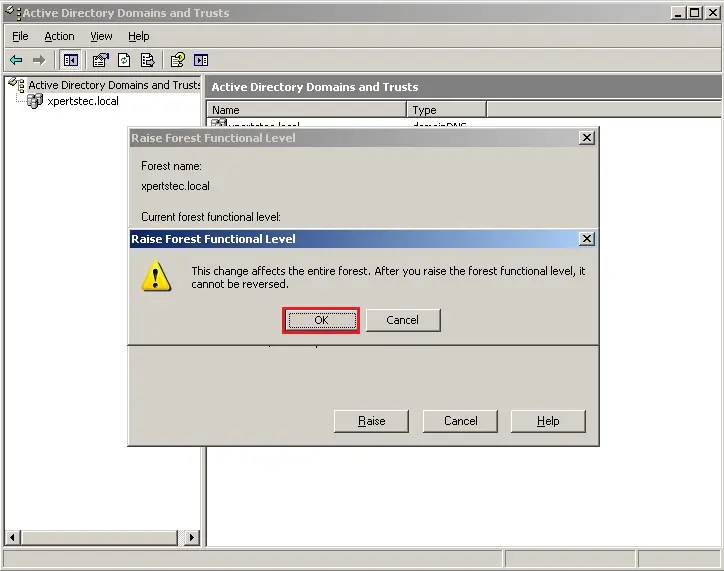
11- On the Raise Forest Functional Level, so click ok.
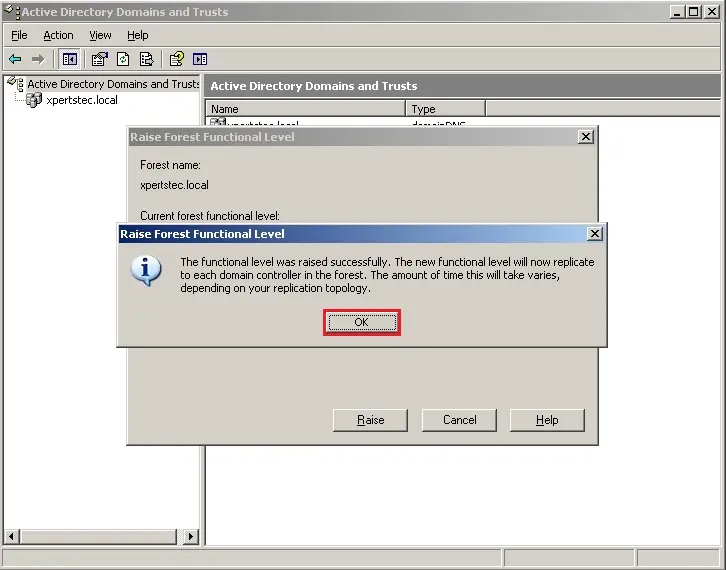
12- Click ok the functional level was raised successfully.
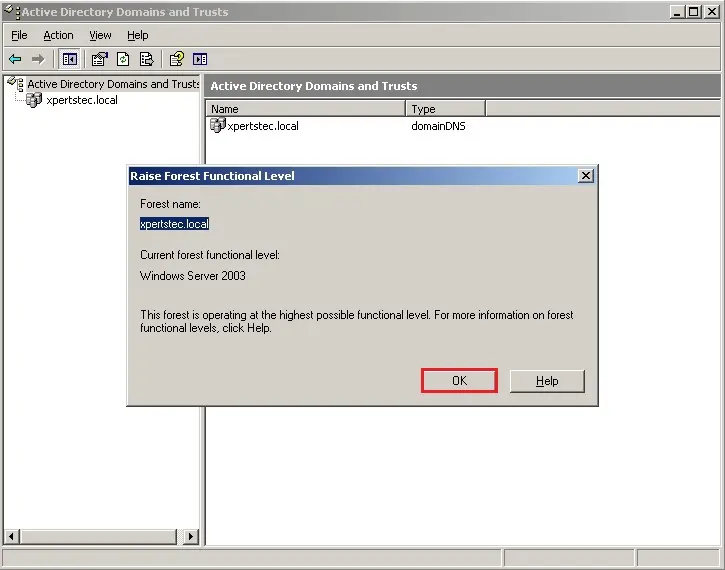
13- Verify Current Forest functional level is Windows Server 2003 and then click on ok.
14- The next step is to hitch Windows Server 2016 to a lively Directory Domain.
How to Join a Windows Server 2016 to a lively Directory Domain, Click here here
Now check in Windows Server 2016 with the domain administrator account.
15- Setup an Additional Domain Controller (ADC) in Windows Server 2016.
How to Setup an Additional Domain Controller (ADC) in Windows Server 2016, Click here
Now we need to move Server roles from windows server 2003 to Windows Server 2016
Change Operation Master ( Migrate Active Directory Server 2003 to 2016)
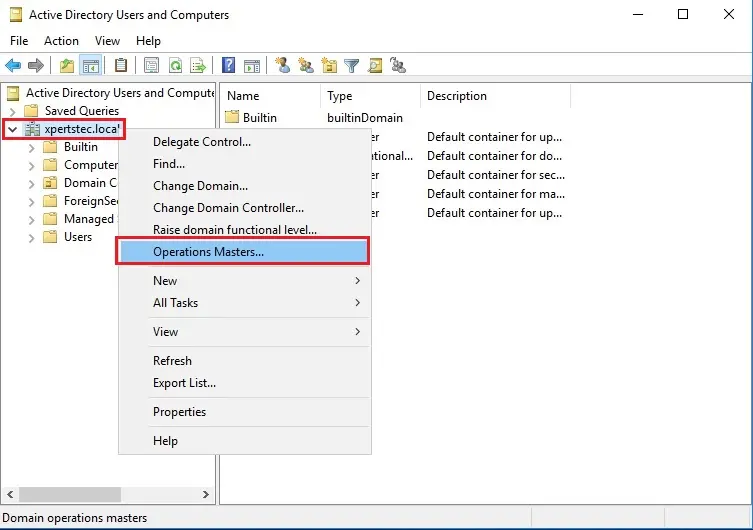
16- On the Server2016 server, open Active Directory Users and Computers, right-click domain xpertstec.local and then click on Operations Masters.
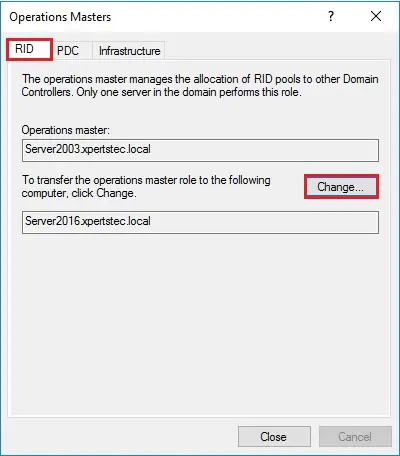
17- On the Operations Masters, Select the RID tab and then choose the Change button.
18- Click Yes.
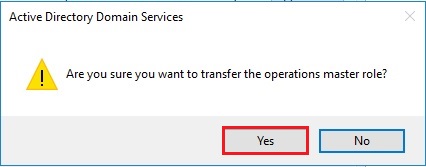
19- The operations master role was successfully transferred and then click ok.

20- Verify that the Operation master now transferred to your new Server Server2016.xpertstec.local.
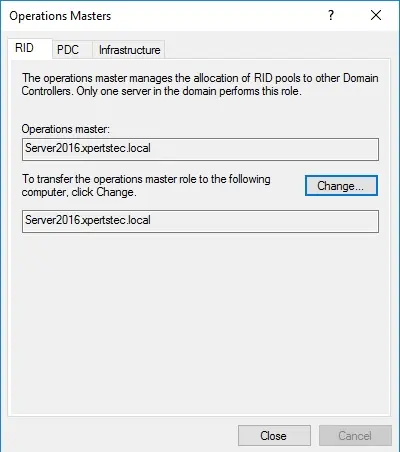
21- On the Operations Masters, Select the PDC tab and then choose the Change button.
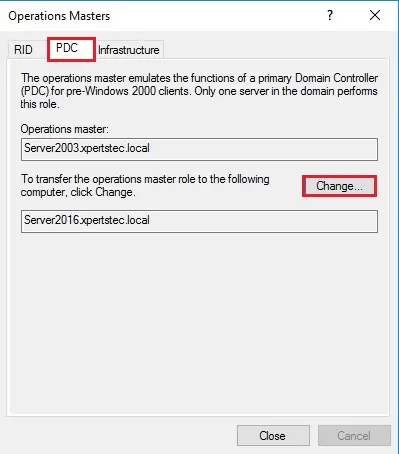
22- Click Yes.
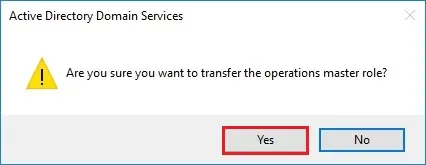
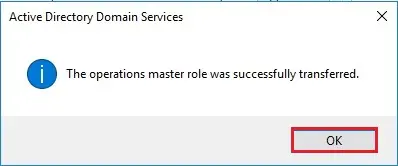
23- The operations master role was successfully transferred and then click on ok.
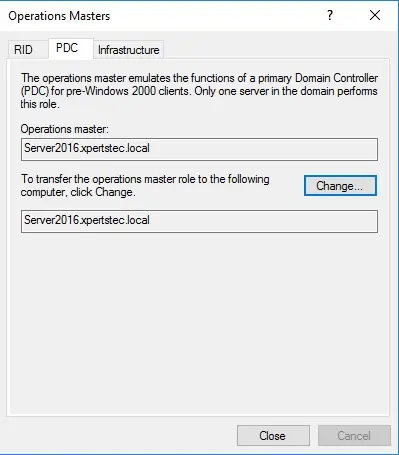
24- Verify that the Operation master now transferred to the new Server Server2016.xpertstec.local
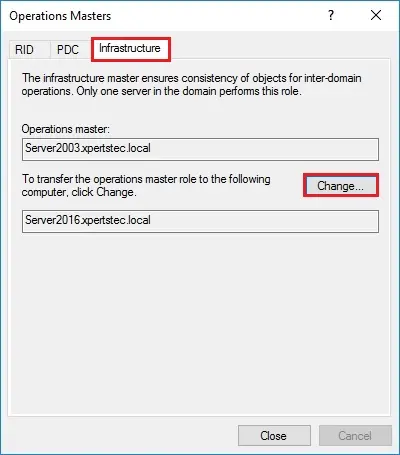
25- On the Operations Masters, Select the Infrastructure tab and then choose the Change button.
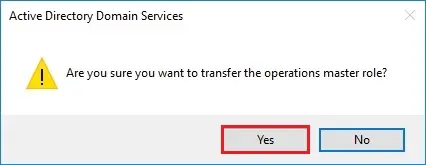
26- Click Yes.
27- The operations master role was successfully transferred, so click ok.
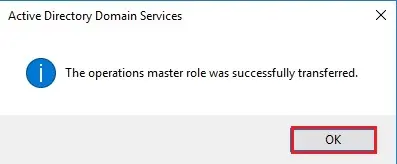
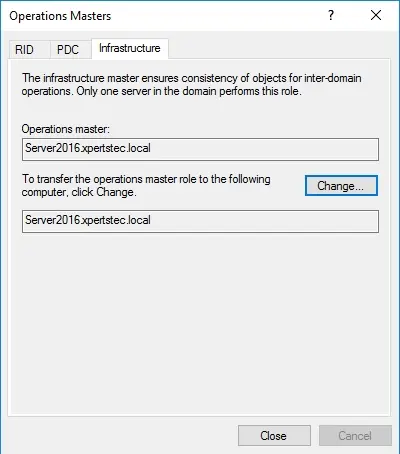
28- Verify that the Operation master now transferred to the new Server Server2016.xpertstec.local
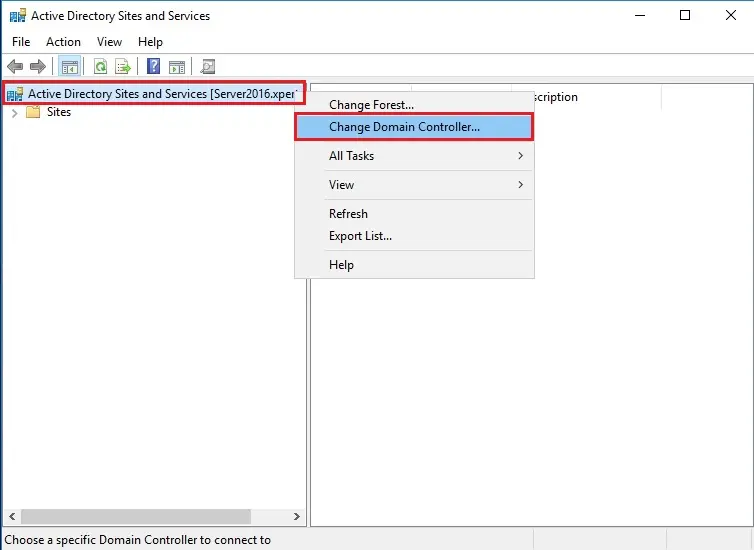
Change Domain Controller
29- On Server2016 server, open Active Directory Sites and Services right-click Active Directory Sites and Services and then click Change Domain Controller.
30- Select This Domain Controller or AD LDS instance and choose your Server2016.xpertstec.local and click on ok.
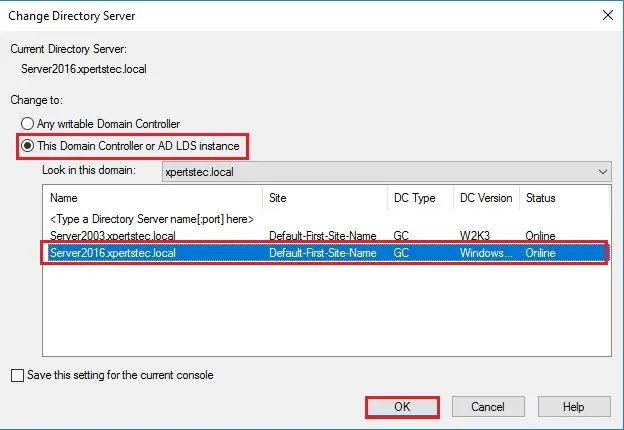
31- Verify that the Windows Server is now reflecting your new Server2016.xpertstec.local.
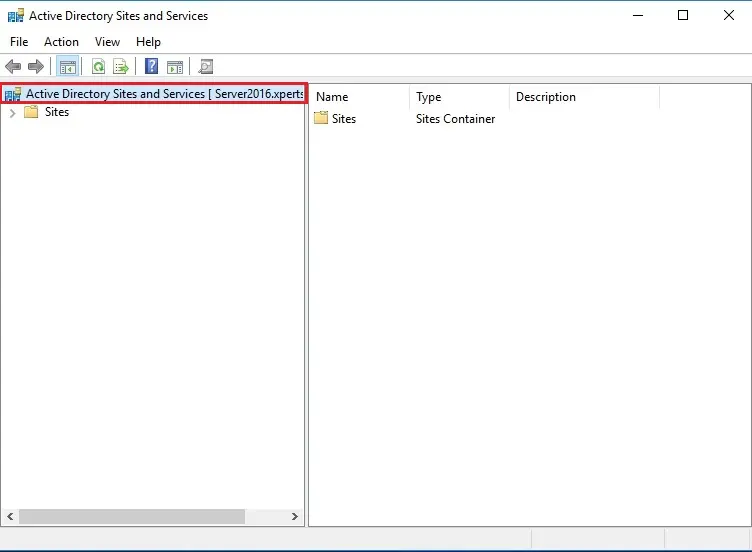
32- On the Active Directory Domains and Trusts, right-click Active Directory Domains and then Trusts and choose Operations Manager.
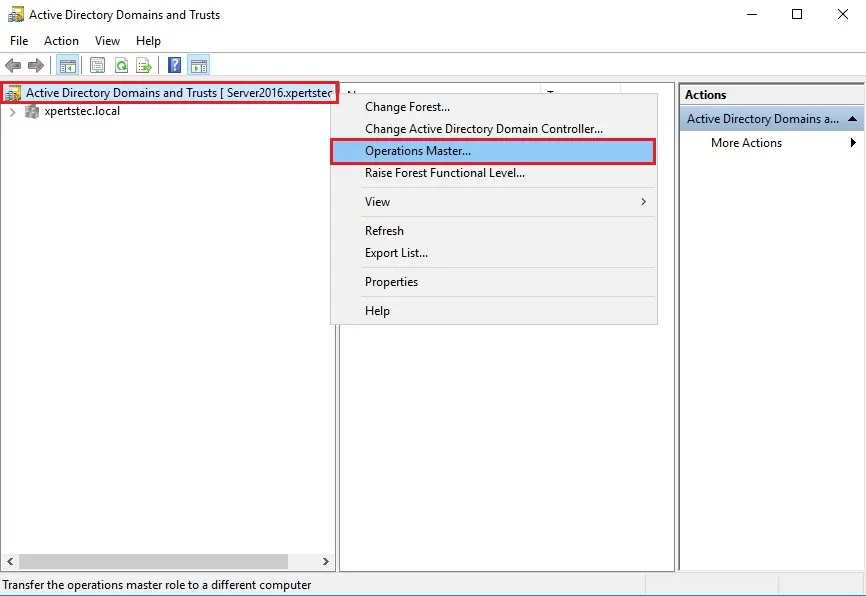
33- On the Active Directory Domains and Trusts, right-click Active Directory Domains and Trusts and choose Operations Manager.
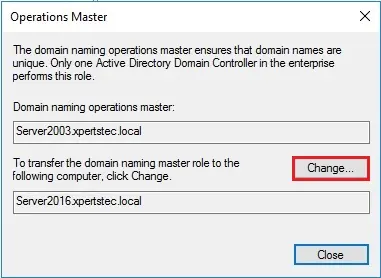
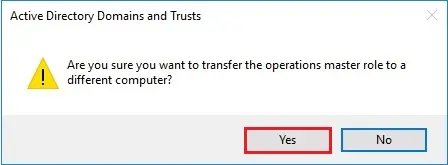
34- Are you sure you would like to transfer the operations master role to a special computer? and click on Yes.
35- The Operations Master is successfully transferred and click on ok.
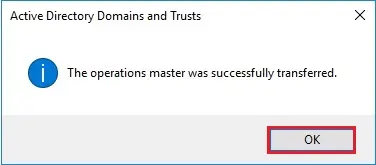
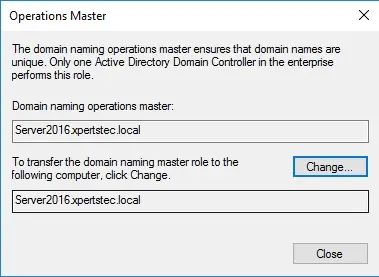
36-Now the Domain naming operations master transferred to the Server2016.xpertstec.local server.
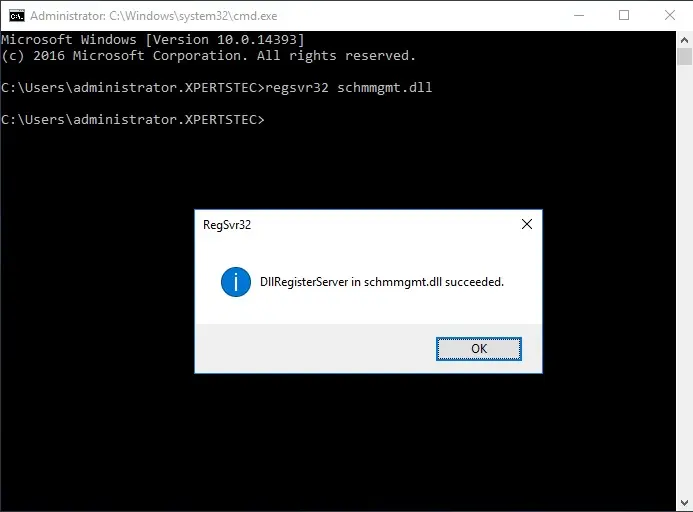
37- On the Server2016 server, open prompt and sort regsvr32 schmmgmt.dll to vary the Schema Master.
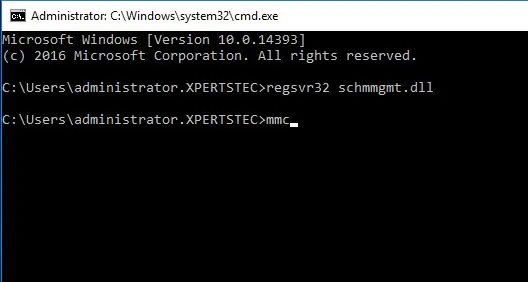
38- Now type mmc and press Enter.
Change Active Directory Schema ( Migrate Active Directory Server 2003 to 2016)
39- On the Server2016.xpertstec.local server > open MMC > click file and then choose Add/Remove Snap-in.
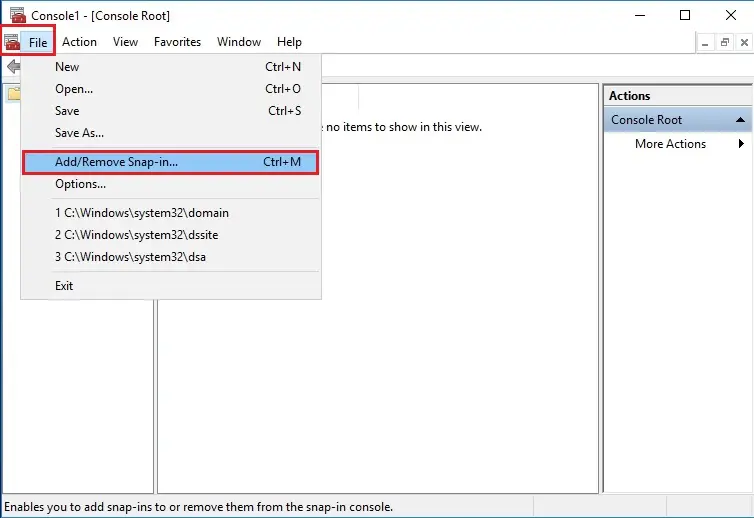
40- Select Active Directory Schema, click Add button and then click ok.
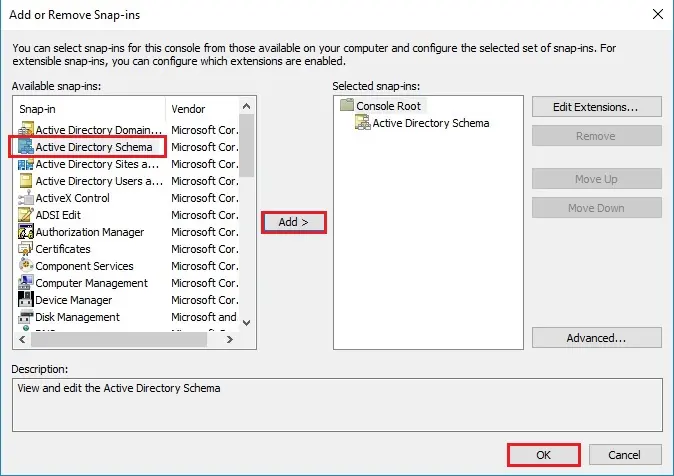
41- On the Console1 > right-click Active Directory Schema and then select Change Active Directory Domain Controller.
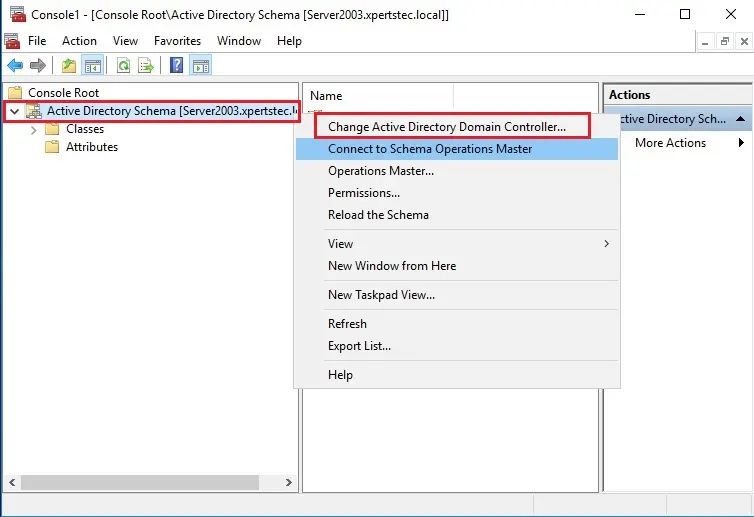
42- Select This Domain Controller or AD LDS instance > click Server2016.xpertstec.local server and then click on ok.
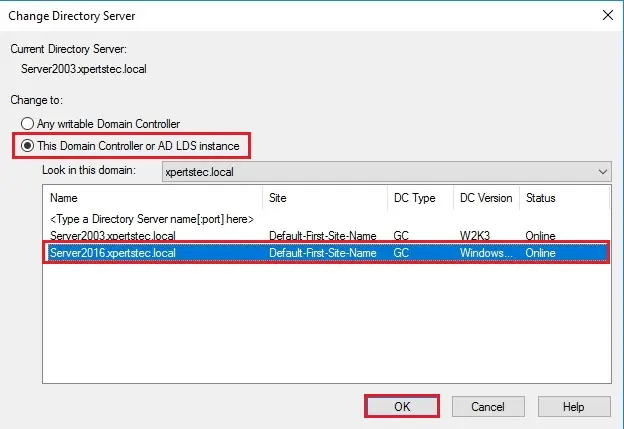
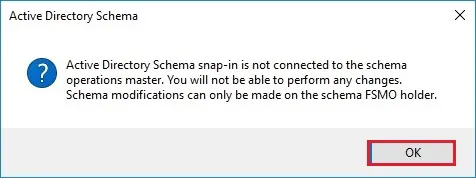
43- Click OK to proceed.
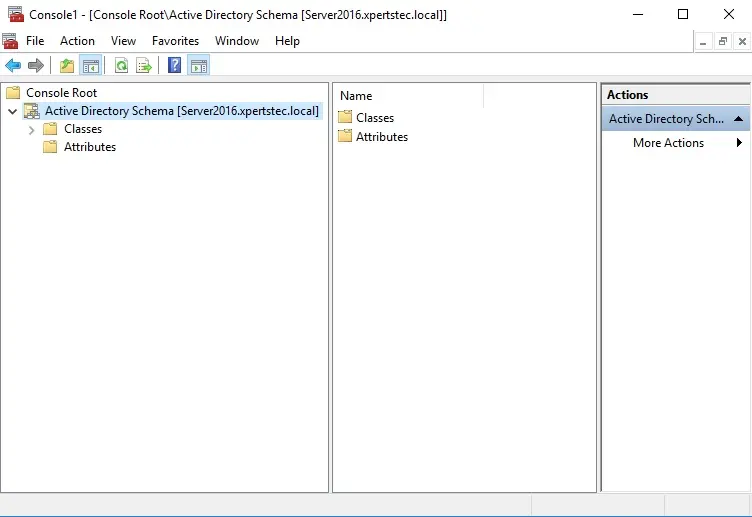
44- Verify the Active Directory Schema Server2016.xpertstec.local computer is shown.
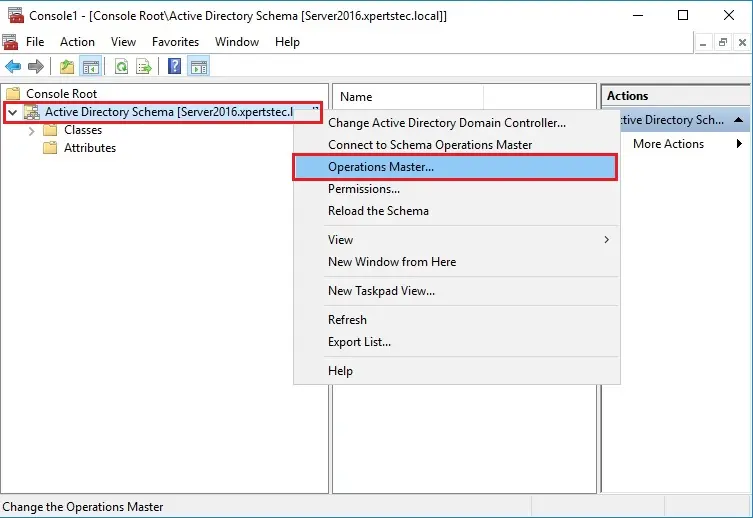
45- On the Console1 > right-click Active Directory Schema and then choose Operations Master.
46- Click the Change button to transfer the schema master role to the Server2016.xpertstec.local.
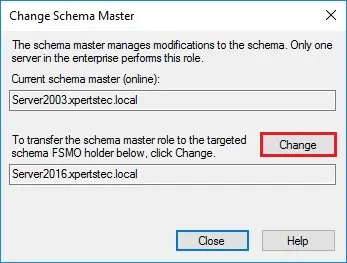
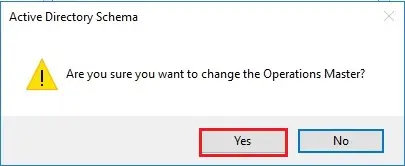
47- Are you sure you would like to vary the schema operations master? and then click on Yes.
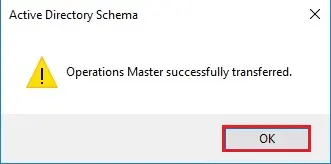
48- Operations master successfully transferred, click ok.
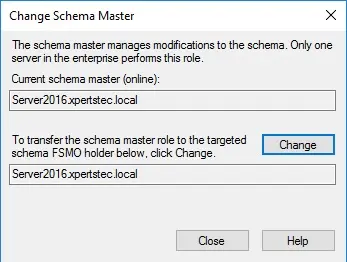
49- Verify the present schema master (online) is now Server2016.xpertstec.local and then click on Close.
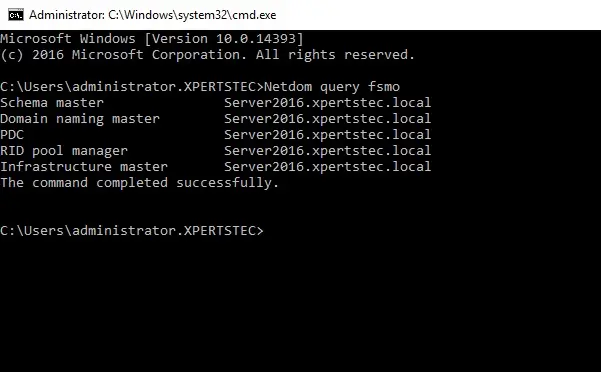
50- Go back to Server2016 Server, open prompt and sort Netdom query fsmo to verify that out new Server2016.xpertstec.local Server is running the FSMO role.
51- Remove the Server 2003 from Global Catalog.
On Server2016 open Active Directory Users and Computers.
Expand your domain (e.g. xpertstec.local) and Select Domain Controllers.
Right-click at your old server (e.g. Server2003) and then Select Properties.
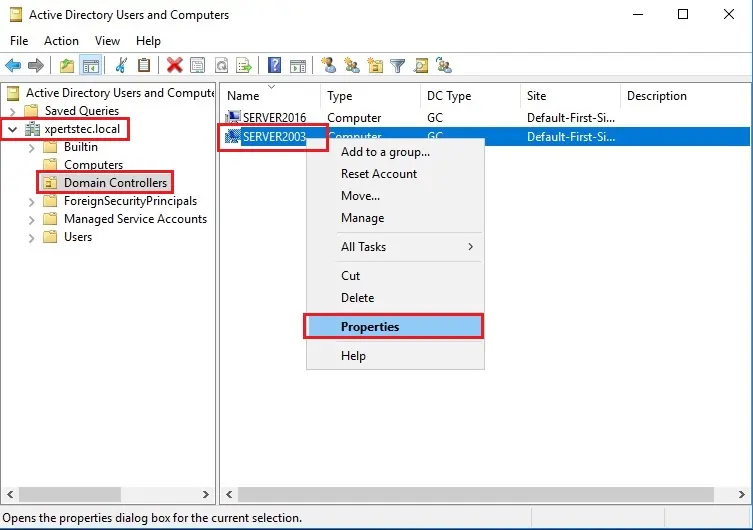
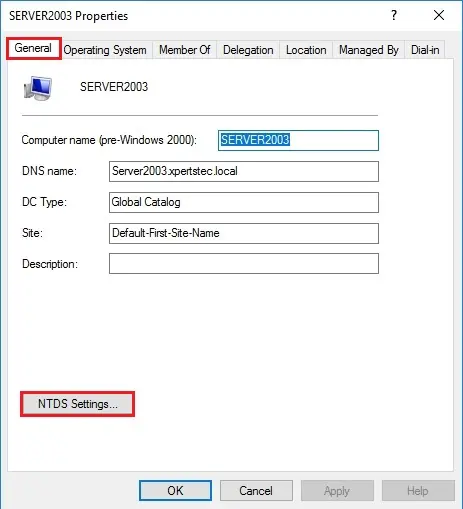
52- So, Under General tab click NTDS Settings.
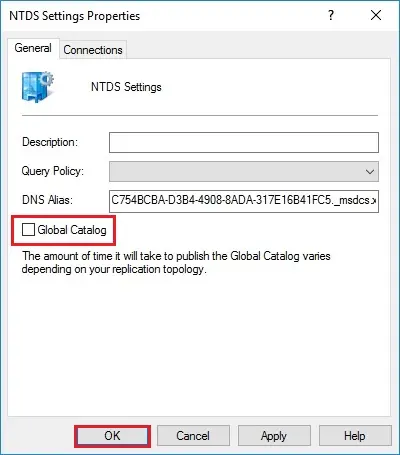
53- Uncheck the Global Catalog checkbox and click ok and then ok to close all windows.
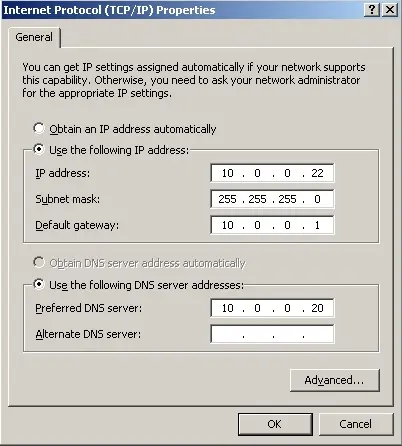
54- Next, open IPv4 IP and make sure you point the DNS IP to your new Server2016.xpertstec.local IP address.
Change the Preferred DNS Address on Server 2003
On Server2003: Open Network and Sharing Center.
Right-click on Local Area Connection and click Properties.
Double click on Internet Protocol TCP/IP.
Change the Preferred DNS server address to match the Server2016 IP Address.
click ok and then close all windows.
Remove Active Directory Server 2003
Now the last step is to remove our Server 2003 Active Directory Domain Controller.
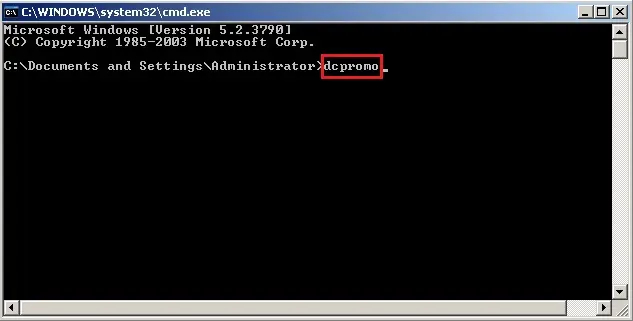
55- Open run and type dcpromo.
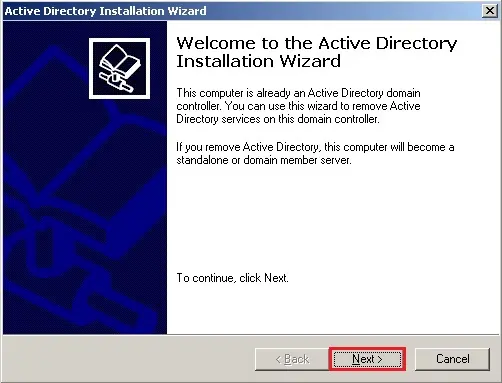
56- Active Directory Installation Wizard, so click next.
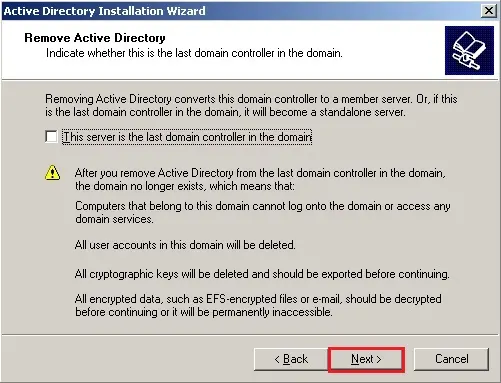
57- Remove the active directory Server 2003, so click on next.
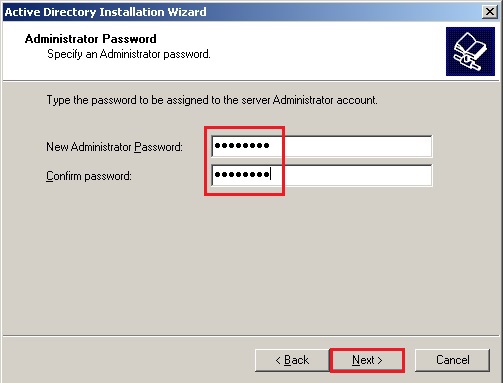
58- Type Active Directory Administrator Password and then click on next.
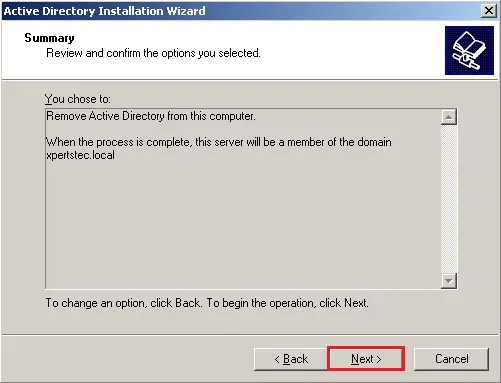
59- Review the summary and ensure the choices you chose and click on next.
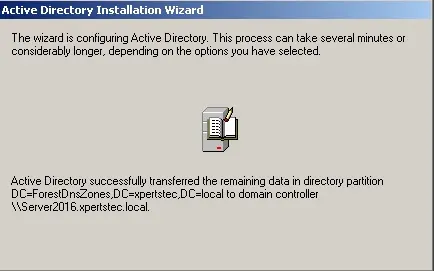
60- Wait for the process to complete.
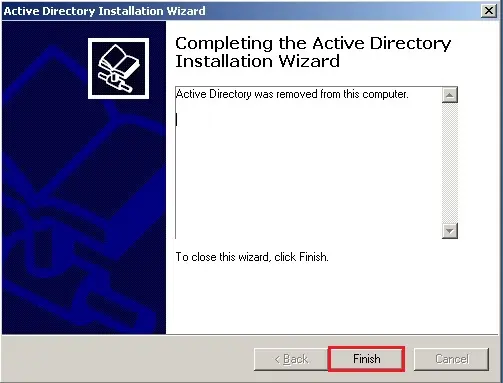
61- Active Directory was faraway from this computer and click on Finish.
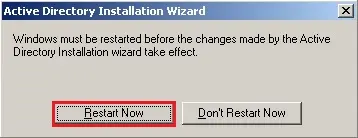
62- Click Restart Now.
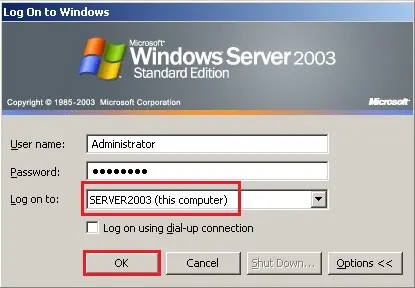
63- Now login on to Server2003 (this computer) type username and password and click on ok.
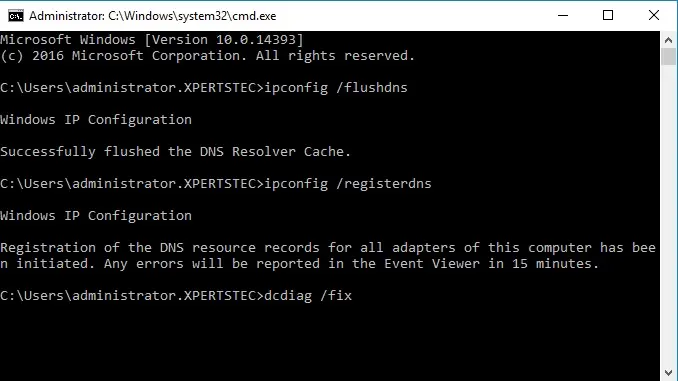
64- Now type ipconfig/ flushdns & ipconfig/ registerdns & dcdiag /fix commands
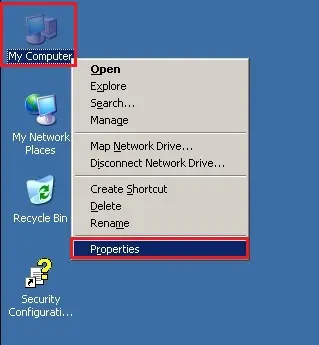
65- To remove Server 2003 from the Domain and join to Workgroup.
Server 2003 Join to Workgroup
Right-click on My Computer and select properties.
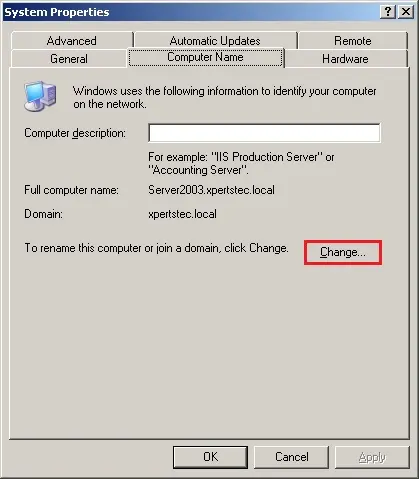
66- Select the Computer Name tab and click the change button.
67- Select Workgroup > type the workgroup name and click ok.
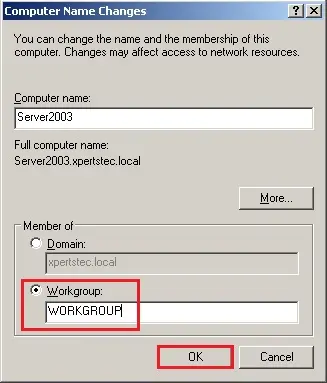
68- Type Administrator username, password and click on ok.
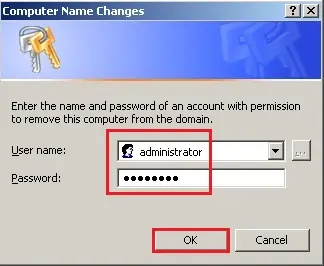
69- Welcome to the WORKGROUP, click ok.
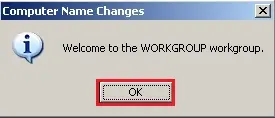
70- Click OK.

71- Click ok.
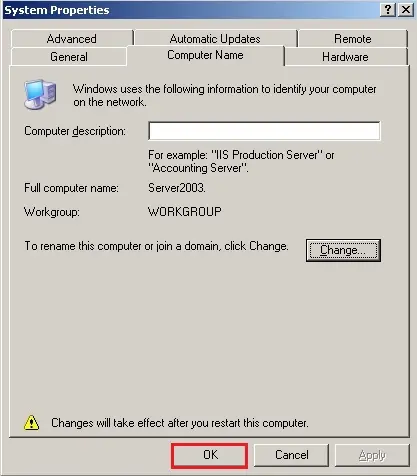
72- Close all open windows and then click Yes to restart the computer

For more details click here


No Comments
This is some great things about Managed Services and Managed Network Services https://itexamall.com
What a resouce great blog concerning Texas business https://txstatebusinessnetwork.org/
For a couple of years now, Microsoft has given basically similar sorts of movement for associations to use
to move email information to Exchange Online in Office 365 from on-premises
informing frameworks, be that Exchange or not https://lightning-emails.com/
This is a person need set more along with energy into the search process.
In case to provide an any difficulty, contact the remote computer support providers.
This is a very my favorite Fall/Winterexercises. https://call-tech-support.com/
What a resouce great blog concerning Texas business http://savvysavr.com/__media__/js/netsoltrademark.php?d=txstatebusinessnetwork.org
For a couple of years now, Microsoft has given basically similar
sorts of movement for associations to use to move email information to Exchange Online in Office 365 from on-premises informing frameworks, be that Exchange or not http://frannetfranchise.net/__media__/js/netsoltrademark.php?d=lightning-emails.com
Like!! I blog quite often and I genuinely thank you for your information. The article has truly peaked my interest.
thank you
It has a real polished speaker to be able to a good job in. In the finish, it all boils in order to how you deliver your best man speech.
You’re more reputable should you look professional.