
This blog will help you to setup remote desktop gateway on Windows server. How to understand remote desktop gateway, provide an overview of security issues, and discuss how best to address common problems. Remote Desktop Gateway is a Remote Desktop Services role on Windows Server that is utilized to provide secure access to remote desktops and published Remote Apps from the Internet through an HTTPS gateway. A server with the RD Gateway role is an intermediary between external RDP clients and internal RD services. When using RDGW, users don’t need to install a VPN to connect to RDS in a corporate network. The Remote Desktop Connection client (mstsc.exe) is used to connect.
Setup Remote Desktop Gateway in Server
Install the Remote Desktop Role
Connect to the host server using RDP with admin credentials.
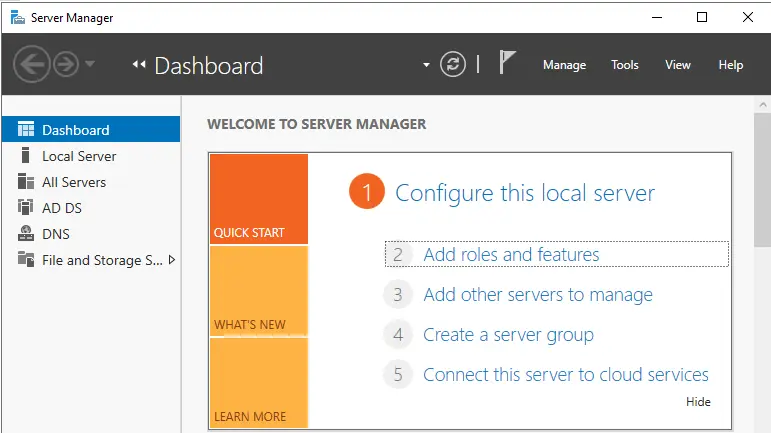
Open the Server Manager and select Add Roles and Features.
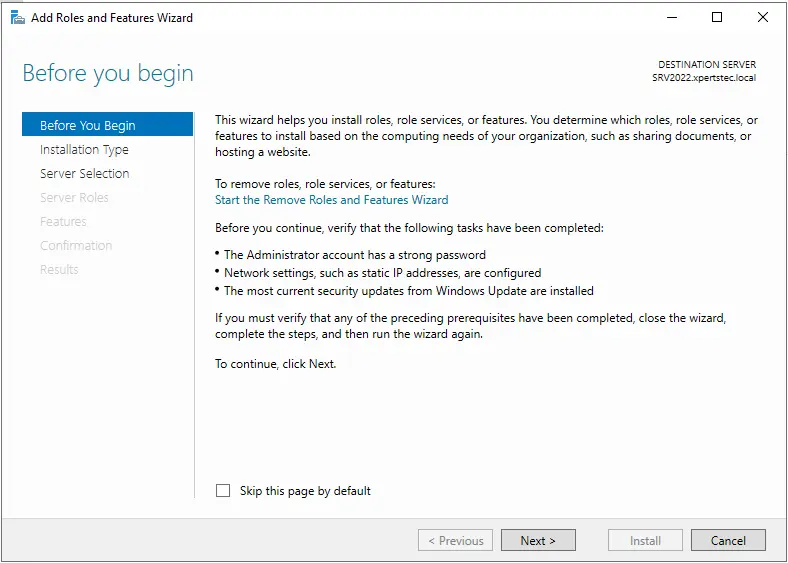
Click Next.
Select “Role-based or feature-based installation” and click Next.

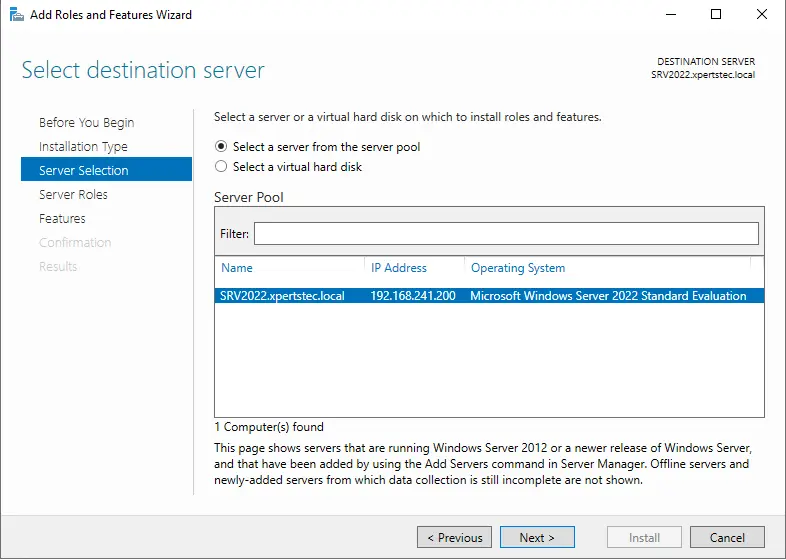
Choose a server from the server pool and click Next.
Select Remote Desktop Services and click Next.
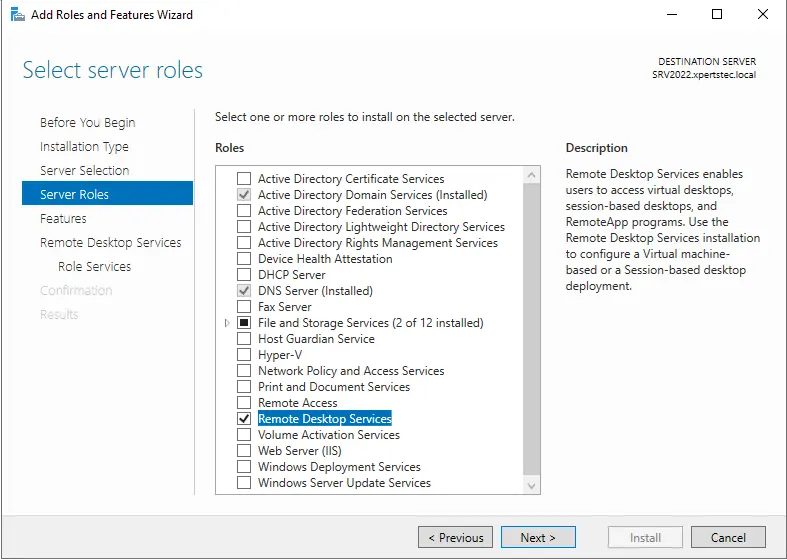
In the Features role, click next.
On the Remote Desktop Services, click next.
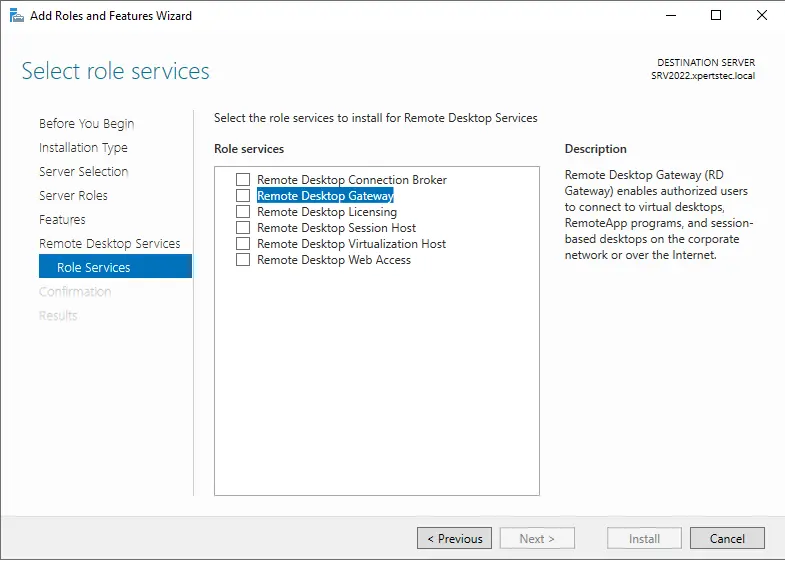
In the Select roles service page, select Remote Desktop Gateway.
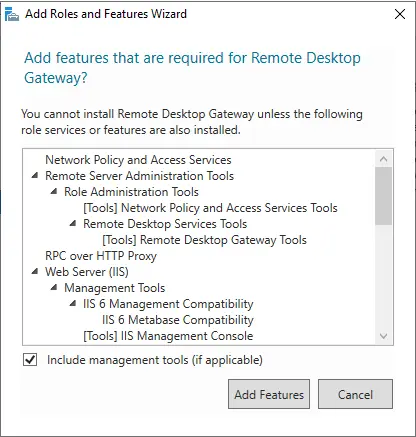
Click Add Features when prompted. Click Next.
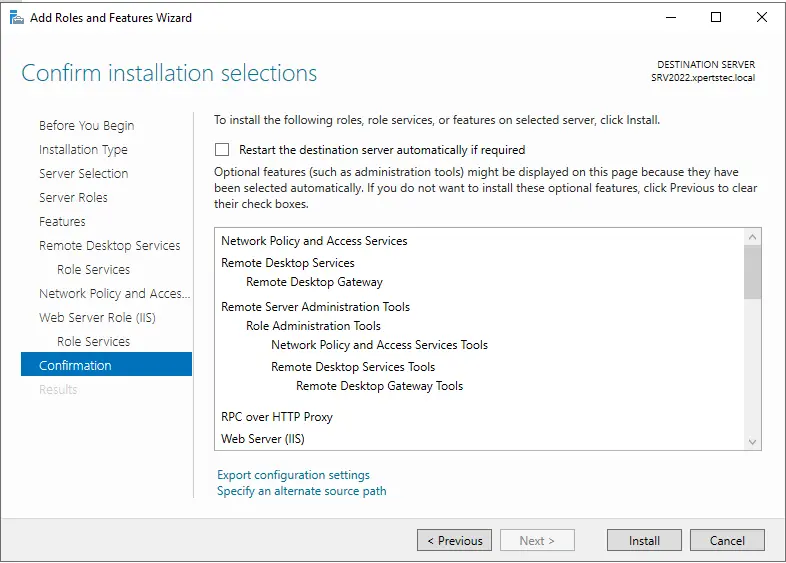
In Network Policy and Access Services, click Next.
Network Policy and Access Services, click next.
Web Server Role (IIS), click next.
Role services, click next.
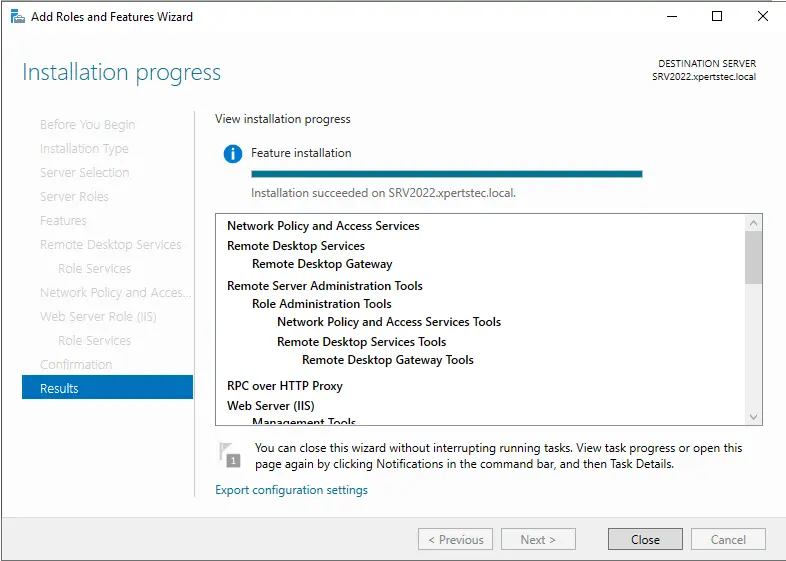
In the Confirm installation selections, click Install and wait for the installation to complete.
Installation successful.
You must now implement the Connection Authorization Policy.
Create Connection Authorization Policy and Remote Authorization Policy
Connection Authorization Policy (CAP): you can specify which groups can access resources behind the Remote Desktop Gateway. You can also use Active Directory Users or Active Directory Computer Objects groups.
Resource Authorization Policy (RAP): This policy allows you to restrict server access based on group members. You will need to create Active Directory groups and add servers to these groups.
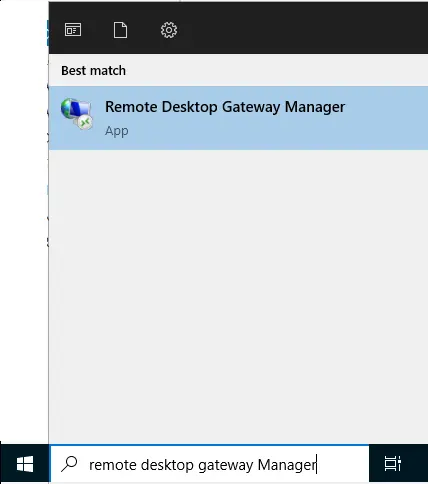
Search Remote Desktop Gateway Manager and open it.
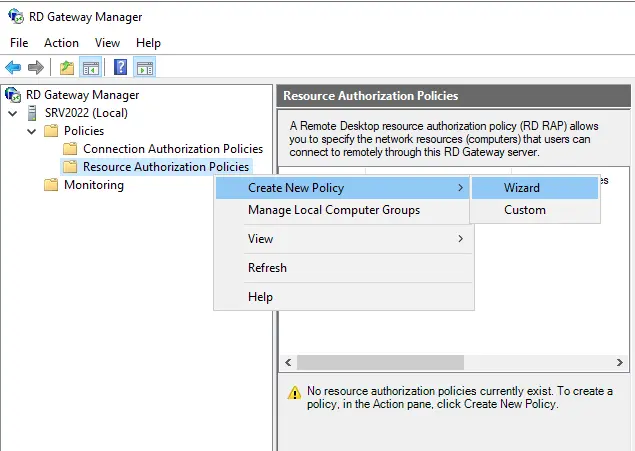
Expand Policies and select Connection Authorization Policies.
Right-click on it, select Create New Policy, and choose Wizard.
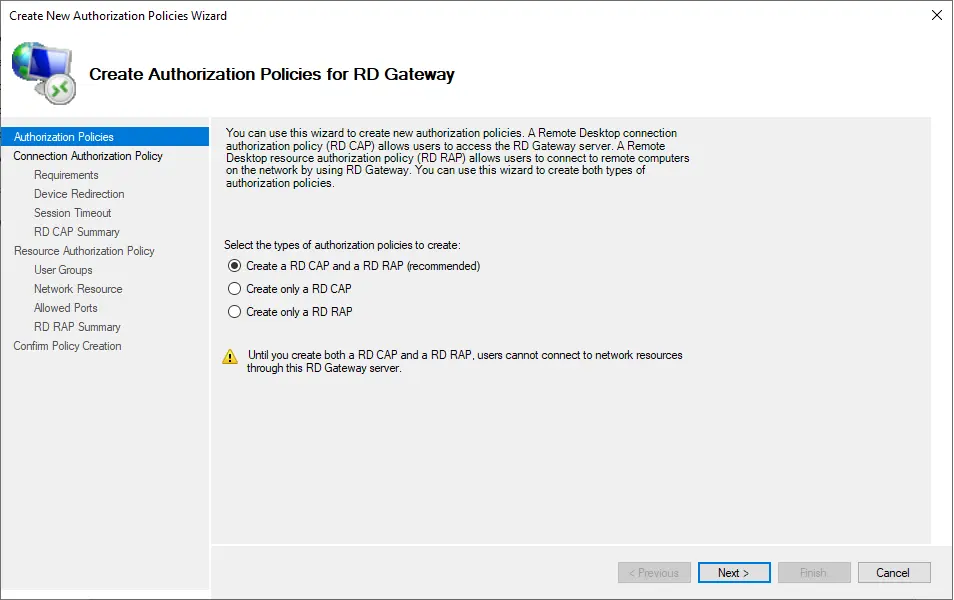
Select “Create an RD CAP and an RD RAP (recommended)” and click Next.
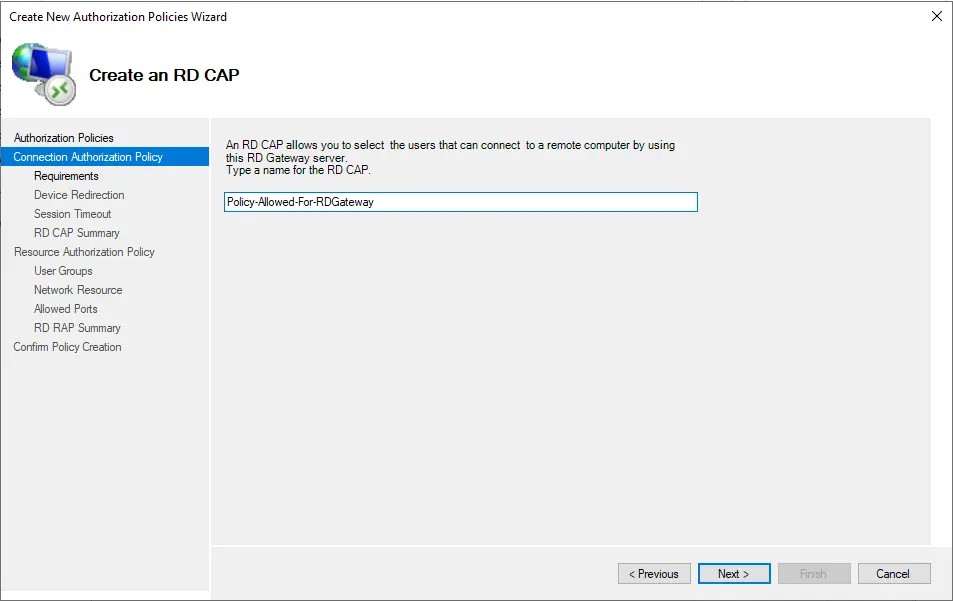
Create a Connection Authentication Policy
Type a name (Policy-Allowed-for-RDGateway) for your Connection Authentication Policy and click Next.
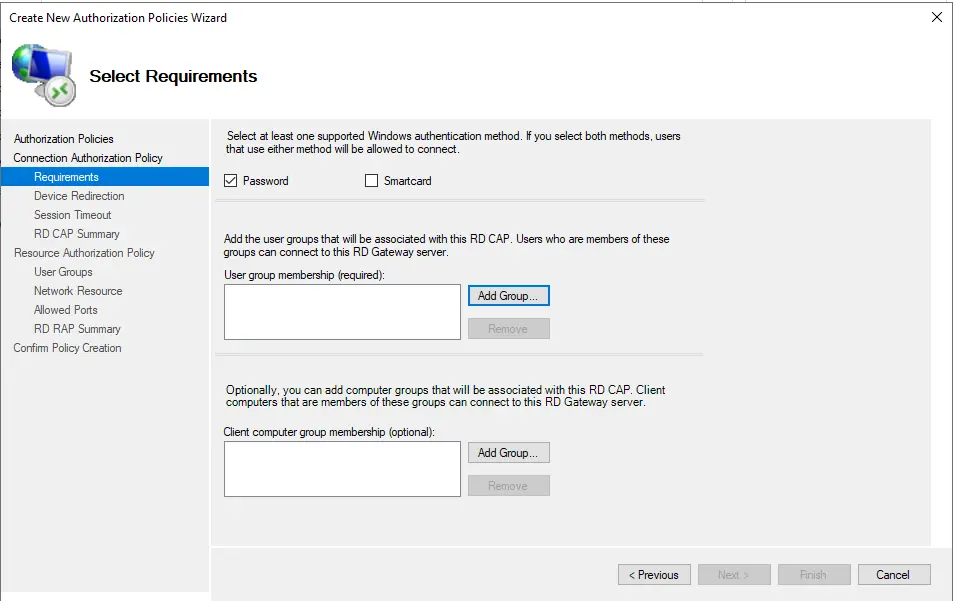
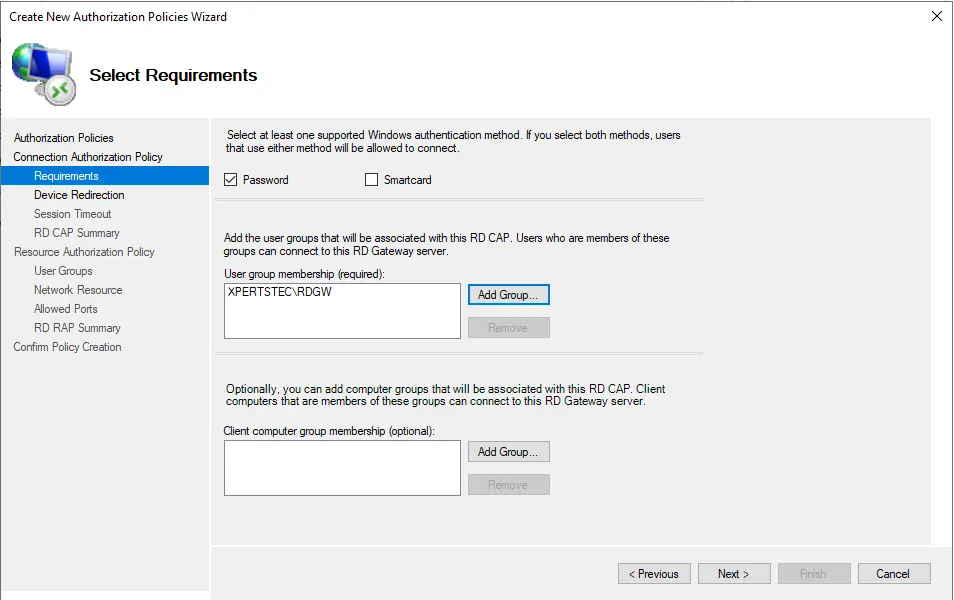
Click Add Group… To create one or more user groups associated with this RD CAP. Users who belong to these groups can access this RD Gateway server.
The most effective approach is to create a separate user group in Active Directory to which you add users you want to enable using Remote Desktop Gateway. For this example, we created a group in Active Directory named RDGW.
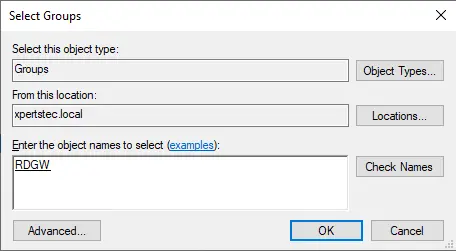
Click on add group.
Type group name (RDGW), click check names, and choose ok.
Click Next.
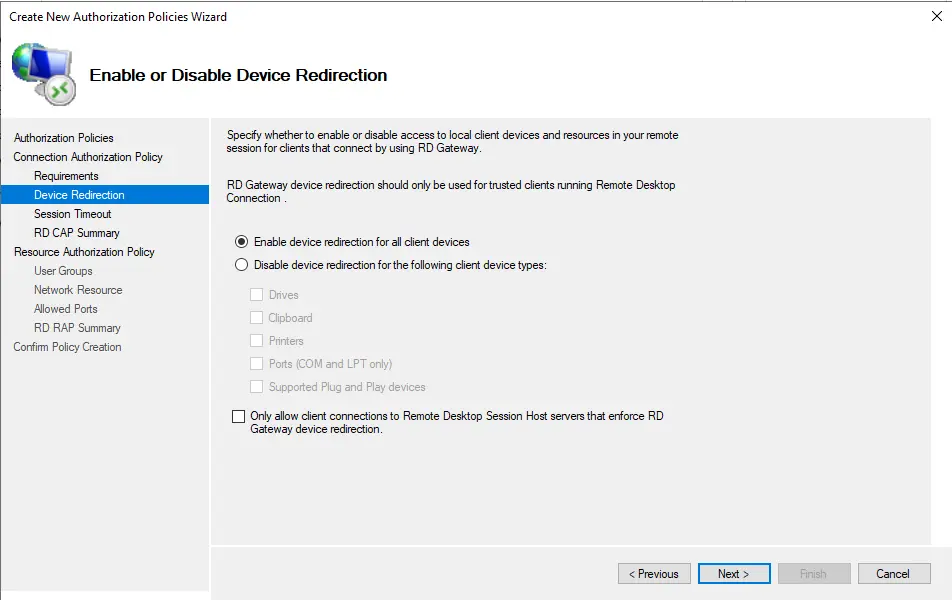
In Device Redirection, you can determine if RD Gateway should transfer local resources, such as printers and ports, to the remote desktop machine for someone who accesses a computer remotely. You do not have to alter anything unless you specifically want to. Click Next.
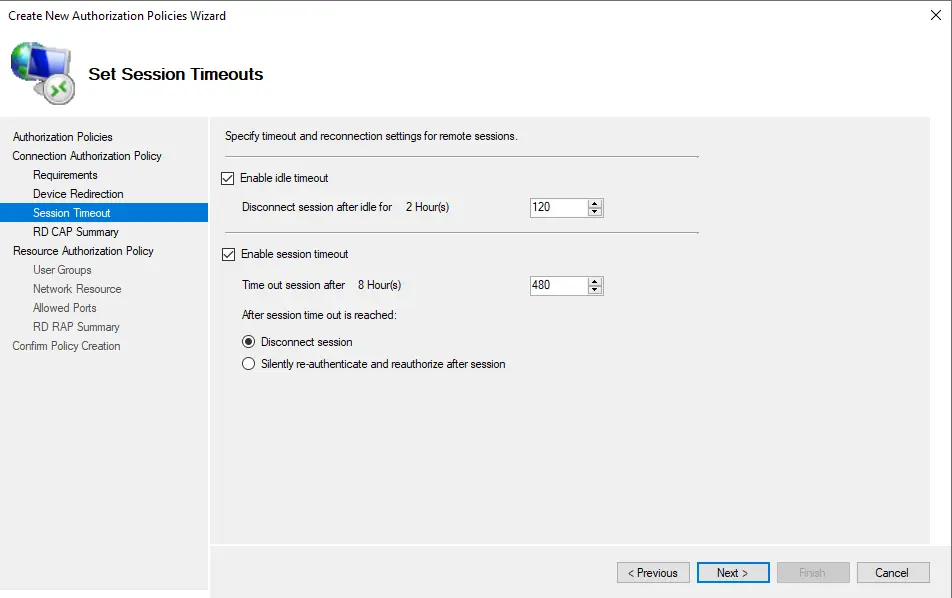
Check the box “Enable idle timeout” and “Enable session timeout” and then click next.
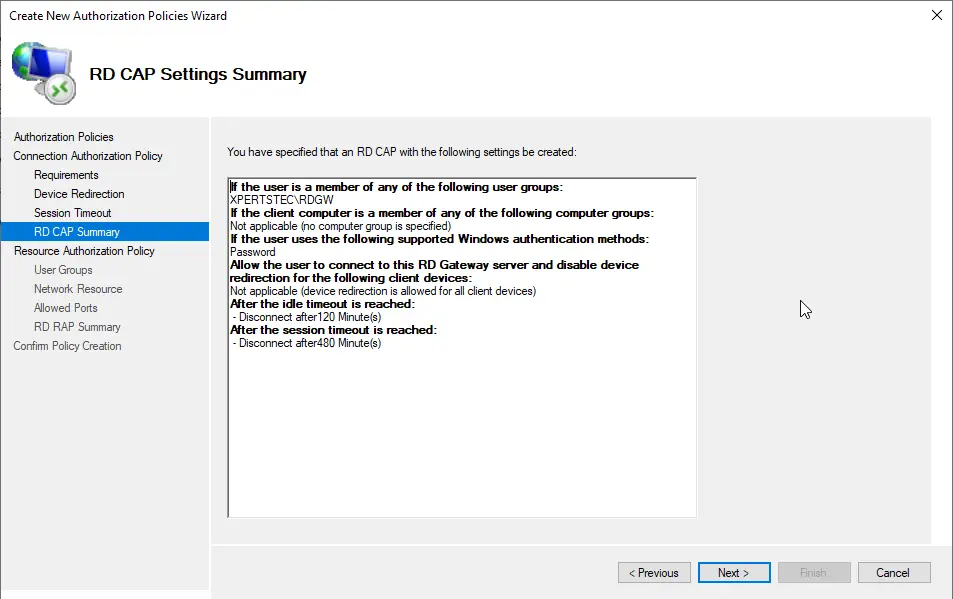
In RD CAP settings summary, click next.
Create a Resource Authorization Policy
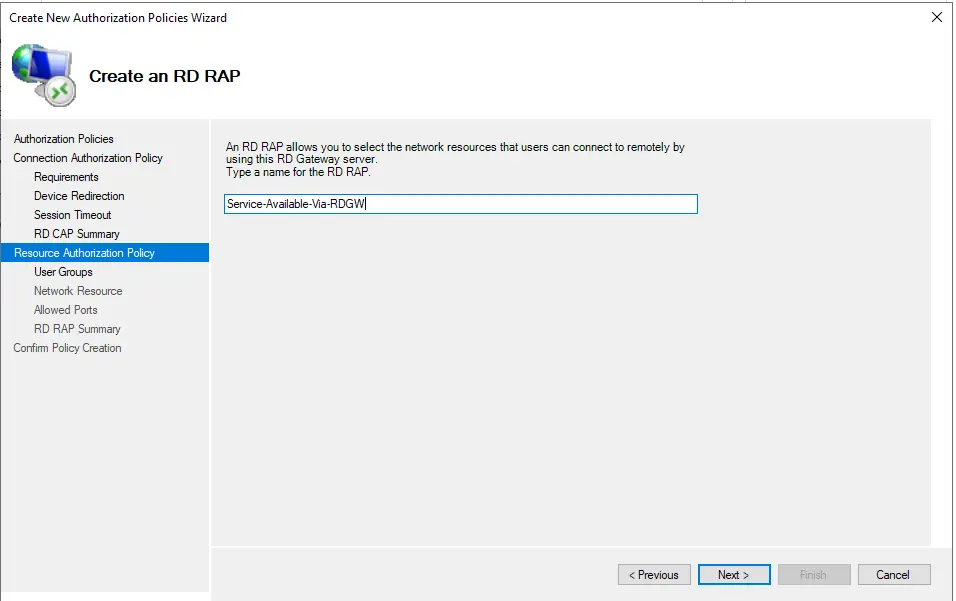
Type a name (Servers-Available-Via-RDGateway) for your Resource Authentication Policy and click next.
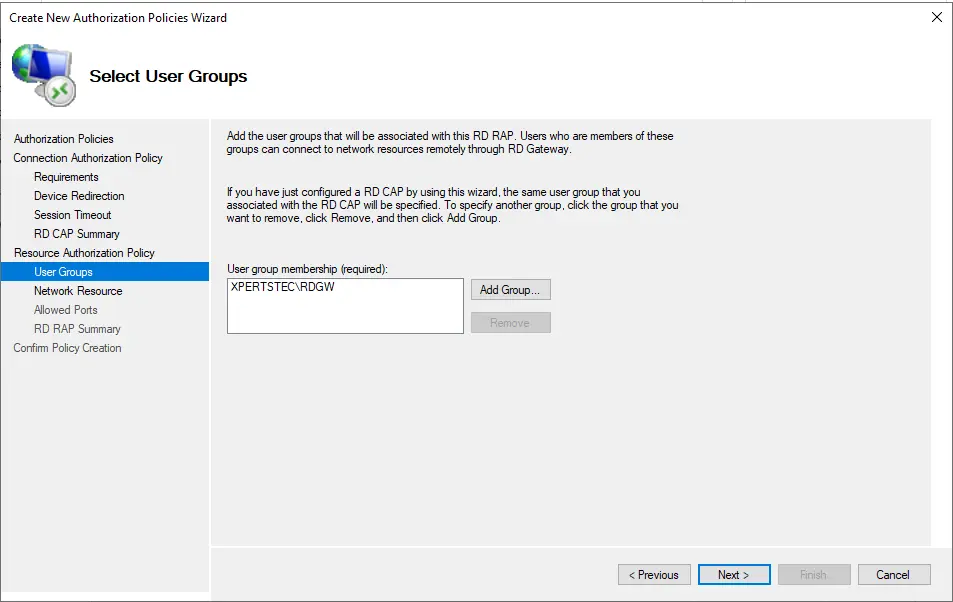
Click Add Group… to add one or more user groups that will be allowed to access network resources. Users in these groups will be able to access servers on the network via the remote desktop.
For this purpose, we selected the same RDGW group when constructing the Connection Authorization Policy. Click next
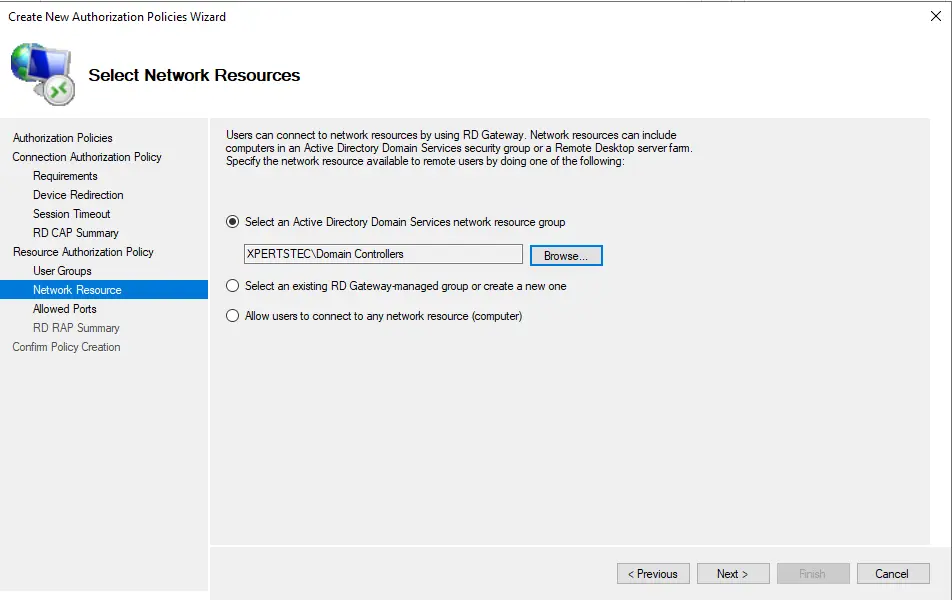
Click Browse and select a group that contains the servers you want the above user groups to access the desktop.
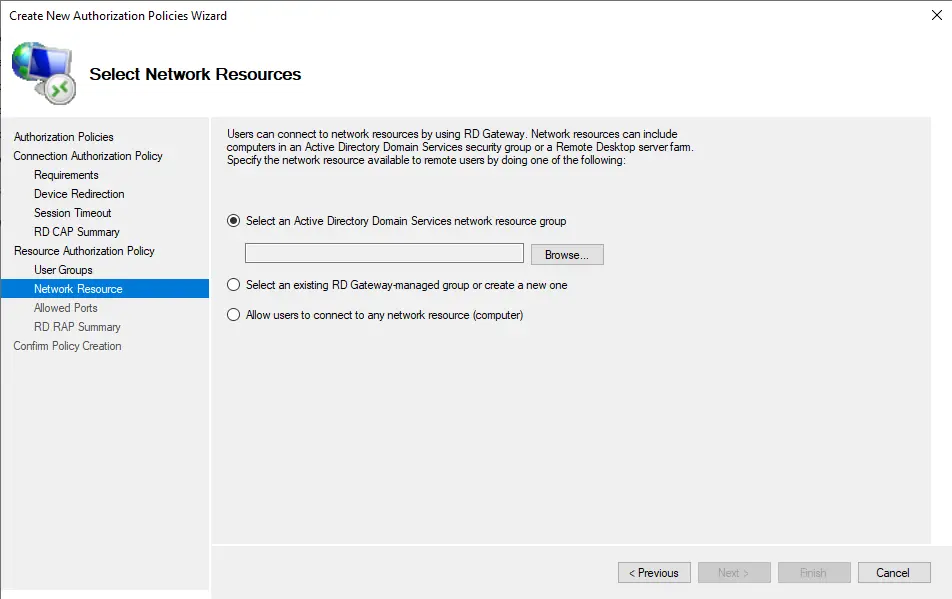
For this guide, we chose the built-in group called Domain Controllers. However, you can create one or more groups of servers, one for each department. This allows you to assign groups based on department users, enabling them to access only certain servers.
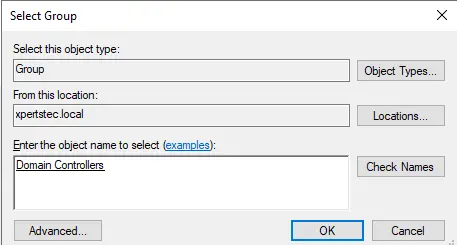
Type domain controller, hit check name, and click ok.
Select next.
Select “Allow connections to these ports” and specify the port. Otherwise, select “Allow connections only to port 3389”. Click next
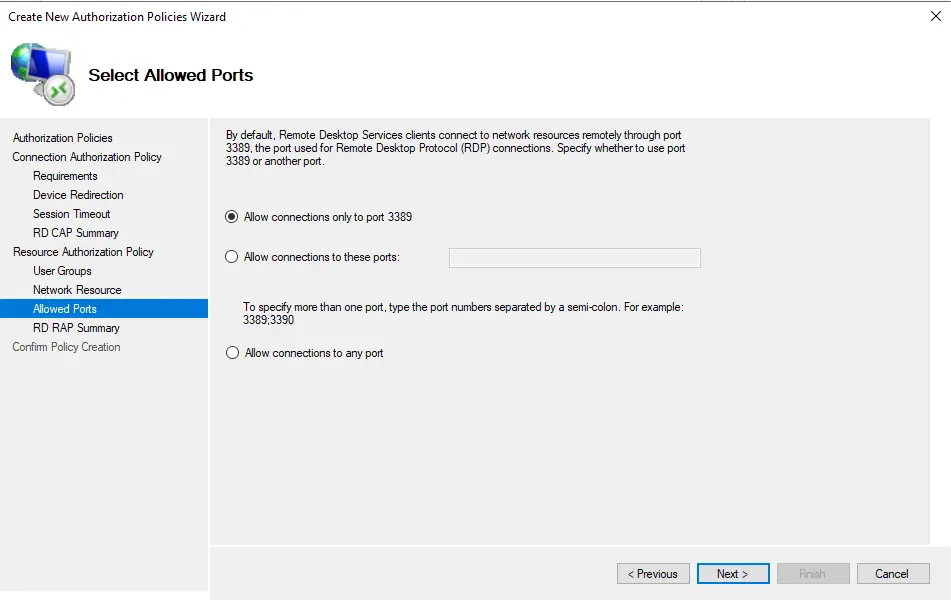
In RD RAP settings summary, click Finish.

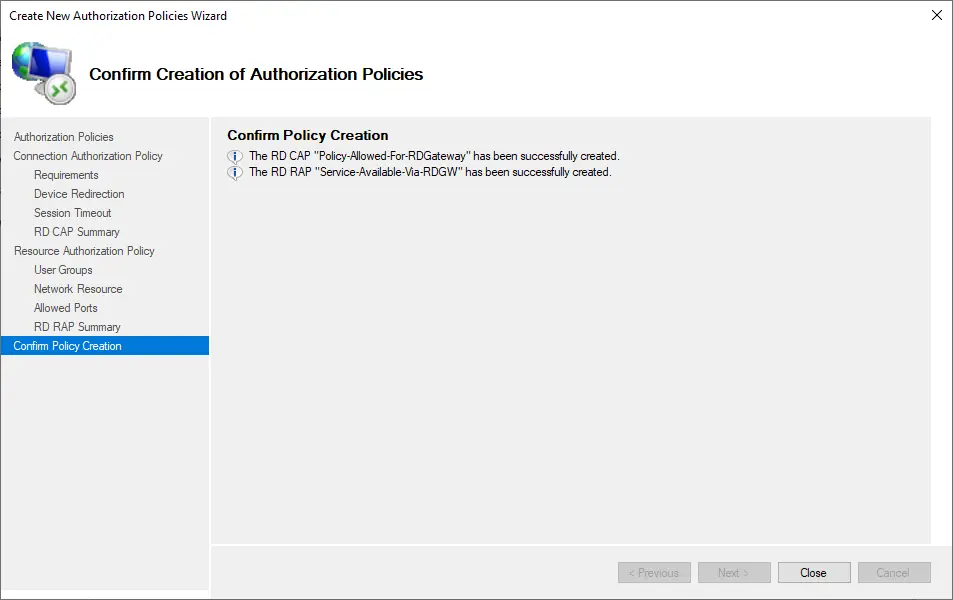
The new authorization policy wizard will create your CAP and RAP policies.
Click close
We have installed the Remote Desktop Gateway and created CAP and RAP policies. You now have to install an SSL certificate on RD Gateway.
Install an SSL Certificate on RD Gateway
The Remote Desktop Gateway requires a valid SSL certification. For this guide, we utilized a self-signed certificate. We strongly suggest you purchase an SSL certificate for your server (using a fully qualified domain name) from a commercial Certificate Authority (CA) or a wildcard SSL certificate for the domain.
We already have your SSL certificate; you can follow these instructions to install the SSL certificate on Remote Desktop Gateway.
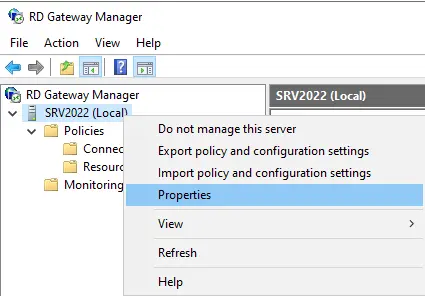
In the Remote Desktop Gateway Manager, click the name of your gateway server and then click Properties.
Navigate to the SSL Certificate tab and select or import an existing certificate.
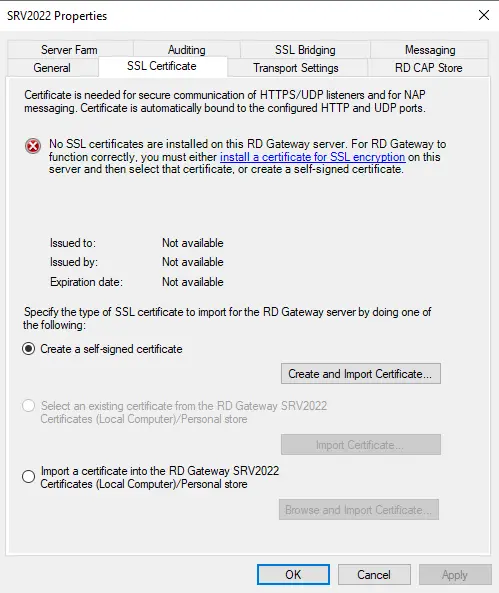
Select your pfx certificate file from the file system and type the password for the certificate when prompted.
You have successfully installed the certificate on the default SSL port (TCP Port 443) so that you can import the certificate.
How to Test Remote Desktop Gateway Connection
The easiest way to test your Remote Desktop Gateway connection is to configure your Remote Desktop Client to access the Gateway server.
If your host computer and Remote Desktop Gateway are ready, follow the steps.
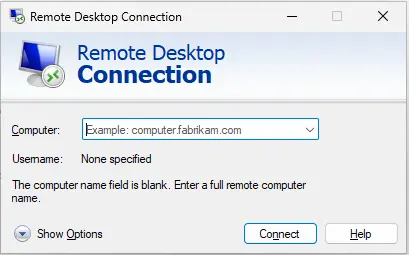
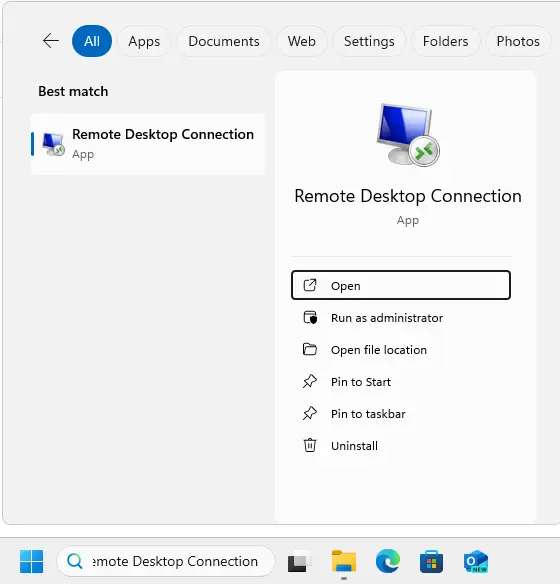
Launch the Remote Desktop Connection app (Start, type “remote desktop connection”), and launch Remote Desktop Connection.
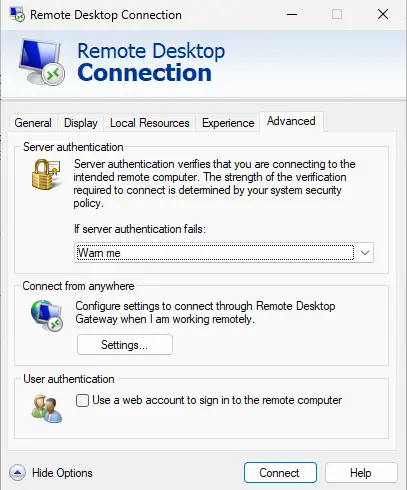
Select the Advanced tab.
Under the Connect from anywhere section, select Settings.
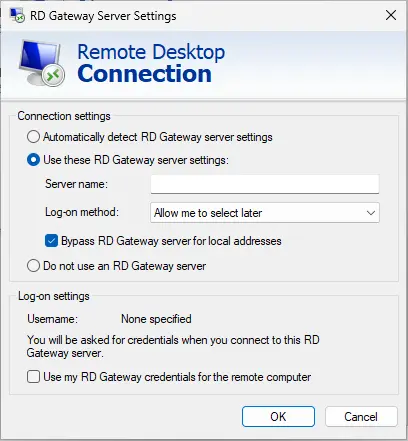
Select the RD Gateway server settings, enter your hostname or IP, and click OK.
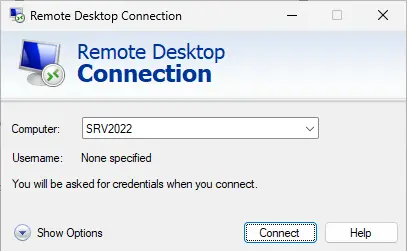
Select the General tab and click Connect.
Provide your Remote Desktop Gateway Server credentials, and after you have been authenticated onto the Gateway server, provide your credentials to be authenticated onto the Remote Desktop server.