In this article, I will explore how to demote the domain controller in Windows Server 2019 Active Directory Domain Services (AD DS). Do you want to demote a domain controller?
Is your domain controller having issues and do you need to manually remove it? No problem.
In this article, we will walk through two options to demote a domain controller. If you are able to access the Windows server then the first option is the preferred choice.
Demote Domain Controller Using Server Manager
Microsoft’s recommended this method for removing a domain controller.
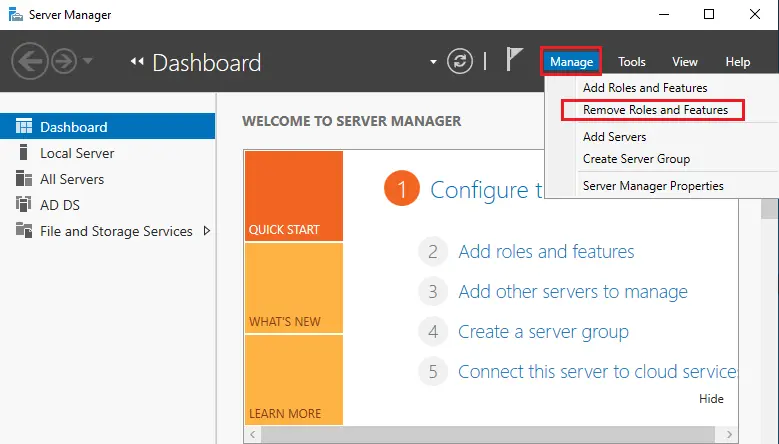
Open Server Manager
Click on the Manage tab and then select Remote Roles and Features.
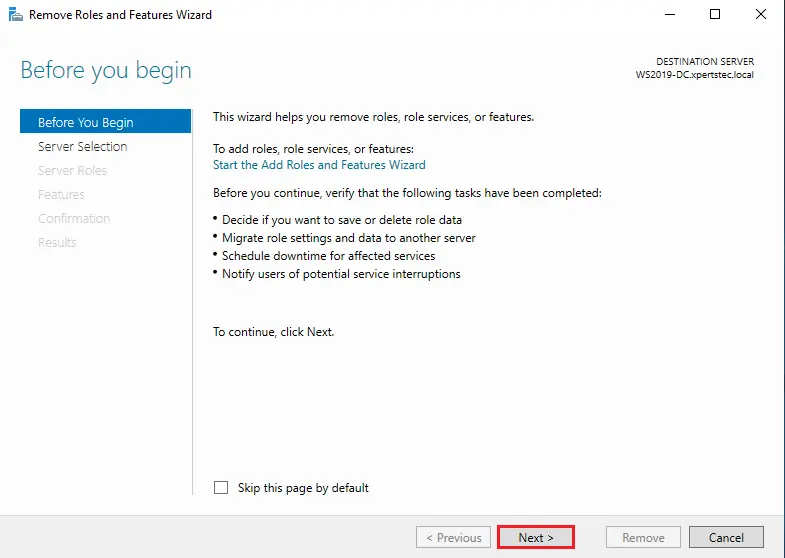
Click on next before you begin the window.
Select the server you wish to demote and then click the next button.
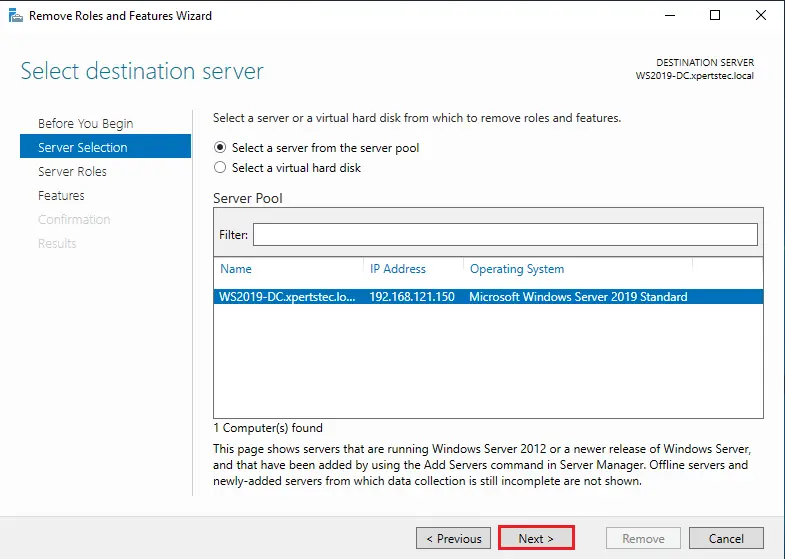
Untick the Active Directory Domain Services box.
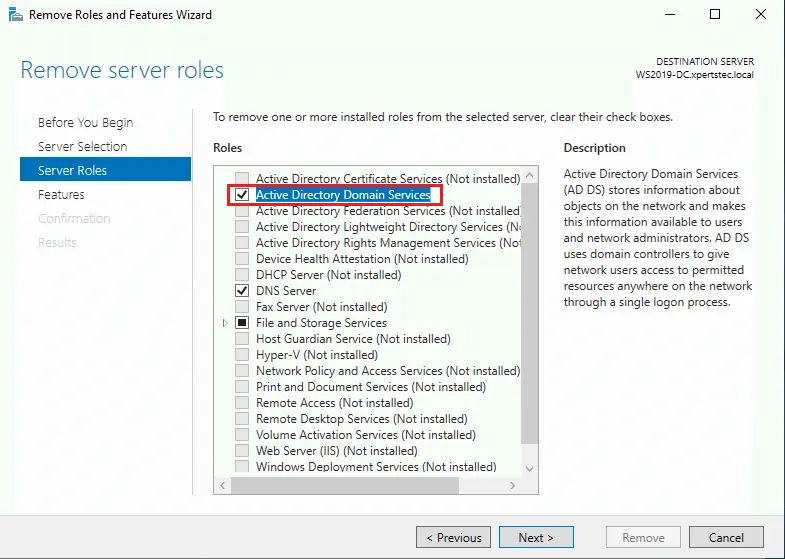
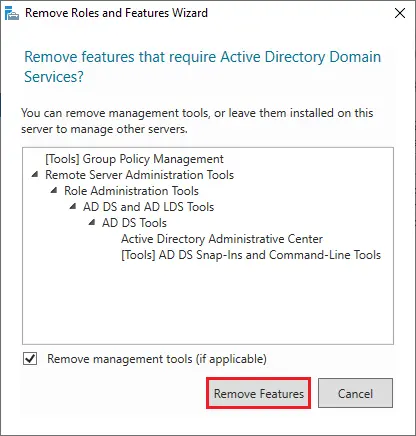
Click on the remove button to remove features that are required.
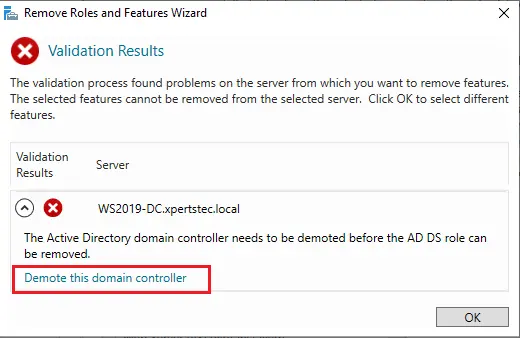
Select Demote this domain controller
Note: Do not tick Force the removal of this domain controller box. Only choose this option if you are uninstalling the last domain controller in the domain.
You may change credentials on this screen if required and then click next.
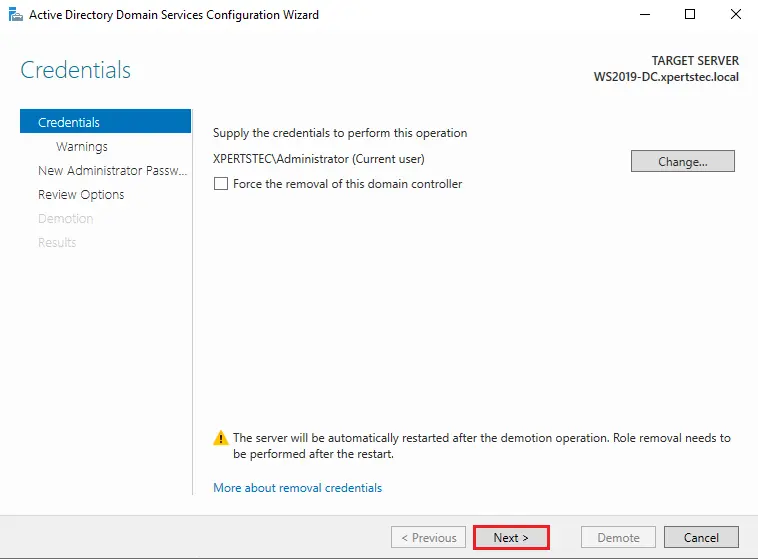
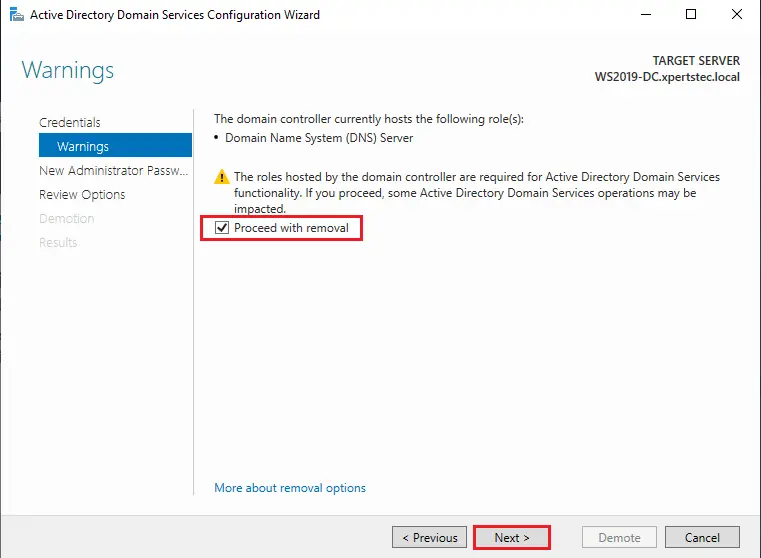
The domain name system (DNS) server warnings window.
Tick the box Proceed with removal and then click next.
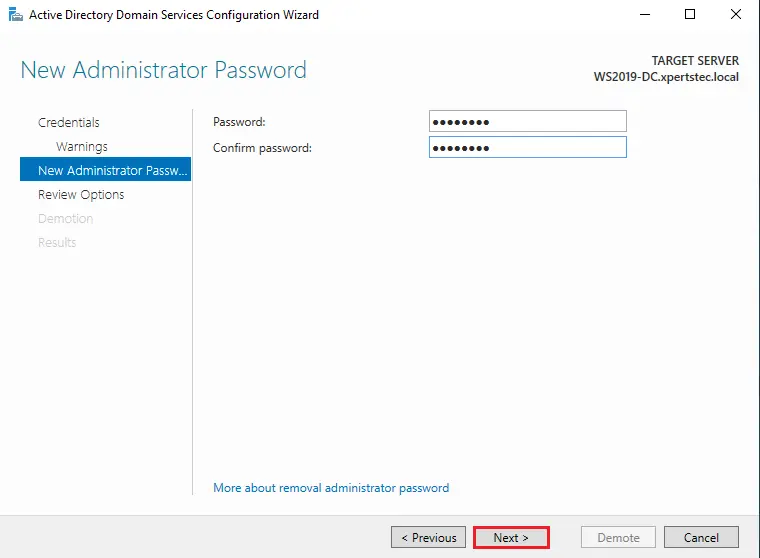
If you get the DNS delegation option you can choose Remove DNS delegation and then click next. Mostly, you will not get DNS delegation and can untick this box.
Type the administrator credentials and then click next.
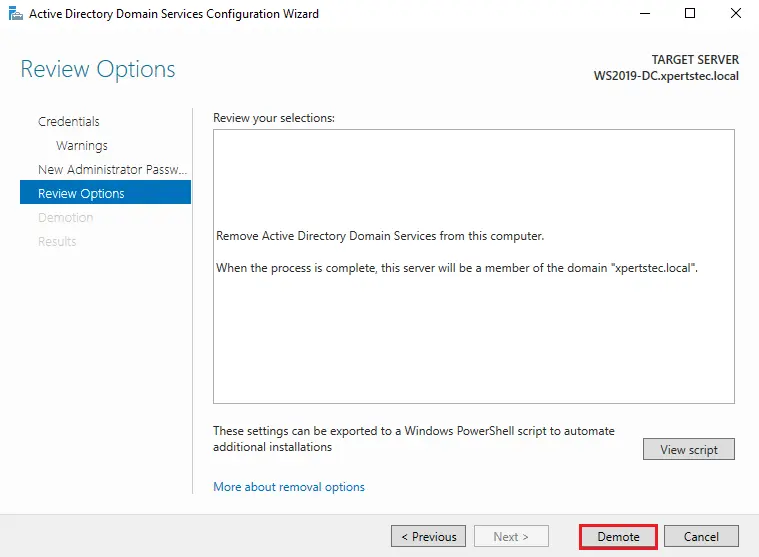
Review options and then click Demote.
After rebooting the server will be a member server.

You can log in with administrator credentials to the server.
Domain Controller Additional Cleanup Steps
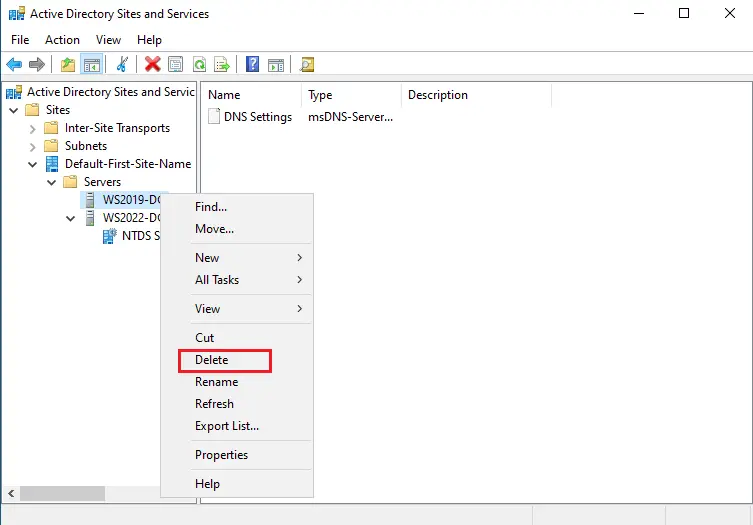
For some cause, Microsoft determined not to include sites and services in the cleanup procedure.
Launch Active Directory Sites and Services and then right-click on the server you want to remove, and click delete.
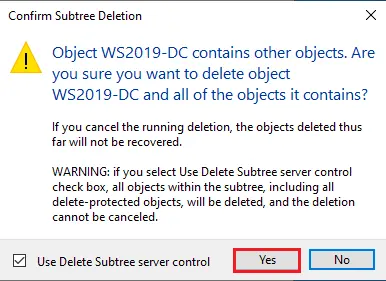
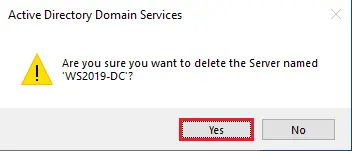
Click yes
Confirm Subtree deletion, click yes.
