Create Storage Account Azure, in this guide I will create an Azure storage account. A Microsoft Azure storage account contains all of our Azure Storage data “objects – blobs, files, tables, queues & disks”. Microsoft Azure storage accounts offer a unique name space for Storage data that one is accessible from anywhere in the world over the “HTTP or HTTPS”. Data in the Azure storage account is “durable & highly available, secure, & massively scalable”.
Create Storage Account Azure
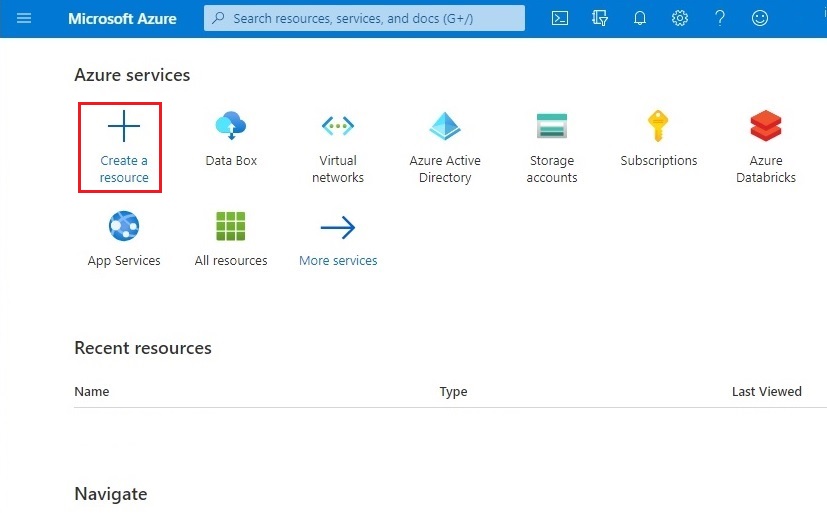
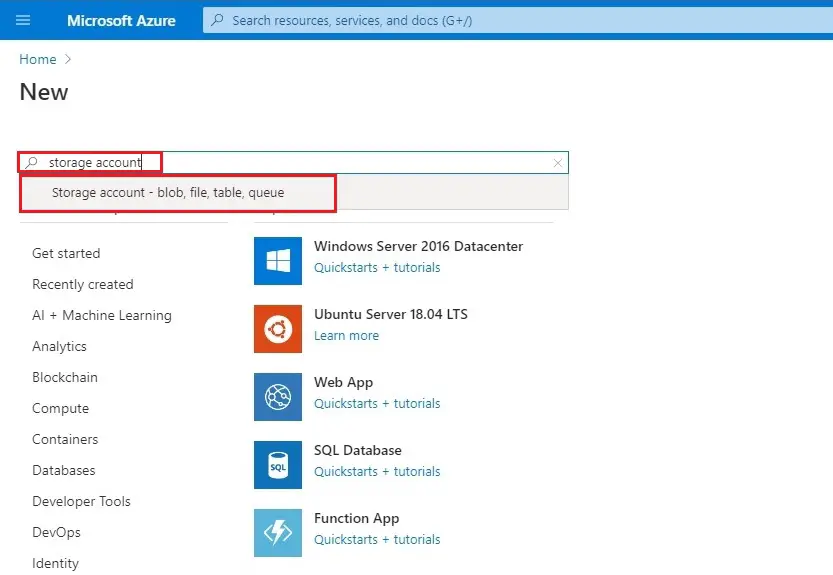
1- Login to Azure portal and then click + Create a resource.
2- On the new wizard, type storage account and then select Storage account – blob, file, table, queue.
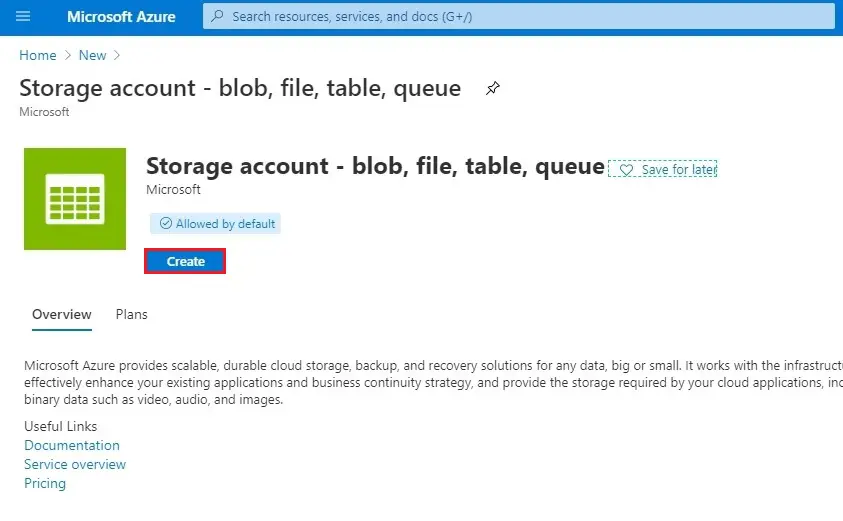
3- On the Storage account page, click Create.
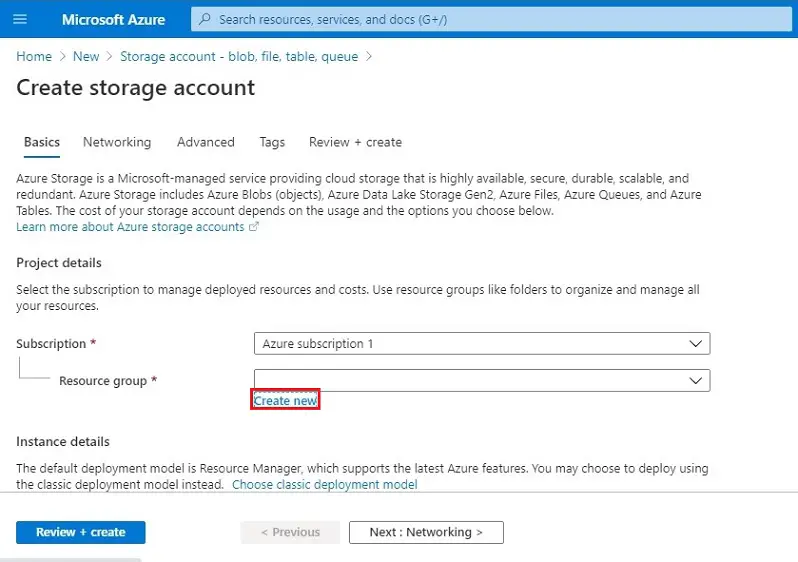
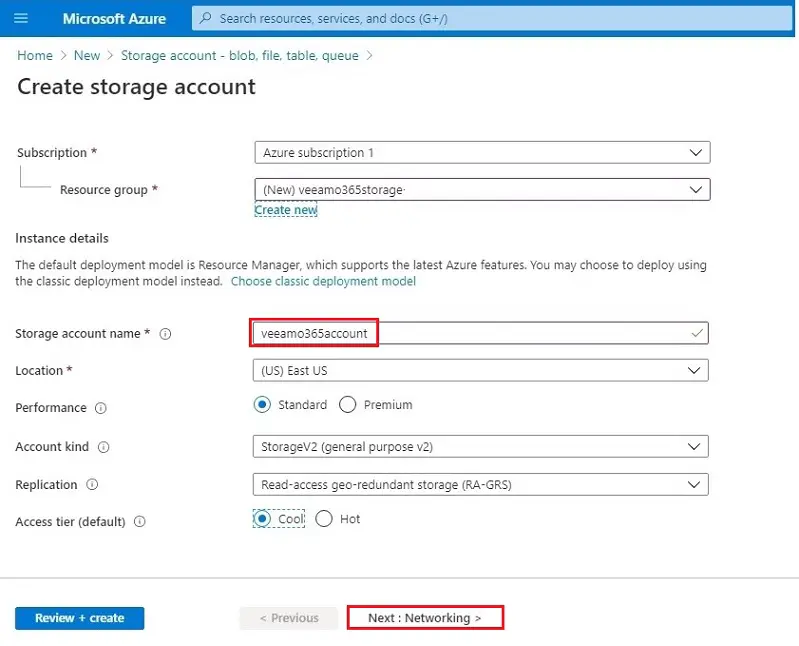
4- Create storage account page, select your Azure subscription, Resource group and then click create new.
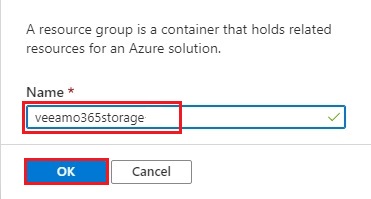
5- Enter a name for the resource group name and then click OK.
6- Storage account name: Type a name for the storage account.
Location: select your location.
Performance: select Standard.
Account kind: select Storage V2 (general purpose v2).
Replication: select Locally-redundant storage (LRS).
Access tier (default): select Cool and then click Next-Networking >
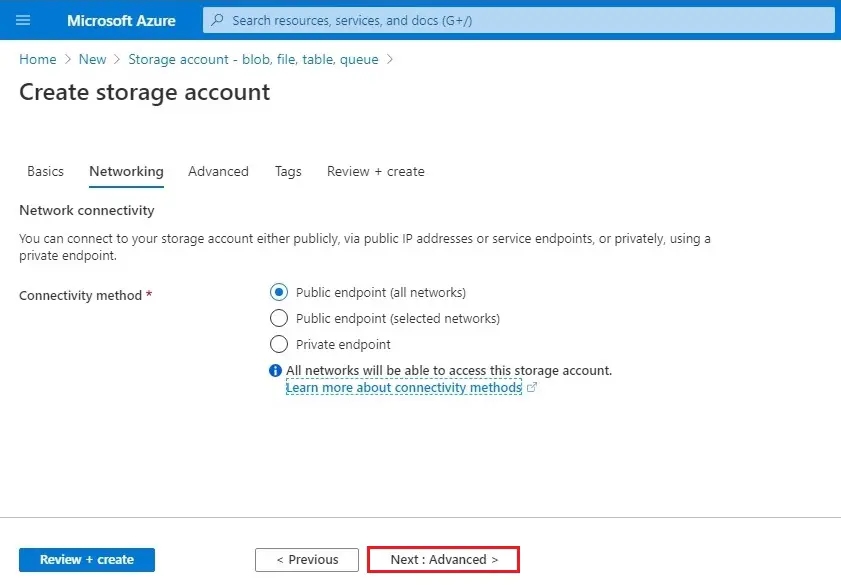
7- Create a Storage account Networking page, select Public endpoint (all network), and then click Next:Advanced >.
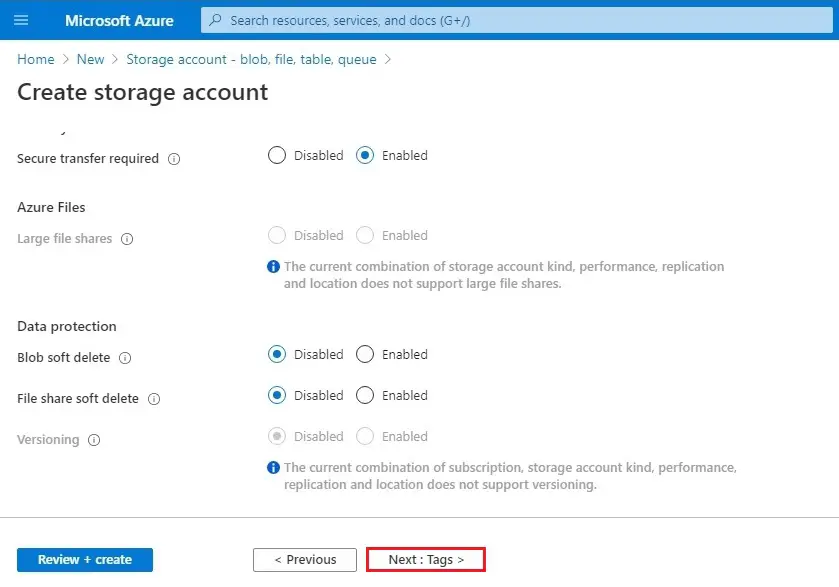
8- Advanced page, configure as follow
Secure transfer required: select Enabled.
Large file shares: select Disabled.
Blob soft delete: select Disabled.
Hierarchical namespace: select Disabled and then click Next:Tags >.
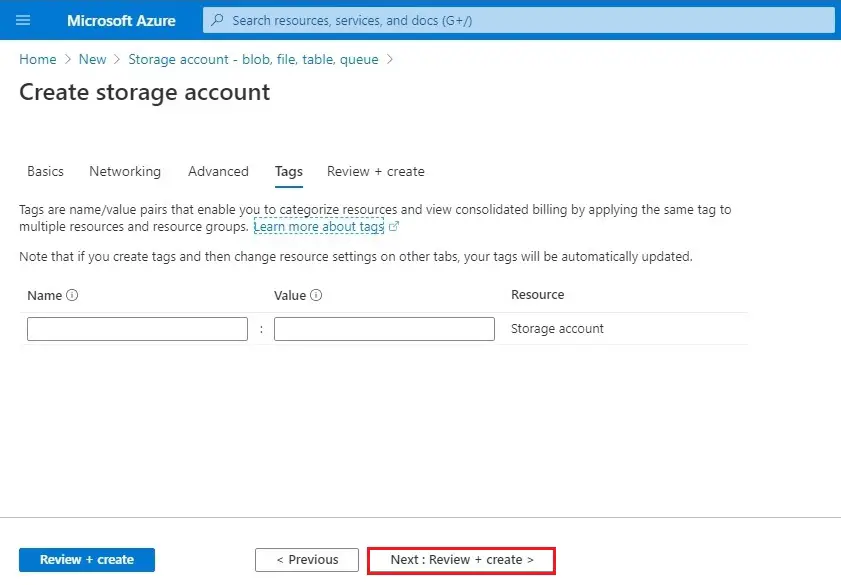
9- Create storage account Tags page, click Next:Review + create >.
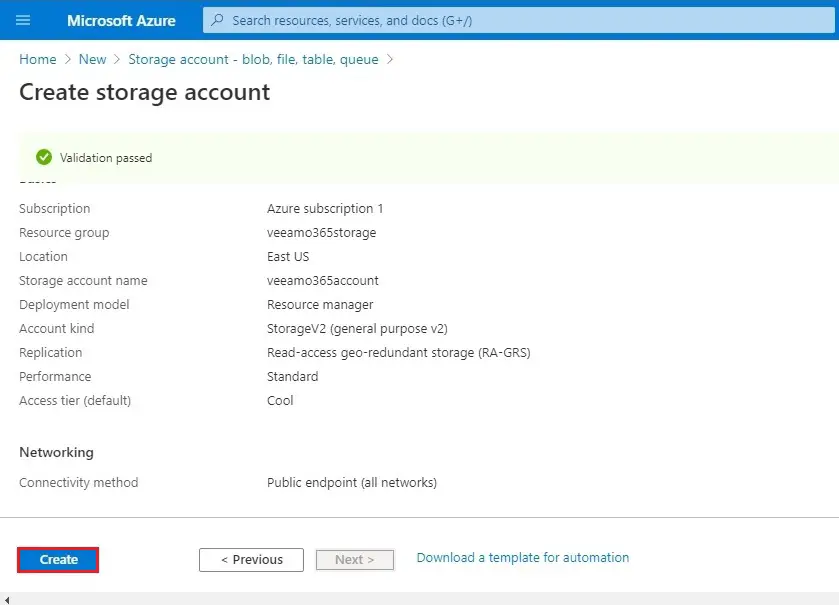
10- Review + create page, make sure Validation passed and then click on Create.
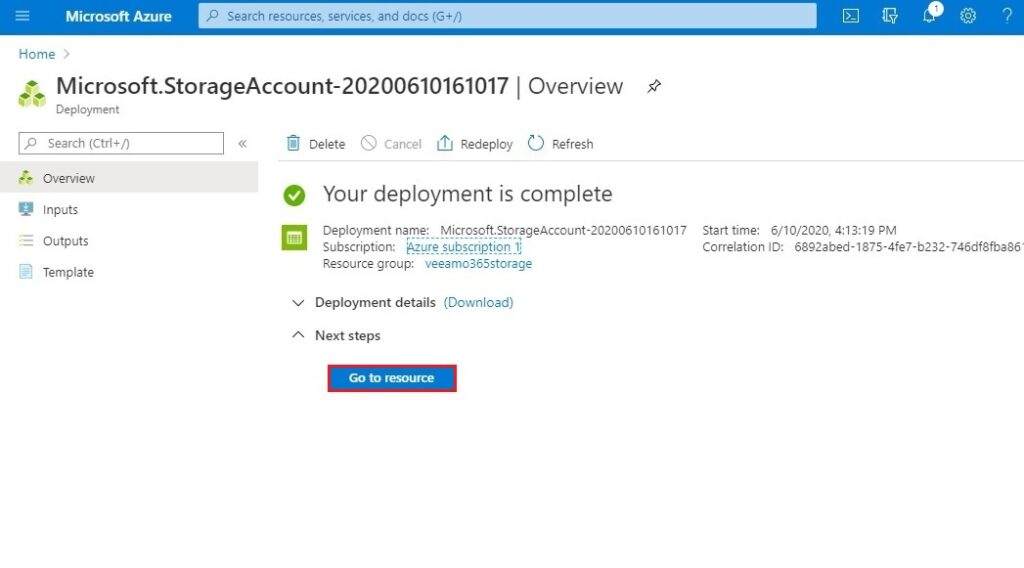
11- It will take few minutes to create the new storage account, click Go to resource after the storage account is ready.
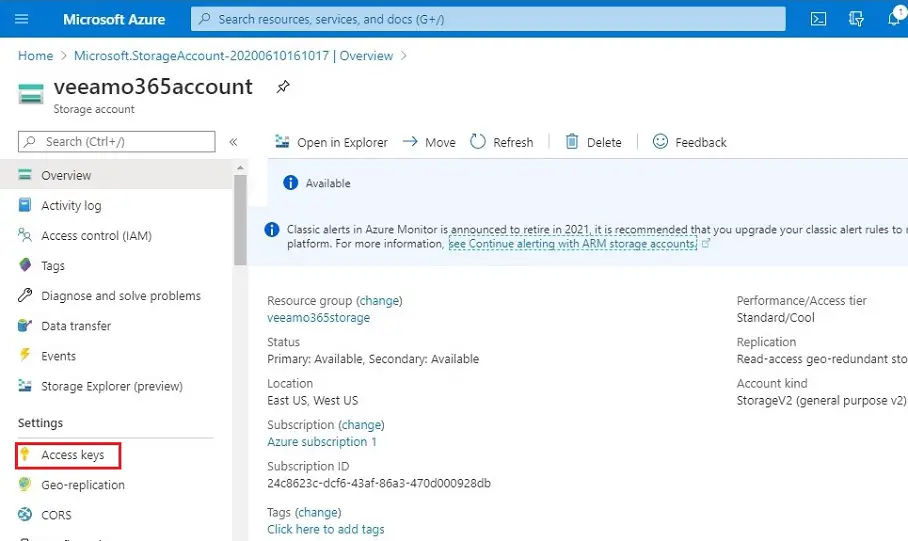
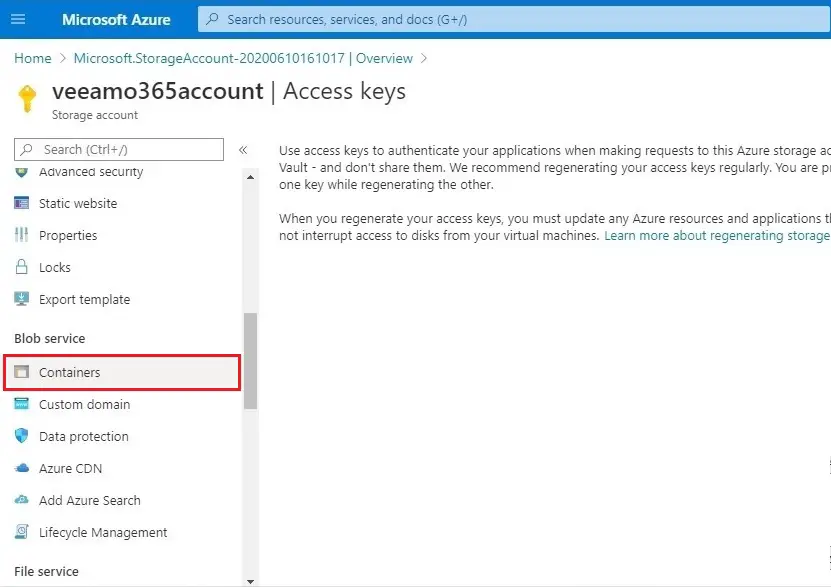
12- Created storage account page, select Access keys.
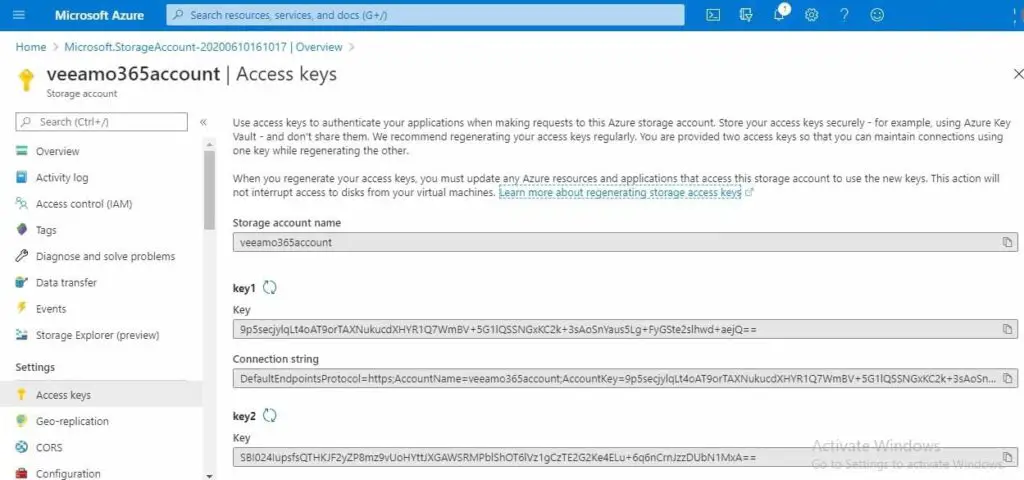
13- Access keys under settings option, copy the “Storage account name” & key of “key1” that we need this key for Veeam storage repository settings later.
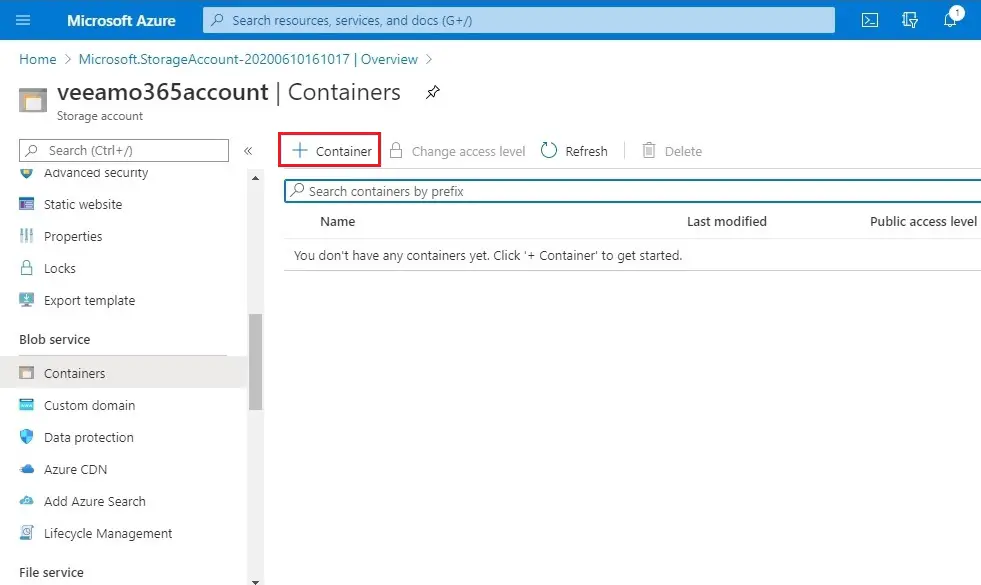
14- Created storage account page, select Containers under blob service.
15- Containers page, click +Container.
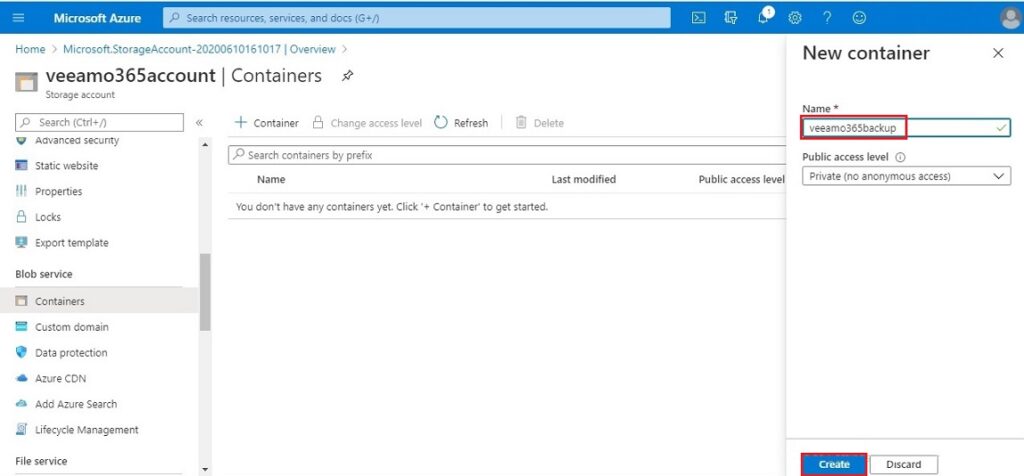
16- New container page, type a name for the new container, choose Private (no anonymous access) as Public access level and then click on create button.
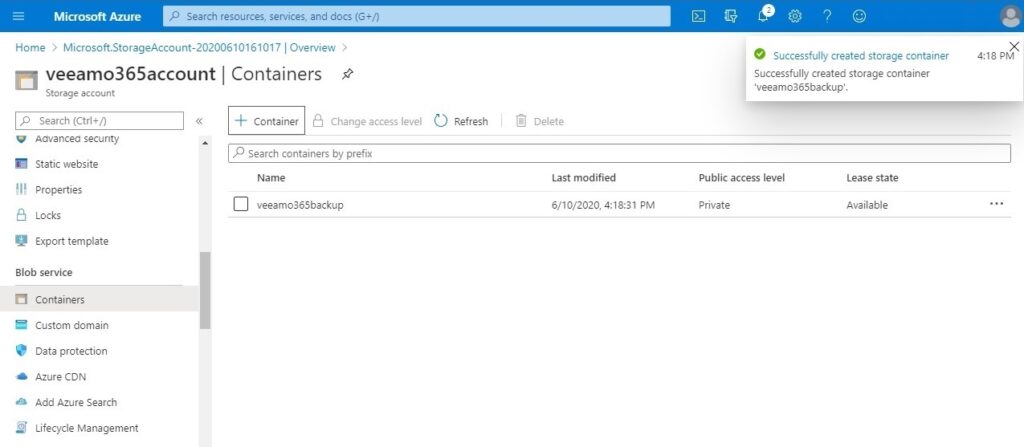
17- Successfully created storage container.
For more details please visit Microsoft