

In this guide, I will show you how to create a Standard Load Balancer that load balances VMs across availability zones. Azure Load balancing provides a higher level of availability by distributing incoming requests across multiple VMs. This helps to defend your apps & data from a doubtful failure or loss of an entire datacenter. One or several availability zones, with zone-redundancy, may fail, & the data route remains as long as one zone in the region remains healthy.
Azure Standard Load Balancer just supports a “Standard Public IP address”. When we create a new public IP during creating the load balancer, it is automatically configured as a “Standard SKU” version, & is also automatically zone-redundant.
Steps to Create a Standard Load Balancer
Create a Standard Load Balancer
Create a Virtual Network
Create network security groups
Create VMs across multiple zones (zone redundant) and attach to the load balancer
Create load balancer backend pool
Create a load balancer health probe
Create load balancer traffic rules
Create a basic IIS site
Test load balancer
For more information about using Availability zones visit Microsoft Standard Load Balancer and Availability Zones.
Sign in to Azure Portal
Create Load Balancer
1- Choose Azure menu tab and then select Load Balancers.
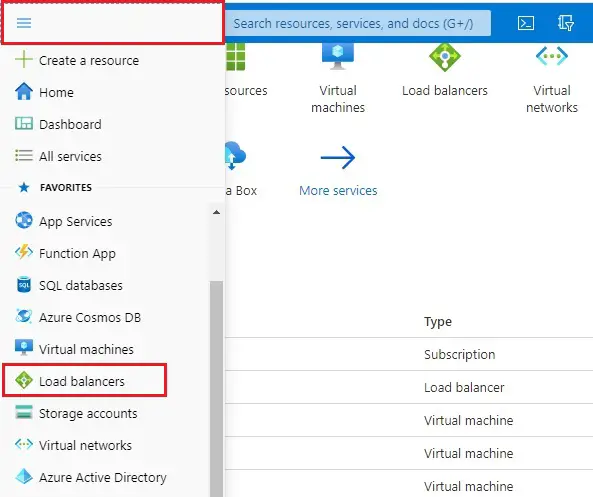
2- Select the + Add button to create load balancer.

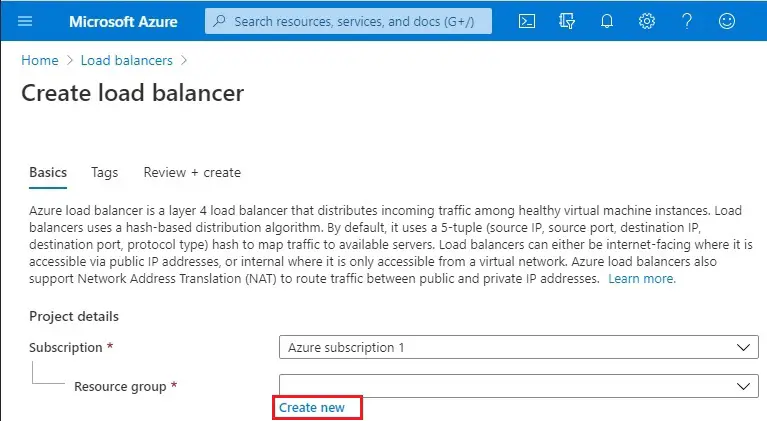
3- Create load balancer wizard, Basics tab, select your resource group, or click new to create a new one.
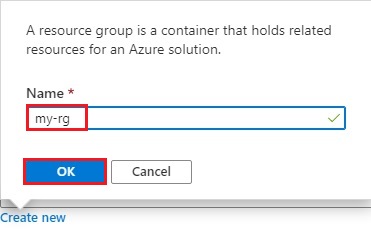
4- Type a resource group name and then click ok.
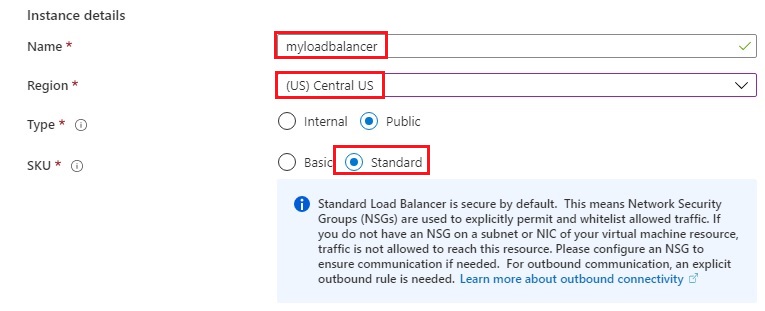
5- Type a name of your Load Balancer (myloadbalancer)
Region (Central US)
Type (Public)
SKU (Standard)
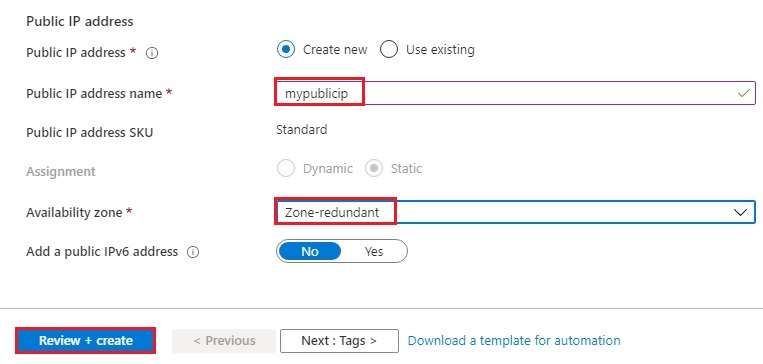
6- Public IP address name (mypublicip)
Availability zone (Zone-redundant)
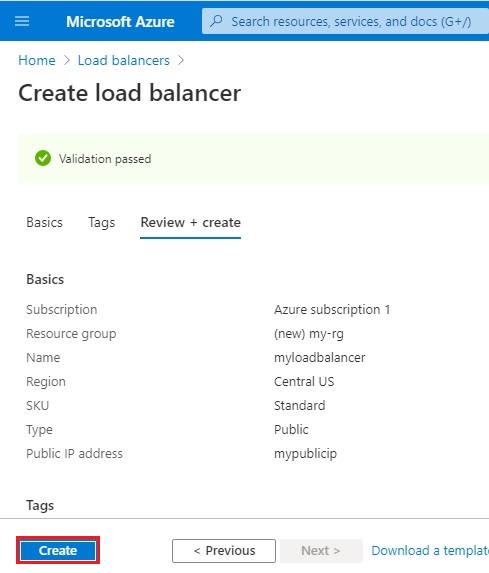
Select Review + create >
7- Click on Create.
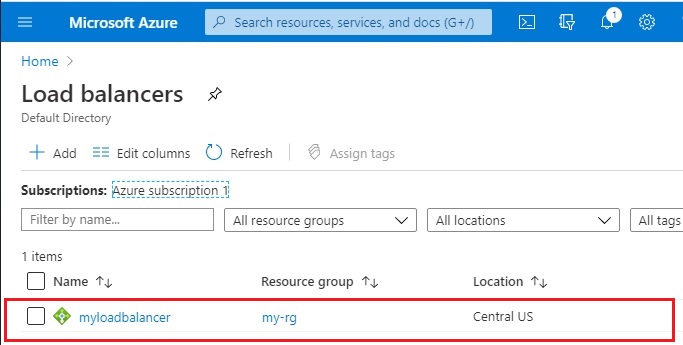
8- Now you can see load balancer successfully created.
Create backend servers
In this step, I will create a virtual network, VM (virtual machines) in different zones. For the region, and then install IIS on the VMs to help test the zone-redundant load balancer. Therefore, if a zone fails, the health probe for virtual machines in the same zone fails, and then traffic continues to be served by VMs in the other zones.
Create virtual networks
Log in to the Azure portal
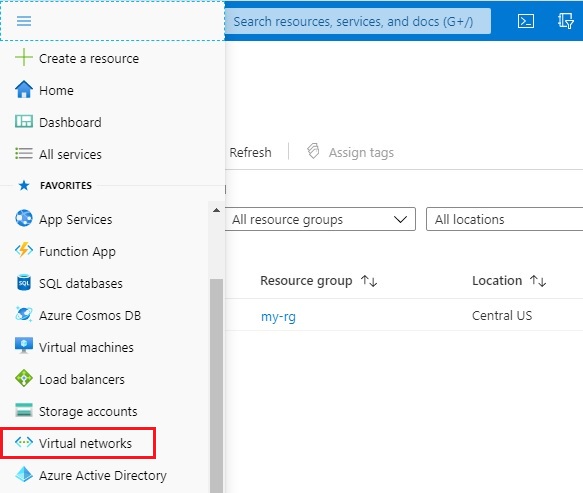
1- In the Azure portal, choose Azure menu bar and then select Virtual Network.
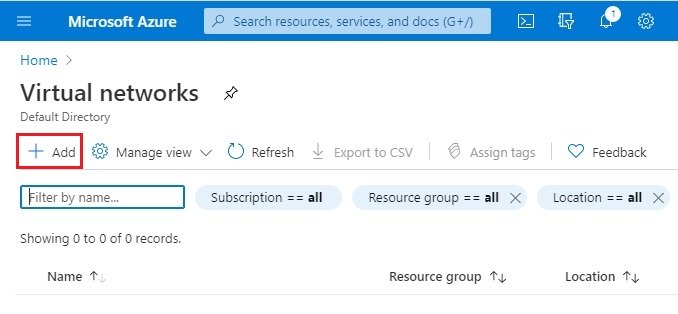
2- Click on + Add to create virtual network.
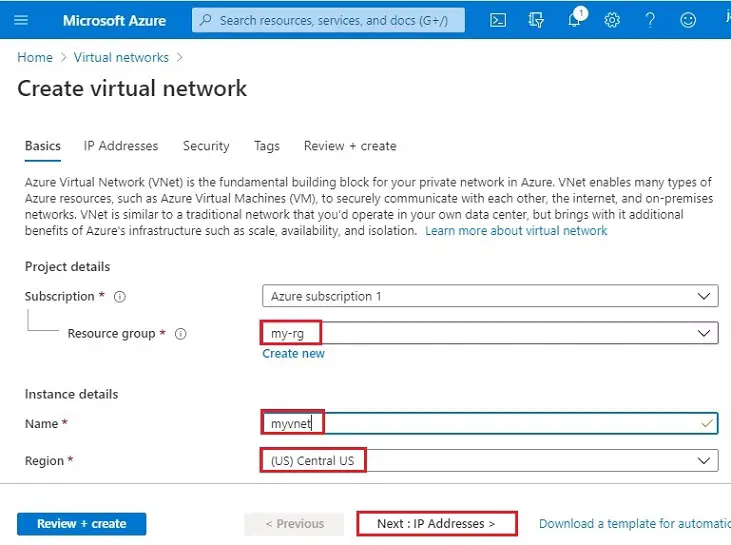
3- Select your subscriptions
Resource group (my-rg)
Instance details
Virtual network name (myvnet)
Regions (Central US) and then click Next : IP Address >
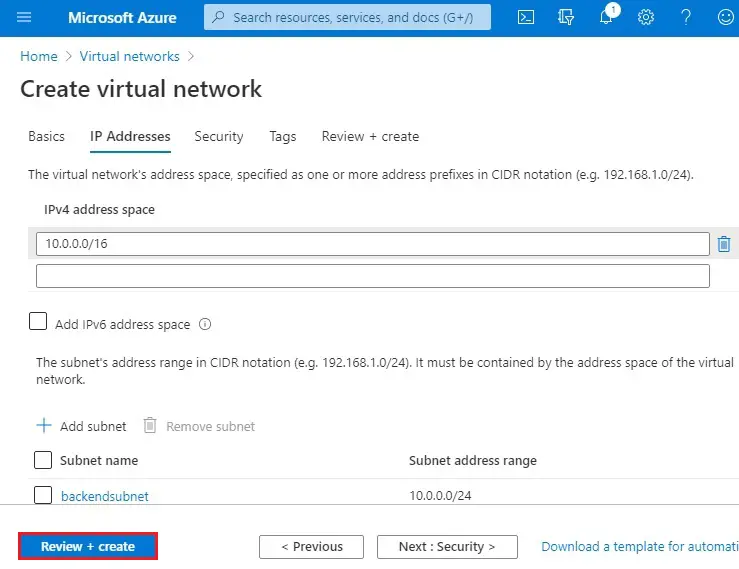
4- IP Addresses tab, type 10.0.0.0/16 for the IPv4 Address Space field. Click the + Add subnet button below.

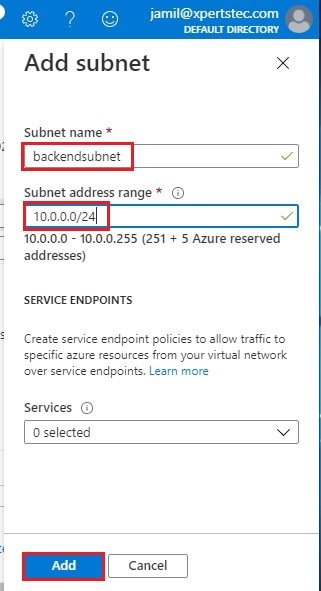
5- Add subnet wizard;
Name (backendsubnet)
Subnet address range types 10.0.0.0/24 and then click Add.
6- Select Review + Create.
7- Select Create.
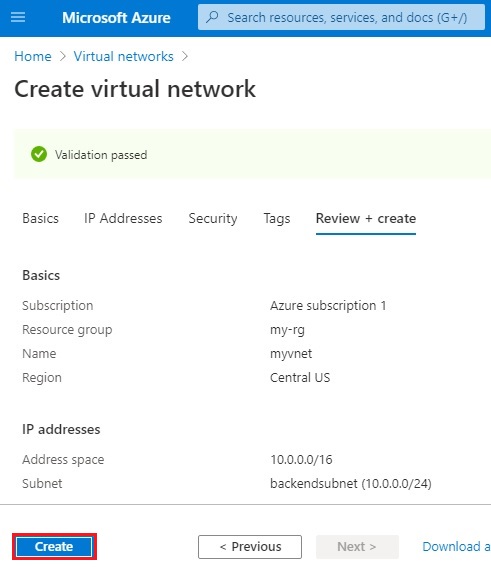
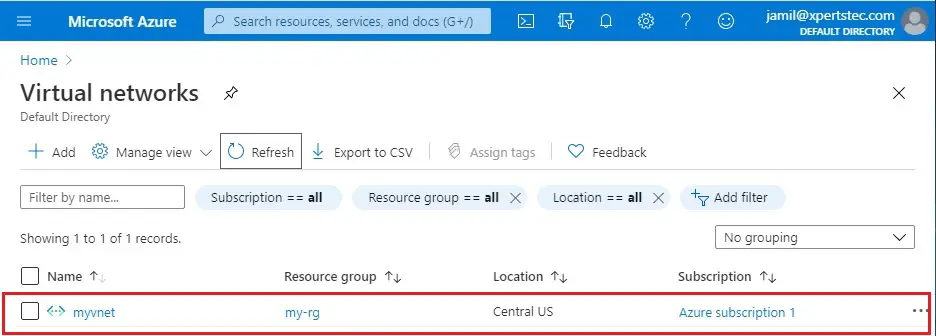
8- Virtual network successfully created.
Create a network security group
Create “network security group” to specify inbound connections to our virtual network.
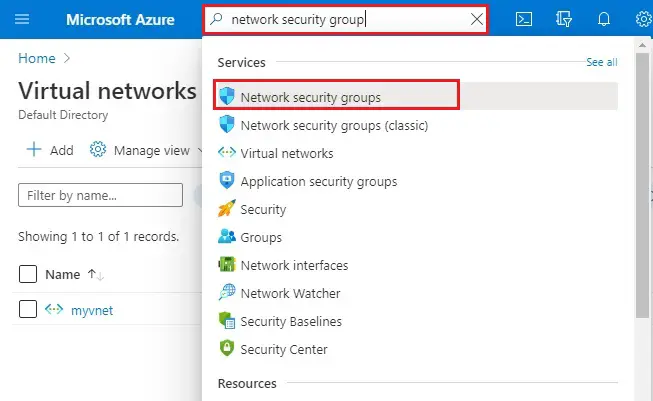
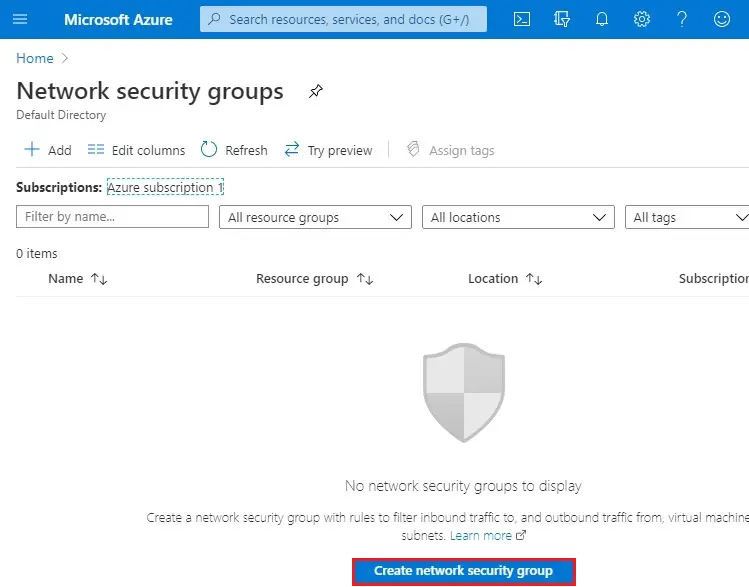
1- In Microsoft Azure portal, in the search box type Network Security Group, and select it.
2- Click Create network security group.
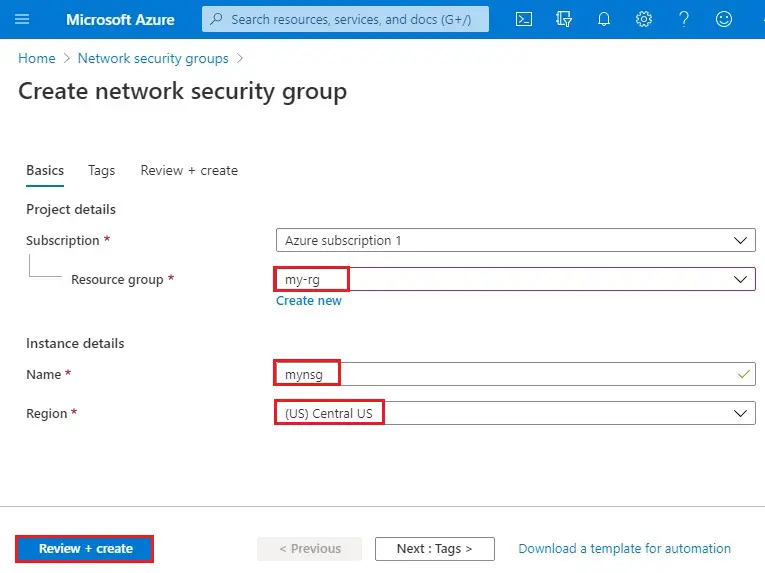
3- Create network security group wizard
Name of the existing resource group (my-rg)
Name (mynsg) Network Security Group
Region (Central US) and select Review + create
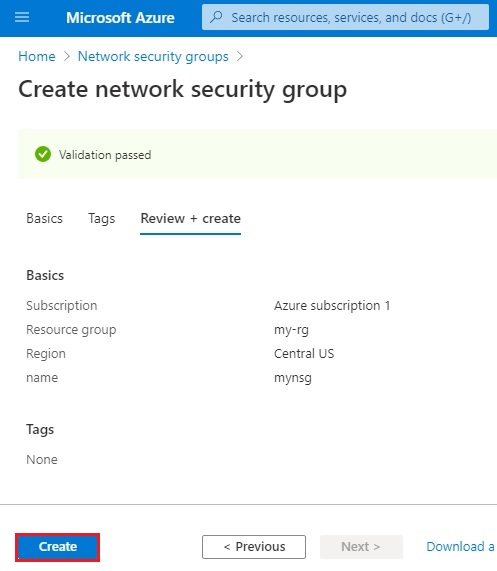
4- Select create.
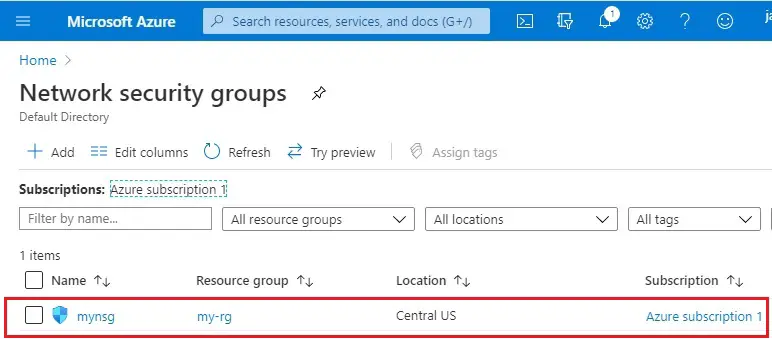
5- Network Security group successfully created.

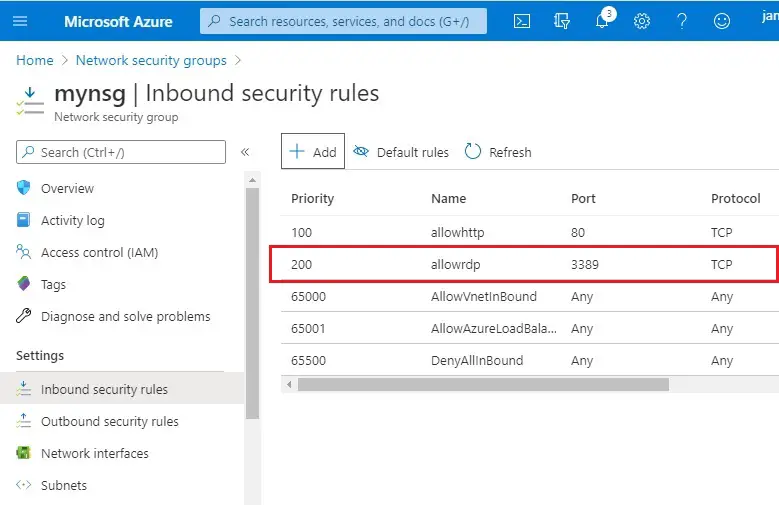
Create network security group rules
In this portion, we will create network security group rules to allow inbound connections using HTTP and RDP using the Azure portal.
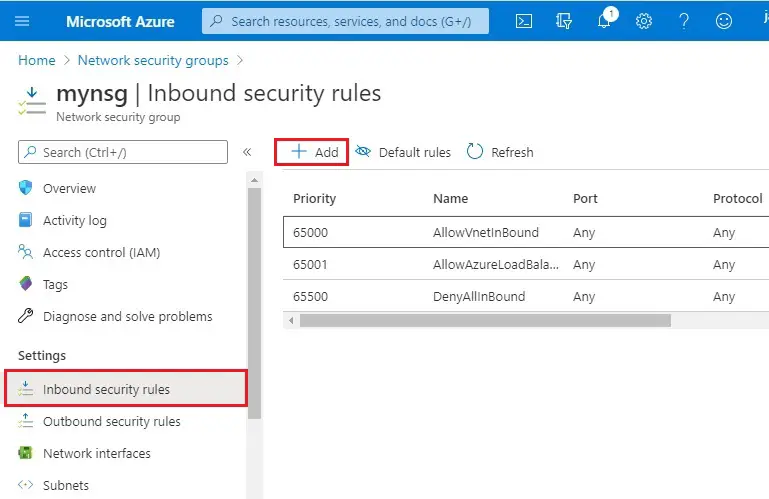
1- Select your network security group.
2- Under Settings, select Inbound security rules, and then click Add.
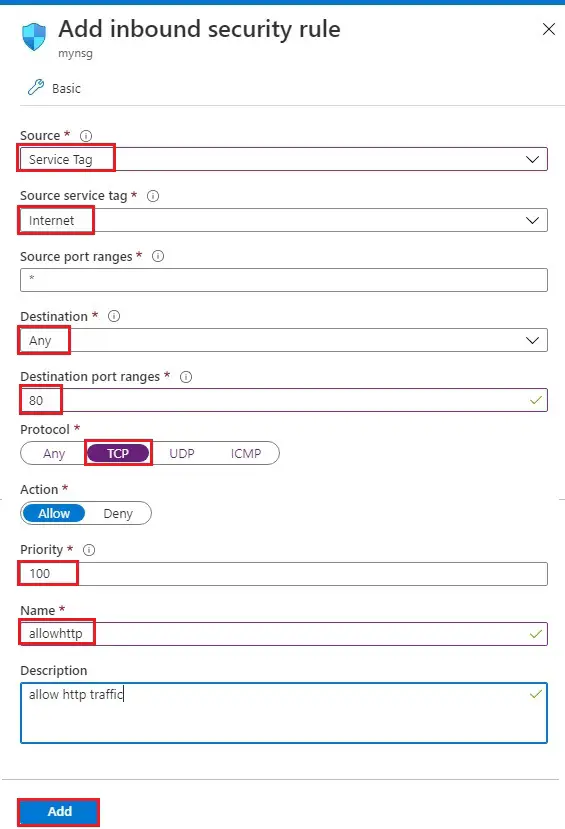
3- Source (Service Tag)
Source service tag (Internet)
Destination port ranges (80)
Protocol (TCP)
Action Allow (Allow)
Priority (100)
Load balancer rule name (allowhttp)
Description (allow HTTP traffic)
Click Add.
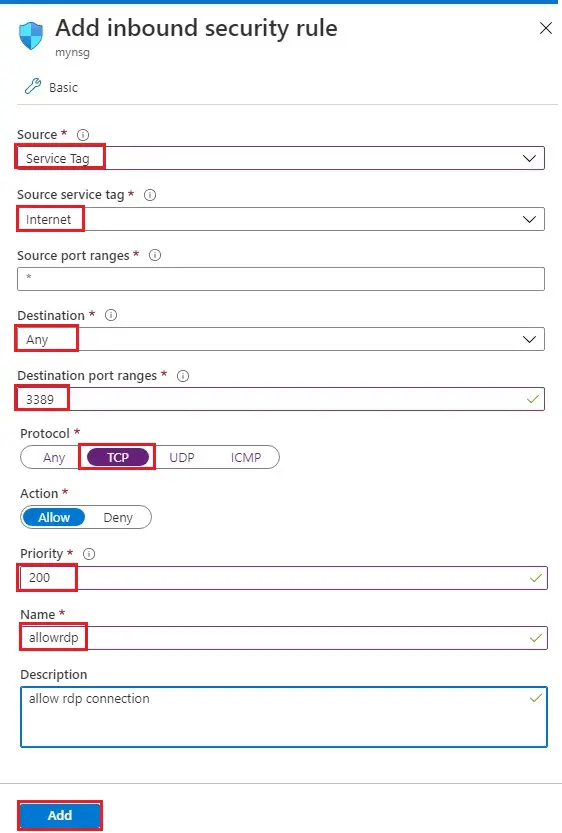
4- Create another rule to allow for an inbound RDP connection using port 3389.
5- Source (Service Tag)
Source service tag (Internet)
Destination port ranges (3389)
Protocol (TCP)
Action Allow (Allow)
Priority (200)
Load balancer rule name (allowrdp)
Description (allow RDP connection)
Click Add.
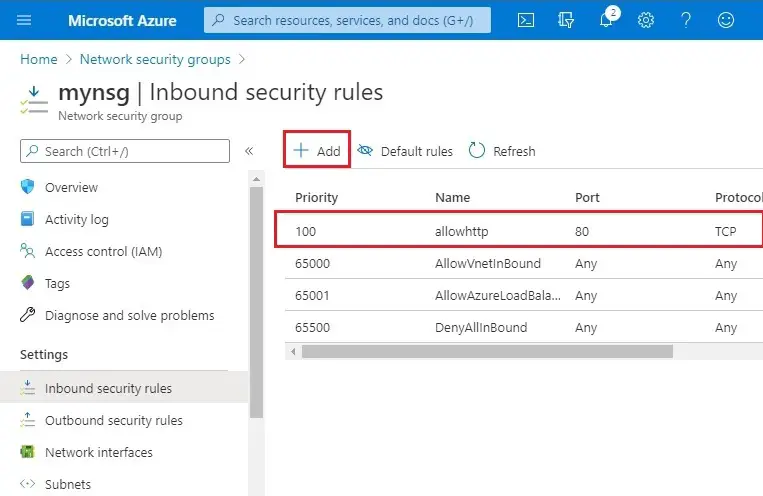
6- Inbound security rules successfully created.
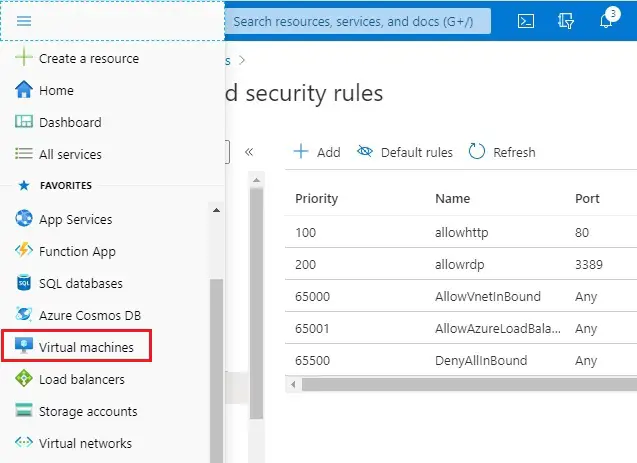
Create virtual machines
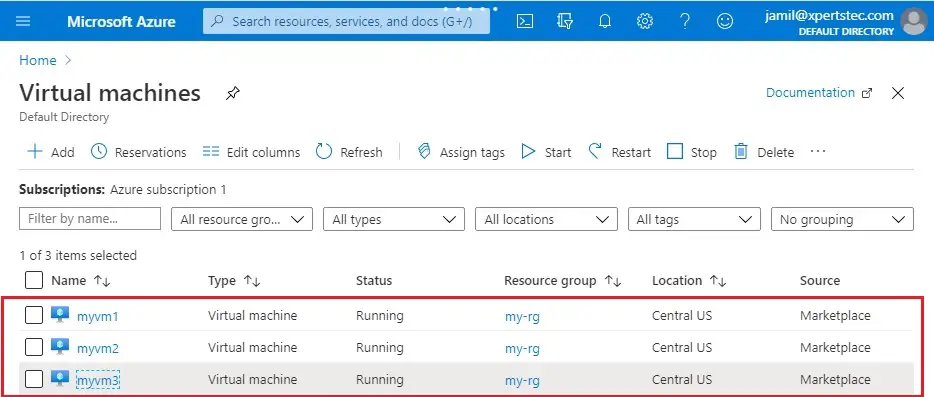
Now we need to create virtual machines in different zones (zone 1, zone 2, and zone 3) for the region that can act as “backend servers” to the load balancer.
First VM
1- Select Azure menu bar and then select virtual machine.
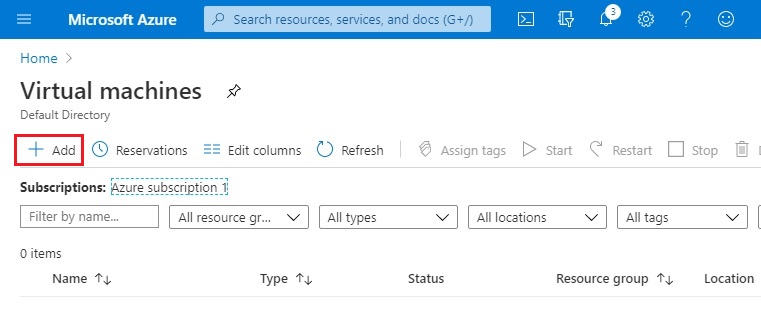
2- Select + Add
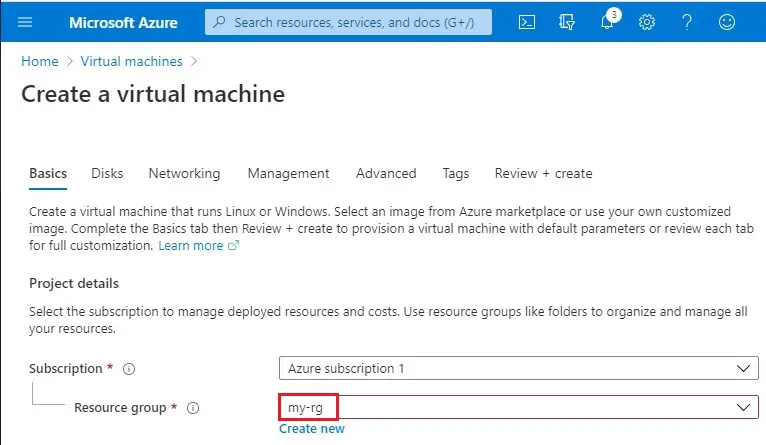
3- Select existing resource group (my-rg).
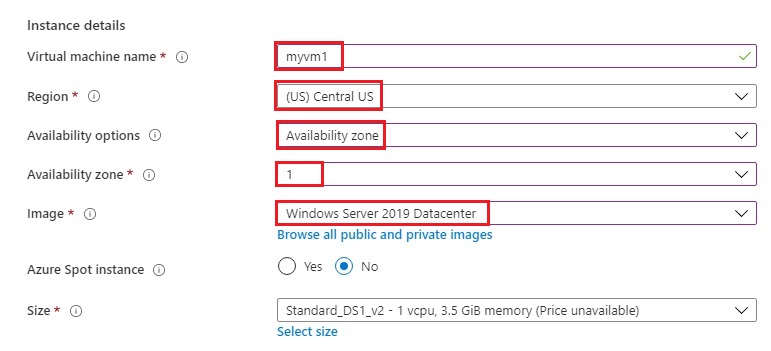
4- Virtual machine name (myvm1)
Region (Central US)
Availability options (Availability zone)
Availability zone (1)
Image (Windows Server 2019 Datacenter
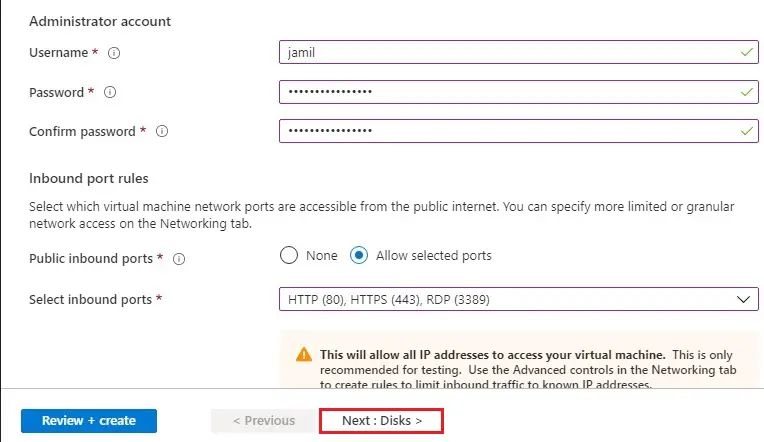
5- Enter username, password
Public inbound ports (Allow selected ports)
Select inbound ports (HTTP, HTTPS, RDP)
Select Next : Disks > and then select Next : Networking >
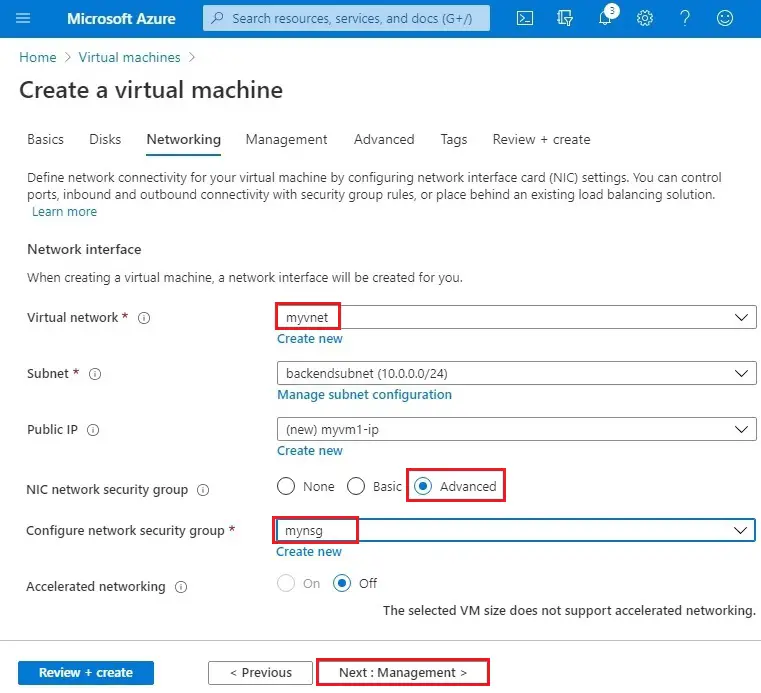
6- Virtual network (myvnet)
NIC network security group (advanced)
Configure network security group (mynsg)
Select Next : Management >
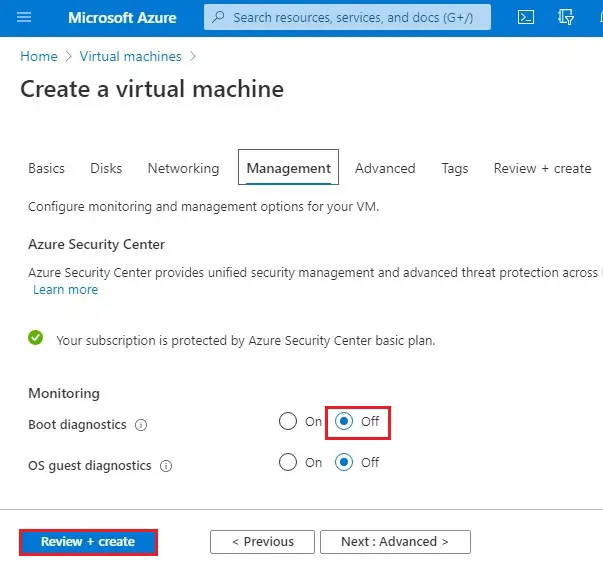
7- Boot diagnostic (Off) select Review + create and then select review + create.
Create 2nd VM
| Settings | Value |
| Resource group | my-rg |
| Name | myvm2 |
| Region | Central US |
| Availability set | Availability zone |
| Availability zone | 2 |
| Server | Windows server 2019 datacenter |
| Administrator account | Username, password |
| Public Inbound ports | HTTP, HTTPS, RDP |
| Networking, virtual network | myvnet |
| NIC network security group | Advanced |
| Configure network security group | mynsg |
| Management | Boot diagnostic off |
| create |
Create 3rd VM
| Settings | Value |
| Resource group | my-rg |
| Name | myvm3 |
| Region | Central US |
| Availability set | Availability zone |
| Availability zone | 3 |
| Server | Windows server 2019 datacenter |
| Administrator account | Username, password |
| Public Inbound ports | HTTP, HTTPS, RDP |
| Networking, virtual network | myvnet |
| NIC network security group | Advanced |
| Configure network security group | mynsg |
| Management | Boot diagnostic off |
| create |
Now you can see three virtual machine has been created.
Install IIS on VMs
How to install Web server IIS
1- # install IIS server role
Install-WindowsFeature -name Web-Server -IncludeManagementTools
2- # remove default htm file
remove-item C:\inetpub\wwwroot\iisstart.htm
3- # Add a new html file that displays server name
Add-Content -Path “C:\inetpub\wwwroot\iisstart.htm” -Value $(“Hello World from” + $env:computername)
4- C:\inetpub\wwwroot
Right-click on iisstart and open with notepad
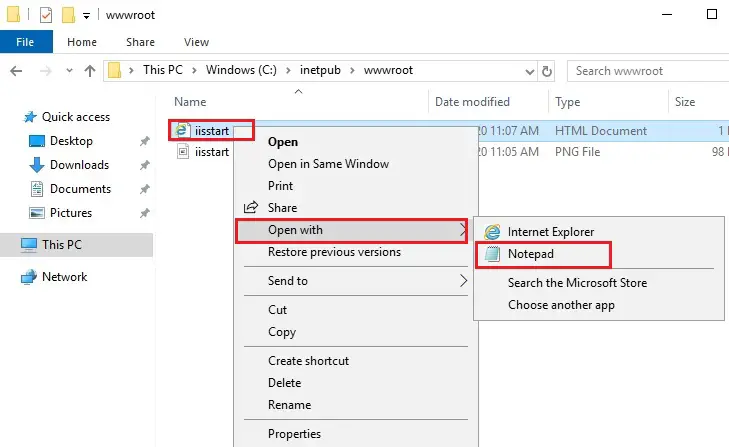
5- Rename text.
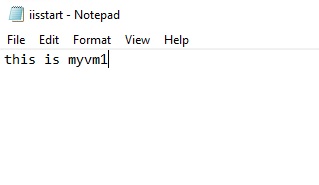
Repeat steps 1 to 5 to install web server IIS and the updated iisstart.htm file on myVM2 and myVM3.
Create load balancer Resources
In this section, we will configure load balancer settings for a backend address pool and a health probe, and specify load balancer and NAT rules.
Create a backend address pool
To “distribute traffic” to the VMs virtual, a “backend address pool” contains the IP addresses of the virtual (NICs) connected to the load balancer.
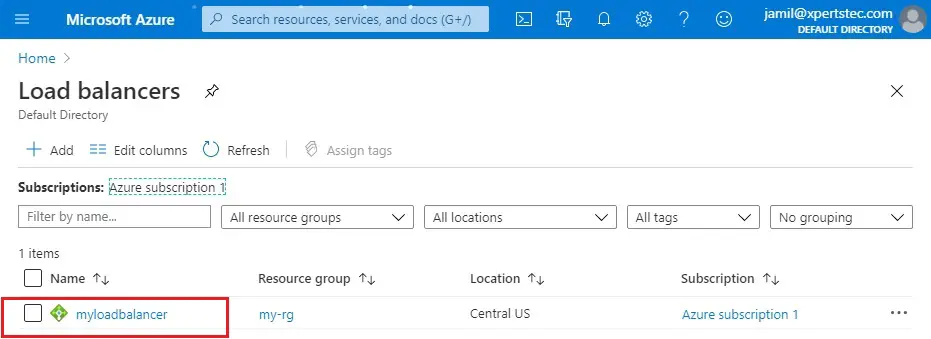
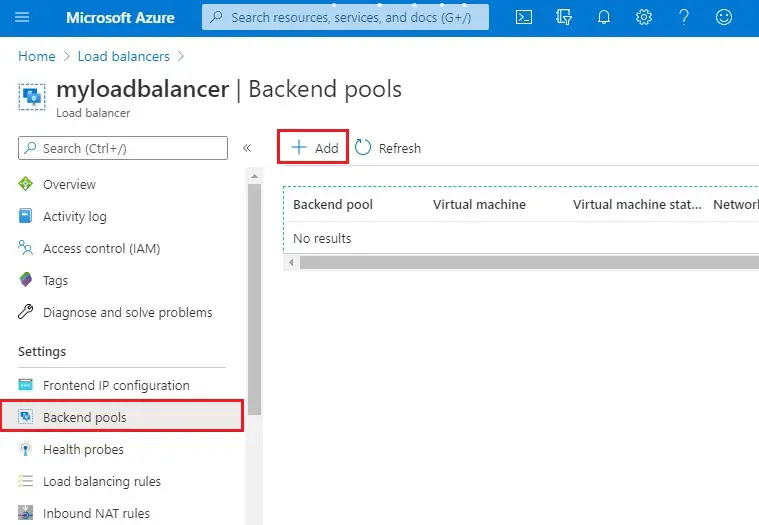
1- Select Azure menu and then select load balancer.

2- Click on myLoadBalancer.
3- Under Settings, select Backend pools, then click + Add.
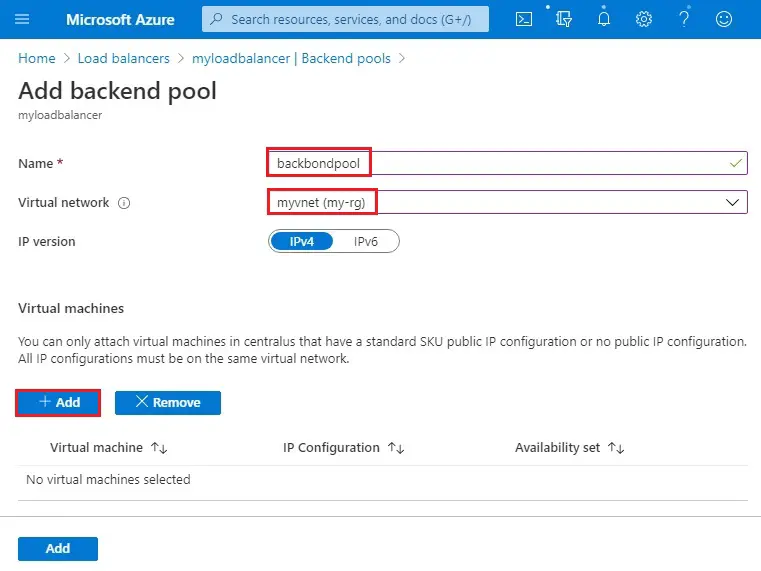
4- Add a backend pool wizard, do the following.
backend pool name (backendpool).
Virtual network, in the drop-down menu, select (myvnet)
Under Virtual machines click the add button.
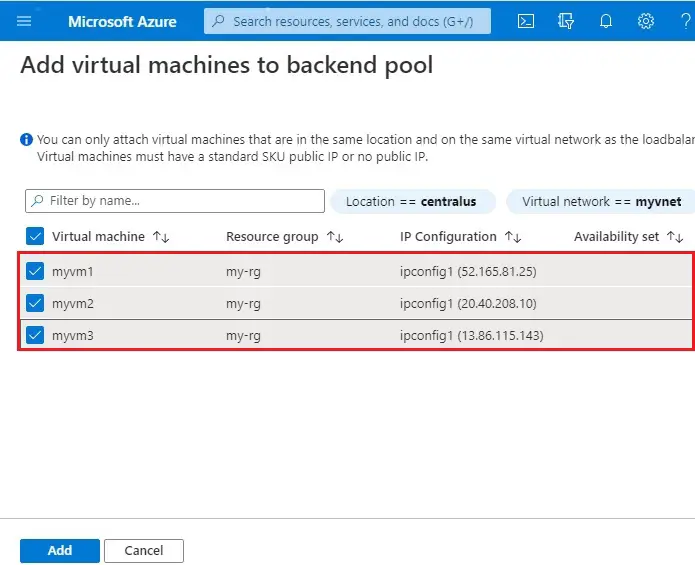
5- Select the virtual machines to add to backend pool and then click add.
6- Click Add.
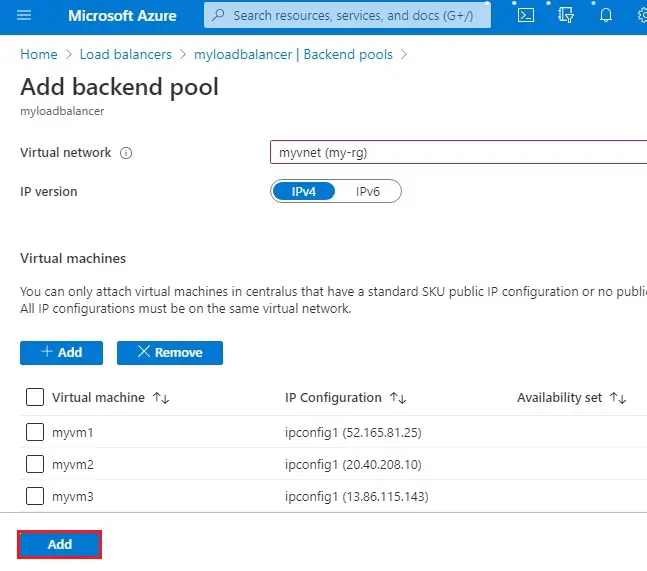
7- Make sure your load balancer backend pool setting displays all the 3 VMs and then select Health probe.
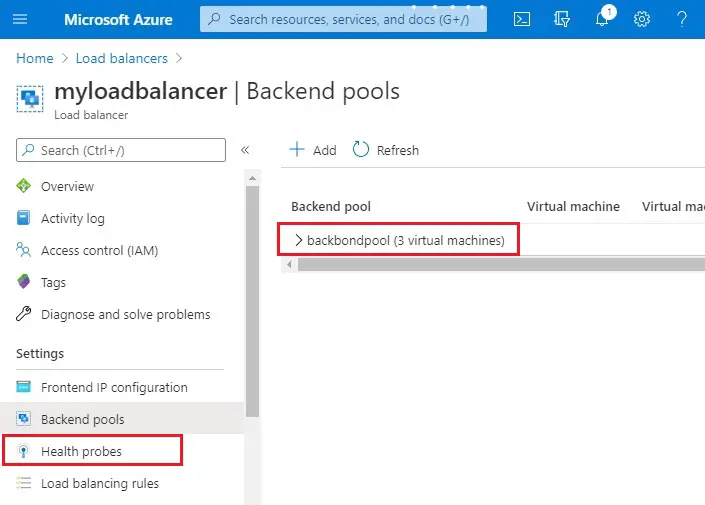
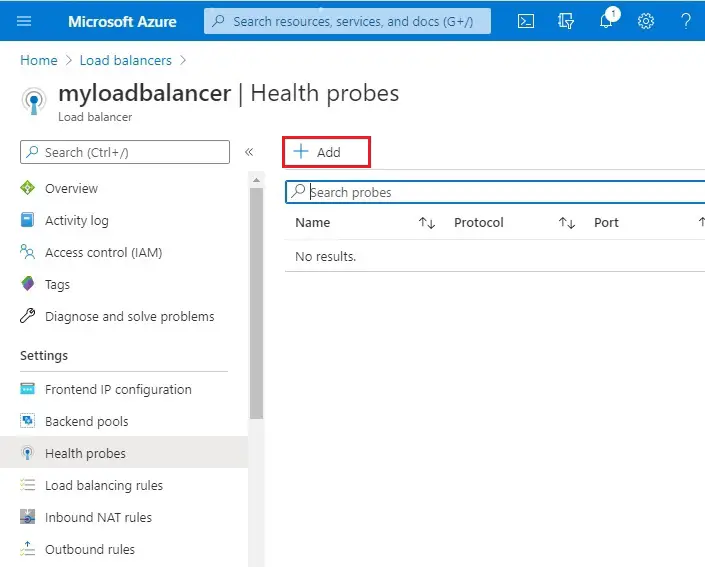
Create a health probe
To permit the load balancer to monitor the status of our app, you use a health probe. The health probe dynamically adds or removes virtual machines from the load balancer rotation based on their response to health checks.
1- Click + Add.
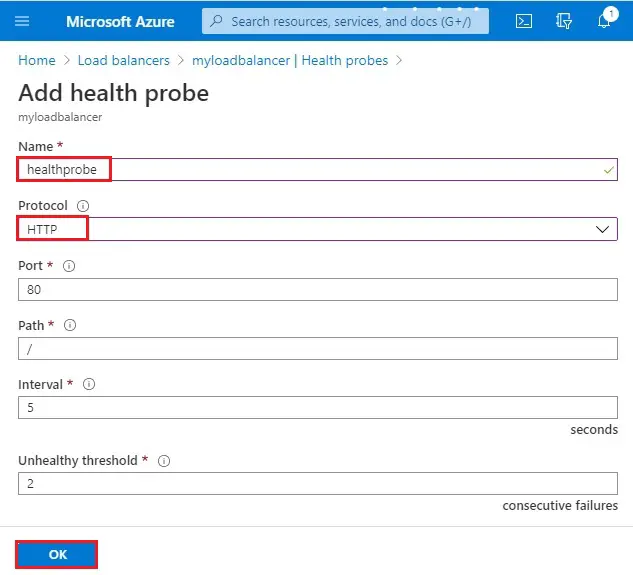
2- Add health probe wizard
Name (healthporbe)
Protocol type (HTTP)
Port number (80)
Number of Interval (5 seconds)
Number of “Unhealthy threshold” or consecutive probe failures (two seconds) that must occur before a VM is considered unhealthy.
Click OK.
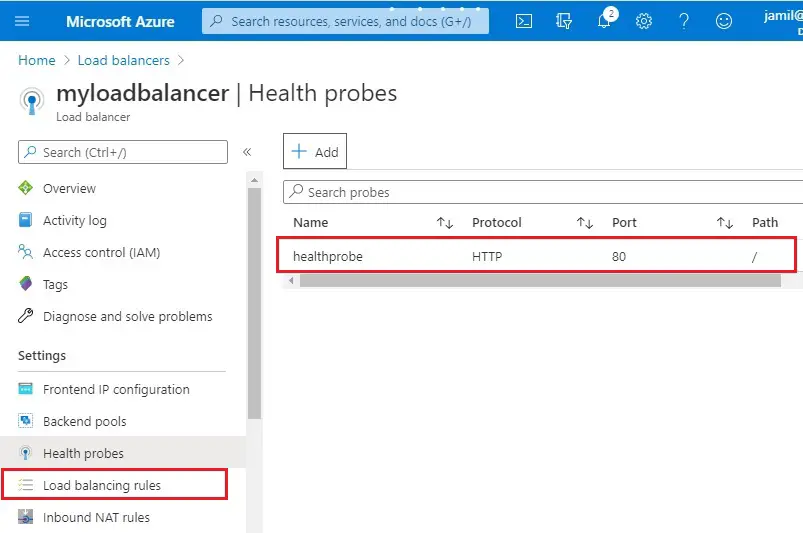
3- Health probe successfully created
Under settings click on load balancing rule
Create a load balancer rule
A load balancer rule is used to specify traffic how it distributed to the VMs. You specify the front-end IP configuration for the incoming traffic and then the back-end IP pool to receive the traffic, ahead with the required source and destination port.
1- Click + Add.
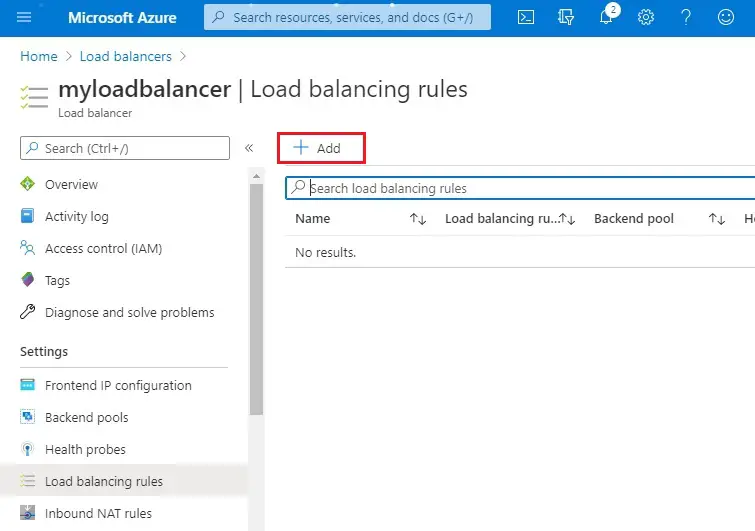
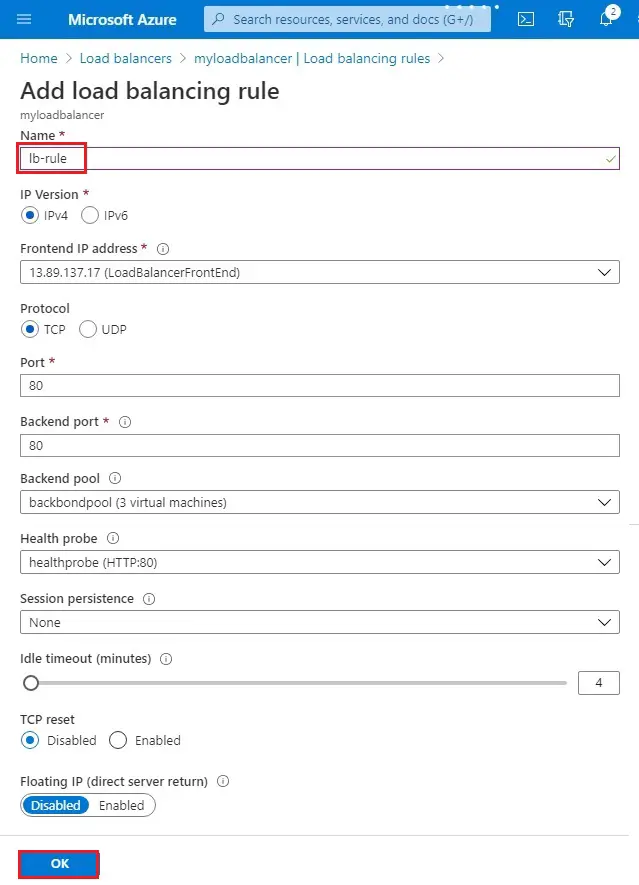
2- Add load balancing rule wizard.
Name (lb-rule)
IP version (IPv4)
Protocol type TCP
Port number (80)
Backend port (80)
Backend pool (3 virtual machines)
Health probe name (healthprobe)
Click Add.
Test the load balancer
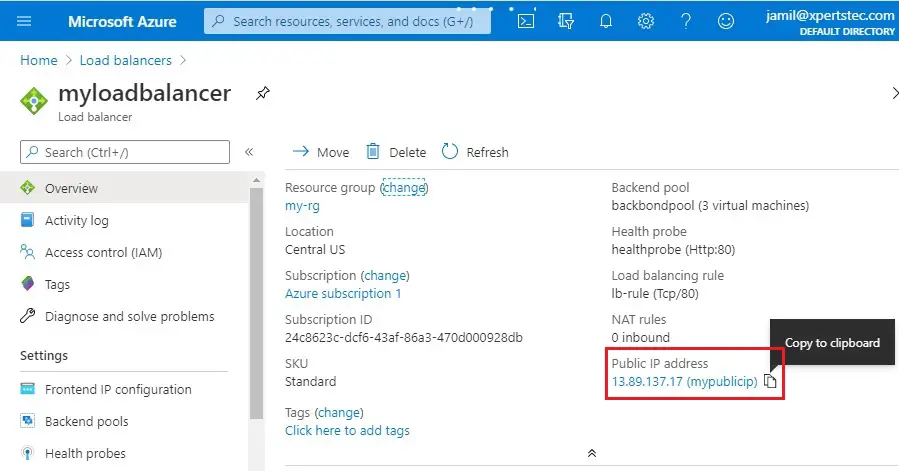
1- Select Azure menu and then select Load balancers.
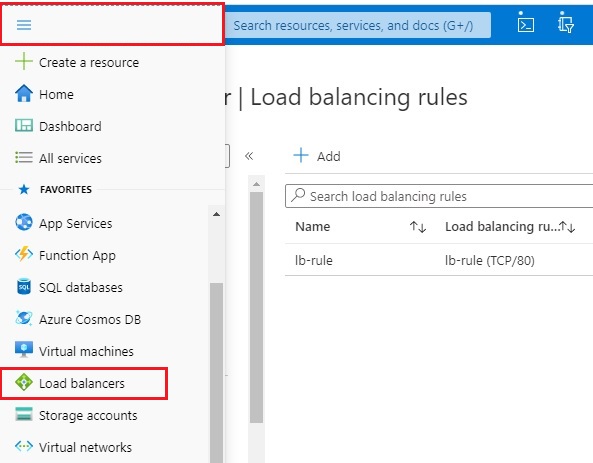
2- Click on myloadbalancer
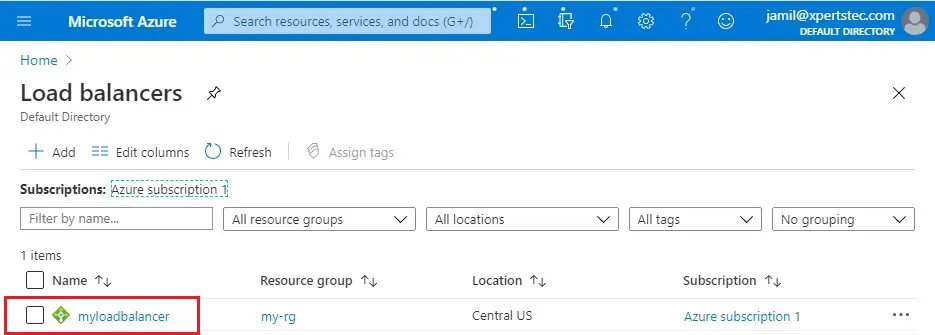
3- On the overview screen, find the public IP address for the Load Balancer.
Select mypublicip
Copy the public IP address,
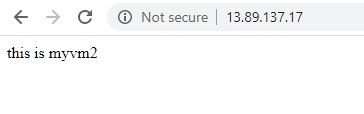
4- Open any web browser and then paste it into the address bar.
On the browser, the default page of IIS Web server is displayed.
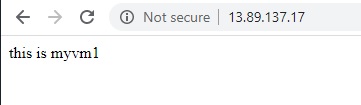
5- You can force-refresh your web browser, to see the load balancer distribute traffic across the VMs distributed across the zone