
Install Hyper-V Server 2019, in this article, I will explain how to install Hyper-V on Windows Server 2019. We can install Hyper-V in Windows Server using Server Manager, and PowerShell command. Download Windows Server 2019 from Microsoft Website.
Install Hyper-V from Server Manager
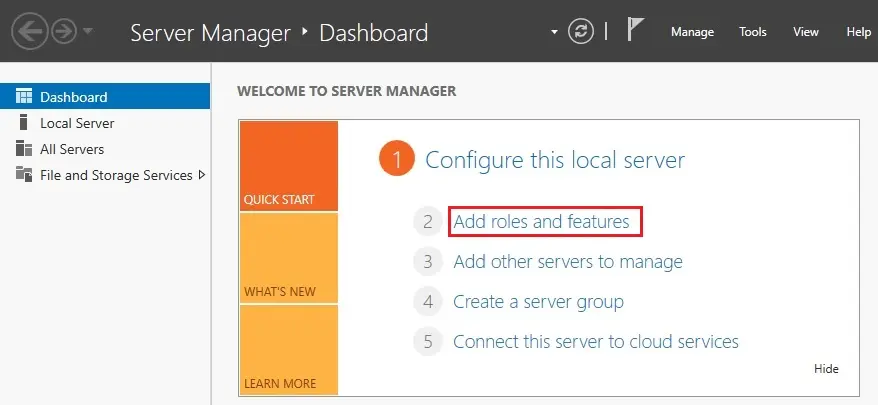
1- Open the Server Manager & then click on Add roles and features
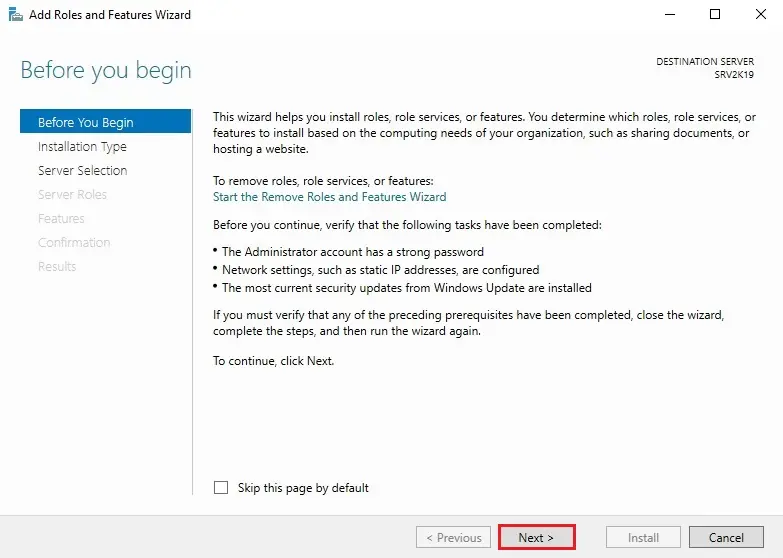
2- Add role and features wizard, and click the next button
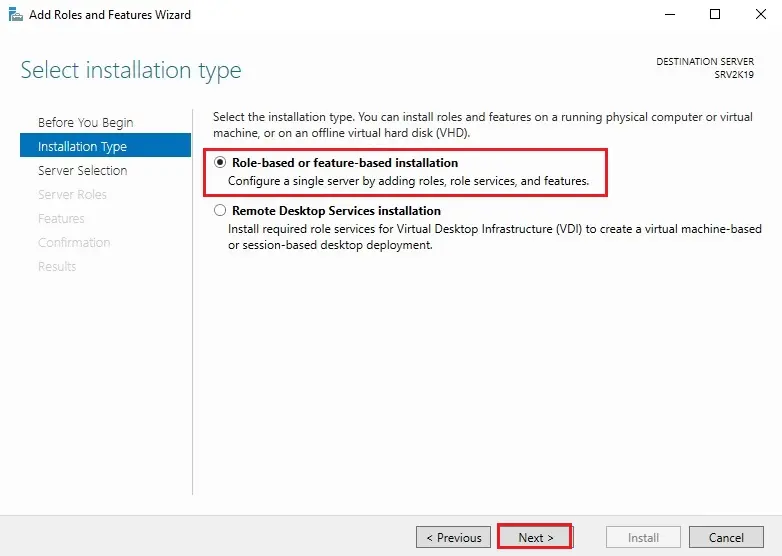
3- Choose Role-based or feature-based installation option and then on click next
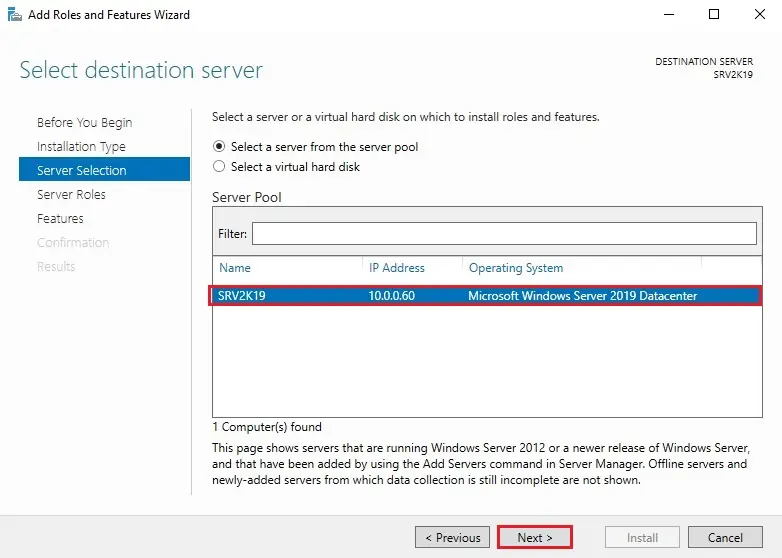
4- Choose a server from the pool and then click next
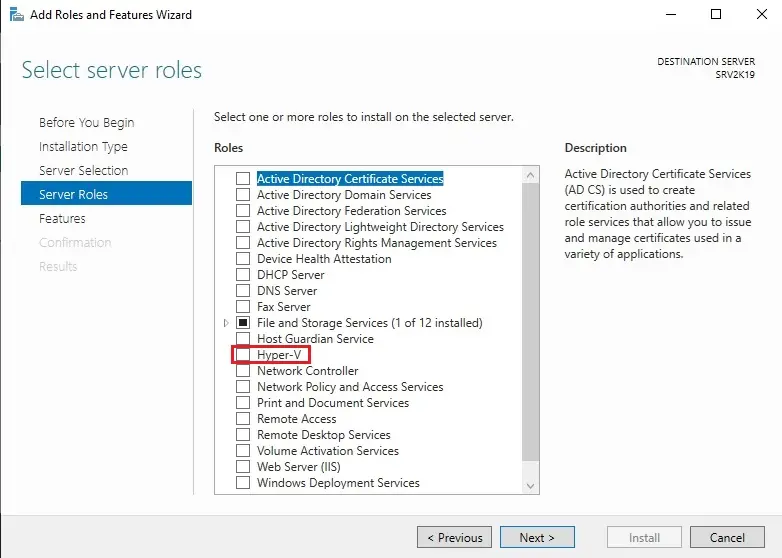
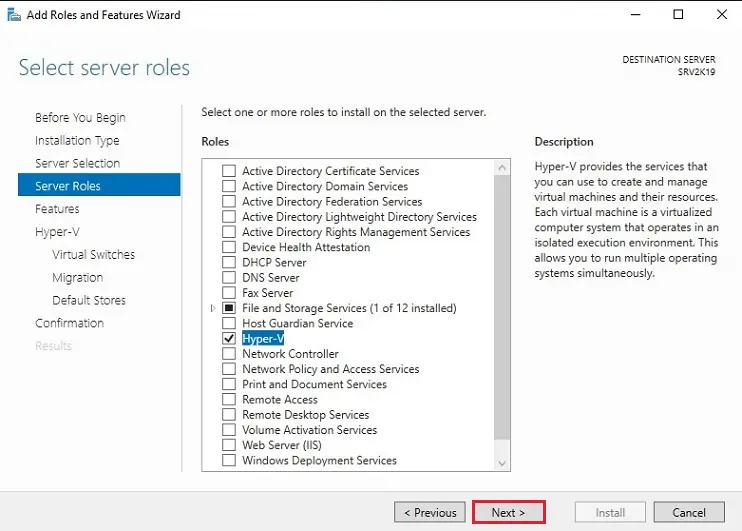
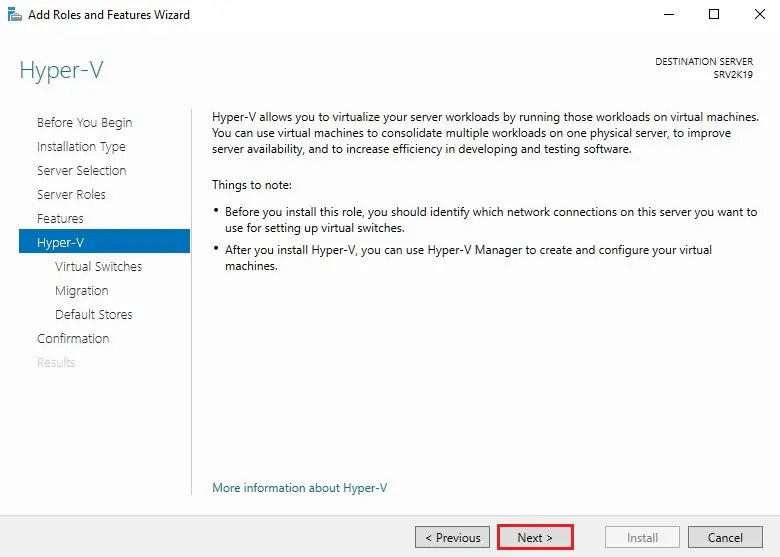
5- Select the Hyper-V role
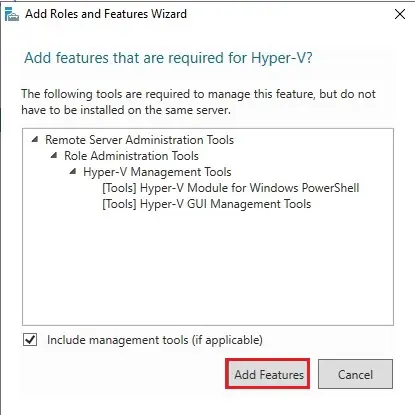
6- Select the add features button to install the required features
7- Click next
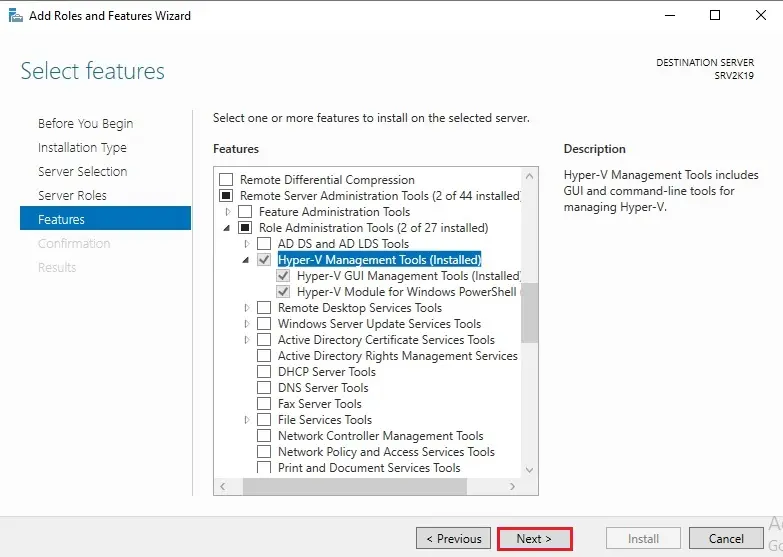
8- Install Hyper-V, Add roles and feature wizard Features option we can view the hyper-V management tools, also we can select the different selection of management tools if required
9- Click Next
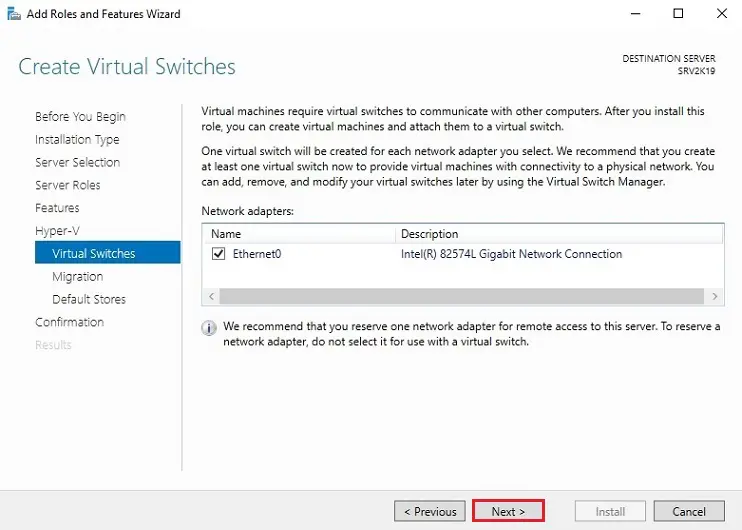
10- Choose a physical Ethernet adapter to host a Hyper-V virtual switch and then click next
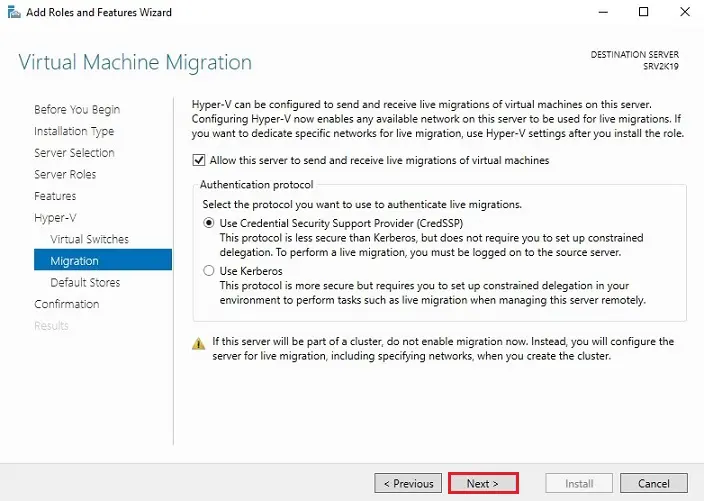
11- Install Hyper-V, the Live Migration security control, these settings are shown only apply to Shared Nothing Live Migration and not clustered Live Migrations. Select the required option and then click next, if required you change this option later.
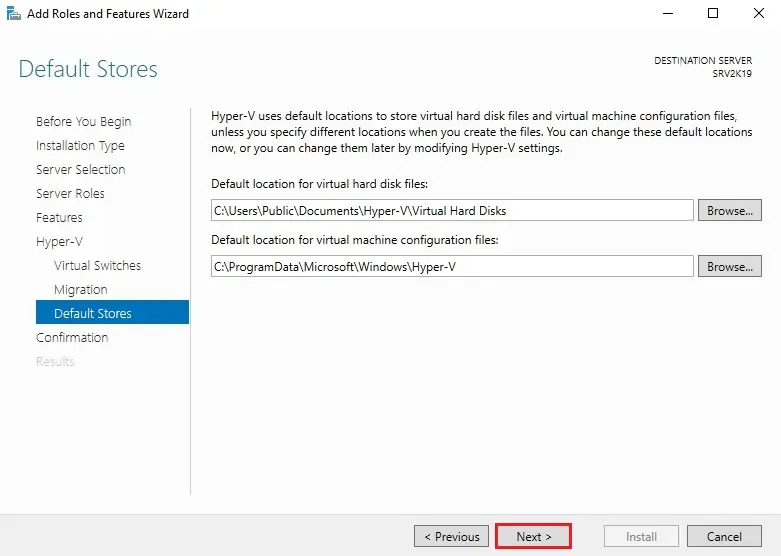
12- Select the storage location for virtual machines and virtual hard disks, or leave it as default path and you can change it later. Click next
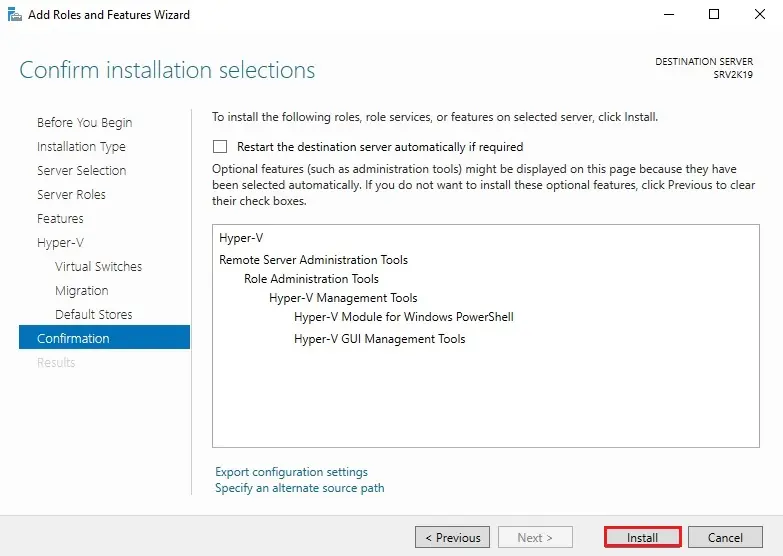
13- Install Hyper-V, Review the options that you have select and optionally you can export them. Click on Install
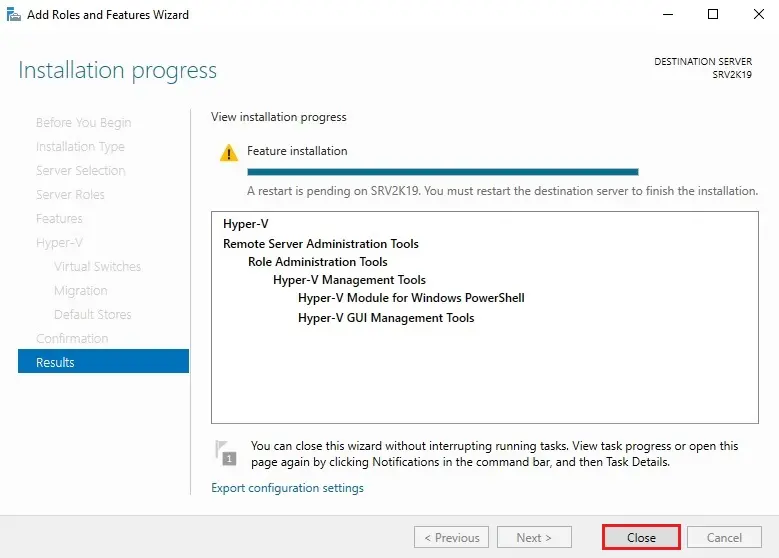
14- Hyper-V roles successful installed and then click the close button
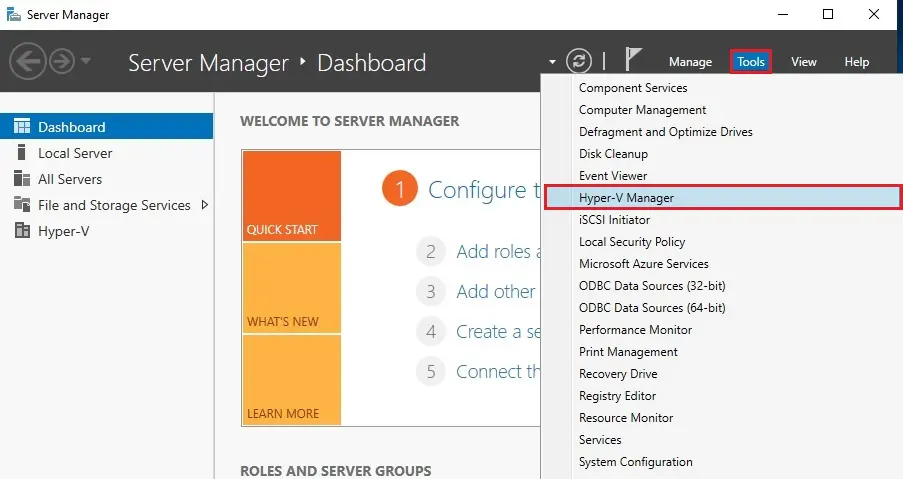
15- Click tools and then click on Hyper-V Manager
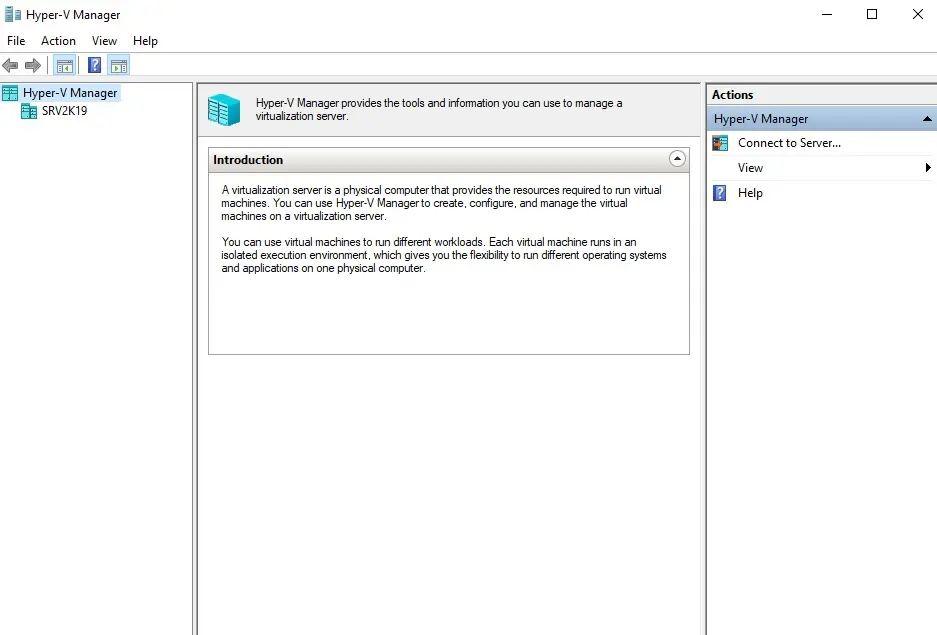
16- Hyper-V Manager
Install Hyper-V with PowerShell
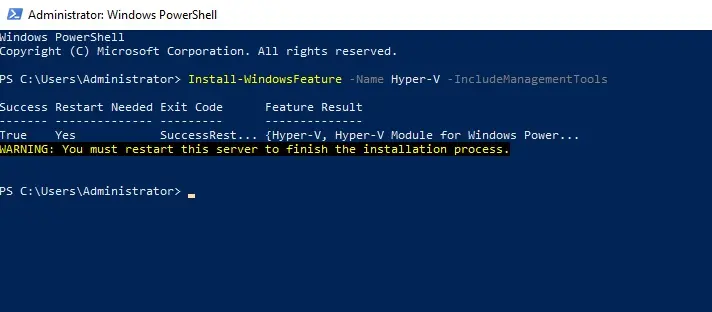
17- PowerShell is the easiest way to install Hyper-V on Windows Server.
Open the Windows PowerShell and run the below command.
Install-WindowsFeature -Name Hyper-V -IncludeManagementTools
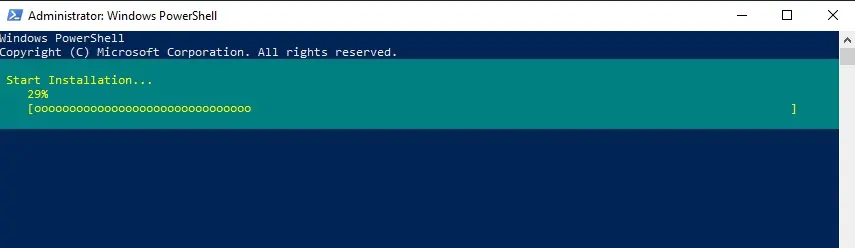
18- Hyper-V roles installation in progress
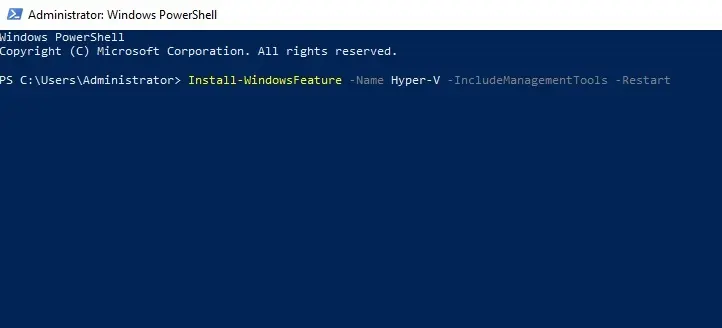
19- We can install Hyper-V with automatic system restart also using below command
Install-WindowsFeature -Name Hyper-V -IncludeManagementTools -Restart
Install Hyper-V with DISM
Run the Windows PowerShell and then run the below command and we need to restart after the successful installation
dism /Online /Enable-Feature /FeatureName:Microsoft-Hyper-V /All
Read more: How to Install Hyper-V Core 2019.
No Comments
Like!! Thank you for publishing this awesome article.
Thank you