In this blog, I will do the installation and configuration of Filezilla FTP Server on my network using free Filezilla Server software, in order to upload or download files from everywhere in the world.
First of all, we’d like to download Filezilla Server for Windows Click here.
Install Filezilla FTP Server
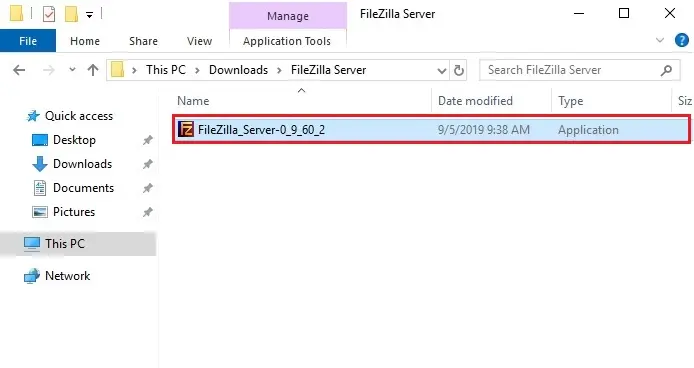
1- After downloading, double click at FileZilla_Server.exe to start out the installation.
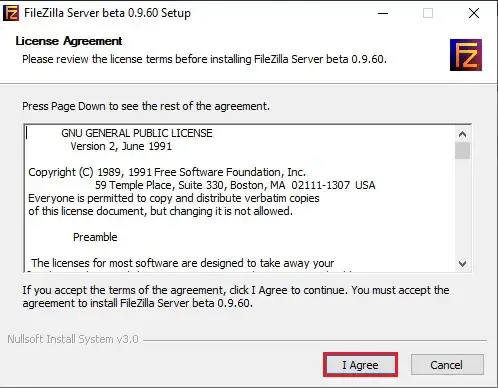
2- Click I Agree.
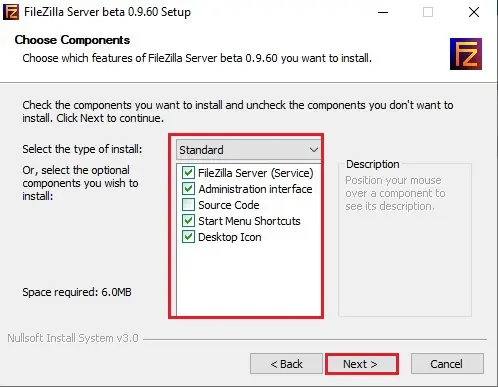
3- Choose which features you want to install and click next.
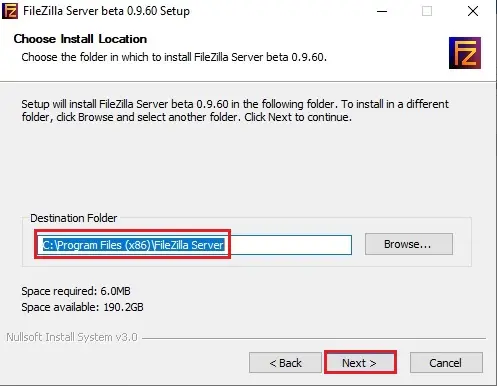
4- Click next.
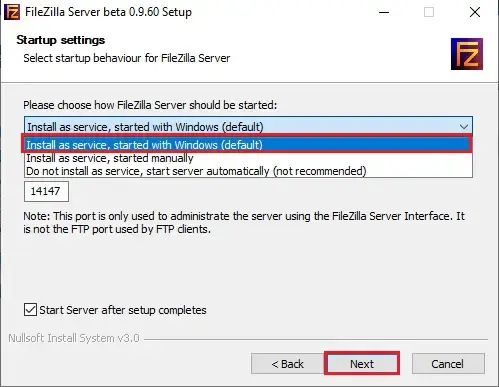
5- Select install as service, started with Windows (default) and click next.
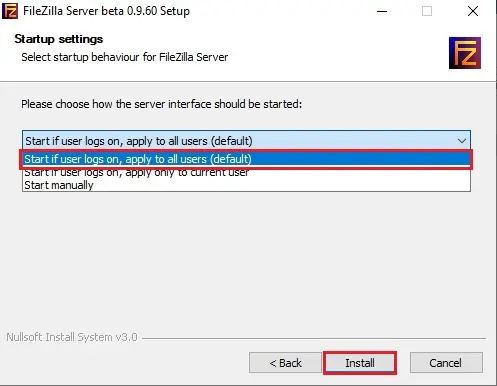
6- Select Start if the user logs on, applies to all users (default) and click install.
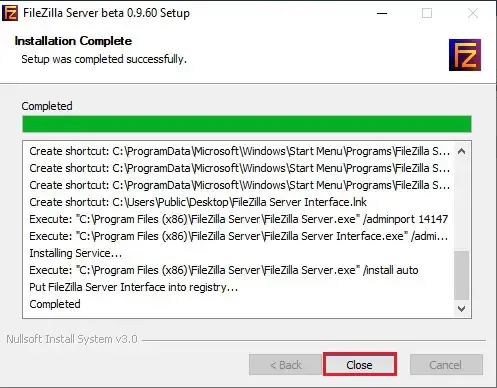
7- Installation completed successfully click close.
8- Launch the Filezilla Server application and click connect to administer (configure) your new FTP Server.
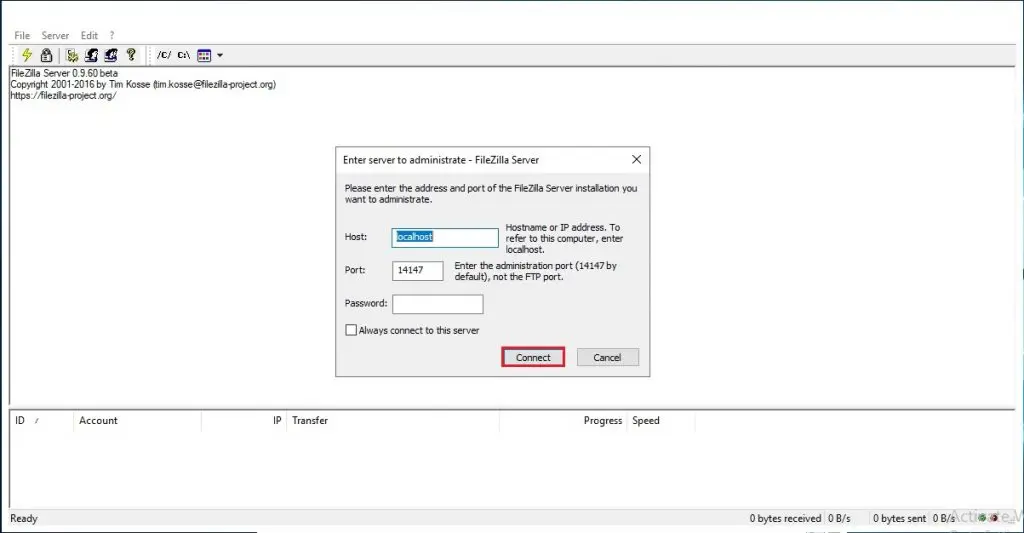
Filezilla Server configuration.
Create FTP Users and groups.
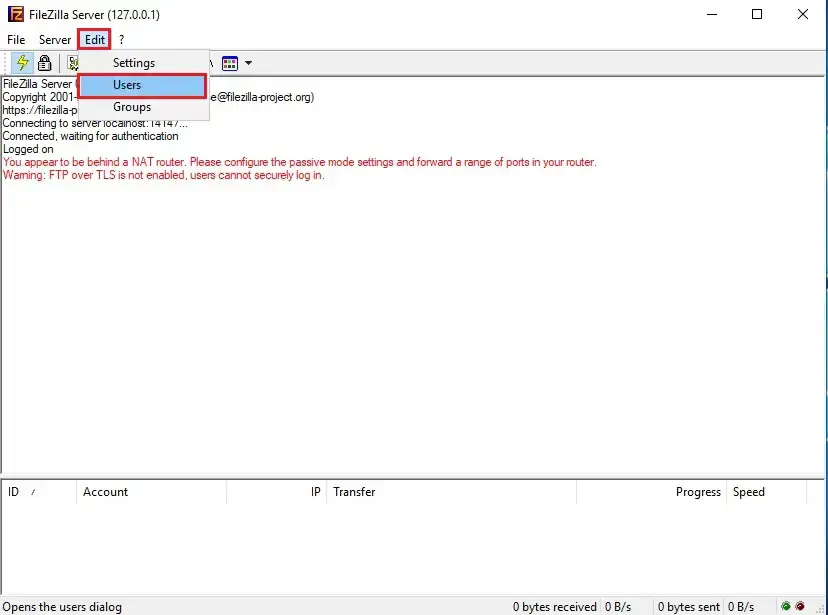
9- From the main menu click Edit and click Users.
Note: If you want to create several users to access your FTP server, with the same permissions, then choose Groups.
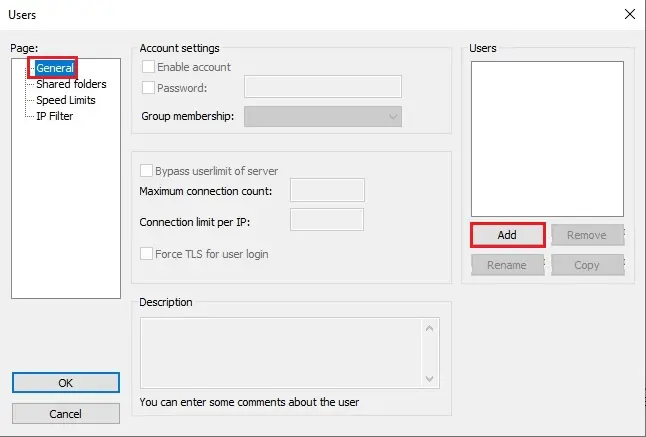
10- Select the General tab click Add to add the users that will have access to your FTP Server.
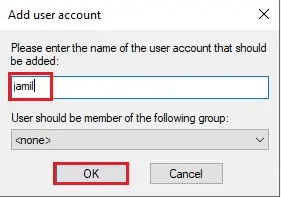
11- Type a name for the new user (Jamil) and click OK.
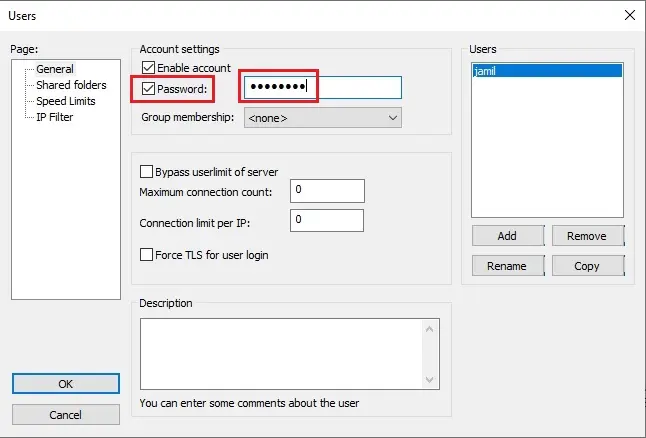
12- Under Account settings, check the Password checkbox and then type a password for the FTP user for security.
Create an FTP Share folder(s).
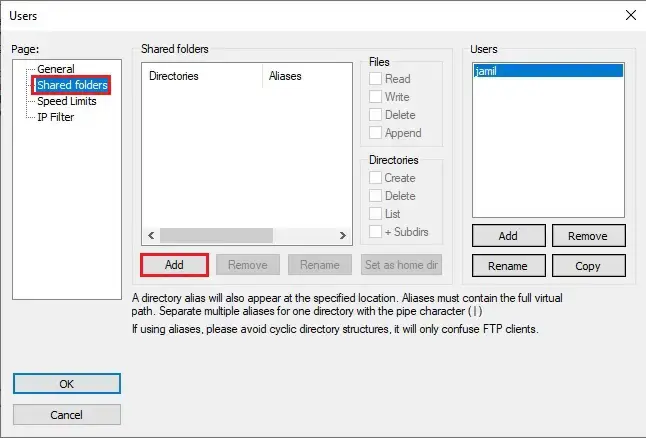
13- Under page tab, select Shared Folders option and click the Add button under Shared folders box, you need to choose the folder from your computer that folder will be shared via FTP. Note: If you haven’t already created a folder for FTP shared access, open Windows Explorer and create a new folder on your disk, before selecting the Add button.
Note: If you haven’t already created a folder for FTP shared access, open Windows Explorer and create a new folder on your disk, before selecting the Add button.
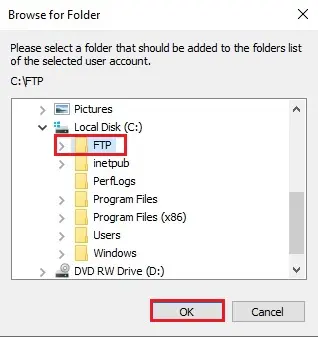
14- Select folder from your computer that will be used for FTP access (I have selected the FTP folder the one I have created in C Drive) and click ok.
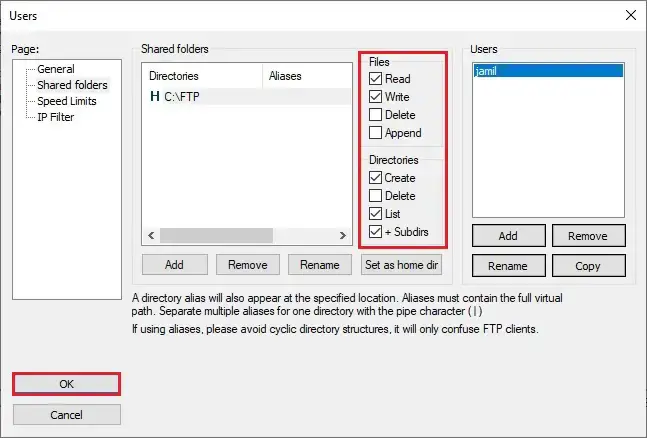
15- Now we need to choose user permissions for the shared folder (Read, Write, Delete, etc.) and click ok.
Secure your FTP Server.
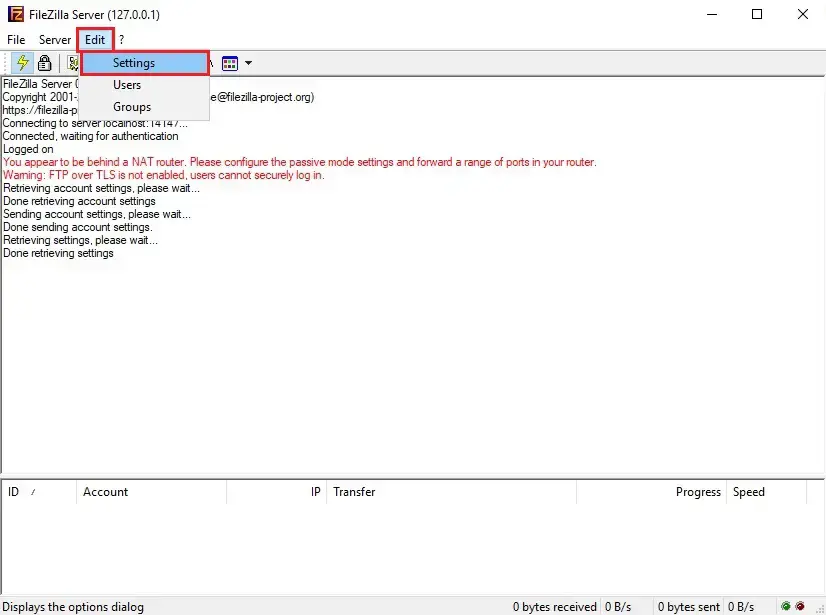
16- If you want to make your FTP Server more secure, then from the main menu select Edit and select Settings.
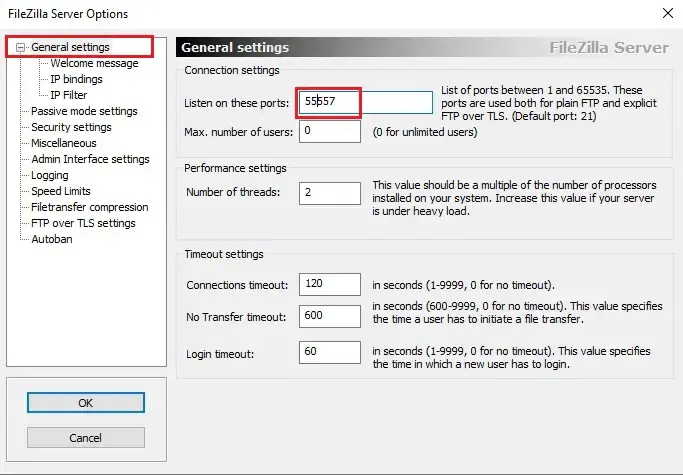
17- Select General settings to specify a different port than the 21 for FTP connections.
Note: if you want to access it from outside, then you need to map (forward) the new port to your FTP server’s internal IP Address (in Firewall/Router settings).
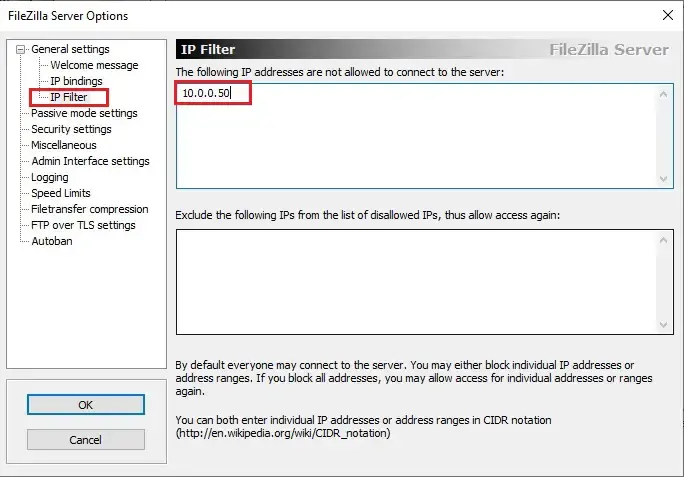
18- Select IP filter under general settings to specify which IP Address is allowed to access your FTP Server. In my test Labe, I am using the internal IP Address 10.0.0.50 to not allowed to connect to the FTP Server.
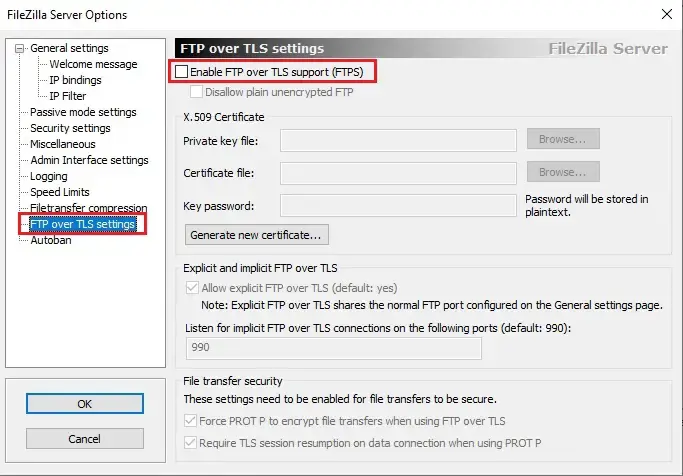
19- If we need to make our FTP Server more secure, then enable the FTP over TLS setting and by using a public/private key combination set for data encryption.
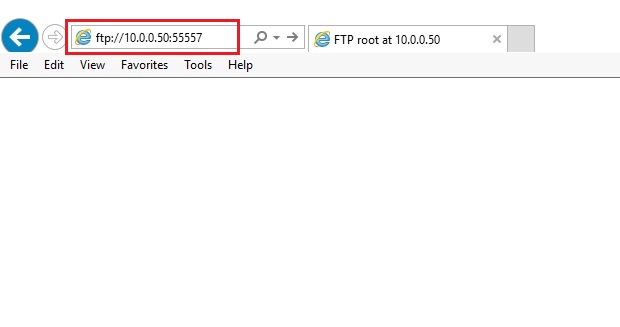
20- the way to access FTP Server from your local (internal) network, by using your browser, like Internet Explorer, Chrome, Firefox)
Open your Internet Explorer, chrome, or Firefox and within the address bar, Type your FTP Server’s Hostname (or IP Address) and therefore the FTP port number (if you’ve got changed the default (21) port for FTP connections) and press Enter. (my FTP Server IP Address is “10.0.0.50” and port is “55557”, so I want to type. “ftp://10.0.0.50:55557”.
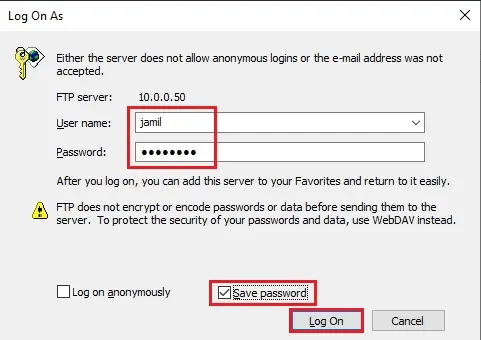
21- Type your username, password > select Save password and click Log on.
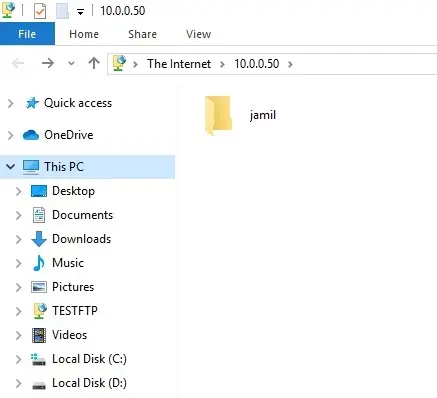
22- FTP Folder successfully connected.
Access Filezilla From Windows Explorer.
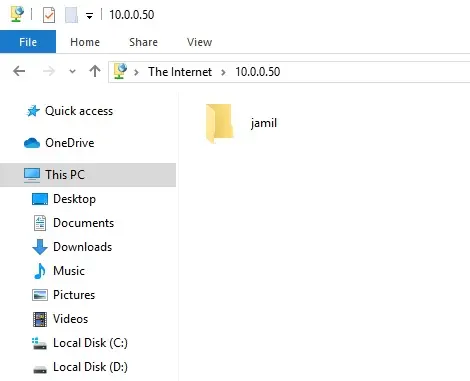
23- Open your Windows Explorer and in the address bar, Type your FTP Server’s Hostname (or IP Address) and the FTP port number (if you have changed the default (21) port for FTP connections) and press Enter.
(My FTP Server IP Address is “10.0.0.50” and port is “55557”, so I need to type. “ftp://10.0.0.50:55557”
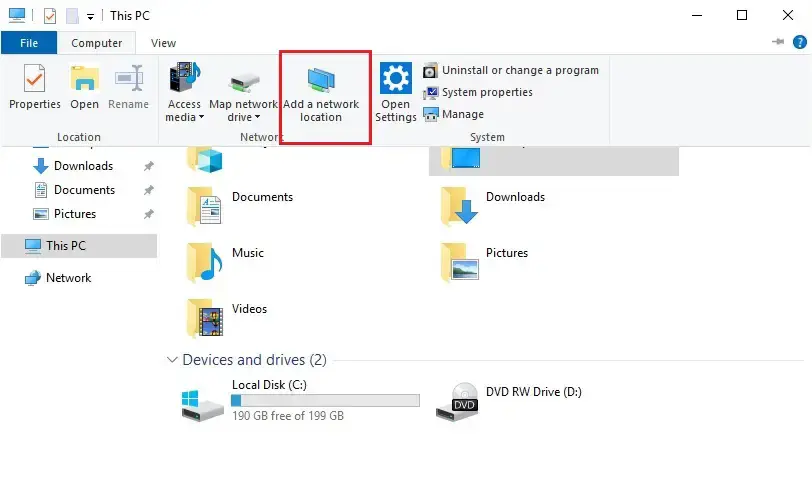
24- If you want to add a shortcut to the FTP Shared folder into your Windows Explorer. Open my computer and Select Add network location.
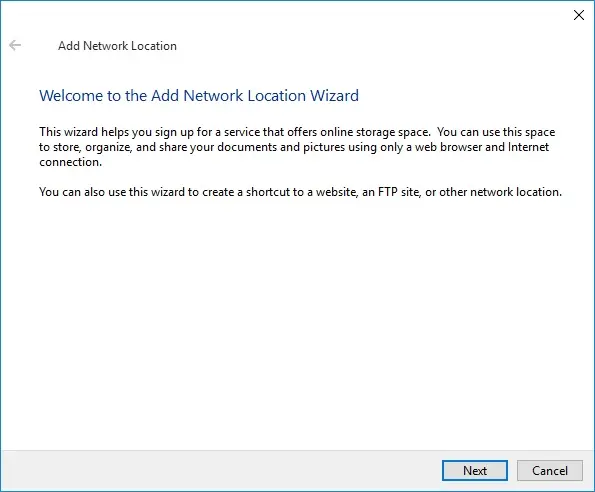
25- Welcome to the Add Network Location Wizard click next.
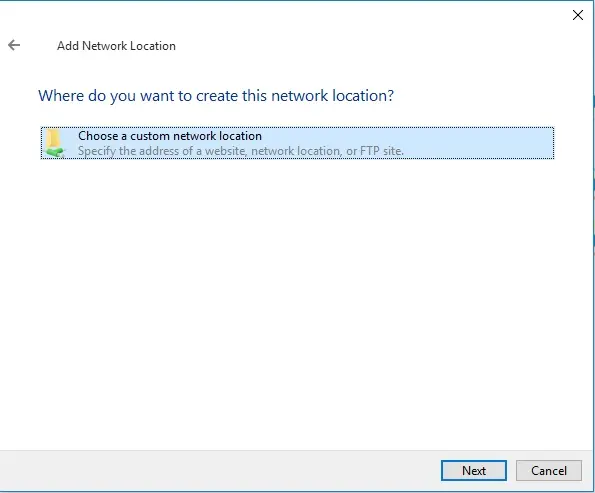
26- Select choose a custom network location and click next.
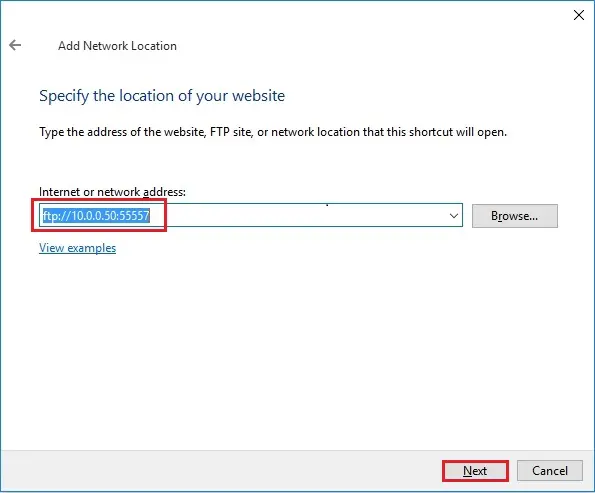
27- Type the IP Address and the port number of your FTP Server and click next.
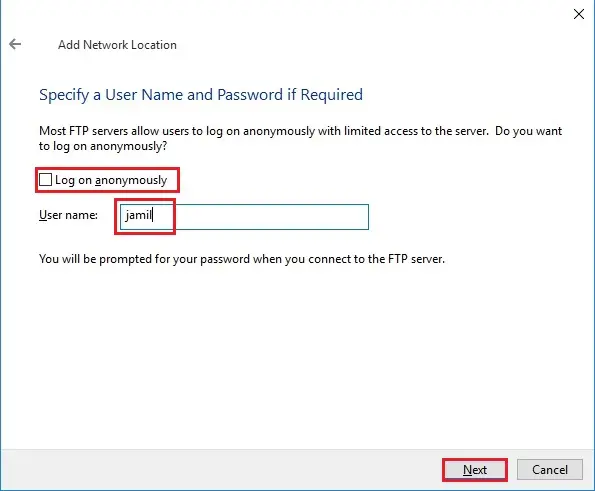
28- Uncheck Log on anonymously box > type your FTP User name and click next.
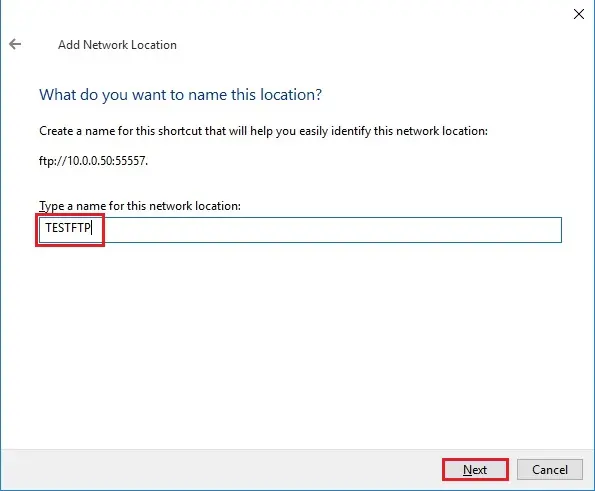
29- Type a name for this for new connection and click Next.
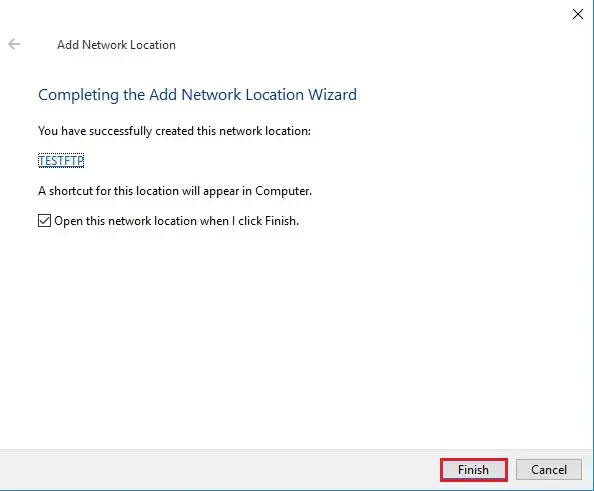
30- Click Finish.
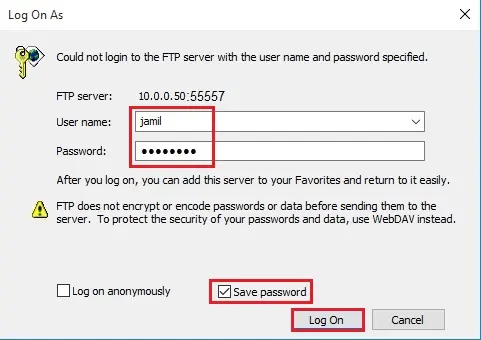
31- Type your FTP server username and password > check save password box and click Log on.
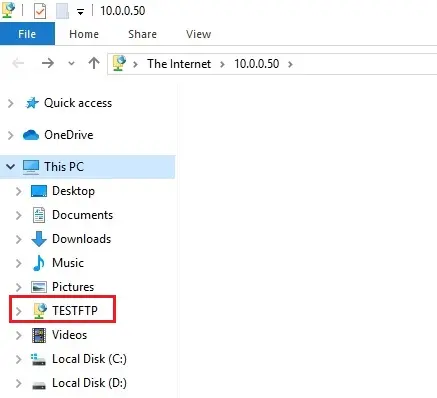
32- Now new FTP network location is added in the Windows Explorer.
Note: If you want to access your FTP server from over the Internet.
Forward the FTP connections to your FTP Server’s Internal IP Address (and port) on your Firewall/Router.
Allow the FTP connections on the required FTP Port on your Firewall/Router.
If you need to connect your FTP server over the Internet, you should know your Public IP Address.
Also read this article: How to Install File Server in Server 2022.


