


You can backup files and folders in VERITAS you want to protect. When you start this type of back up, copies are made of the files & folders you select to backup. The backup files are converted into a compressed format. They are then stored backup in a subfolder at the destination you specify. By default, this destination is the same backup location that is used for storing recovery points.
If you want, you can select to include these folders when you define the backup.
Note:
The file & folder backup is intended for less than 10,000 files. If the data to be backed up exceeds this amount, VERITAS strongly recommends to use the drive-based backup.
Backup Files and Folders in Veritas
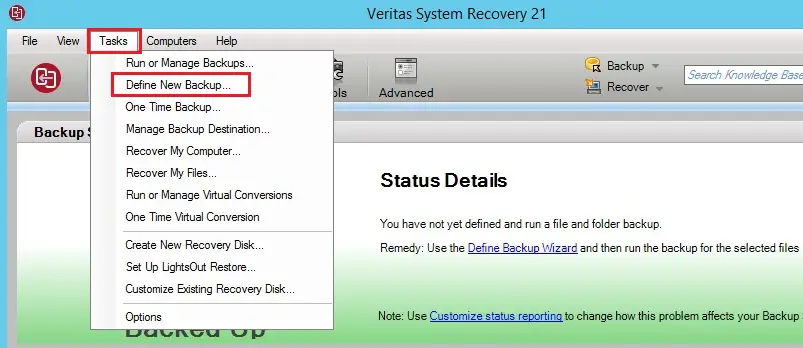
1- Select Tasks menu and then select define new Backup.
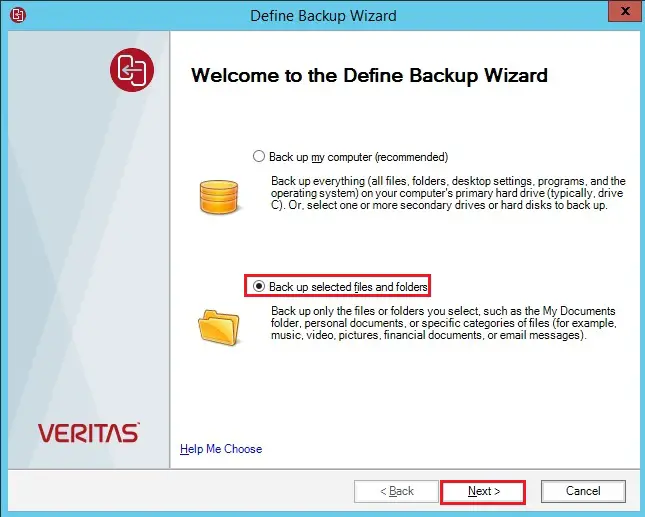
2- Choose back up selected files and folders option, and then click Next.
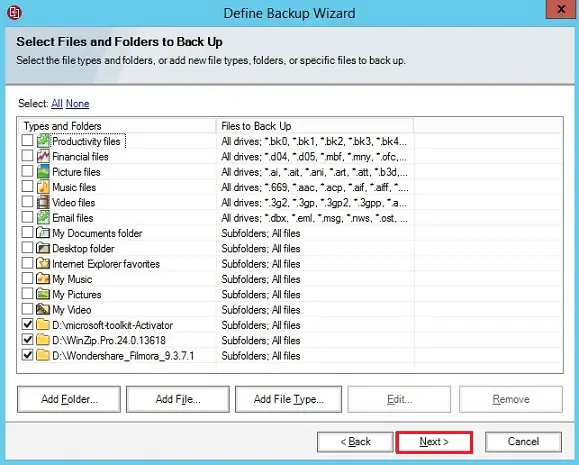
3- In the Select Files and Folders to Back Up window, choose the files and folders that you need to include in your backup.
Select Files and Folders to Back Up options
Note:
In the all versions of Windows, the My Documents folders comprise two subfolders by default. My Pictures and My Music. These folders comprise only the shortcuts to folders at another location and not the actual files.
If you intend to backup your pictures & music files, ensure to include the actual folders where your files are stored.
If you need to add specific folder then click add folders

4- Click on browse button.
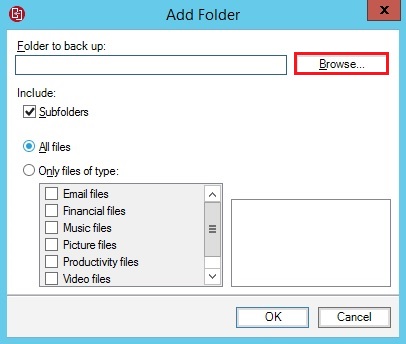
5- Choose the folders you need to backup and then click ok.

6- Click Next.
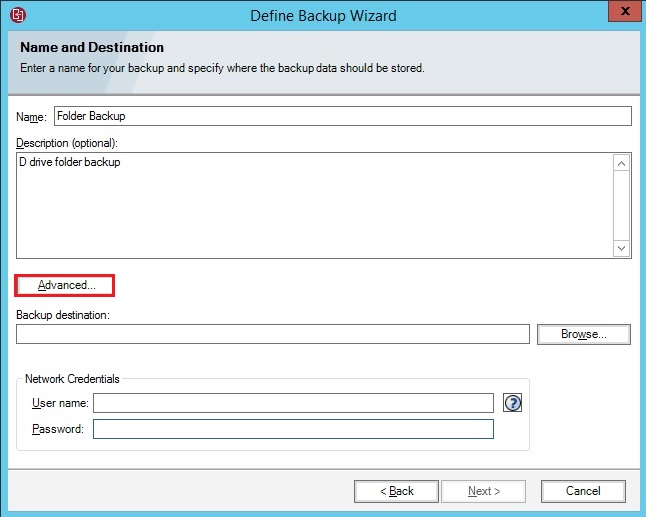
7- In the Name and Destination window, type a backup name and destination.
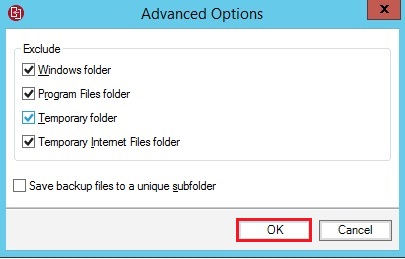
Then choose Advanced Options for a file and folder backup.
8- Click Ok.
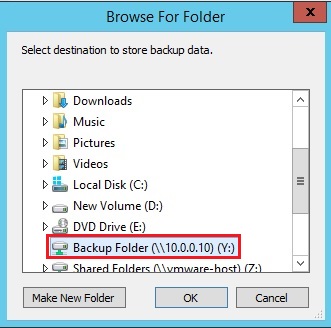
9- Select the browse button next to backup destination
Choose the destination folder where you need to backup and then click ok.
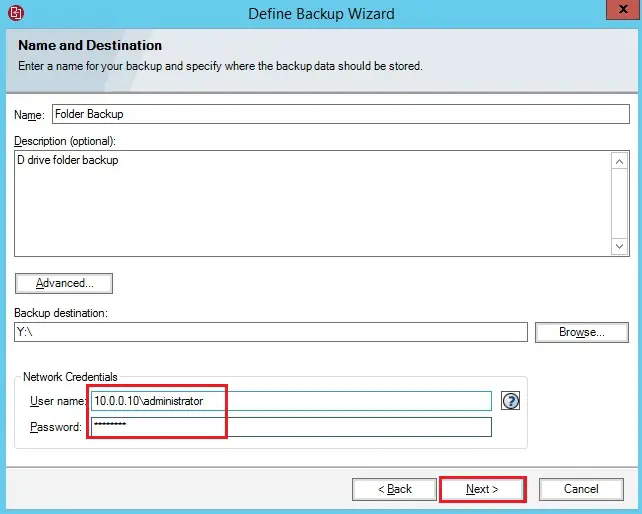
10- Shows the default backup location. Or, you can specify the own local or network path for the recovery point files.
Enter network credentials and then click next.
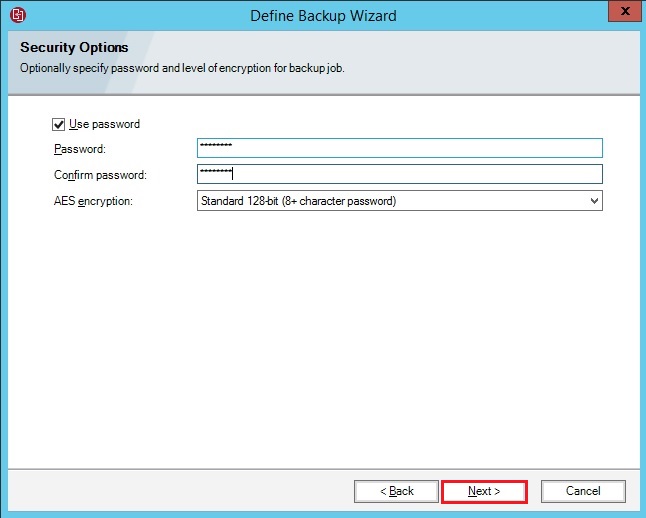
Security Options
In the Security Options, set the password, choose the encryption for the file and folder backup, and then click Next.
Use password Sets a password & enables AES encryption on the recovery point when it is created.
This check box is selected by default.
Password lets you identify a password for the backup. Passwords can contain standard characters. Passwords can’t include extended characters or symbols.
You should enter this password before you restore a backup or view the contents of the recovery point.
Confirm password – Lets you re-enter the password for confirmation.
AES encryption – Encrypts restore point data to add additional level of protection to your recovery points.
If we upgrade from an older version to VERITAS System Recovery 21, for ancient backup jobs where only password protection is determined, you need to edit the jobs to select the AES encryption level. If you never edit the older backup jobs, they further to run without AES Encryption. VERITAS recommends that you edit the job and then select AES encryption level.
Note:
If your Password checkbox is selected, you must define AES encryption.
Choose from the following encryption levels:
Standard 128-bit (8+ character password)
Medium 192-bit (16+ character password)
High 256-bit (32+ character password)
11- Click next.
12- Click advanced.
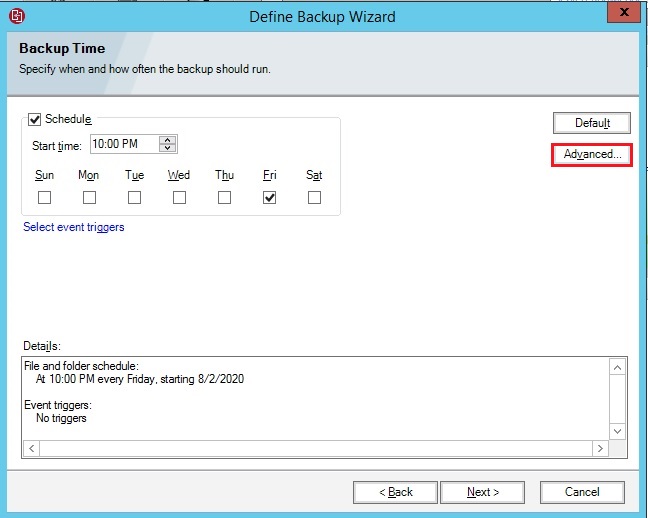
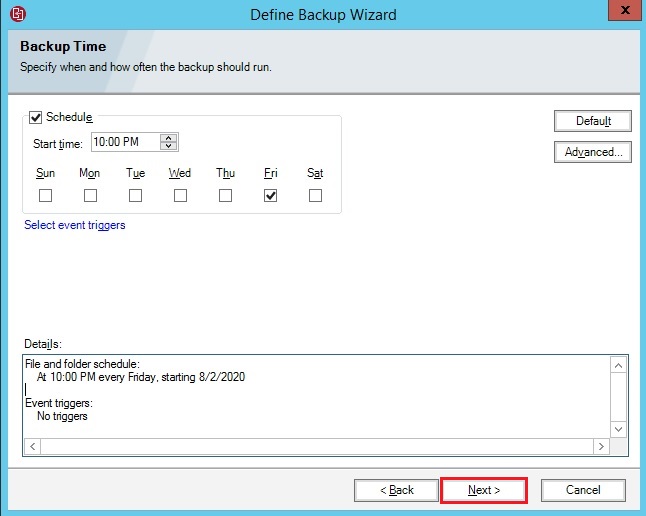
13- Set a backup time schedule and then click ok.
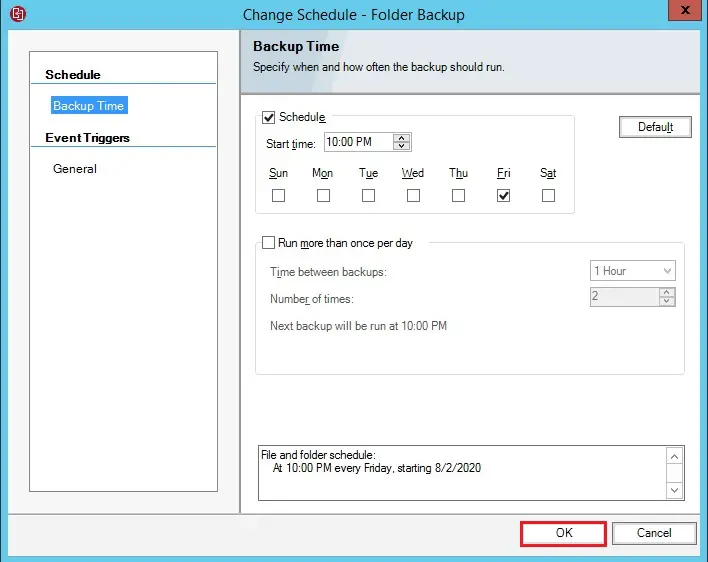
14- Click next.
15- Click on Preview button to review the total number and size of files to be included in the backup. Or select finish button to start the backup.
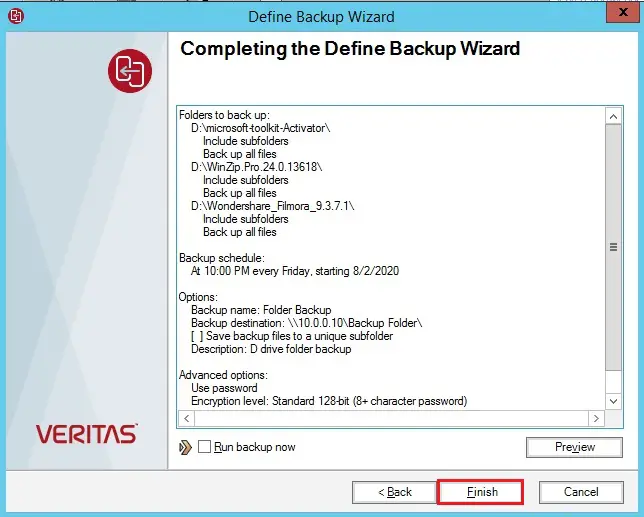
Note:
According on the amount of data you have identified for file and folder backup, the preview process can take some time.
16- If you need to run the back up immediately, then select Run backup now.
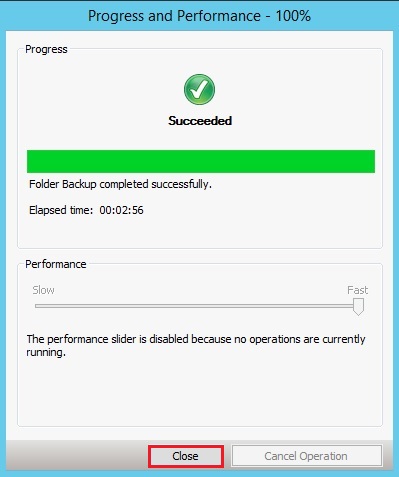
17- Files and folder backup job in progress.

18- Backup Successfully completed, select close button.
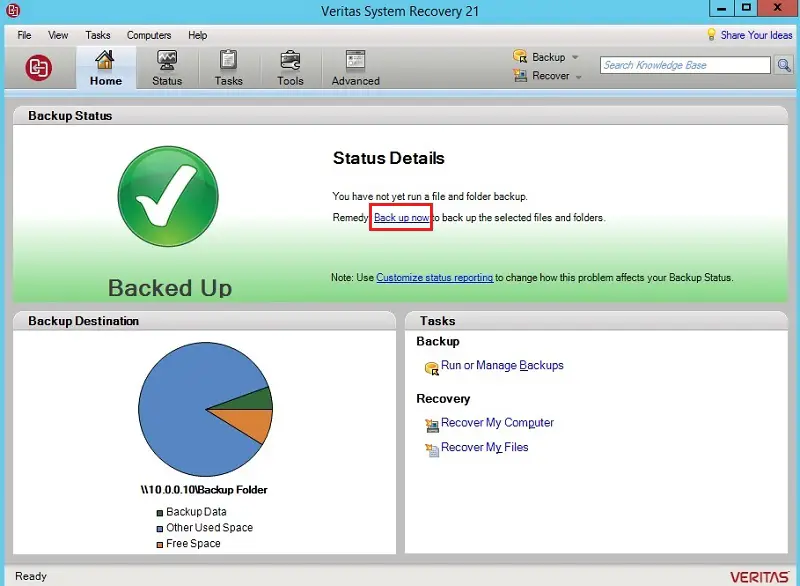
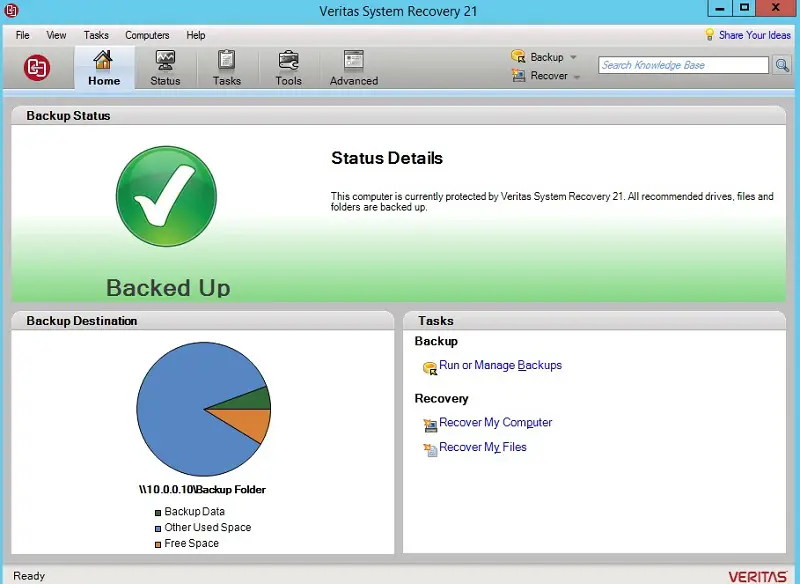
19- VERITAS system recovery console.
For more details visit Veritas