Veeam Capacity Tier Cloud Tier
In this article, I will explain how to create an Azure Storage Account, Container adding this to your Veeam Backup & Replication, and creating a Scale-Out Backup Repository with a performance tier and capacity tier.
This new storage tier is called Capacity Tier and it can be coupled with a Scale-Out Backup Repository, which then is the Performance Tier of the tiered solution. Actually, Veeam does not use the new Capacity Tier as a direct target for backup and backup copy jobs, fairly a new mechanism has been introduced. Let see how it works & how then a service provider can design his storage with this new capability.
Veeam Cloud Tier enables institutions to natively tier backup files to Microsoft Azure Blob, providing the ability to scale infinitely and leverage the simplicity and elasticity of object storage.
Archive Veeam on-premise data to Azure Blob
Veeam Capacity Tier Cloud Tier
First, we need to create a Microsoft Azure Storage Account to create the cloud repository
How to Add Storage Account as backup repository in Veeam
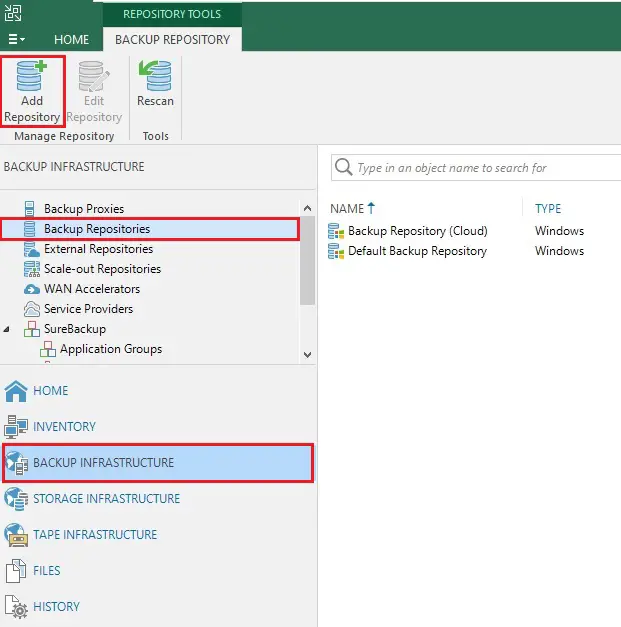
1- Open the Veeam console, select Backup Infrastructure. Select Backup Repositories and then select Add Backup Repository.
2- Add Backup Repository wizard, select Object storage.

3- Select Microsoft Azure blob storage.

4- Select Azure blob storage.

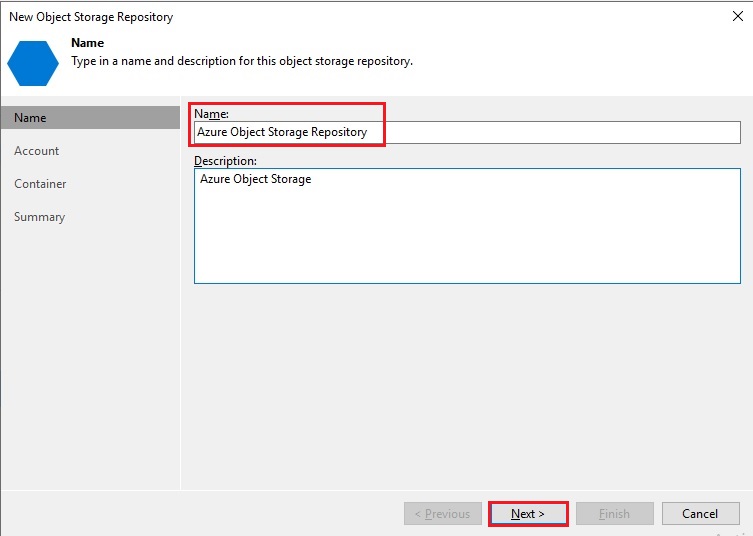
5- Enter a name and a description for this backup repository and then click next.
6- Click on add button under credentials.
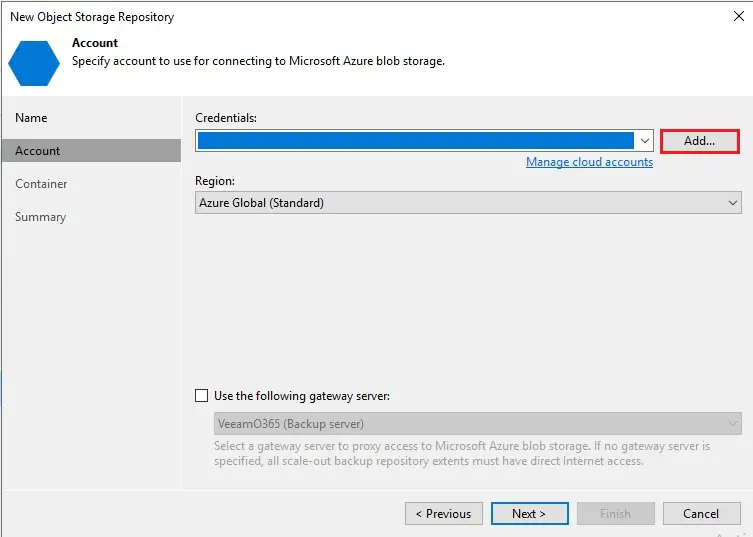
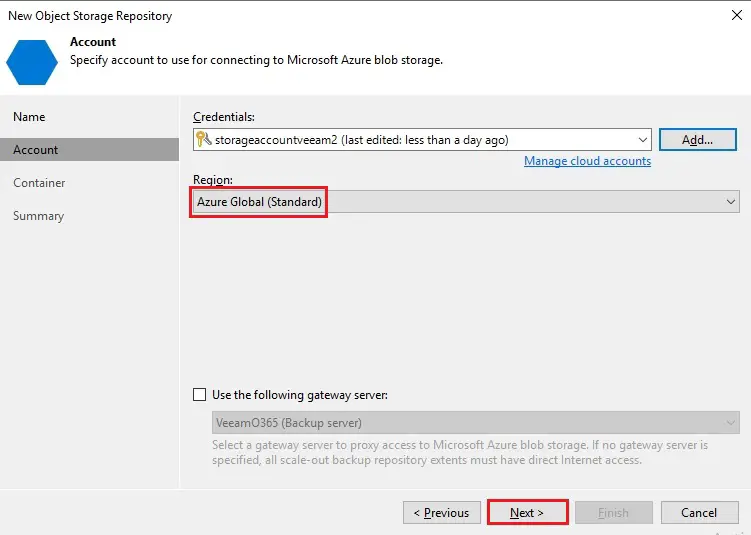
7- Specify the storage account name, shared key and then click OK.

8- Select Region and click next.
9- Select the blob container and click on browse button next to folder.
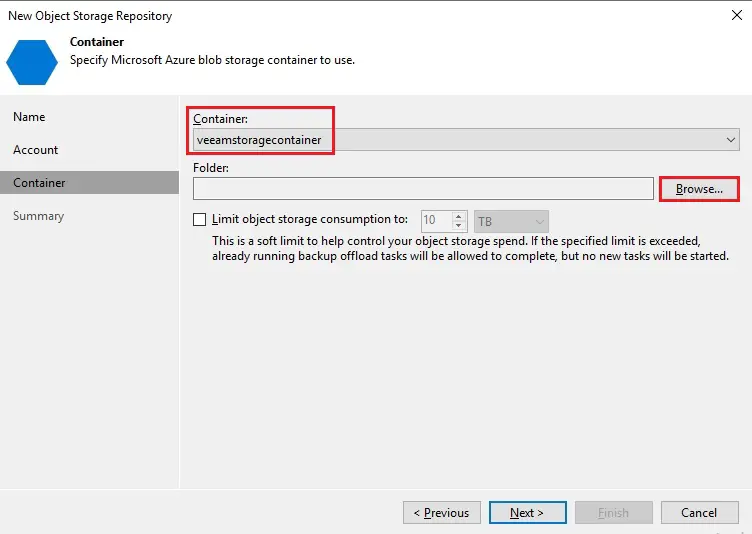
10- Select new folder type a unique name and then click OK

11- Here you can also limit the storage consumption in this backup repository and click next.

12- To create the backup repository, review summary and click Finish.
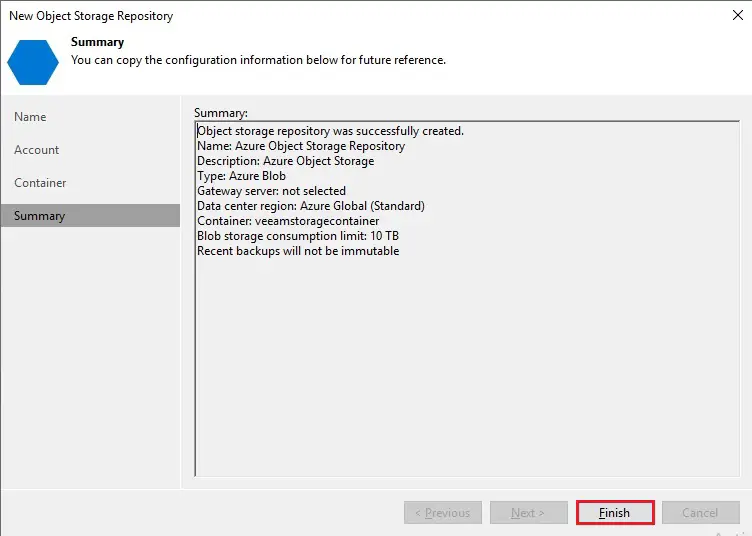
13- Azure object storage repository successfully created.

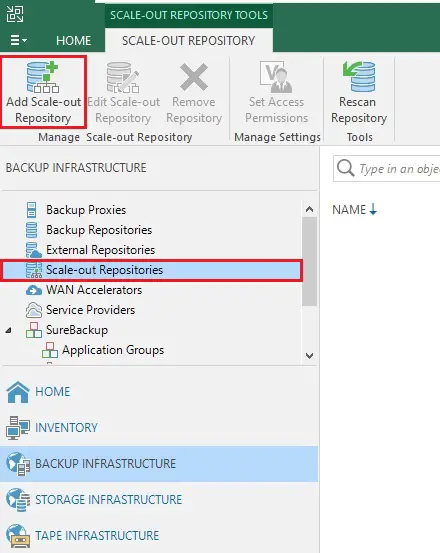
Create the Scale-Out Backup Repository
1- In the Veeam console, select Scale-Out Backup Repository and then select Add Scale-Out Backup Repository.
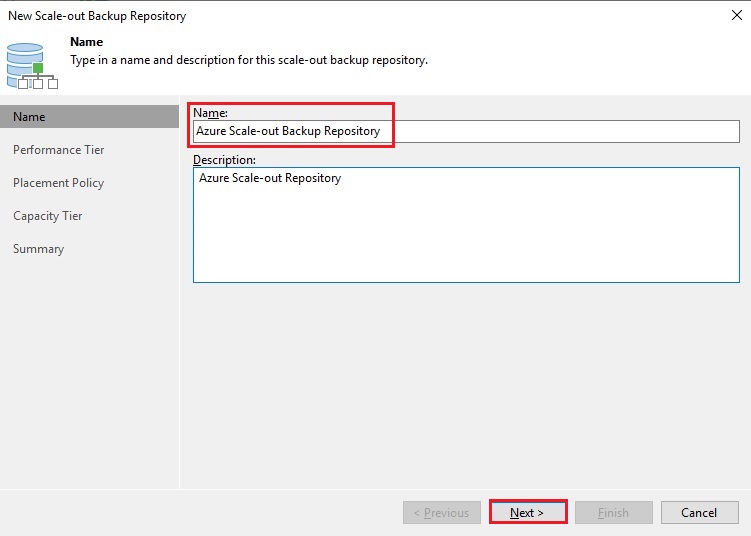
2- Enter a name, a description for this SOBR (Scale-out backup repository) and click on Next.
3- In the performance tier option, click the add button to add your On-Premise backup repositories.

4- I have already created a local backup repository name (Backup Repository cloud). Select your local backup repository and then click OK.

5- Click next.

6- Select Data locality as a placement policy and click next.

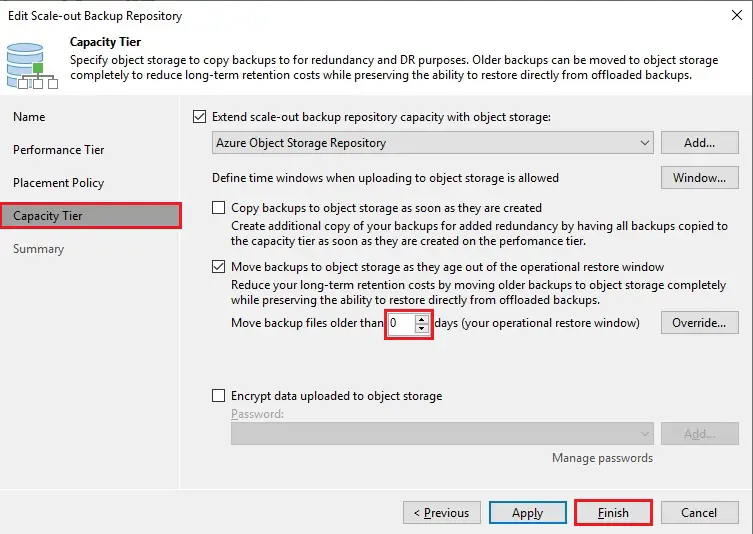
7- Choose Azure object storage repository as object storage. Then select the file ages to be moved in Microsoft Azure. Click override.

8- Also you can move files depending on the used space. Choose your choice, click ok and then Apply.

9- Review the summary and click finish

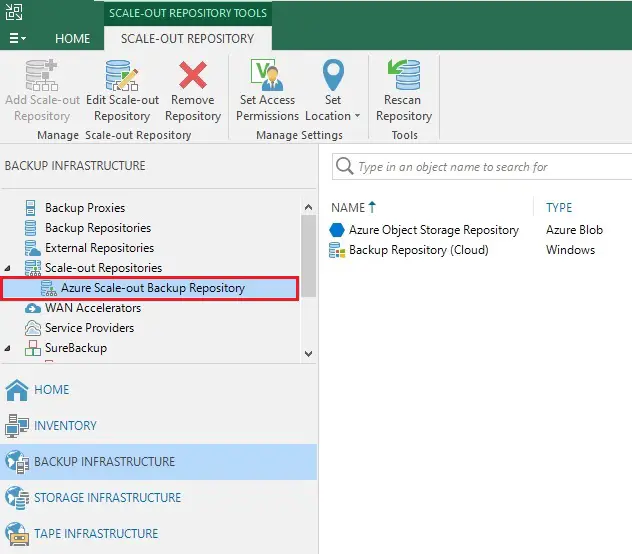
10- Now you can see scale-out backup repository
Create a Backup Job Veeam
1- To create a Backup Job to take advantage of the Immutability feature.
Choose the home tab, select backup job, and then virtual machine.

2- Type backup job name and then click next.

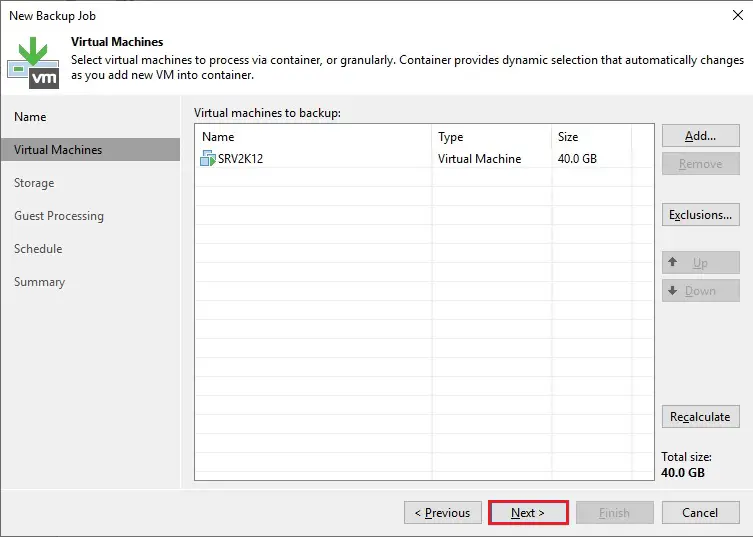
3- Virtual machine to backup click the add button

4- Select the object (virtual machine) to backup and then click add

5- Click next
6- In the configuration wizard select from the Backup repository drop-down menu the just created Scale-out Repository (local backup repository) and click next.

7- Click next

8- Click apply
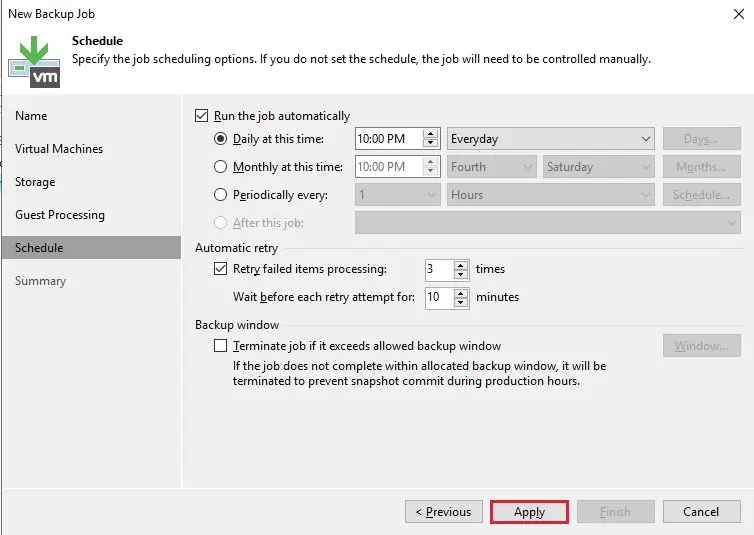
9- Click finish

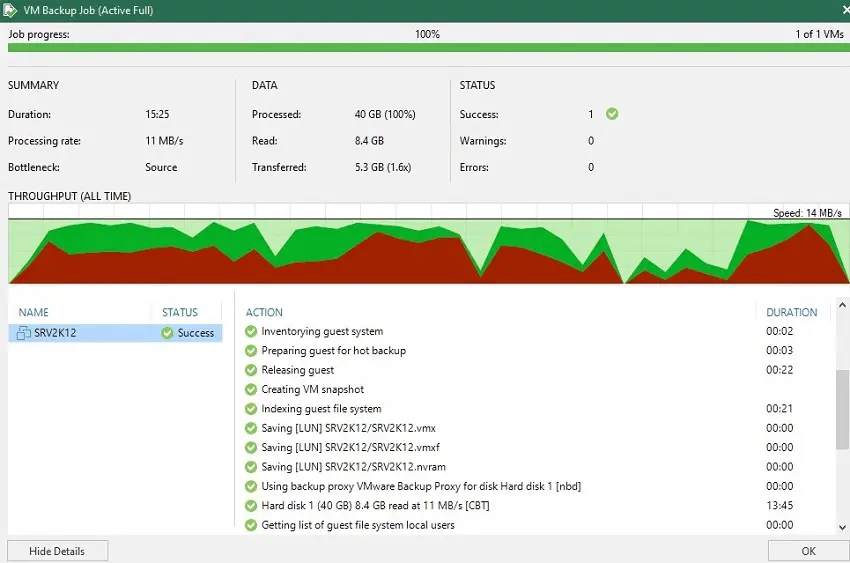
10- During the first operation, a Full Backup is being performed.
Move backups to Azure Object Storage
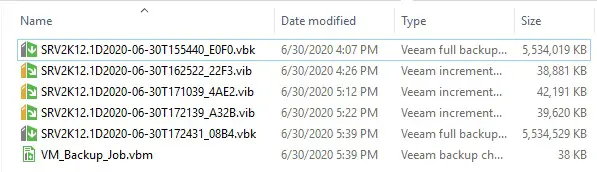
If you would like to test the archival process, after the initial Full Backup previously processed, you should perform some additional backups. At least three additional Incremental Backups and one more Active Full Backup.
1- In this picture you can find 2 full backups 3 increments backup.
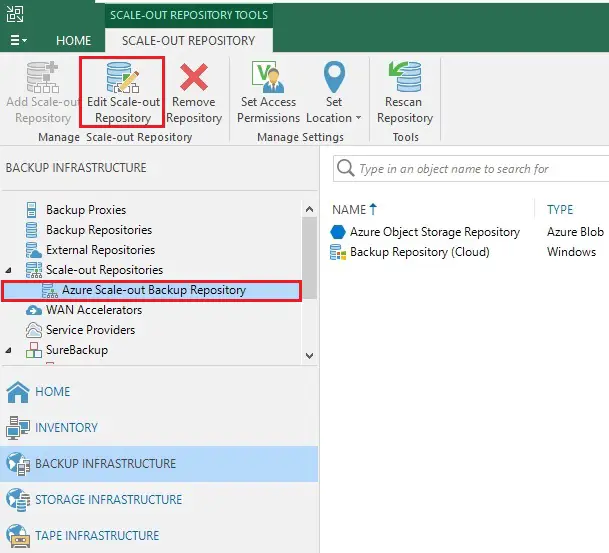
2- To move backups immediately to the selected Azure Object Storage. Select your Azure scale-out repository and then click edit scale-out repository.
3- Select Capacity Tier option, select Move backup files older than field set to 0, and then click finish.
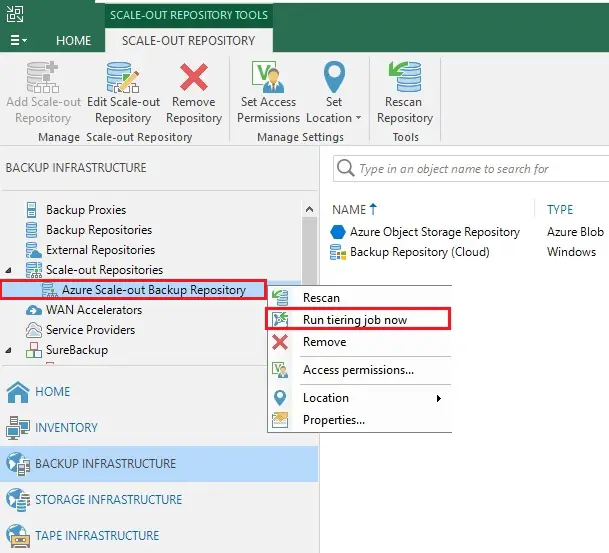
4- Keep the CTRL button and right-click on your Azure Scale-out Backup Repository and then select Run tiering job now.
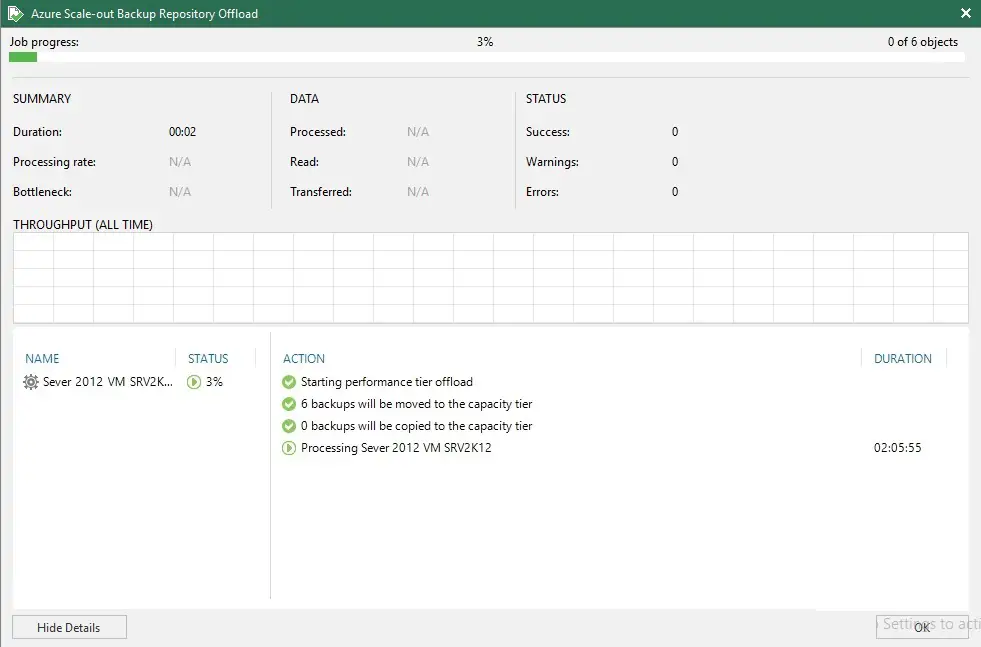
5- The offload process is performing and backups are moved to Azure Object Storage. I am testing in my home lab so I am stopping it.
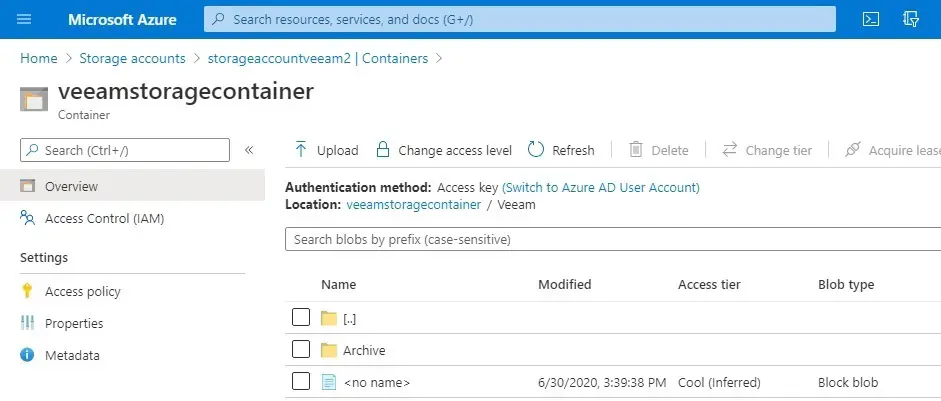
6- Login to Azure Portal and access the Bucket used as Backup Repository. As expected, backup files have been stored in the configured blob storage.
For more details please visit Veeam
Cloud Tier store long-term data retention Veeam click here
Archive Veeam Backup to AWS S3 click here