
Create VM copy job Veeam, in this article, I have explained how we can create a Virtual Machine Copy using Veeam Backup & Replication. Please follow the below steps to create a VM copy job.
Create VM Copy Job Veeam
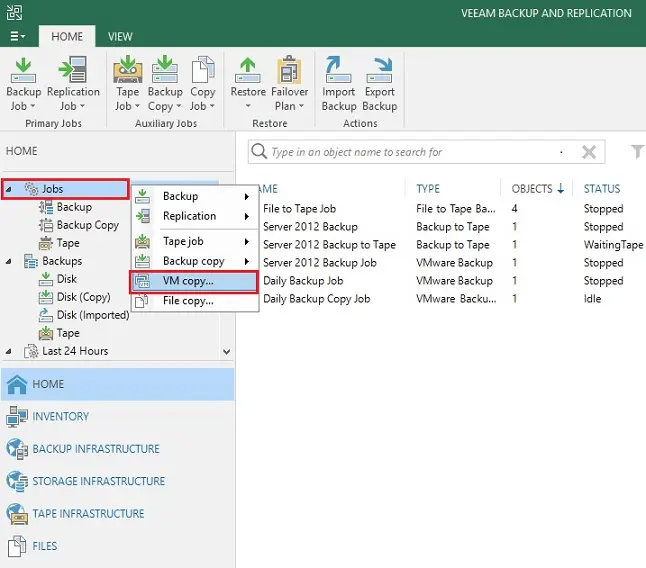
1- Open the Veeam Backup and Replication console, right-click on Jobs node and then click on VM copy.
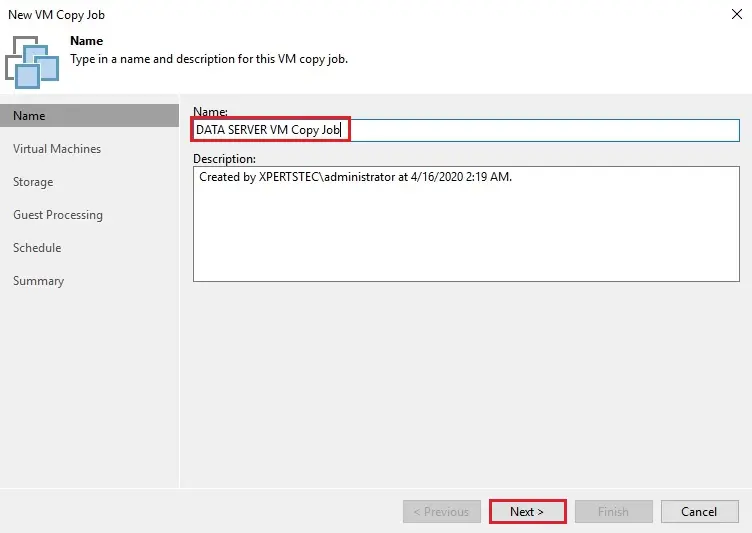
2- New VM Copy job wizard, type a VM copy job name, job description, and then click on Next Button.
3- Click on Add button
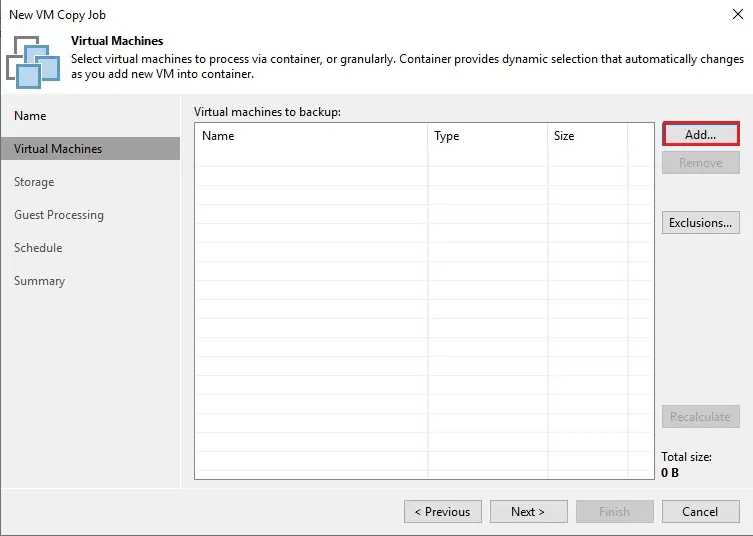
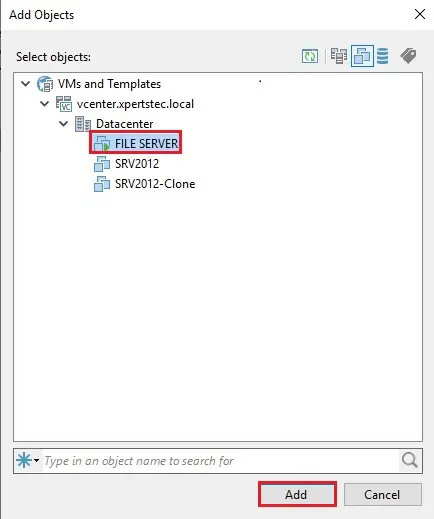
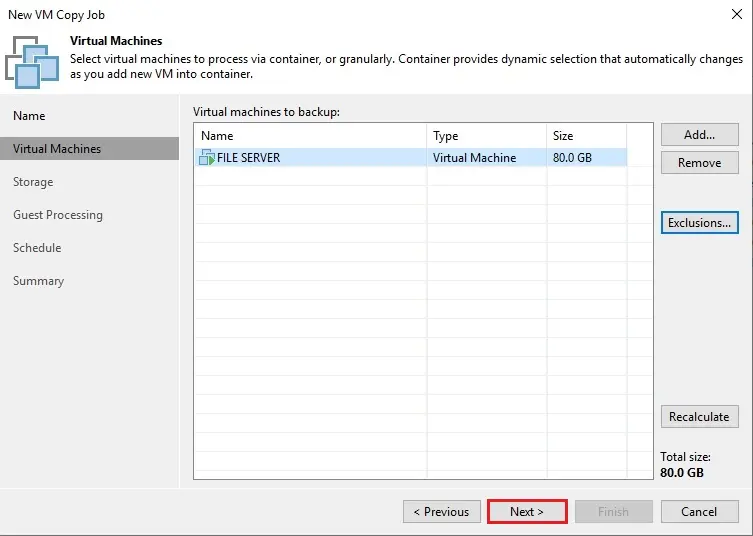
4- Select a virtual machine the one you want to copy job and then click add.
5- After selecting the Virtual Machine, click on next button.
6- New VM copy job wizard, storage option, 1- Backup Repository, 2- Shared Folder.
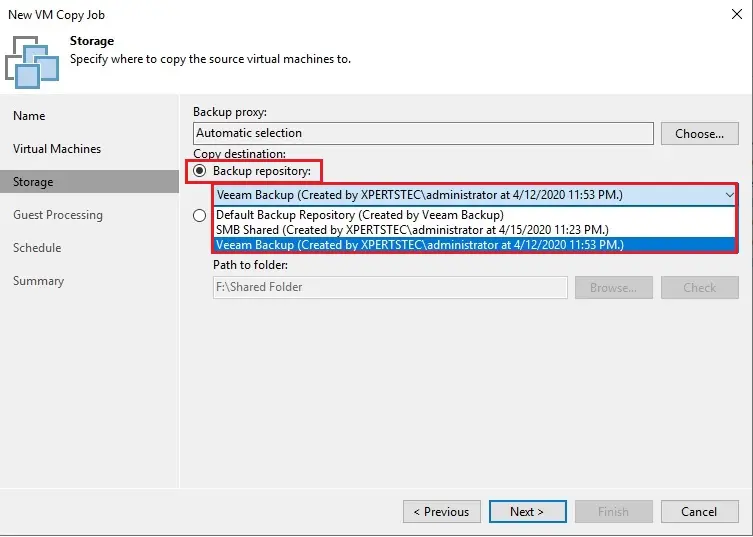
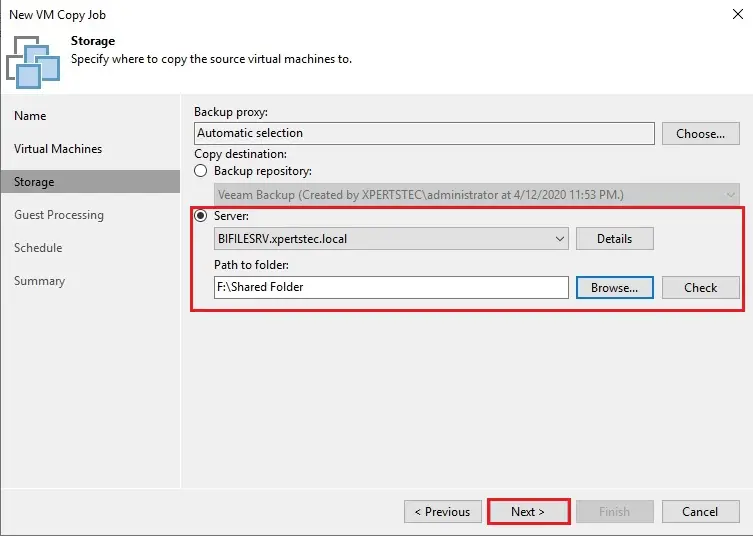
7- I am going to VM copy to a shared location, so I selected the Server option and then click on the Next button.
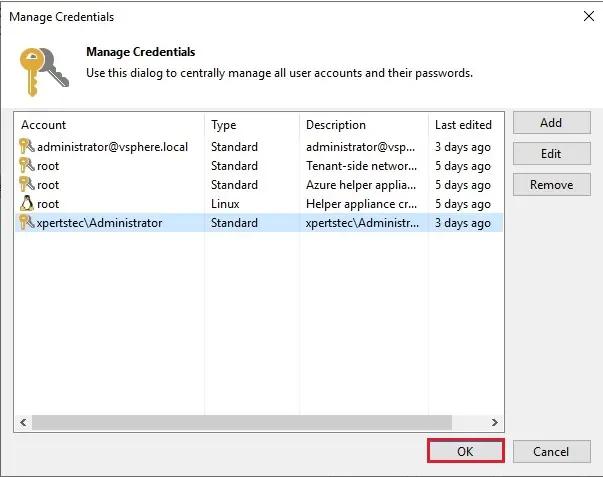
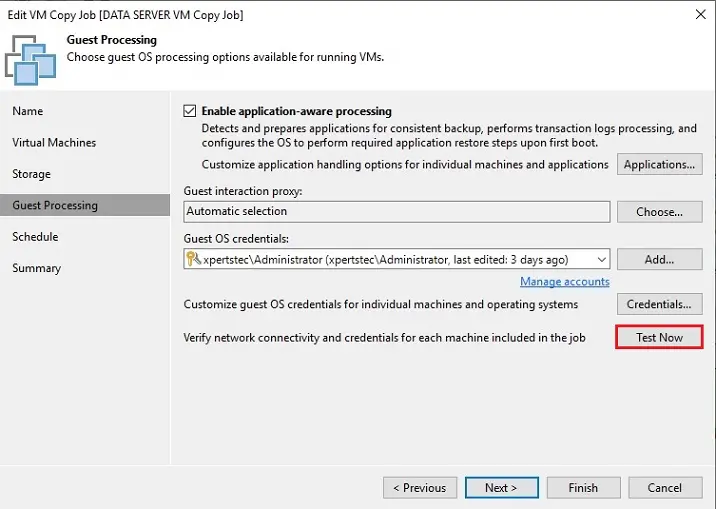
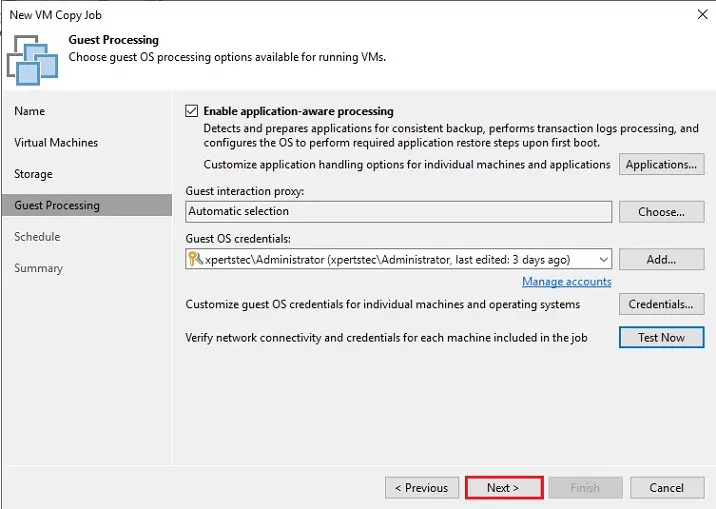
8- New VM copy job, guest processing option, click on manage credentials.
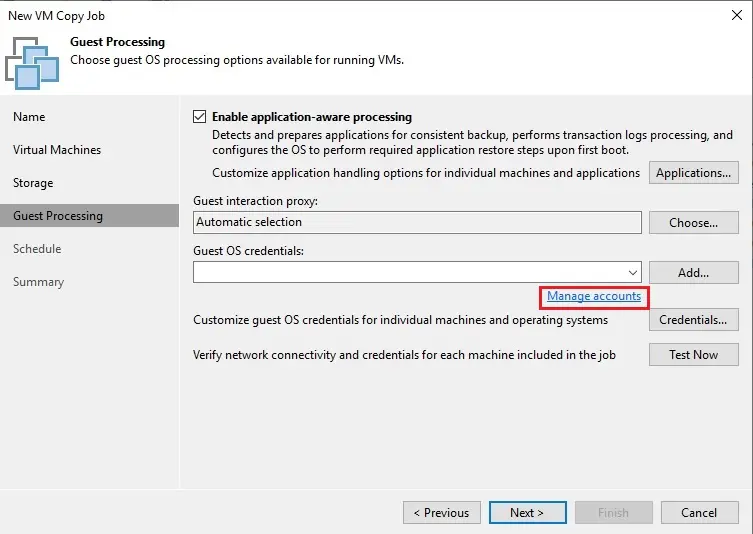
9- Select user credentials for this VM copy job and then click OK.
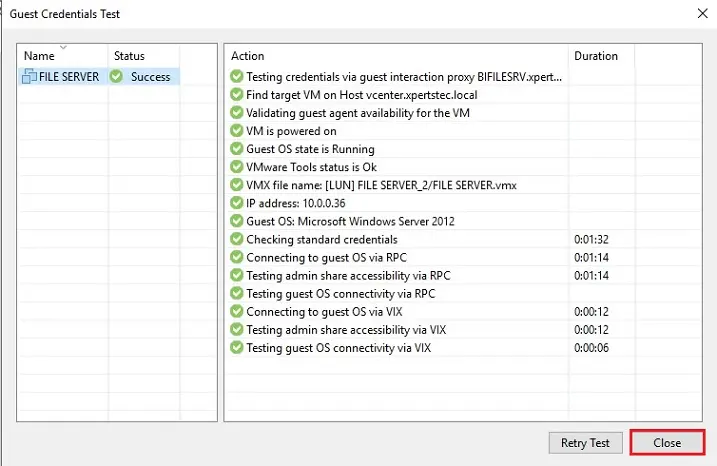
10- Click test now.
11- After successfully test guest credentials then click close.
12- Click next.
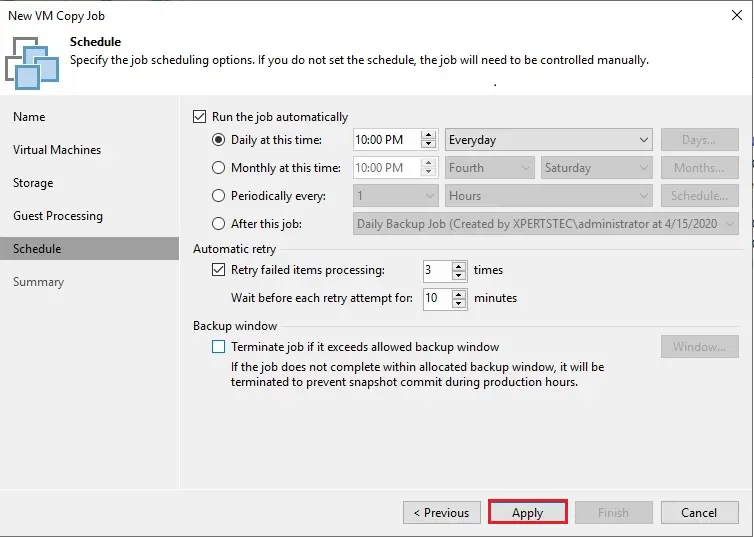
13- New VM copy job schedule option, configure backup schedule and then click apply.
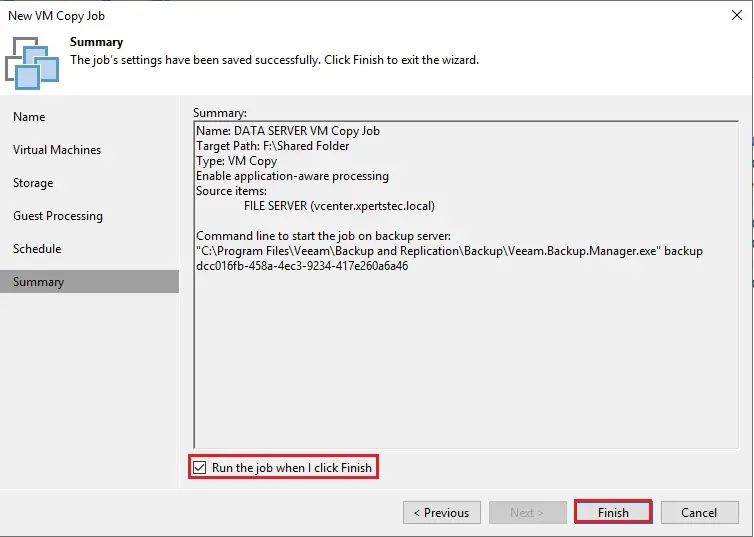
14- View the Job Summary, Select Run the job when I click Finish, and then click on Finish Button.
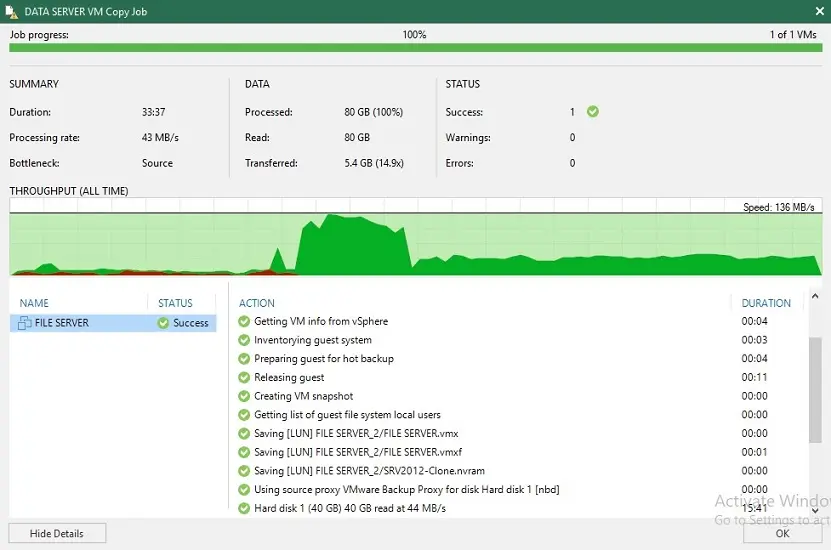
15- Now you can see the Job progress.
For more details, please visit Veeam