Create Backup to Tape Jobs; in this article, I am creating a backup to tape jobs using the New Backup to Tape Job wizard.
Create Backup to Tape Jobs Veeam
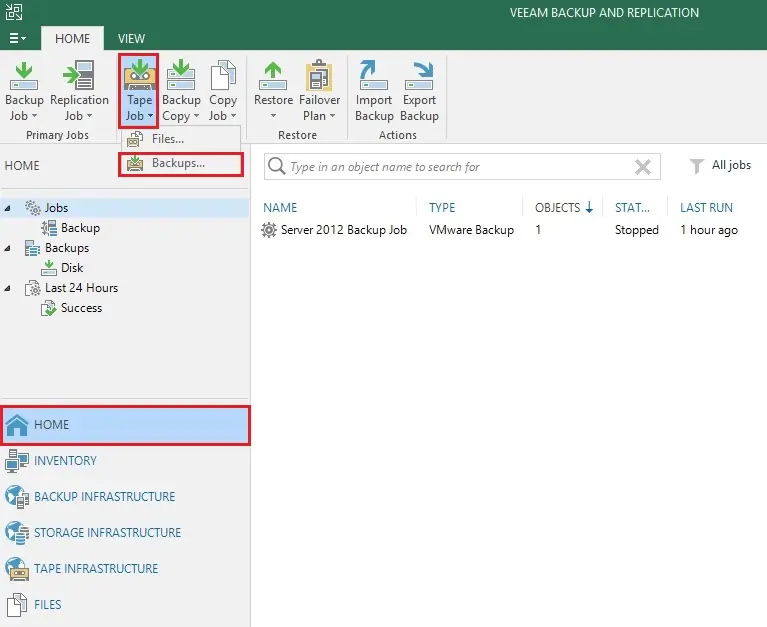
1- Open Veeam Backup and Replication console, click on the Home tab, select Tape Job menu and then select Backups.
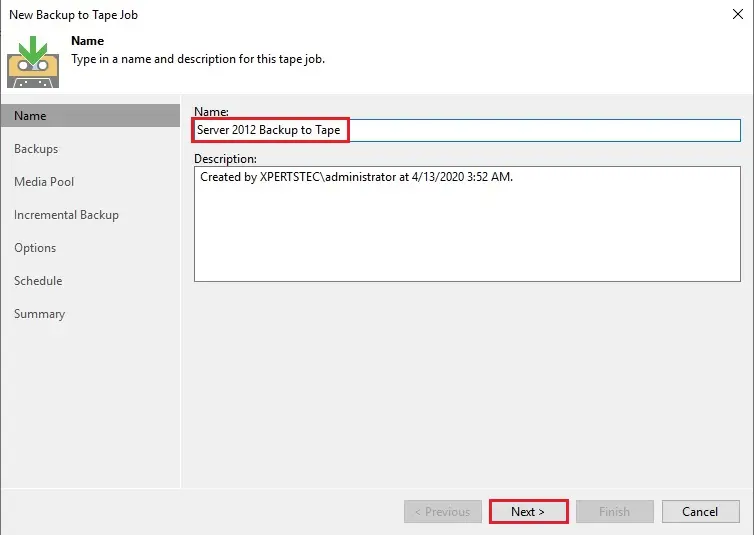
2- In the Name field, type a name for the backup to Tape job.
Under the Description option, type a description of the tape job. The default description includes information about the user the one create the job, date, and time when the job was created. Click Next
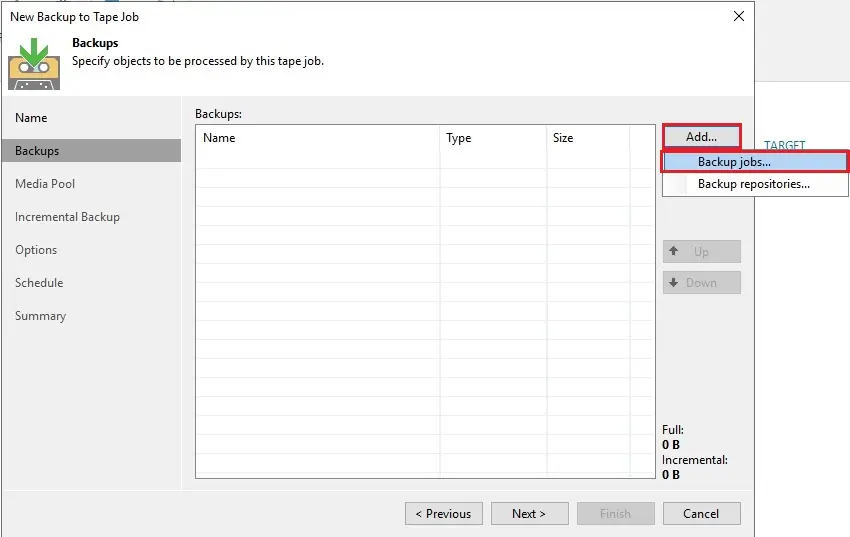
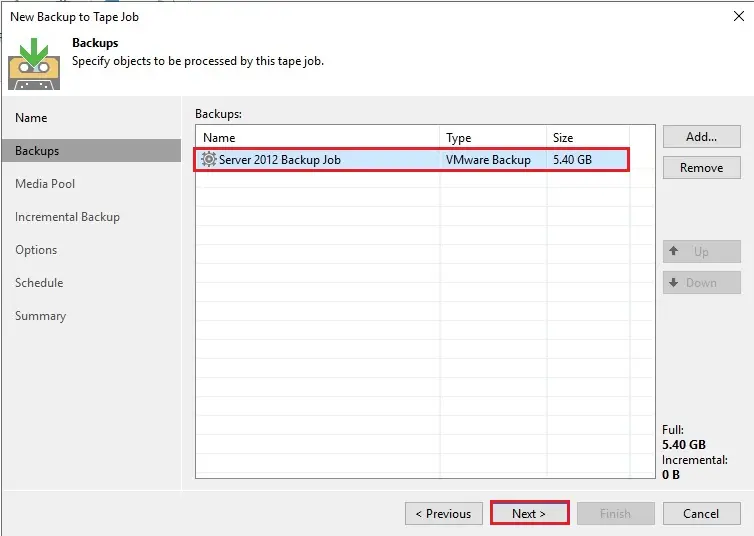
3- Select the Add button and then select backup jobs.
2 Type of Tape Backup options
1- Backup jobs. You can choose a backup from available backups
2- Backup repositories. you can select whole backup repositories.
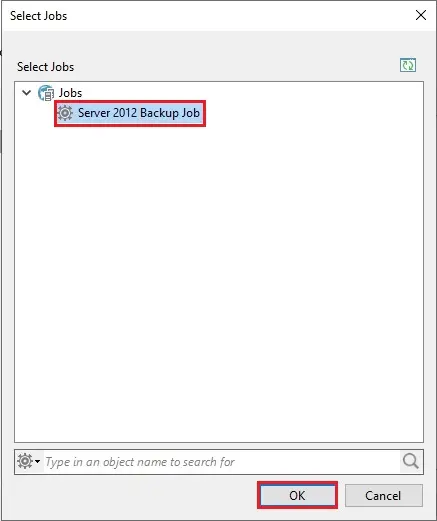
4- Select the backup jobs and then click next.
Backup Repositories options.
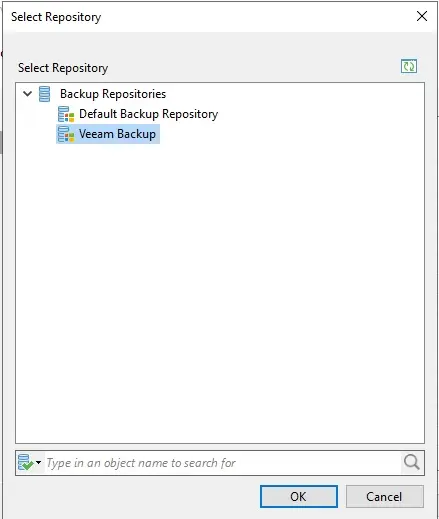
5- To remove a backup from the job list, click on it, and then click Remove.
You can move a source up or down in the list, using the up and down button.
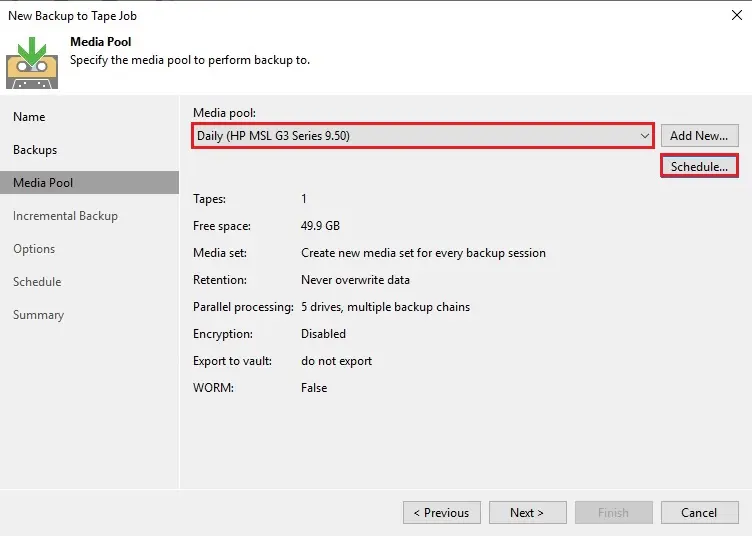
Veeam media pool
6- At the Media Pool option of the wizard, select a media pool for full backups.
From the Media pool for full backups list, select a backup media pool that you can use for the archiving full backup files.
You can also choose a backup media pool or a GFS backup media pool.
For tenants backups, you can choose only GFS media pools. Now click on the Schedule button.
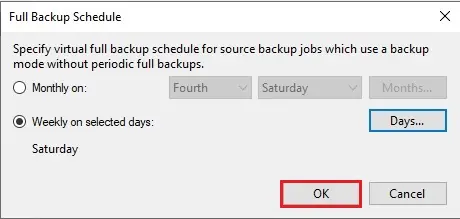
7- Now you can configure a full backup schedule for the virtual full backup. So click on OK and then click Next.
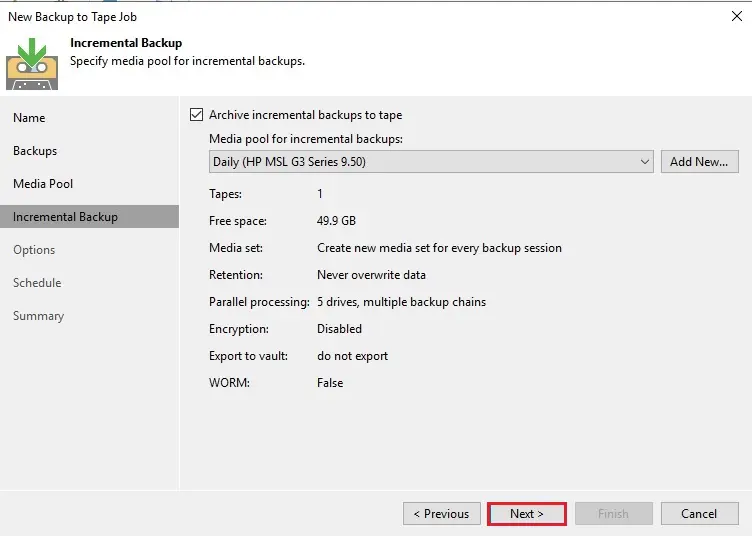
8- At the Incremental Backup step of the wizard option, you can enable or disable incremental backups processing and choose media pool for incremental backups.
If you want to create a new media pool with the required settings, so you can click on the Add New button and create a new media pool without closing the job wizard.
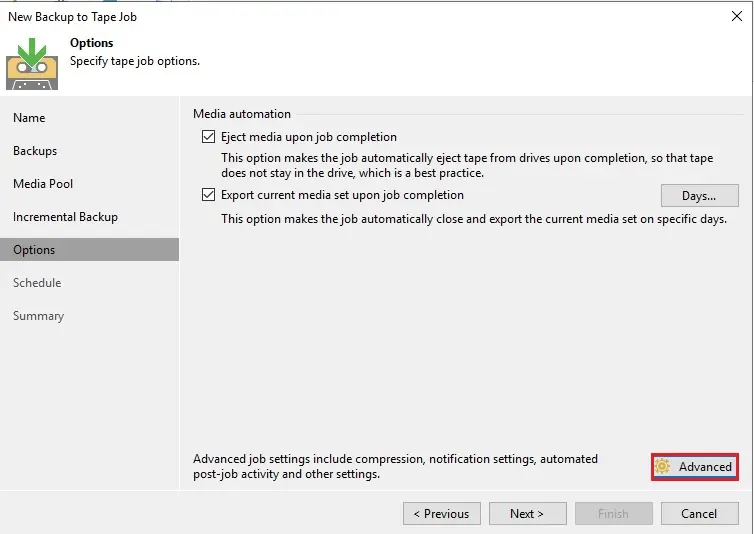
9- New Backup to Tape wizard options, Choose the Eject media upon the job completion check box if the tape should be automatically ejected from the tape drive after the job successfully finishes.
Choose the Export current media set upon job completion check box if you want to pull out the tapes with the current media set from the tape library device. Click on Advanced to configure the advanced job options.
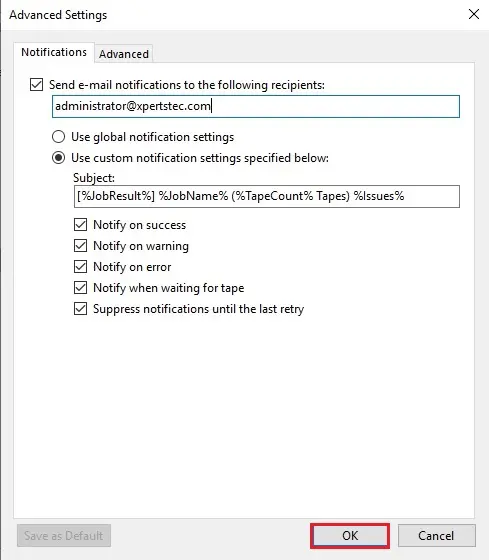
10- At the Notifications option, you can specify notification settings for the backup to tape job.
Set E-mail notification, subject type
Notify on success, Notify on warning, Notify on error, Notify when waiting for tape and suppress notification until the last retry and then click ok.
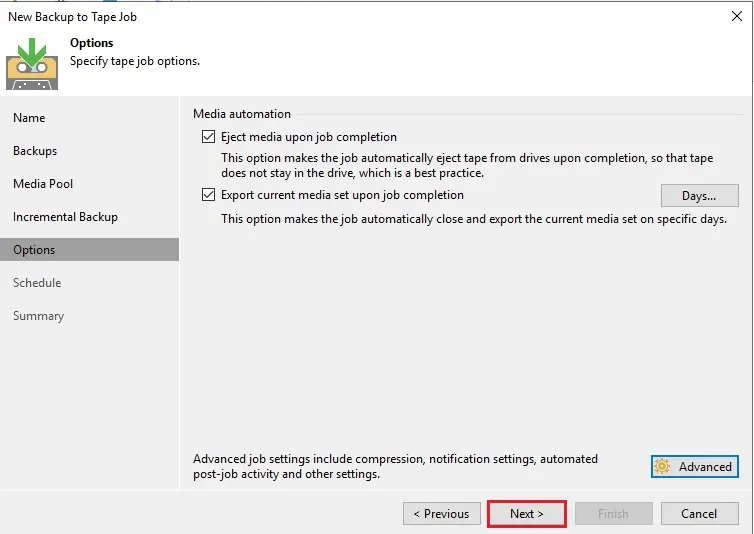
11- After configuring the advanced option then click next.
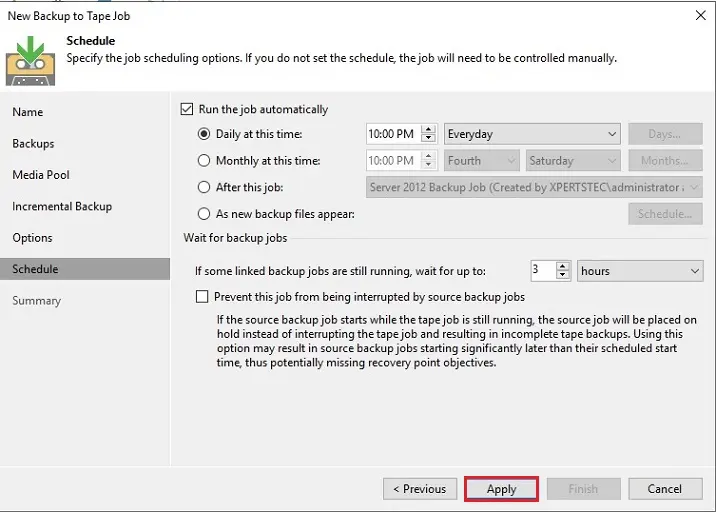
Backup Schedule
12- Here you can specify the job scheduling settings
Daily at this time and monthly at this time and then click on next.
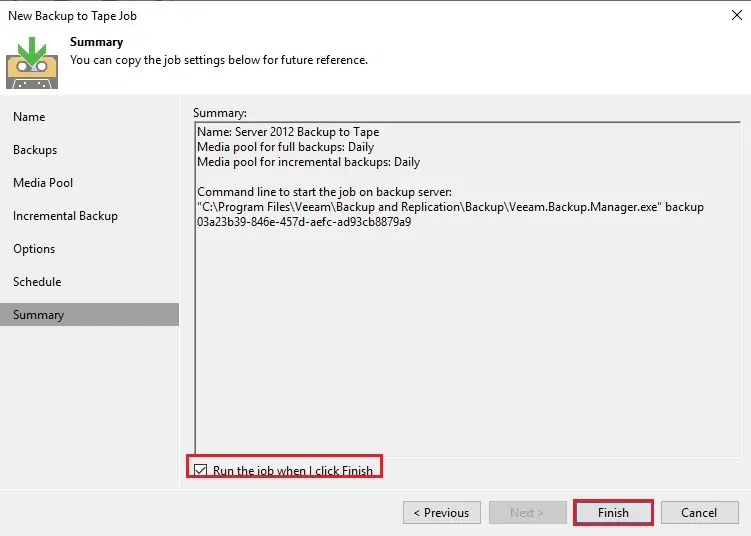
13- Select the Run the job when I click Finish checkbox if you need to start back up to tape job now after you complete the wizard. Click the Finish finish button to close the wizard.
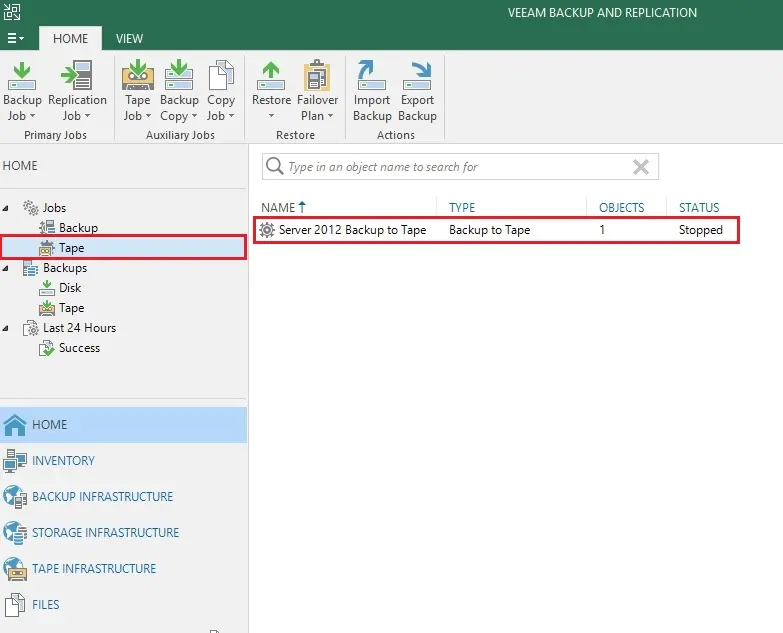
14- Now you can see Backup to Tape Job has been created successfully.
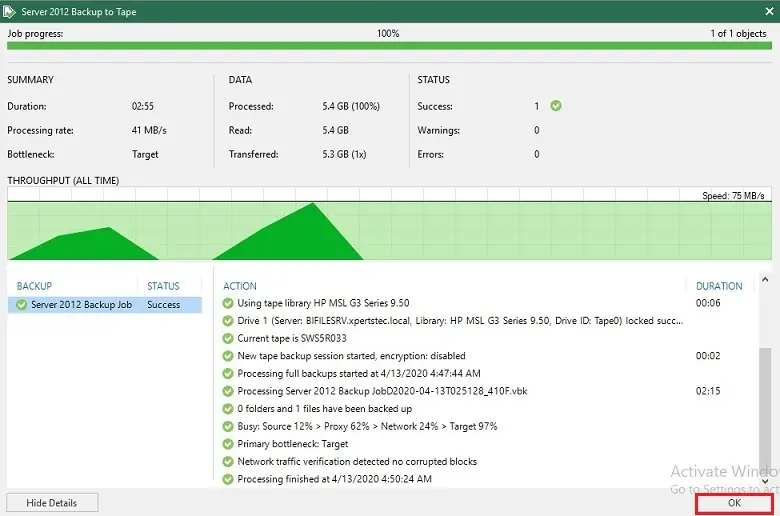
15- Backup job to Tape completed successfully.
Related: How to Create File to Tape Jobs Veeam
Related: How to Link Backup Jobs to Tape Veeam.


