In this guide I will explore how to create Agent Backup Job Veeam Software, a backup physical computer, we can configure a Veeam Agent backup job in the Veeam Backup & Replication console. In the Veeam Backup, we can create Agent backup jobs Veeam.
The backup job runs on the backup Windows server, like Virtual Machine backup jobs. The backup job is for computers that are connected to the backup server. This connection must not be interrupted.
The Veeam Backup & Replication allows you to configure backup jobs for Microsoft Windows and Linux computers. In this section, you will learn how to create a Veeam Agent backup job for Microsoft Windows computers.
The Veeam Agent for Microsoft Windows does not backup data to which indicative links are targeted. It just backs up the route information that the symbolic links include. Afterward, the restoration, like symbolic links are created in the restore destination.
Create Veeam Agent Backup Job
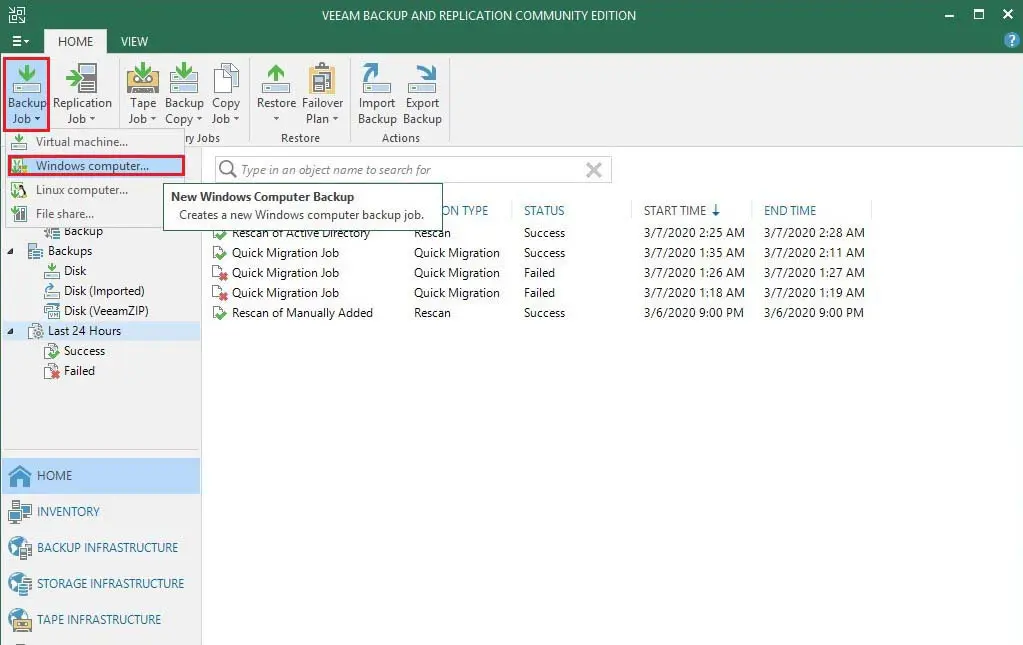
1- Open Veeam Backup & Replication console, On the Home tab, click Backup Job option, select Windows computer to start the New Agent Backup Job wizard.
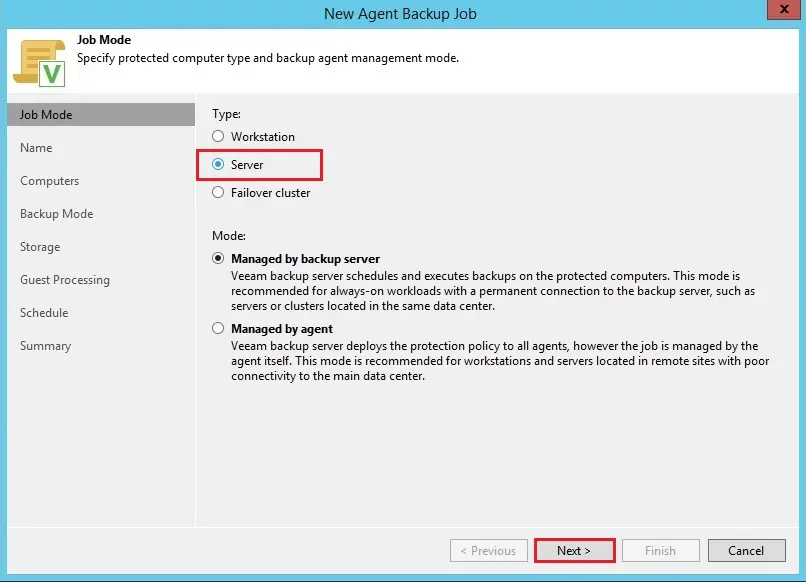
At the Job step of the wizard, indicate protection settings for the backup job:
In the menu, choose Windows Server to add to the backup job standalone servers that have a lasting connection to the backup server.
2- In the way list, select Managed by the backup server and then click Next.
Once you set up an Agent backup job Veeam managed by the backup Windows server, Veeam Backup & Replication records the job configuration to its database. Veeam Backup & Replication operates all management tasks for the Veeam Agent backup job.
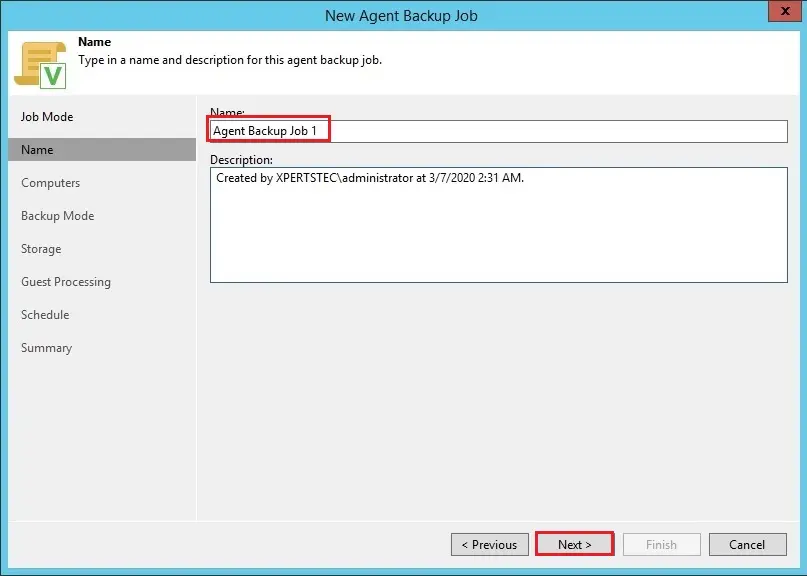
3- At the Name step of the wizard, type a name and description for the backup job and then click next.
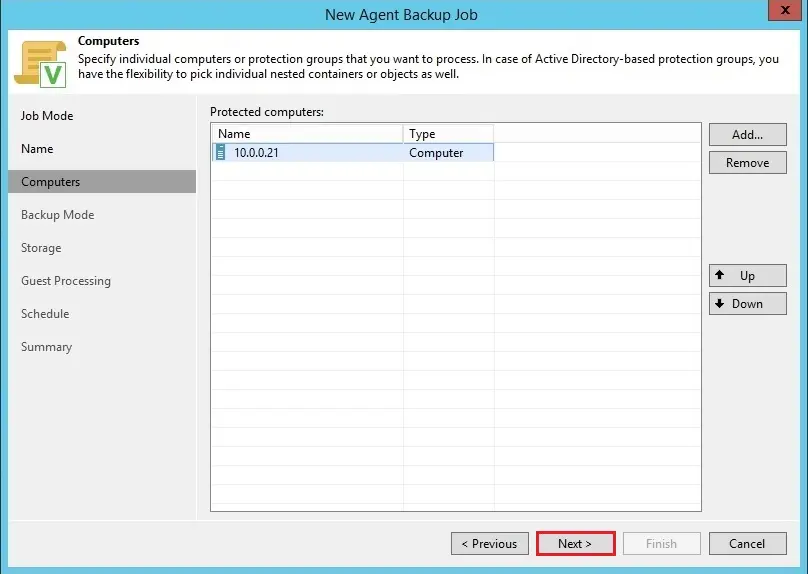
4- At the Computer level of the wizard, then click on Add.
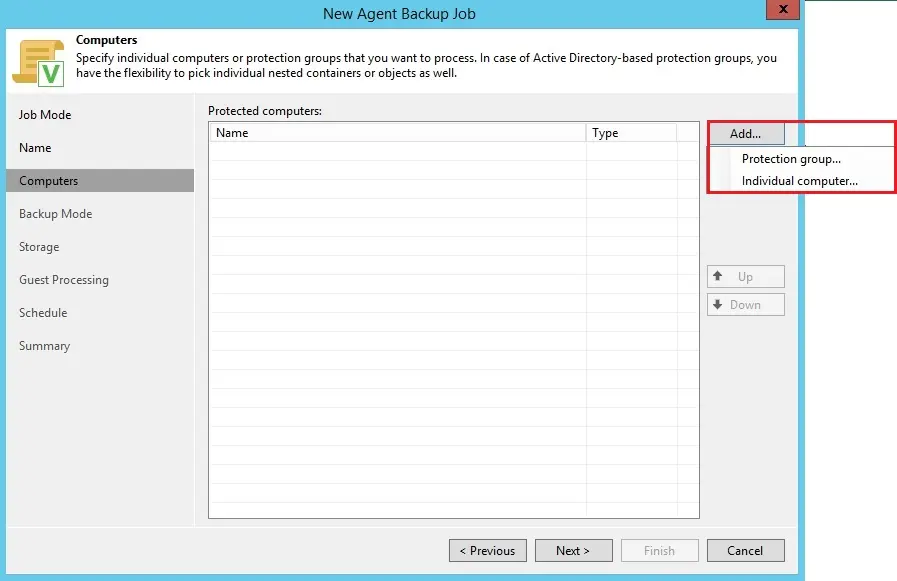
5- A- Select protection group, select object and then click ok.
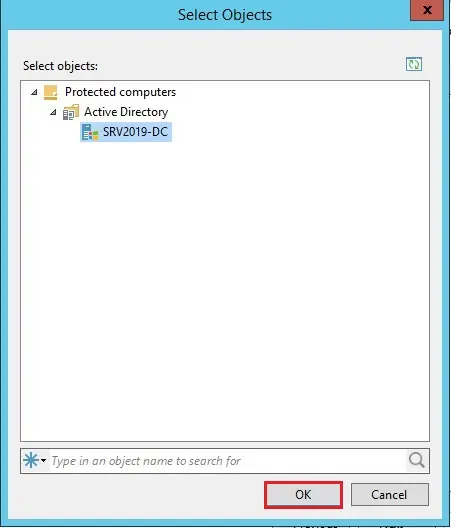
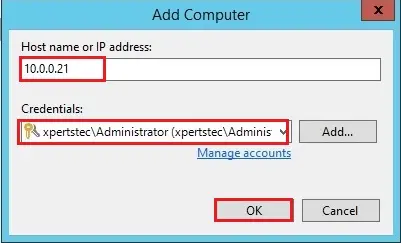
6- B- Select Individual computer
Enter host name or IP address of the computer you want to add then click OK.
7- Click next.
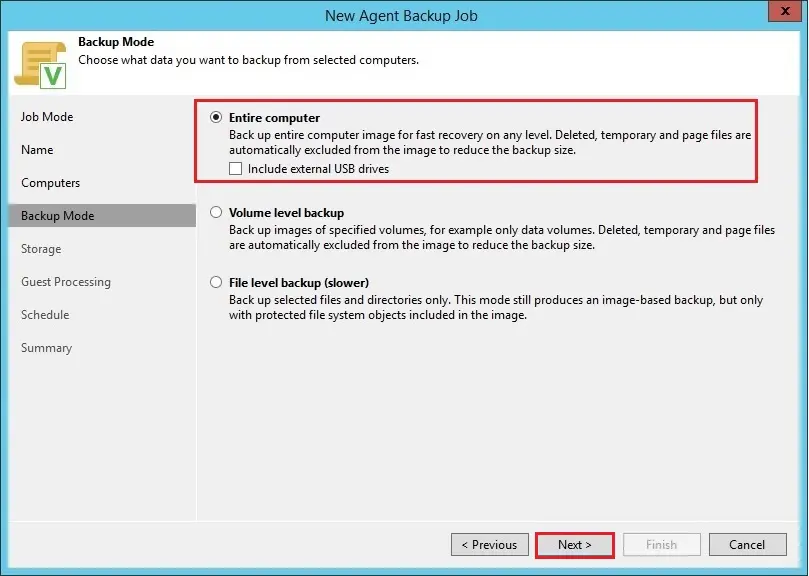
8- At the Backup Mode step of the wizard, select the Entire computer and select next.
At the Storage option of the wizard, select the backup repository where you need to store your backups. For other settings, leave the default values, and then click ok.
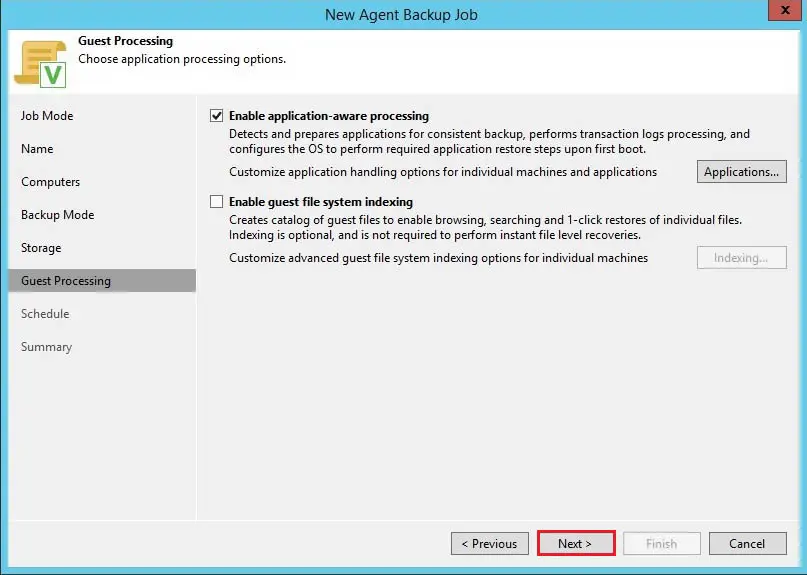
9- At the Guest Processing step of the wizard, leave the default settings and click next.
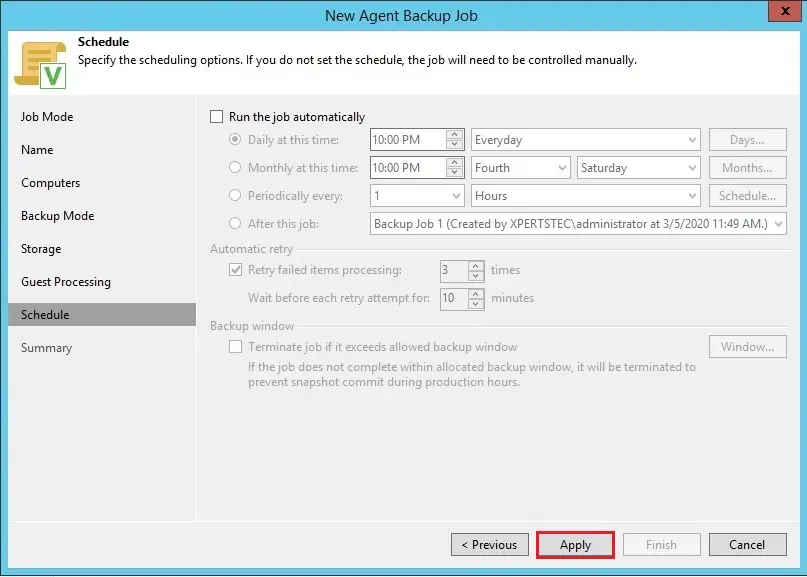
10- At the Schedule step of the wizard, define scheduling settings for the job and then click on apply.
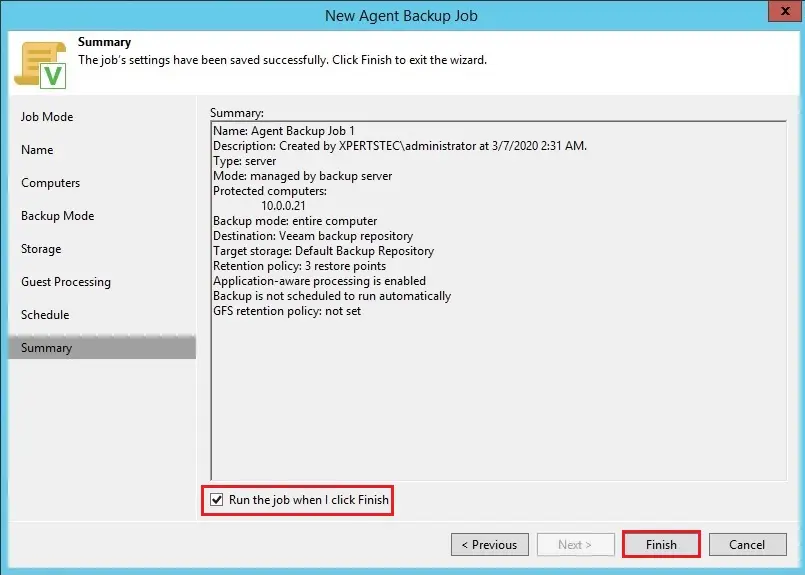
11- At the Summary option of the wizard, select the Run the job when I click Finish checkbox and then click the Finish button.
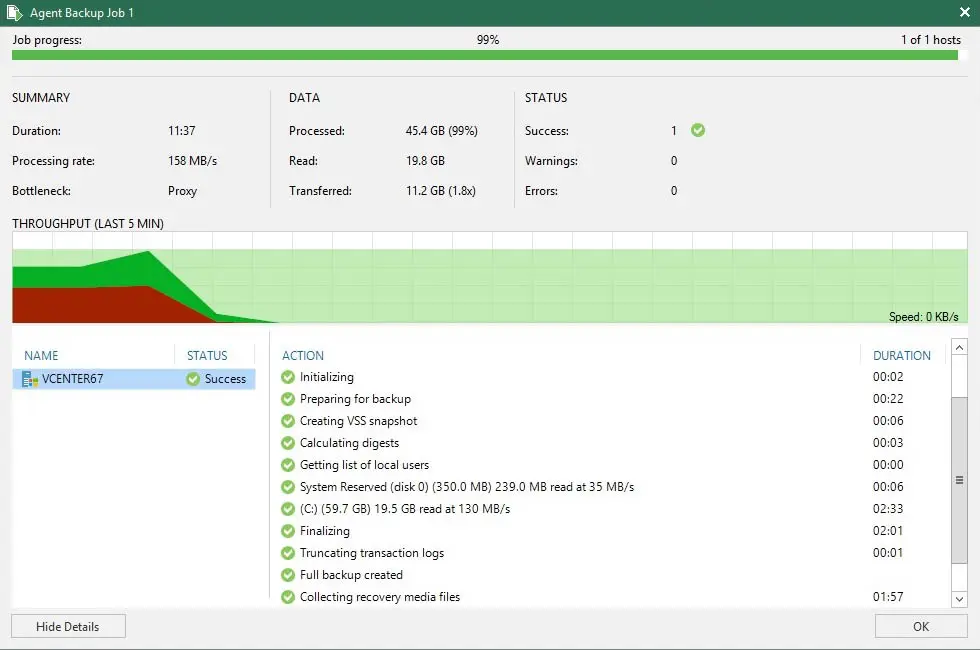
12- Agent backup job 1 completed successfully.
To learn more, please visit Veeam
Watch Youtube video about How to Create Agent Backup Job With Veeam Software.


