
Configure backup Veeam agent, we can configure the physical computer (Windows and server) operating system new backup job using Veeam Agent for Microsoft Windows.
Create Agent Backup Job for Computers & Workstation
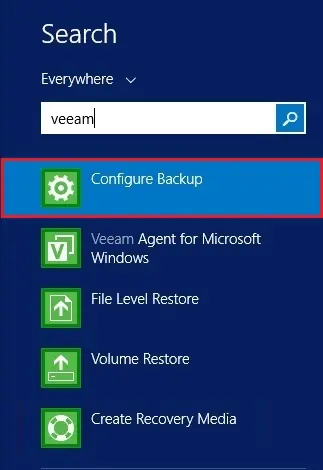
1- In server search type veeam and then click on configure backup
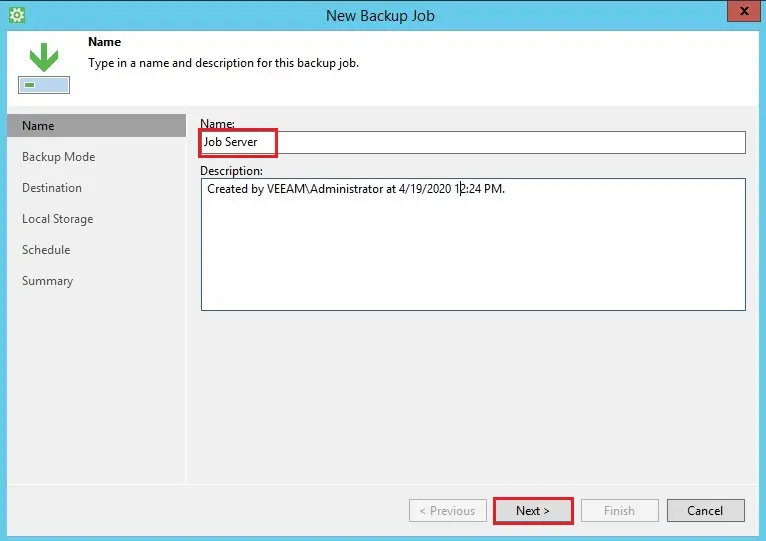
2- New backup job Veeam agent wizard, type a backup job name, description and then click next
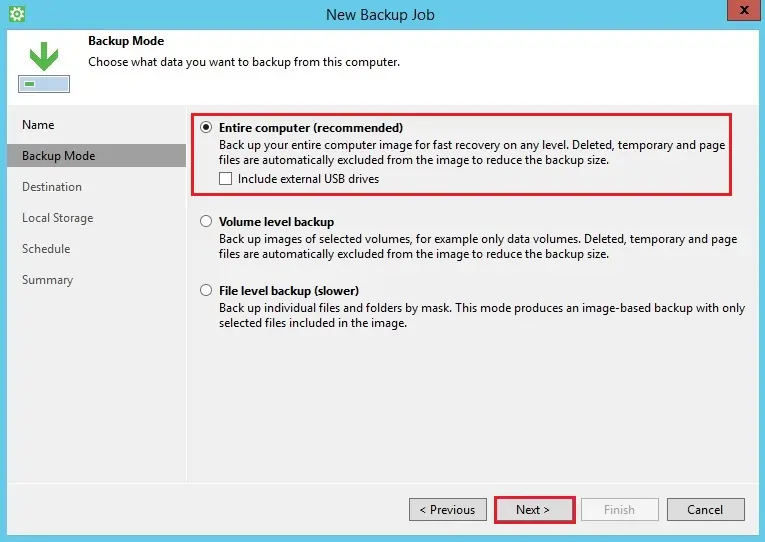
3- Configure backup Veeam agent wizard, select the backup mode that you want to configure.
I have selected the Entire computer (recommended) mode to backup my entire computer image.
Click next
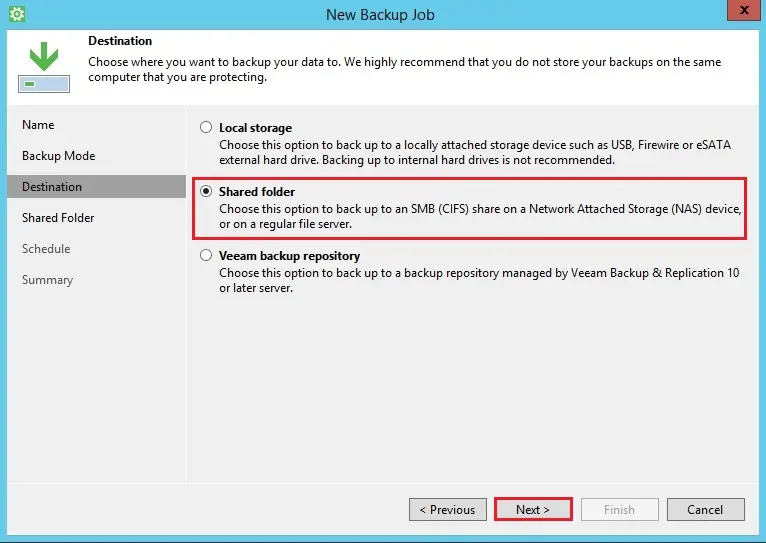
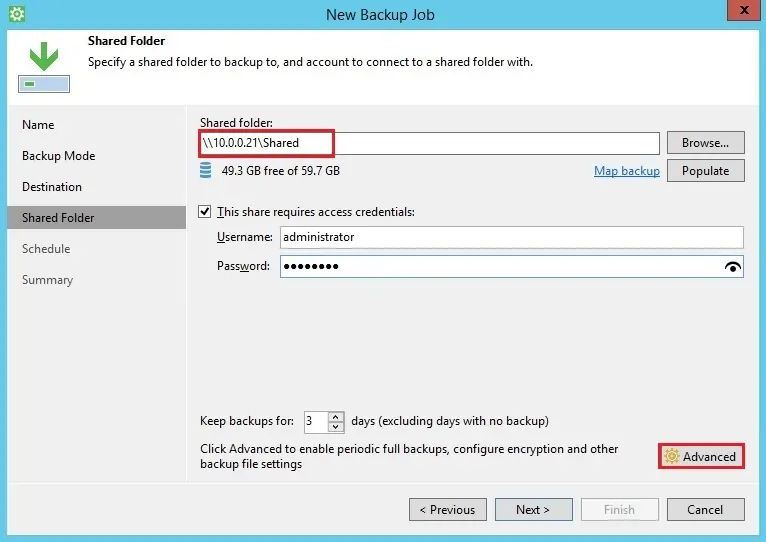
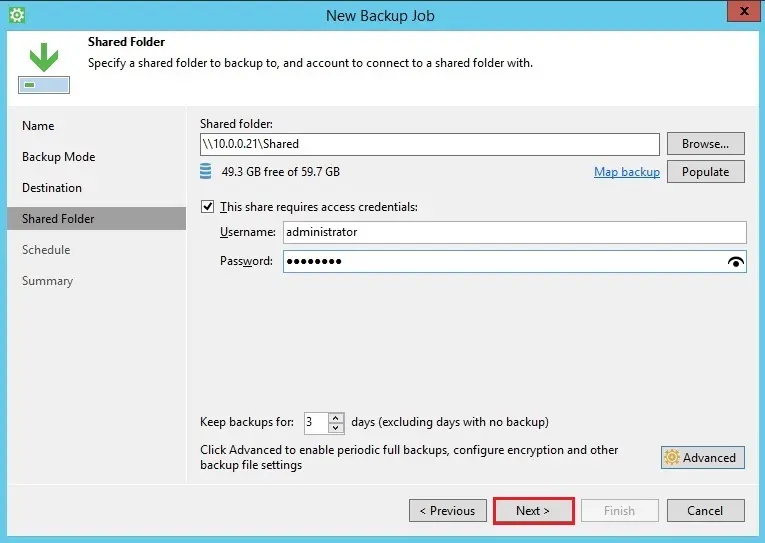
4- 3 type of destination location to save backup job (local storage, shared folder & Veeam backup repository) I am going to shared veeam agent backup job to a shared folder, so click next
5- We can configure full backup and incremental backup. full backup file and a chain of subsequent incremental backup files on the shared backup destination consolidates computer data from these files.
Type your shared folder path or click the browse button to select the shared folder. If you want to configure a credentials then select this share requires access credentials checkbox. now click on advanced button
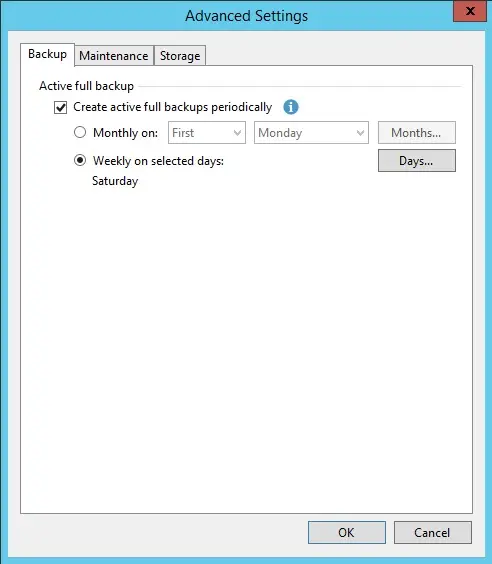
6- Under the advanced option, select the backup tab and select active full backup.
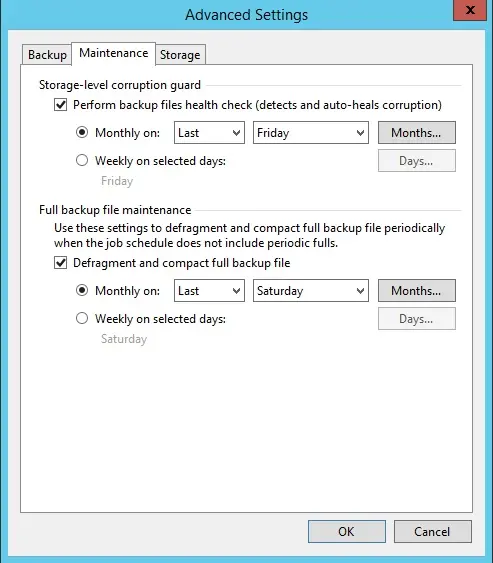
7- Configure backup maintenance
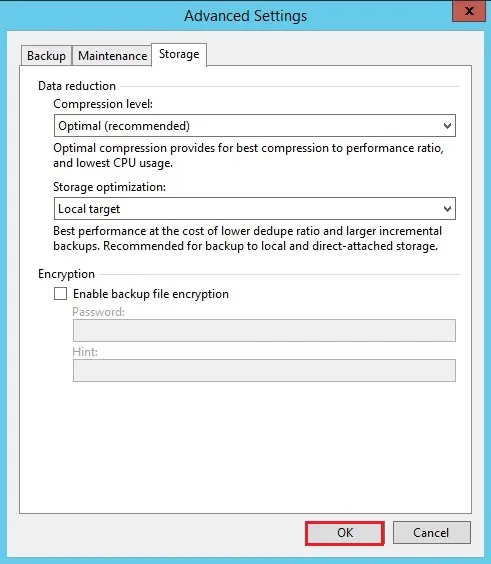
8- Select the storage tab and configure as your requirements, then click OK
9- Click Next
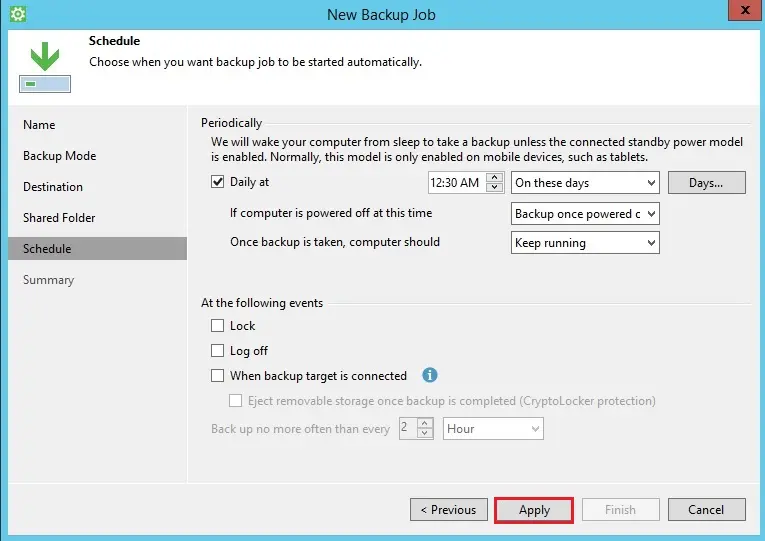
10- Configure the backup veeam agent wizard and select the backup schedule when you want the backup job to be started automatically. then click next
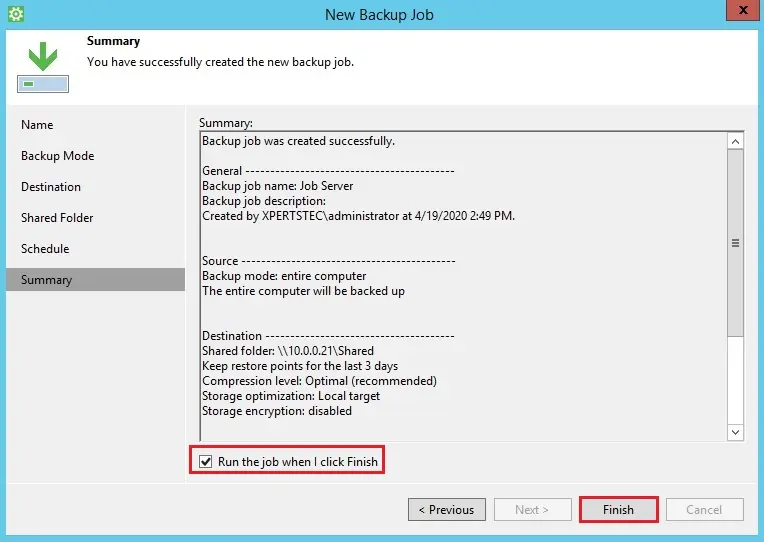
11- Backup Veeam agent job, review the backup settings. Check run the job when I click Finish checkbox and then click on Finish button.
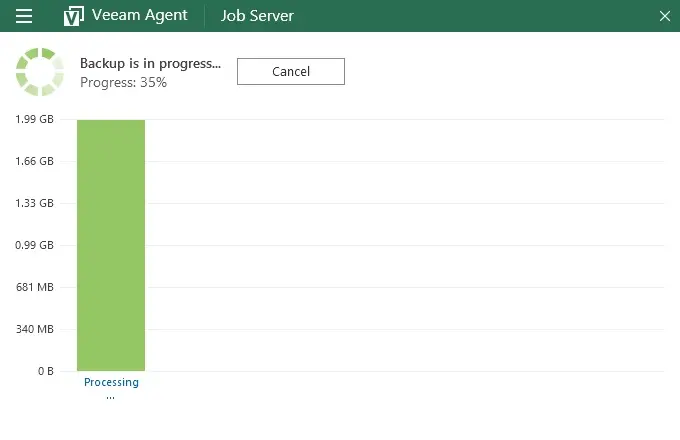
12- The full backup job is in in progress, you can click on the graph to show backup details
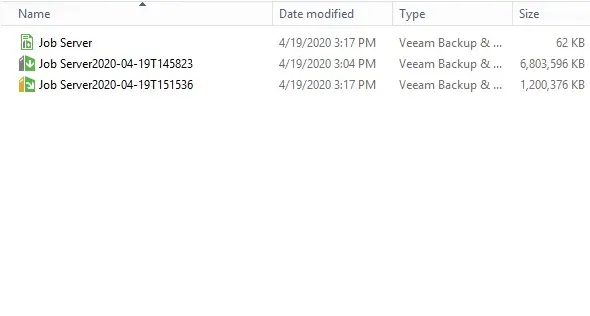
13- Veeam Agent for Windows backup image created.
If you would like to know more about how to create agent backup job for Windows, Servers and workstation click here