
In this blog, I will show you how to Configure NFS Share in TrueNAS CORE. Creating a Network File System (NFS) share on TrueNAS CORE gives the benefit of making lots of data easily available for anyone with share access. Depending how the share is setup, users accessing the share can be restricted to read or write privileges.
How to install of TrueNAS CORE.
NFS allows users to mount all or a section of a file system throughout the network. The share section of the file system that is mounted would be accessed by clients with have permissions like read only or read/write.
How to share file/directory via NFS in TrueNAS.
Type the TrueNAS server IP address in the browser.
TrueNAS CORE OS supports OS X, Unix, and Windows clients and various virtualizations VMware.
To configure NFS share on TrueNAS, please follow below steps.
Login to TrueNAS CORE
TureNAS CORE dashboard.

Configure NFS Share in TrueNAS CORE
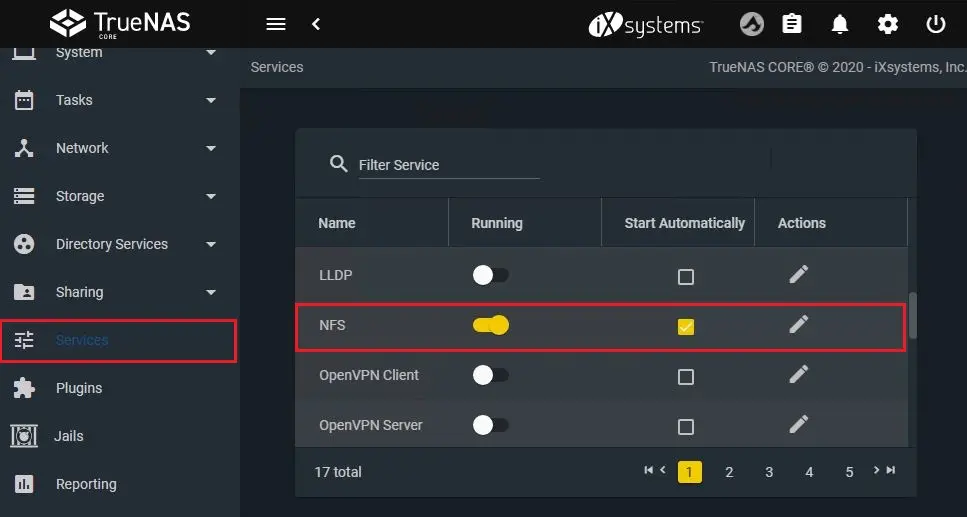
Select the services tab and then enable NFS service.
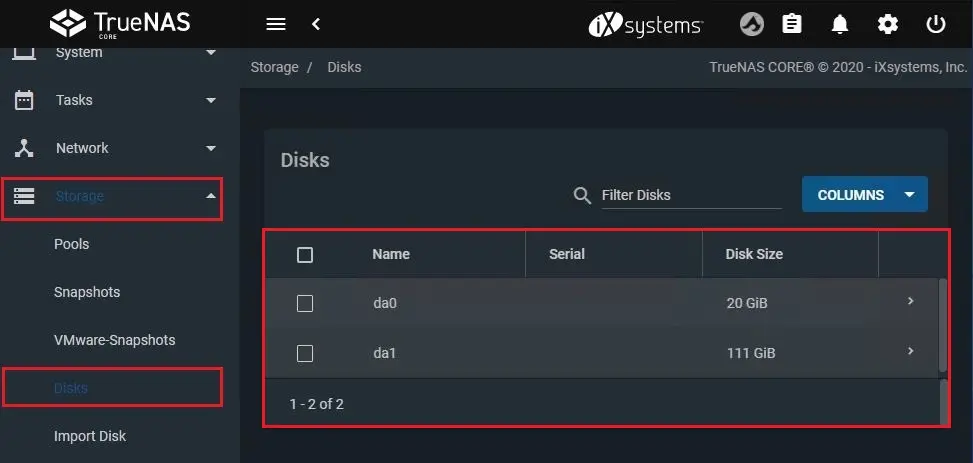
Choose storage option and then disks to check your disks.
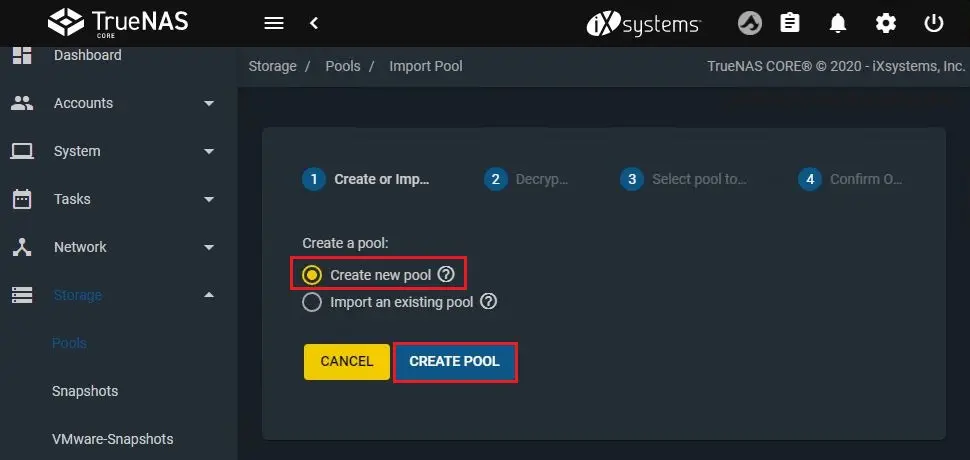
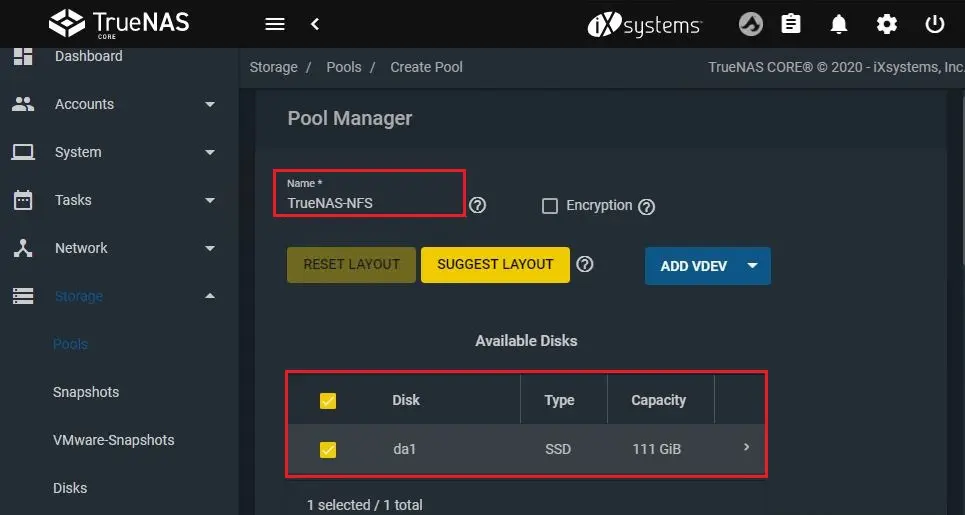
Under storage choose pools and then click on ADD button.

Choose create new pool and then choose create pool.
Type name and then choose disk the one you would like to use for NFS share.
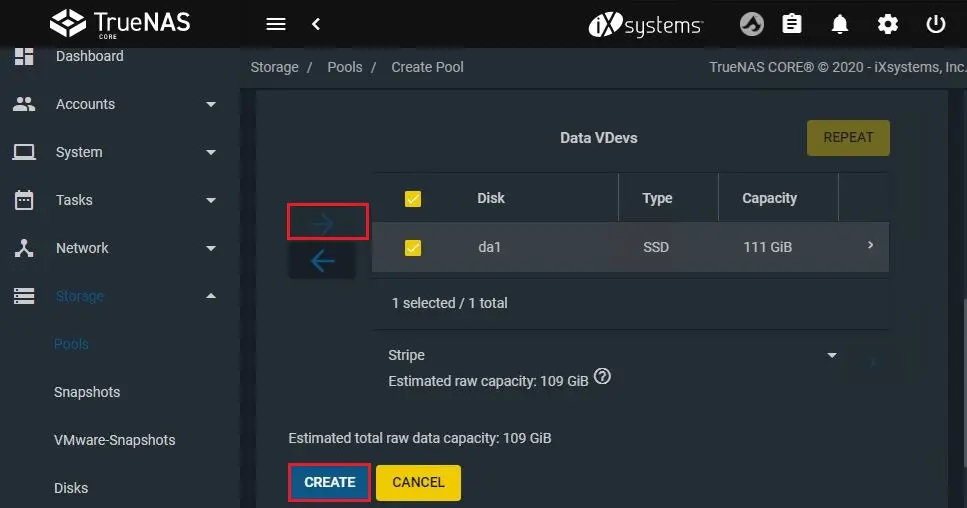
Click on forward arrow key and then click create.
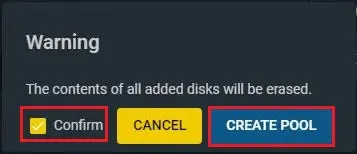
Select Confirm and click Create Pool.
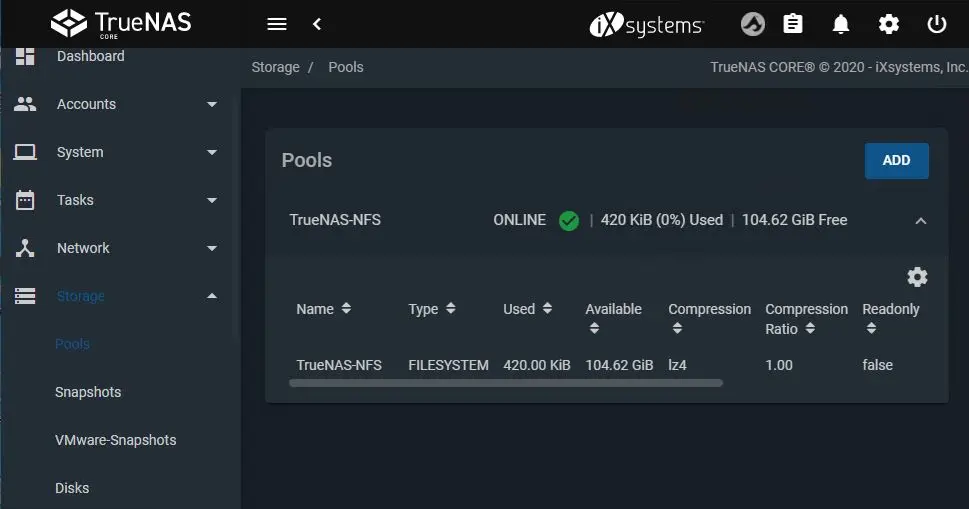
A pool was successfully created.
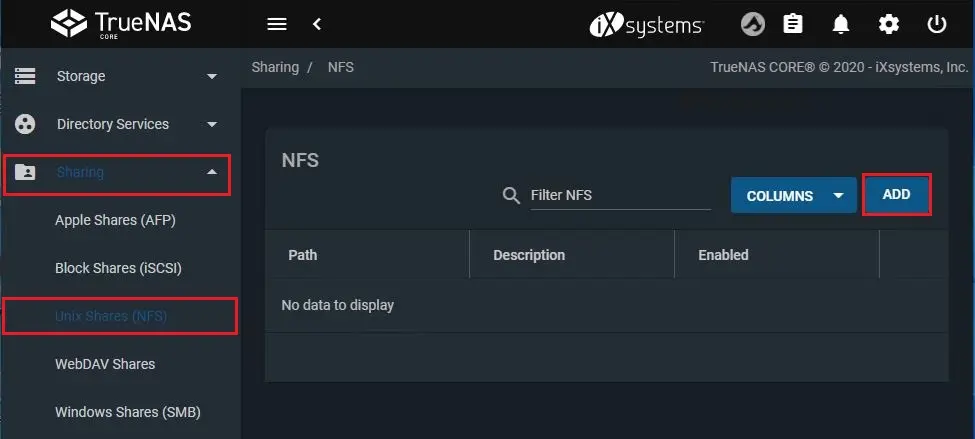
To configure NFS share choose the Unix Shares (NFS) option and then click on ADD button.
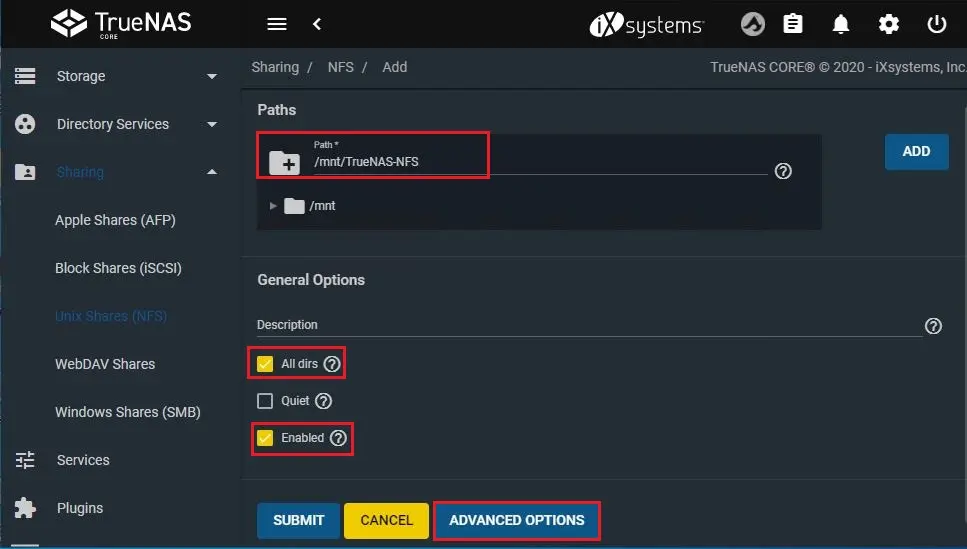
Enter a path, select All dirs option, choose enabled and then click advanced mode.
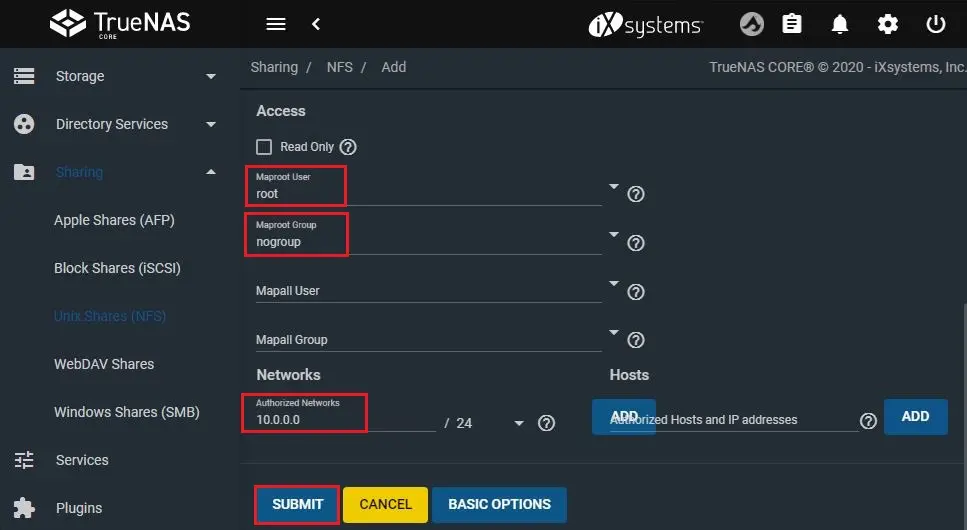
Maproot User – Select root
Maproot Group – Select nogroup
Authorized Network – type your network address and then click SUBMIT
NFS path created.

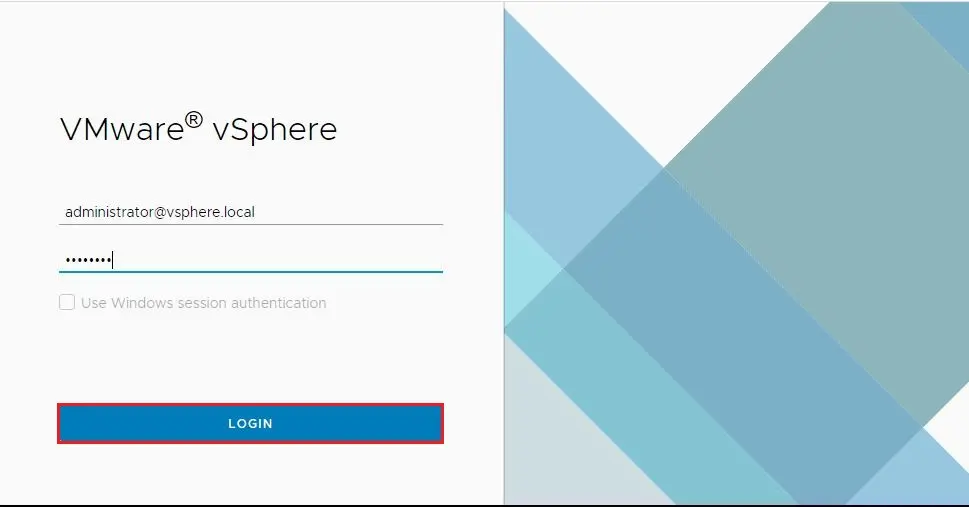
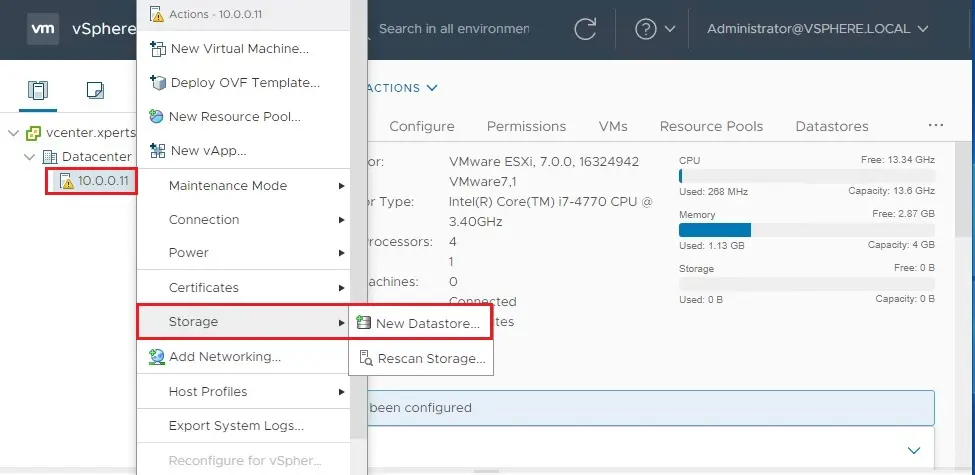
Now we configure on TrueNas CORE. Now we can Add NFS shared to VMware Host as a datastore. Log in to VMware vsphere client.
Right-click, on ESXi Host, click Storage and then New datastore.
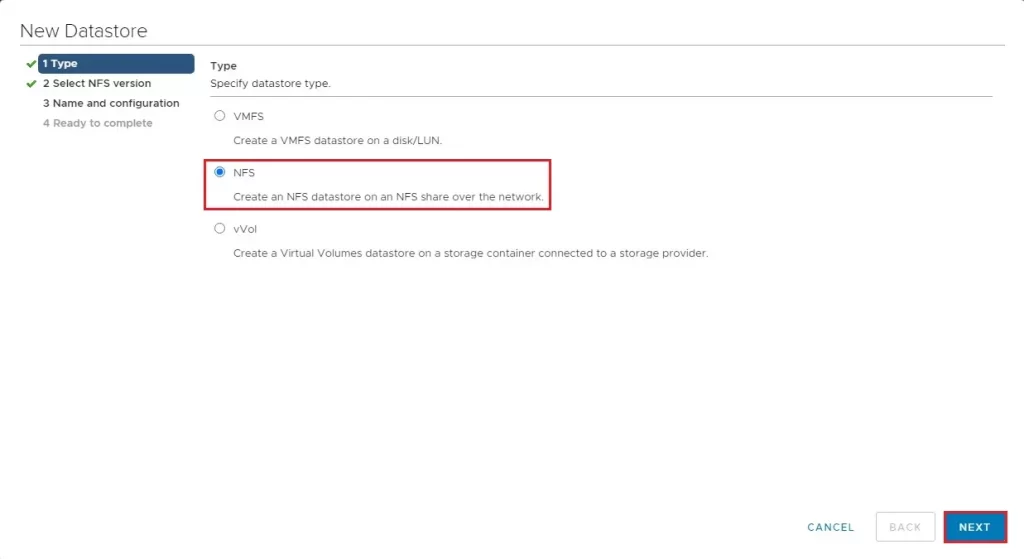
Select NFS datastore and click next.
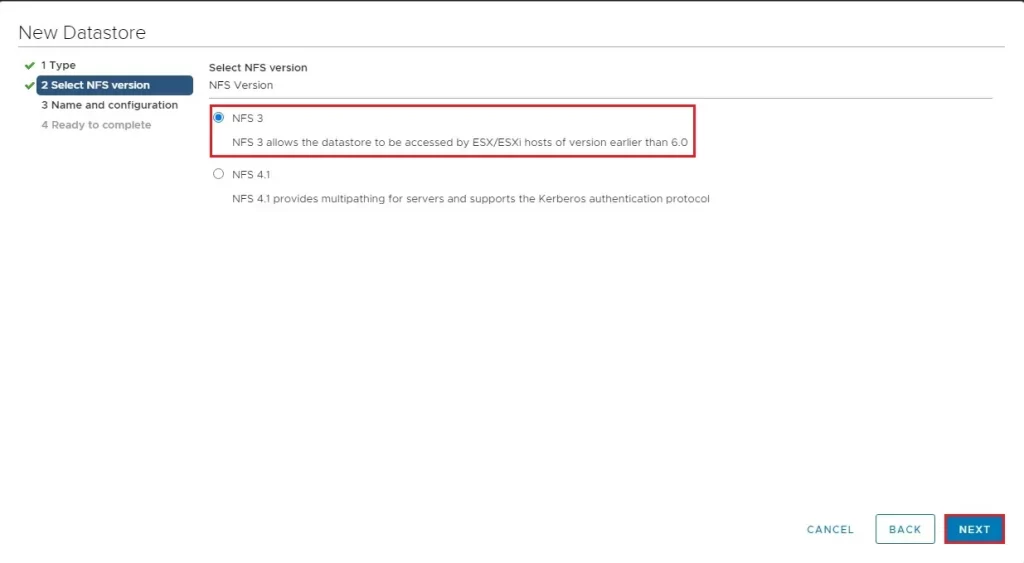
Select NFS version and then click next.
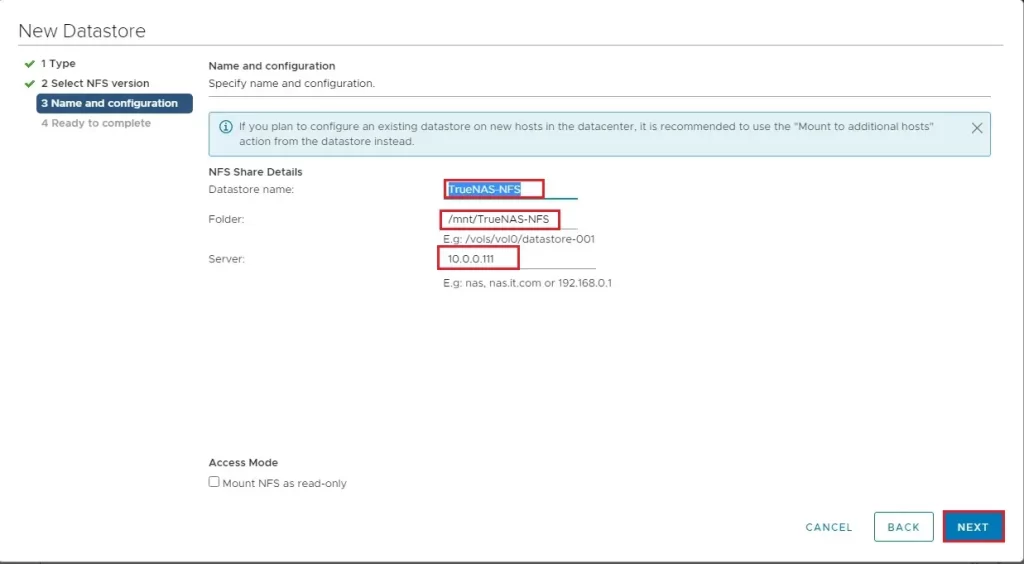
Enter Datastore Name, NFS share folder, NFS server IP, and then click next.
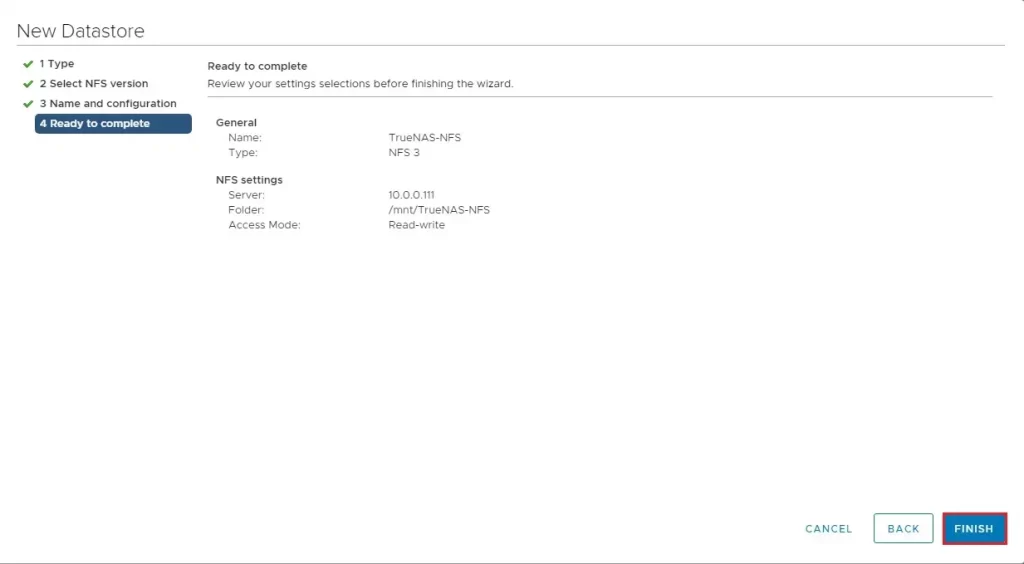
Review the summary and click finish.
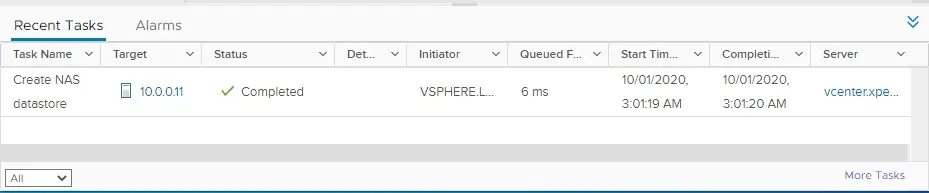
Successfully created datastore.
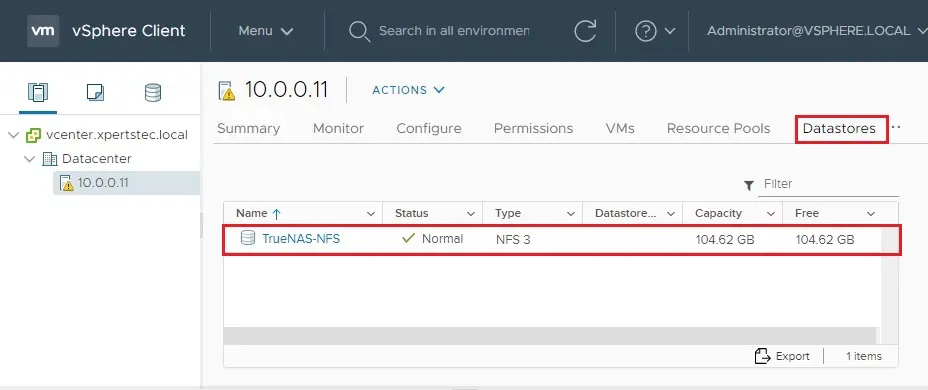
Now we can see TrueNAS-NAS on storage list.
For more details, please visit TrueNas