Step-by-step Installing Vinchin Backup & Recovery Software
In this blog, I’m installing Vinchin Backup & Recovery on VMware ESXi. Vinchin is a professional provider of data protection solutions for enterprises, offering Vinchin Backup & Recovery, an all-in-one backup software containing a series of data backup, instant recovery, and offsite DR solutions for private cloud, public cloud, and hybrid cloud environments.
Vinchin Backup & Recovery
can be either installed on a physical server or on the hypervisor as a virtual machine by creating a new VM. Burn the downloaded iso image to a DVD disk or make a bootable USB drive; you can install the software.
To download Vinchin Backup & Recovery first, you can click here:

Then, we need to install the software on VMware EXSi.
1. Open the browser and the EXSi server interface and fill in user credentials.

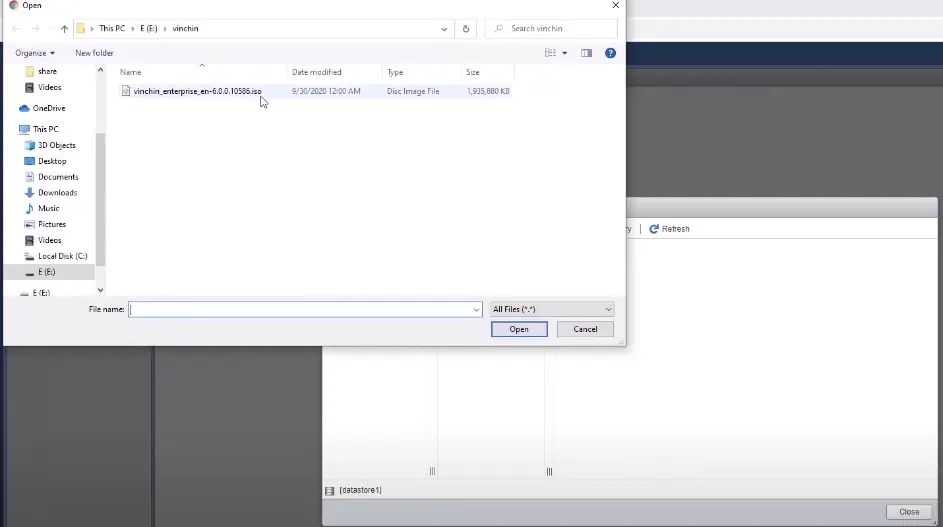
2. Upload the iso image to the ESXi server

3. Click on“Datastore browser”.

4. If you haven’t uploaded the iso image, click on the upload button to the pixel file for uploading.
5. Create a new virtual machine.

6. Finish the settings in order:
Select the creation type; click “Next”.
Then the new VM’s name selects the Guest OS family
Select installation storage.
Customize settings: CPU, memory, hard disk, and disk provisioning under hard disk
Choose storage for a CD/DVD Drive.
Review and confirm the settings, then click “Finish”.
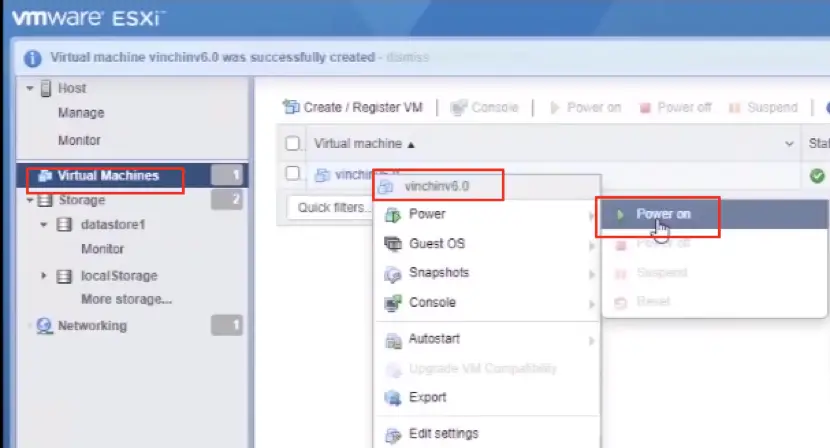
7. Power on the new virtual machine you created.
8. Click “Console” and “Open browser console”.

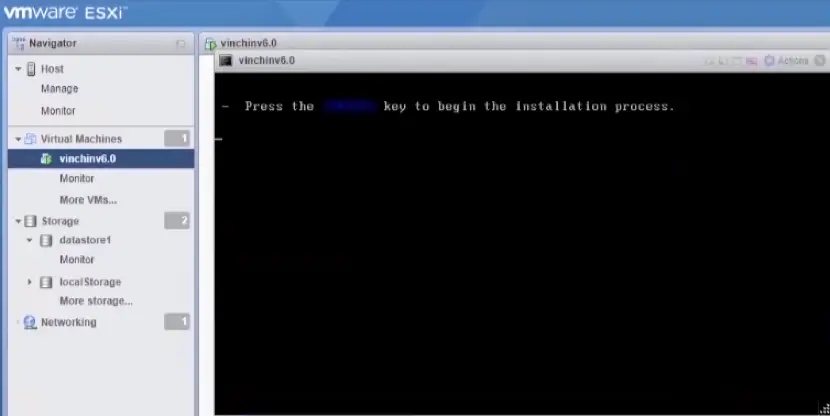
9. Recenter to start.
10. Set the installation destination.
Select the assigned virtual disk and click “Done”.

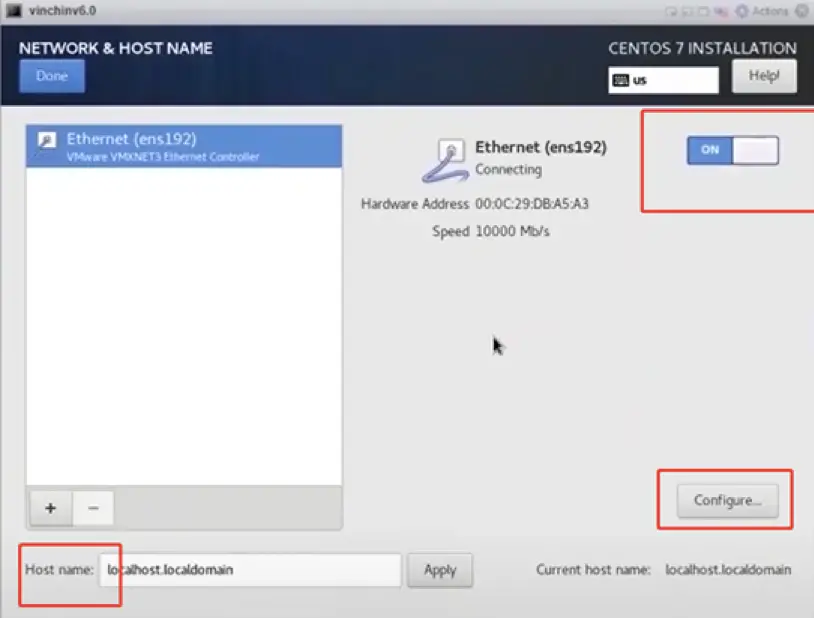
11. Set the network & host name.
Turn on the network adapter and change the host name. Click “Configure” to finish the network & host name.

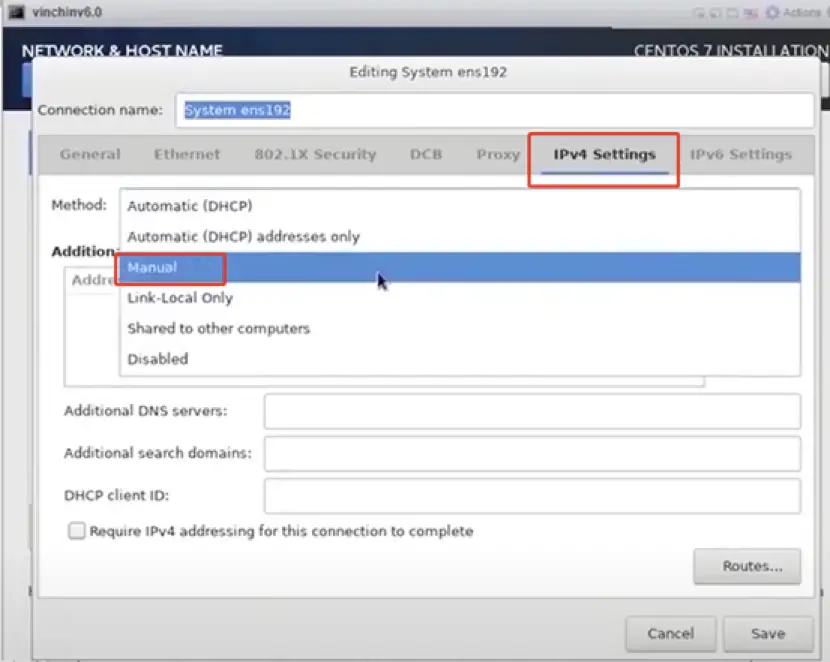
12. Click “IPv4 Settings” and choose “Manual” as “Method”.
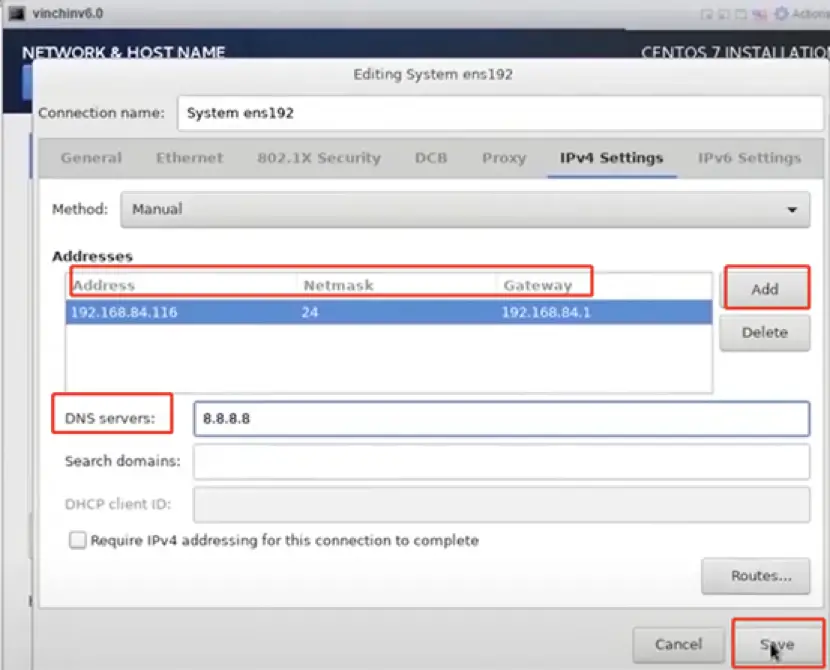
13. Add the valid addresses for “Address” “Netmask”” Gateway” and specify the DNS servers, click “Save”.
14. Click “Done” to finish.

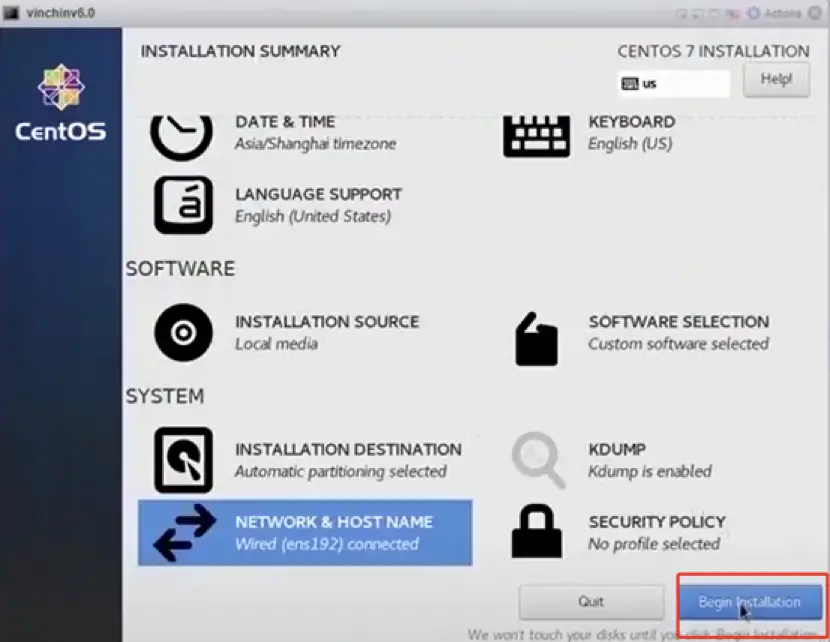
15. Click “Begin Installation”.
16. The installation has completed, now click “Reboot”.

Note:
the software will perform some post-installation in the first reboot, so please do not power off the Vinchin backup server during the process. Otherwise, the installation may be incomplete.
Vinchin Backup & Recovery supports VMware vSphere ESXi 4. x–7.0 and simplifies their protection with Agentless and LAN-Free Backup. Rather than install an agent in the virtual machine, the software interacts with VMware ESXi to back up the data, significantly saving up the cost, minimizing the backup system’s effect on the production virtual machine, and ensuring better business continuity. Also, the Scheduled Automatic backup under assorted backup strategies– Incremental, Full and Differential Backup- is efficient and practical.
So, now we have the software, but how do we back up VMware with these incredible features?
Here’s how we back up VMware VMs with Vinchin software.
Now we have completed the software installation and backed up the VMware data successfully, we can start our data protection journey with Vinchin, yet still there are more puzzles to solve and explore, namely, Instant Recovery, Archive to Cloud, Offsite Backup Copy and etc.
The 60 days full-featured free trial is currently available, download and get more.
Watch our video below or on YouTube to learn:
Vinchin Backup & Recovery on VMware ESXi.