Increase Disk Size EC2 Instance
Amazon Web Services (AWS) you may find that when we are using one of the EC2 Amazon Machine Images (AMIs) provided, you may run out of disk space. There doesn’t show up to be any way to resize an Elastic Block Store (EBS) volume; however, you can create a new one based on an existing snapshot and replace the current drive with a larger one. I have submitted the instructions for doing so below.
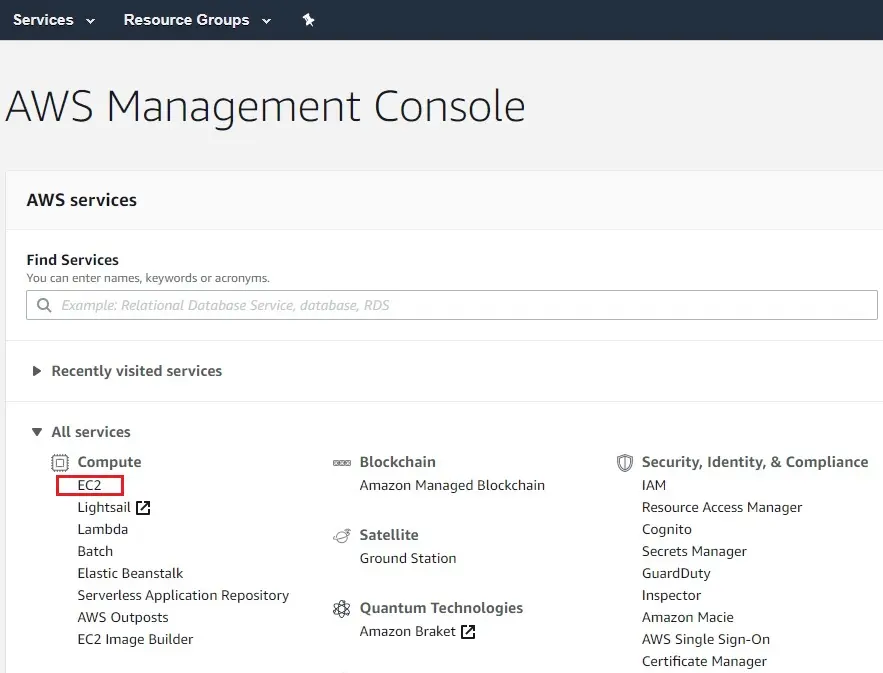
1- Log into the AWS Management Console
Increase Disk Size EC2 Instance
Select services and then select EC2 under compute.
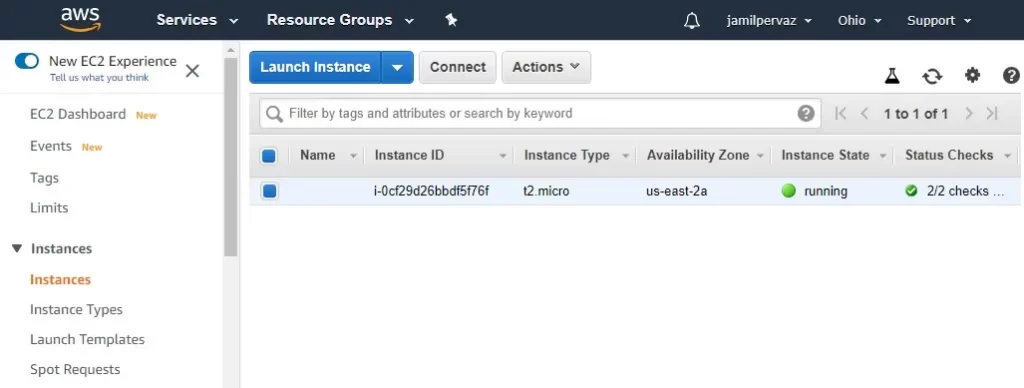
2- Make sure that the EC2 Instance that you want to change is not currently running
Create Snapshot
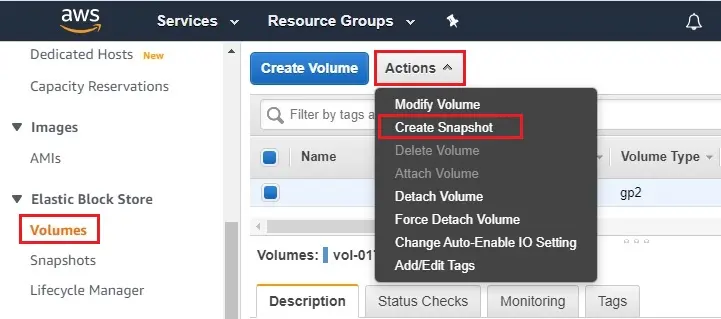
3- Select Elastic Block Store, select Volumes
Select the box next to the Volume that needs more space
Select Action menu, from the drop-down list, select Create Snapshot
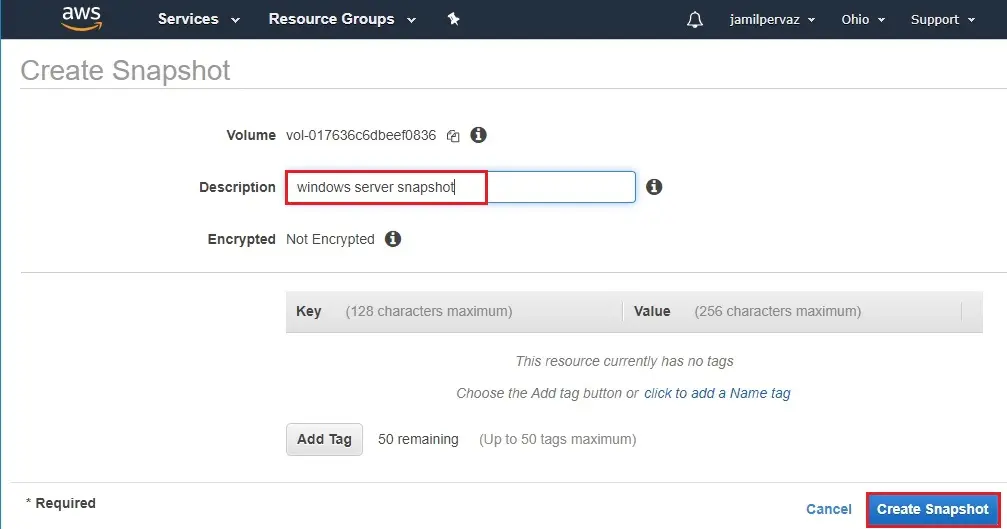
4- Type a Name, a Description and then click create snapshot.
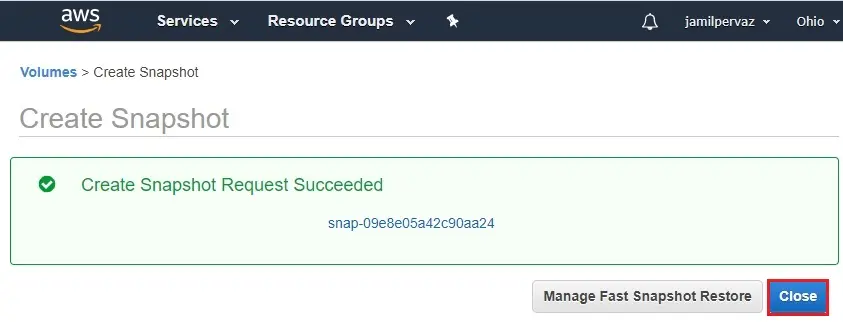
5- Snapshot request succeeded click the close button.
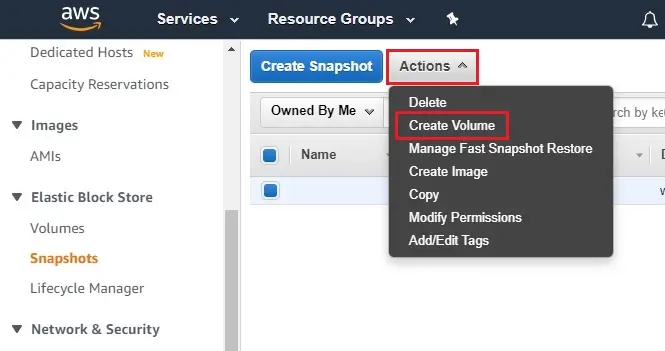
6- Go back to Elastic Block Store select Volumes
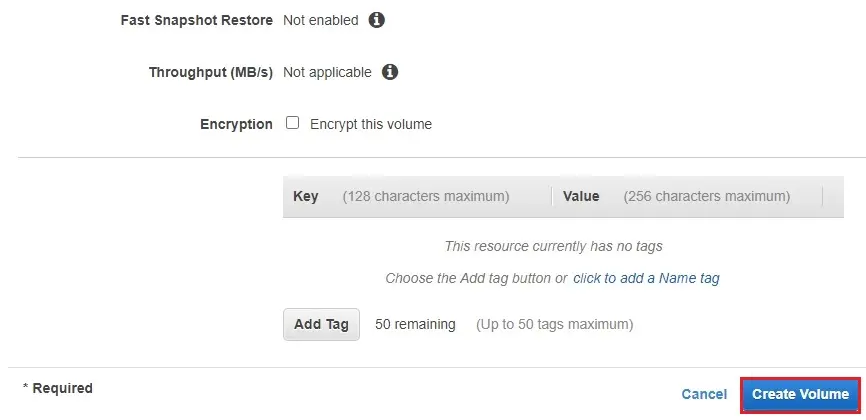
Select action menu and then click Create Volume
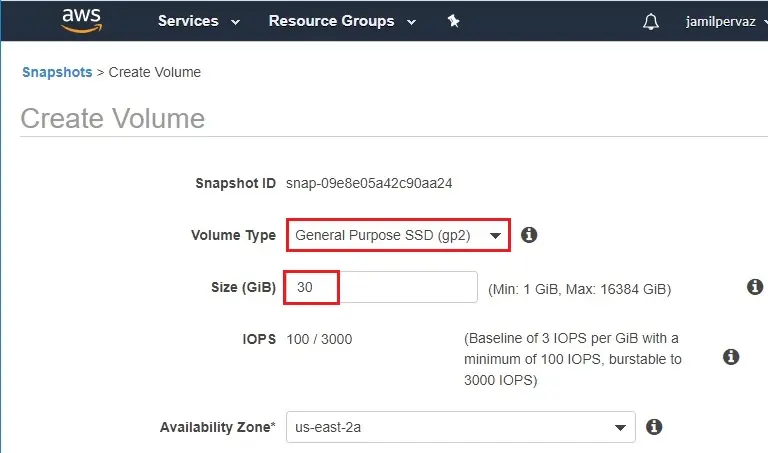
7- Select volume type
Type the desired size for the new volume
Be sure that you select the same Availability Zone for your instance
8- Click Create volume
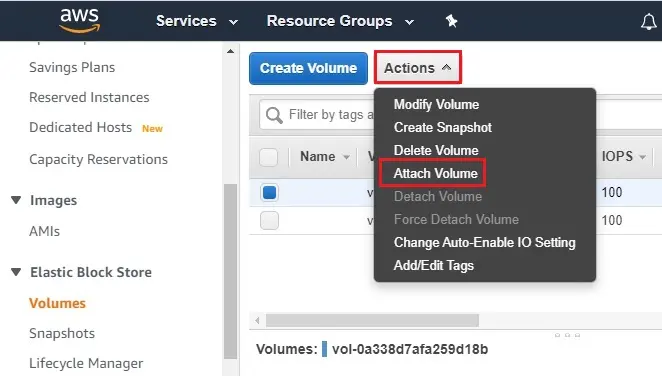
9- Choose the box next to the Volume that is currently connected to the Instance
Make sure that there is no other Volumes are selected
10- From the Action menu list select Attach Volume
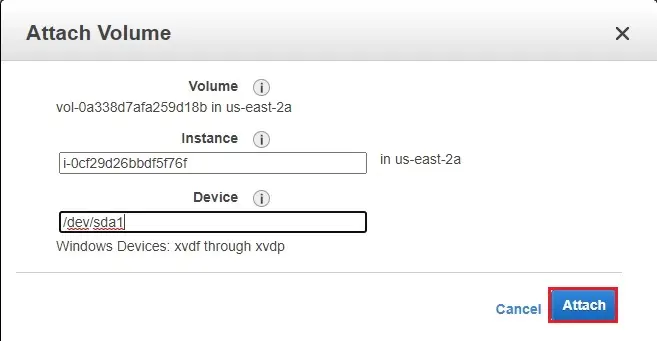
11- Select the Instance that you want to change
Change the value in Device from xvdf to /dev/sda1 and then click Attach
12- Click close.

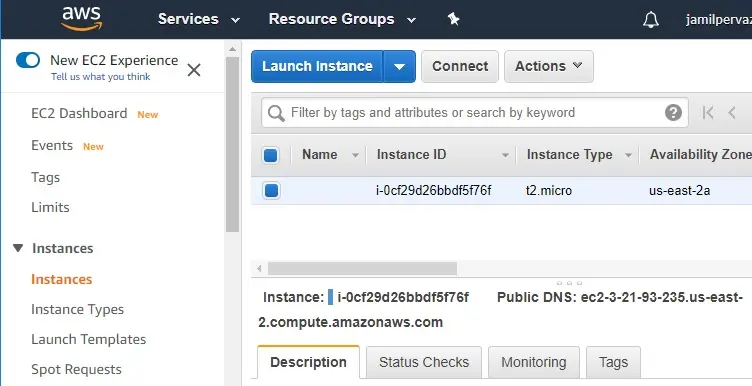
13- Go to your Instances and start your Instance
After starting click connect.
Click choose file
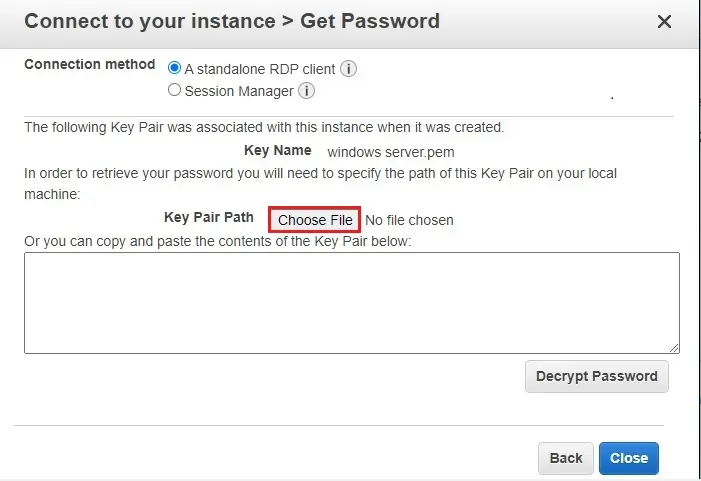
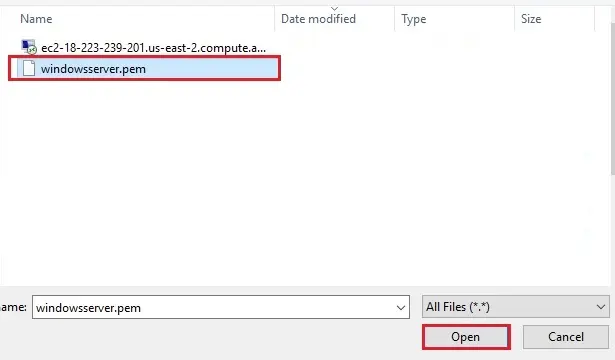
14- Select your key pair and then click open
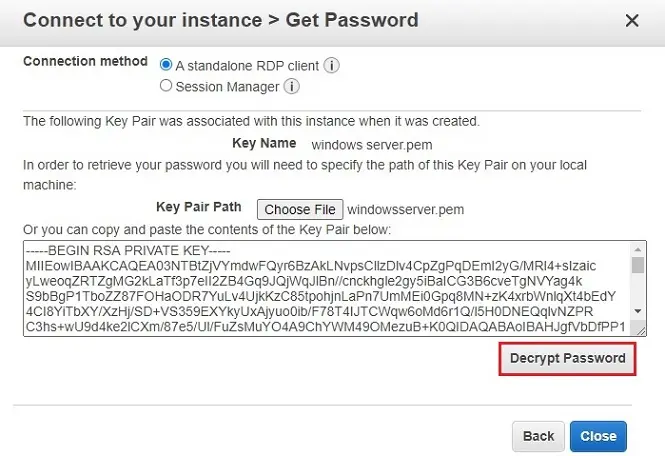
15- Select decrypt password
16- Select get password
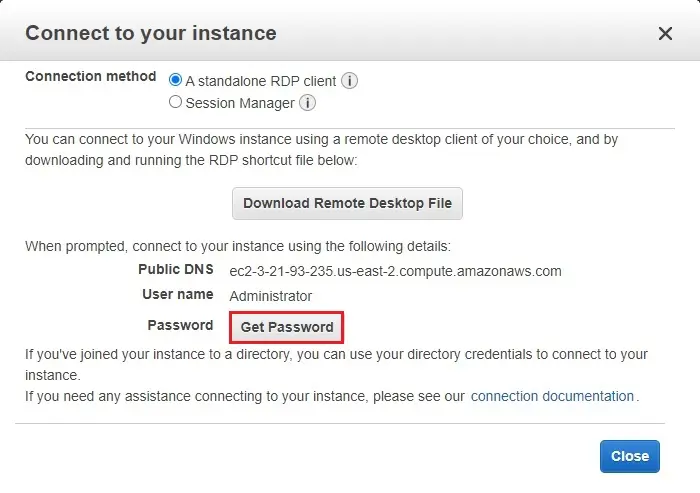
17- Copy the password and then click download remote file
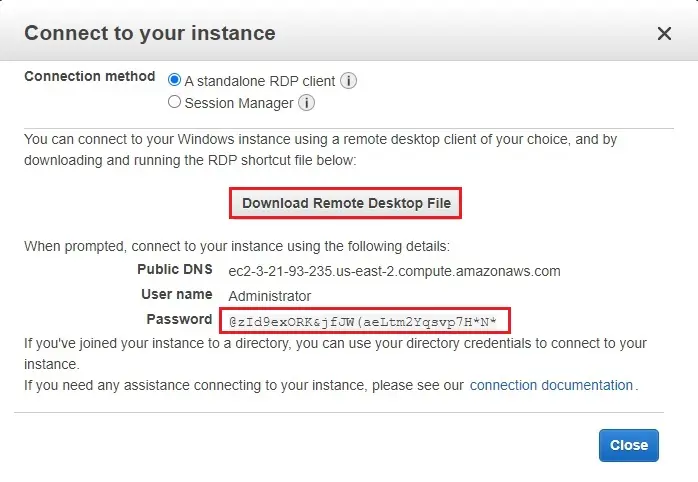
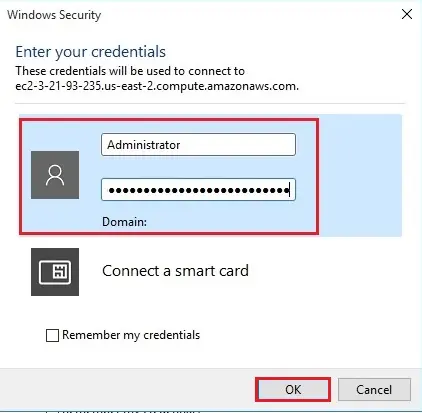
18- Paste the key pair and then click OK.
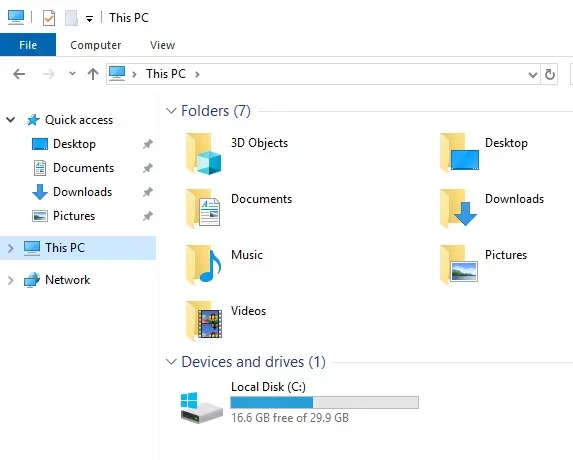
19- Now, you can see only one partition is showing.
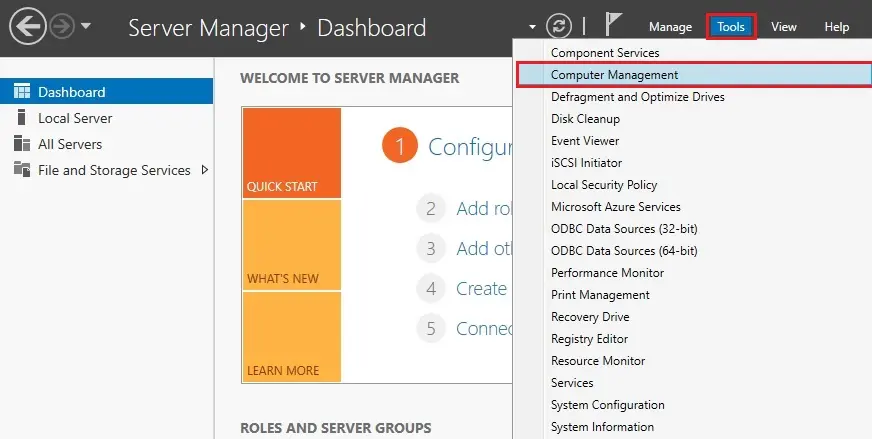
20- Open server manager, select tools, and then click computer management.
21- Under storage select disk management.
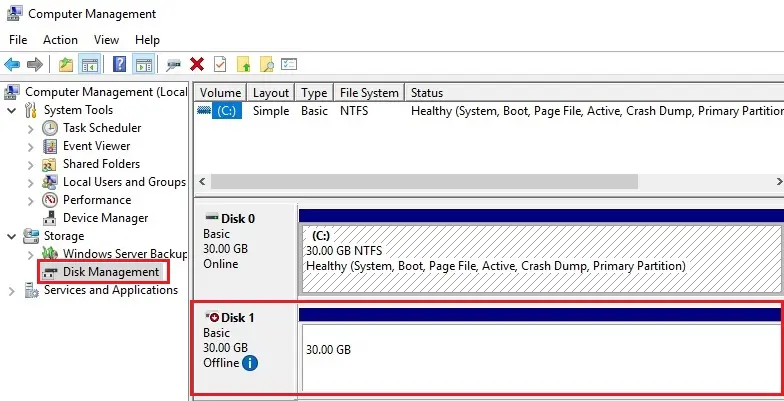
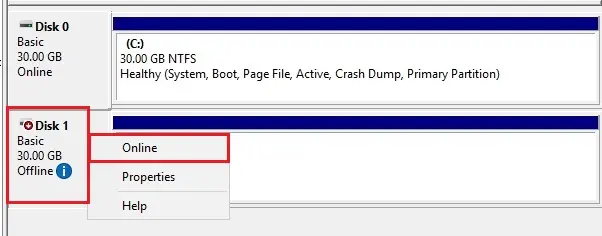
22- Right-click on offline disk and click online
23- Disk is online
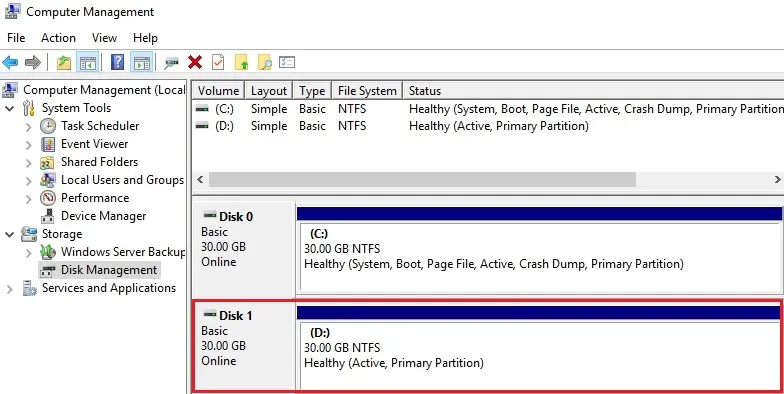
24- Here is 2nd disk.
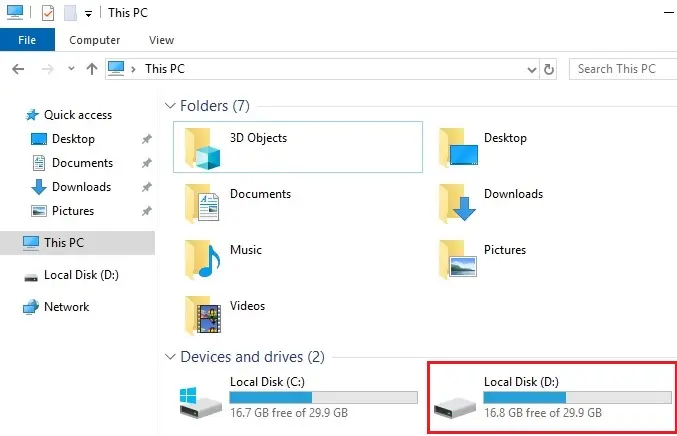
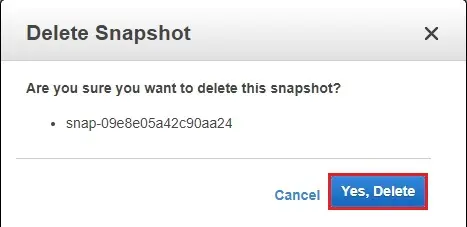
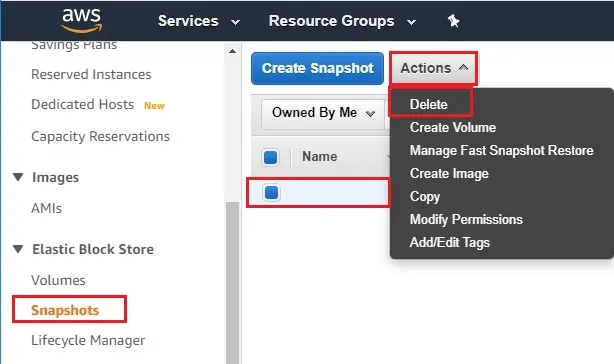
25- After you are gratified that the volume works, feel free to delete the Snapshot.
Select snapshot under elastic block store, select the action menu and then select delete.
26- Select Yes, Delete.