Create EC2 Instance in AWS
In this blog, I am going to create an EC2 Instance in AWS. I will show you how to launch an on-demand EC2 instance in AWS Cloud. The instance would have charged per hour with different rates based on the type of the instance chosen. AWS offers multiple instance types for the relevant business needs of the user.
Hence, you can rent an instance based on your own CPU & memory requirements, and use it as long as you want. You can terminate the instance when it is no more used & save on costs. This is the most striking benefit of an on-demand instance- you can drastically save on your CAPEX.
What is Amazon EC2 Instance Click Here?
Create EC2 Instance
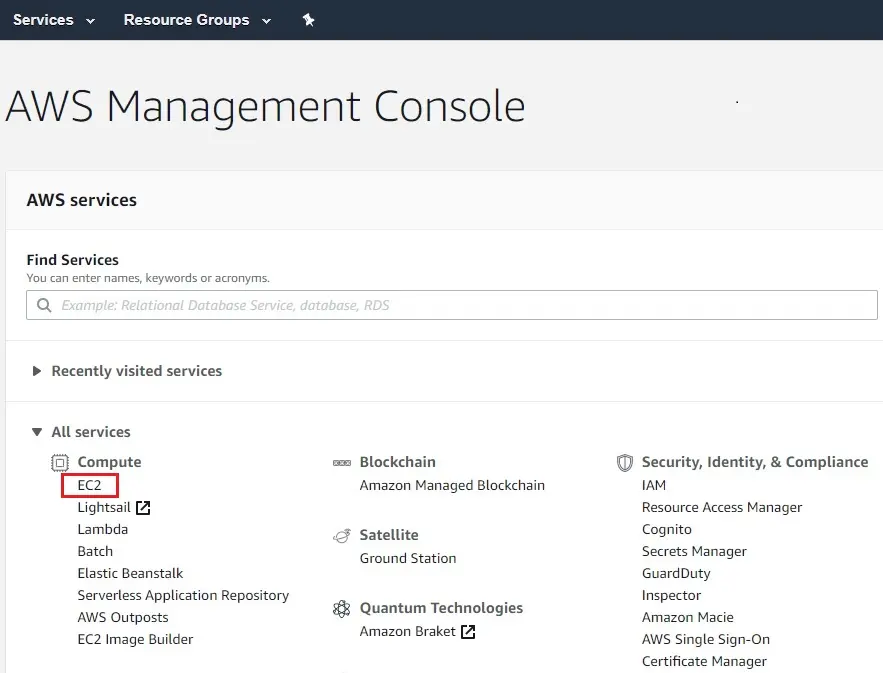
1- Login with AWS account and go to the AWS Services tab at the top left corner. Click on EC2 under compute.
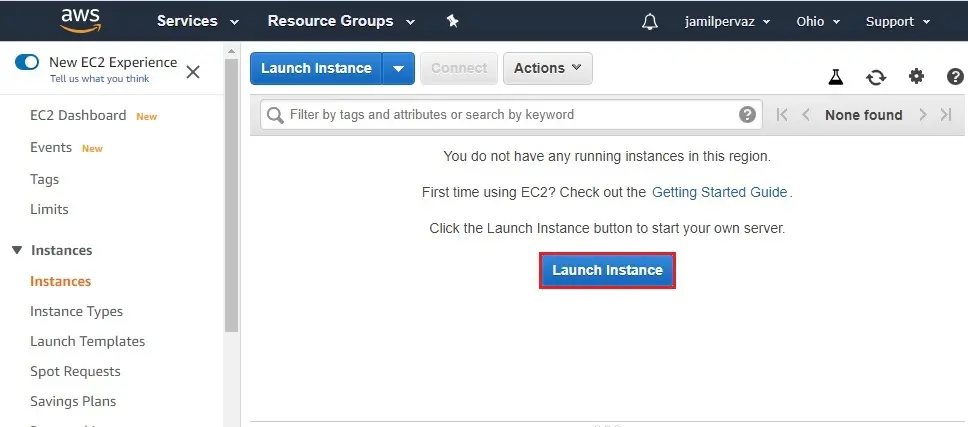
2- Select instance on your left side and then click on Launch Instance button.
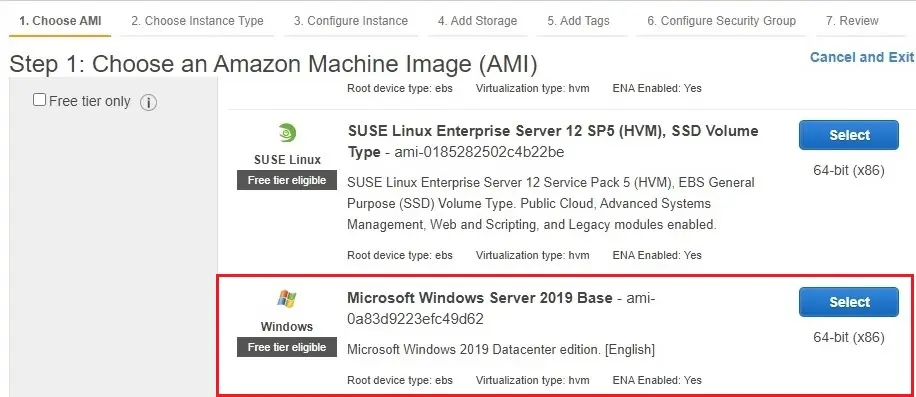
3- Here we can choose the default Amazon (64 bit) AMI.
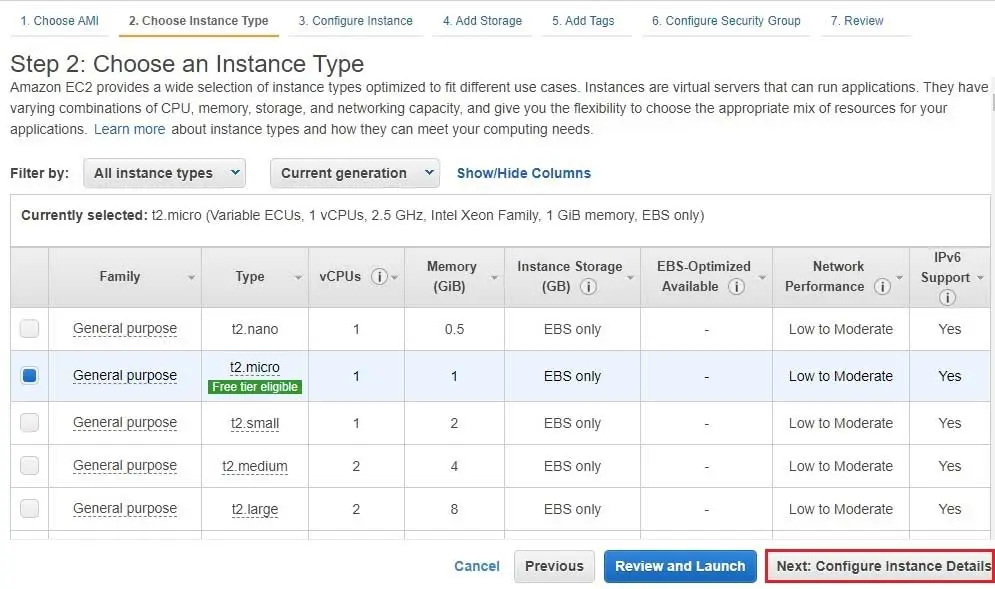
4- Choose instance type.
Click Next : Configure Instance details
5- Type Number of instances.

6- Network section select you of VPCs available in our platform I am selecting the default one. Subnets we can select the subnet where you need to place our instance.
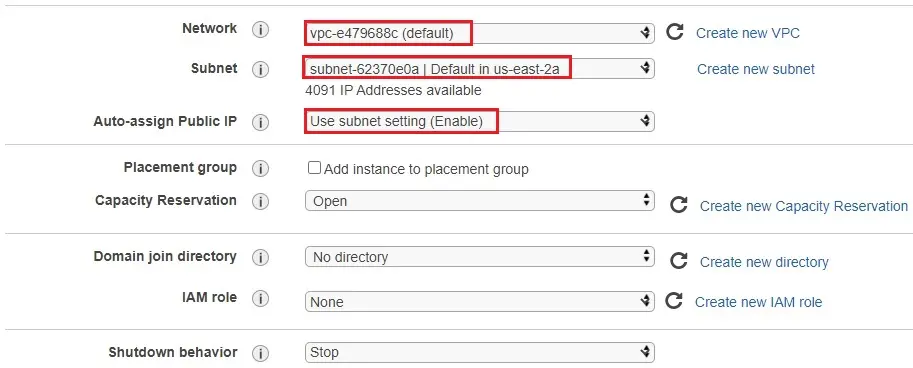
7- Enable termination protection, It will not delete your instance if you have enabled accidental termination protection.
Click on Next : Add Storage.
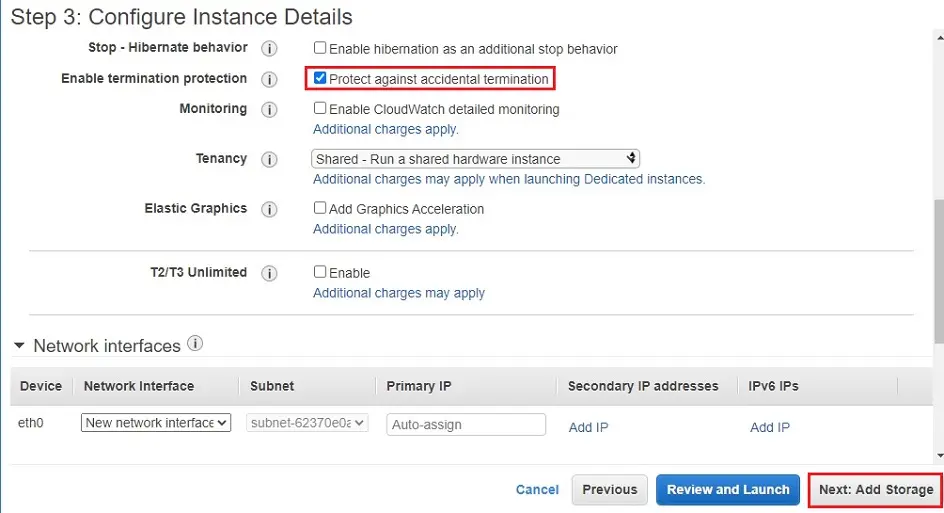
8- Here you can change your volume size, add new volumes, change the volume type, etc.
Under Volume type, you can choose Magnetic, General Purpose SSD, Provisioned IOPS.
Click Next : Add Tags.
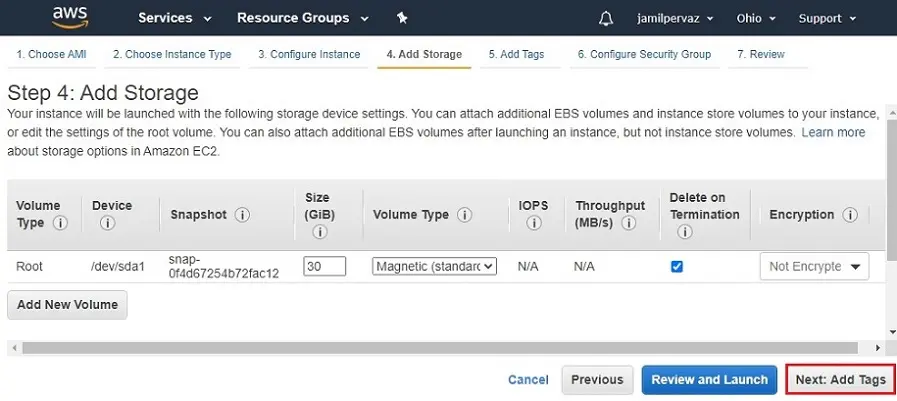
9- Here we have tagged the instance (Windows Server 2019)
Click on Next : Configure Security Groups
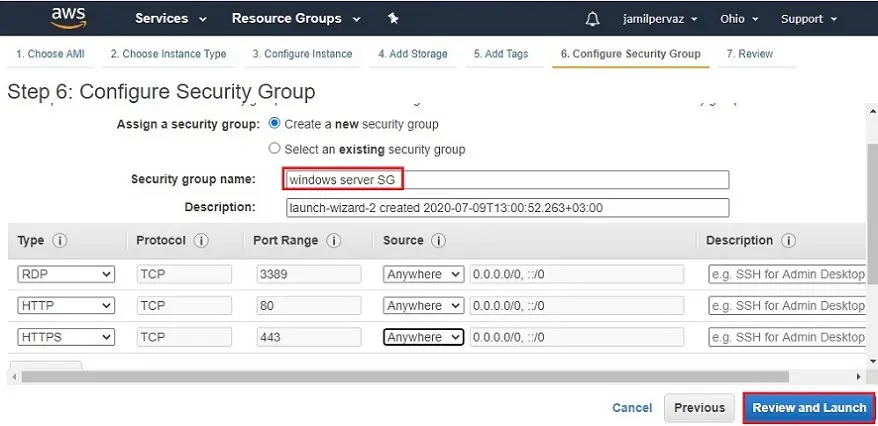
10- Here you can create a new Security Group.
Naming our SG for easier reference
Select Protocols which you want to enable on my instance
Click on Review and Launch
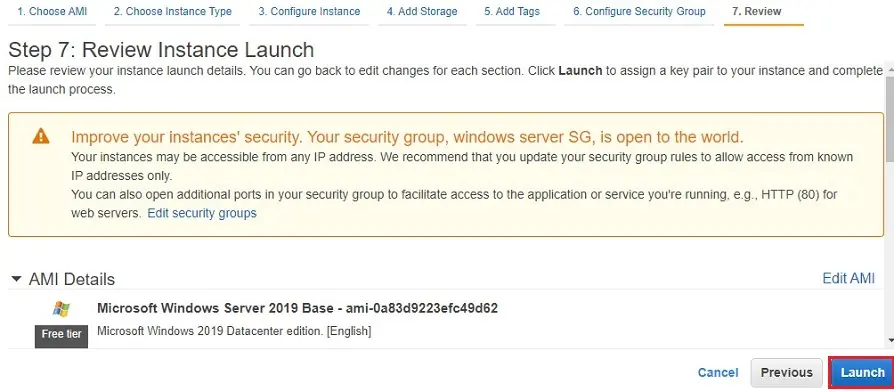
11- Review instance details and parameters and then click launch.
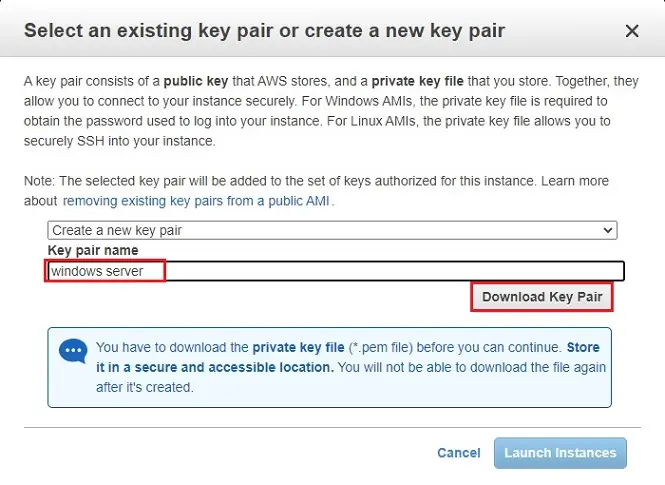
12- Create a key pair to instance login. A key pair is a kind of public, private key.
AWS stocks the private key in the instance, you are asked to download the private key. Verify you download the key and keep it safe and secured.
Select Create a new key pair
Type a name to your key
Click download key pair and save it in your secured folder
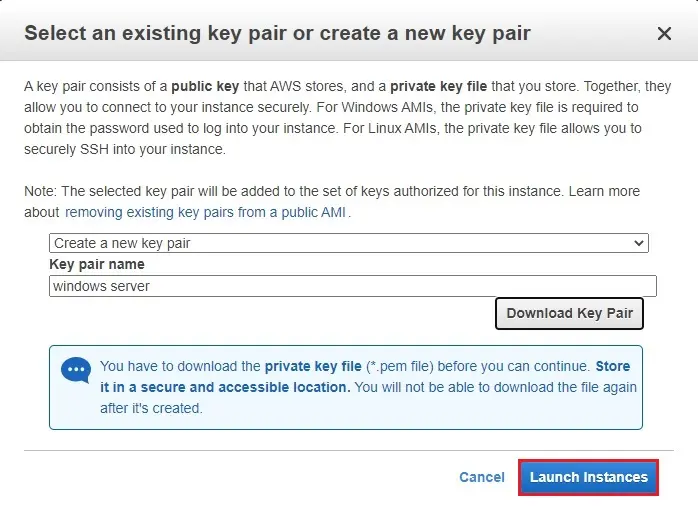
13- After downloading key pair and saving your key, click launch instance.
14- You can see the launch status meanwhile.
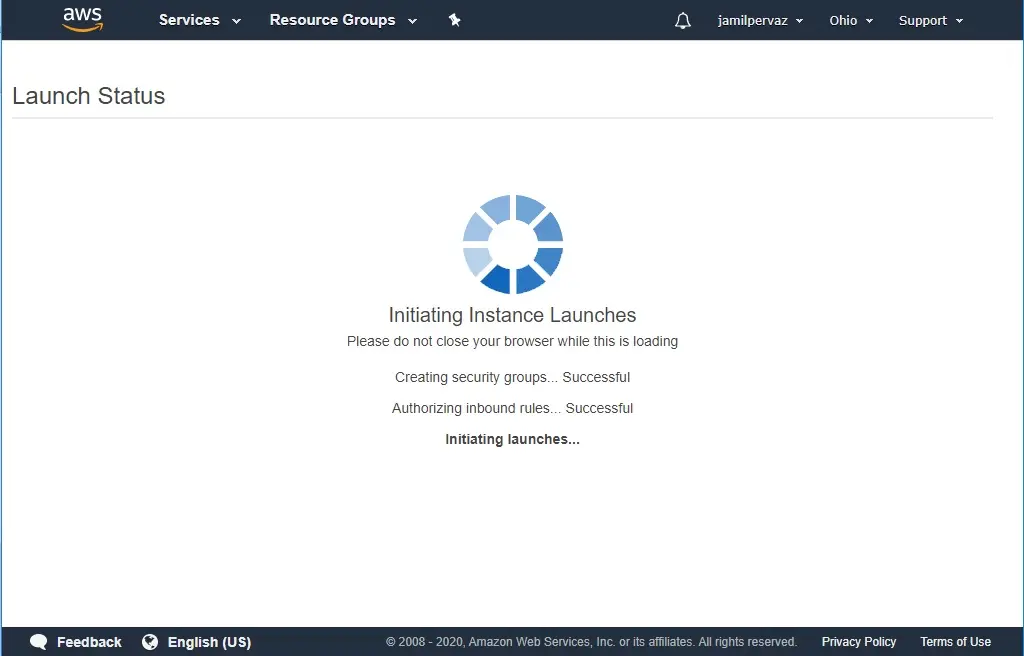
15- You can also see the launch log.
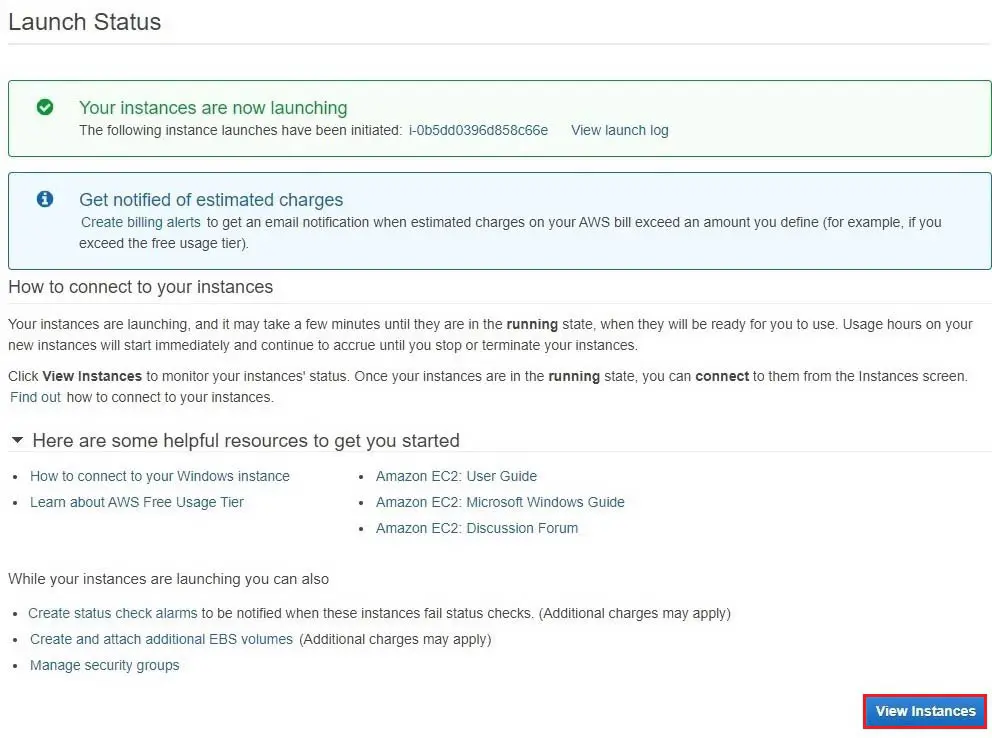
16- Click on the Instances on the left pane where you can see the status of the instance.
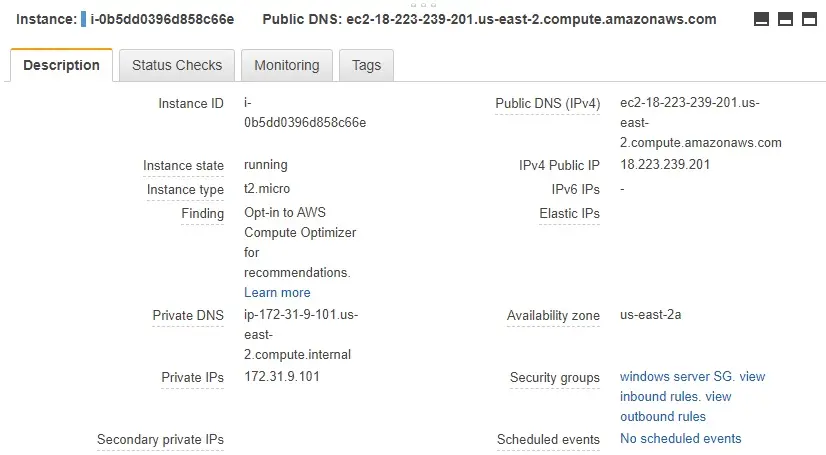
Once the instance is up & running, you can see its status as running.

17- Review the description of your instance.
Log in EC2 Instance
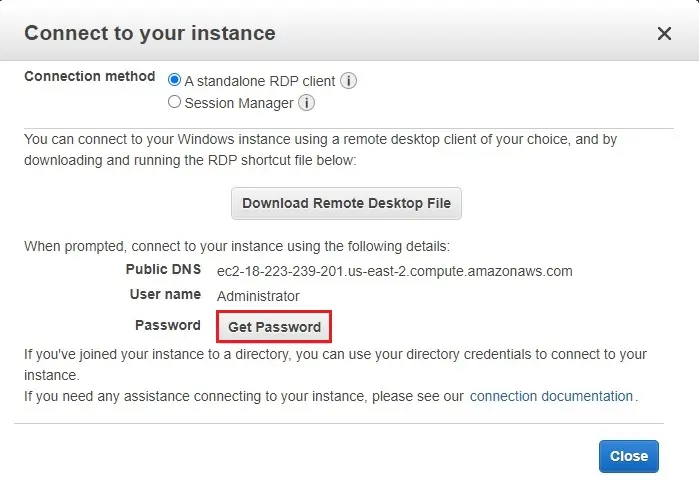
18- Select the instance and then click connect.

19- Click on get password.
20- Click the choose file button.
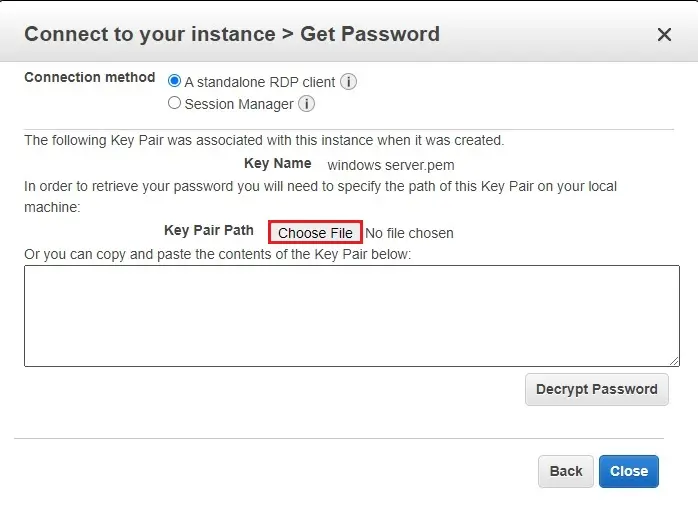
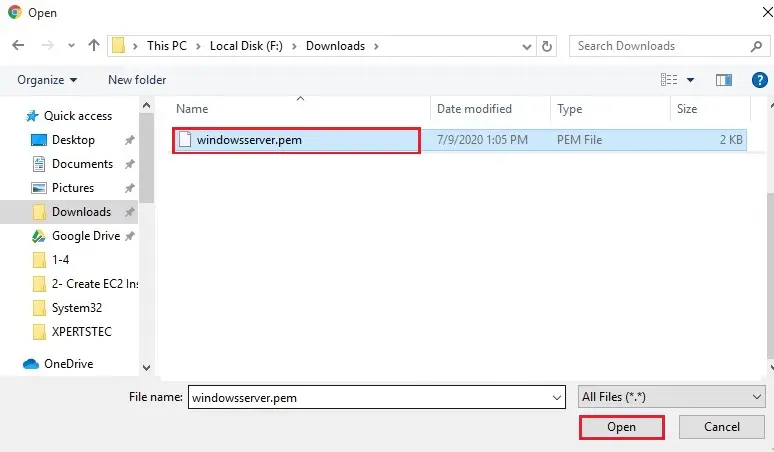
21- Select the key pair you downloaded earlier and then click open.
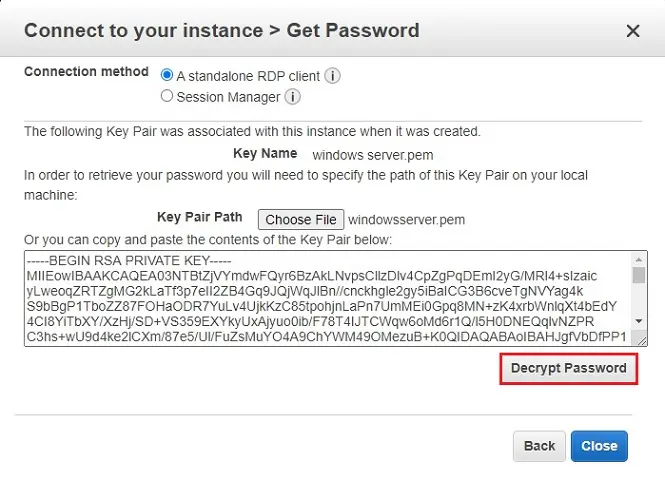
22- Click Decrypt password.
23- Copy the password and then click download remote desktop file
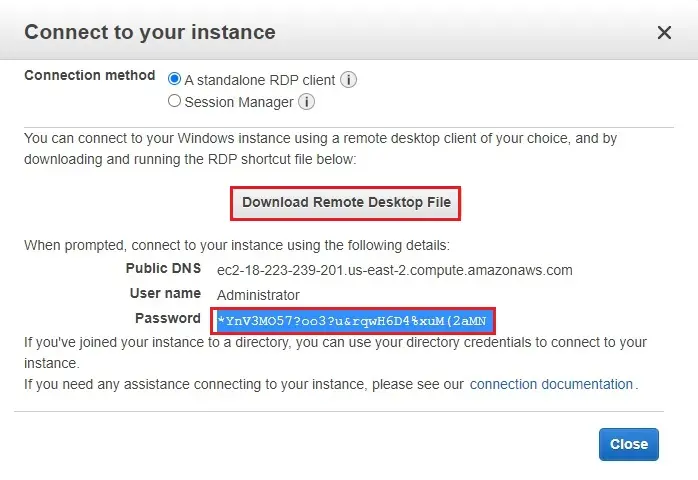
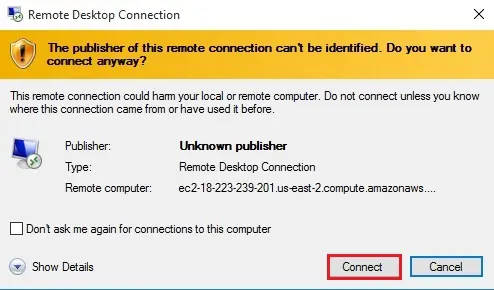
24- Click Connect.
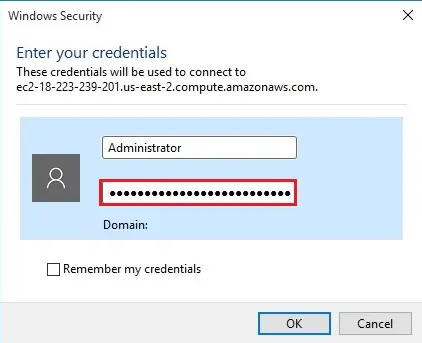
25- Paste the password and then click ok.
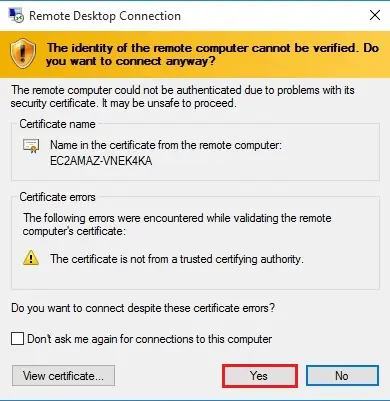
26- Click yes
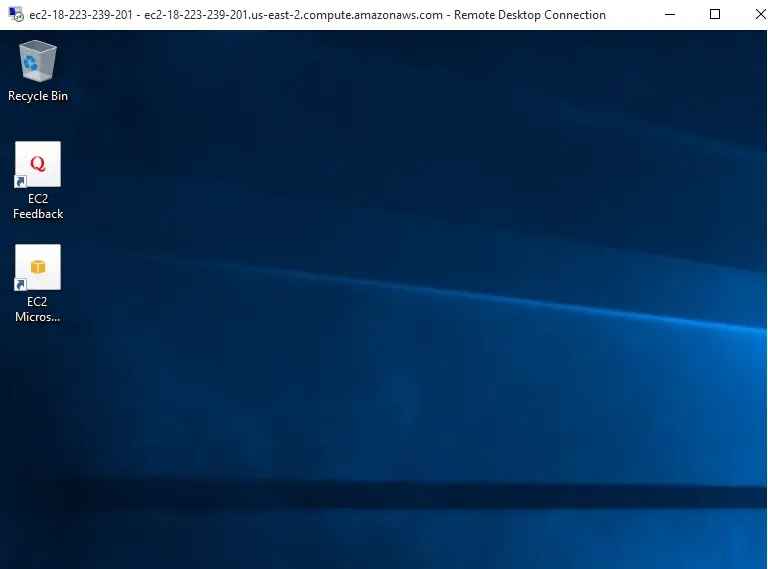
27- EC2 Instance (Windows Server 2019 desktop)
Please read my article on how to use Veeam Backup for AWS Free Edition.


