
In this article, I am going to share how to setup and Configure an active directory in Windows Server domain controller using windows server 2019 standard.
Requirements for Configuration of Active Directory.
The administrator account features a strong password
Static IP is configured
Latest windows updates
A firewall turned off
Rename Computer (optional)
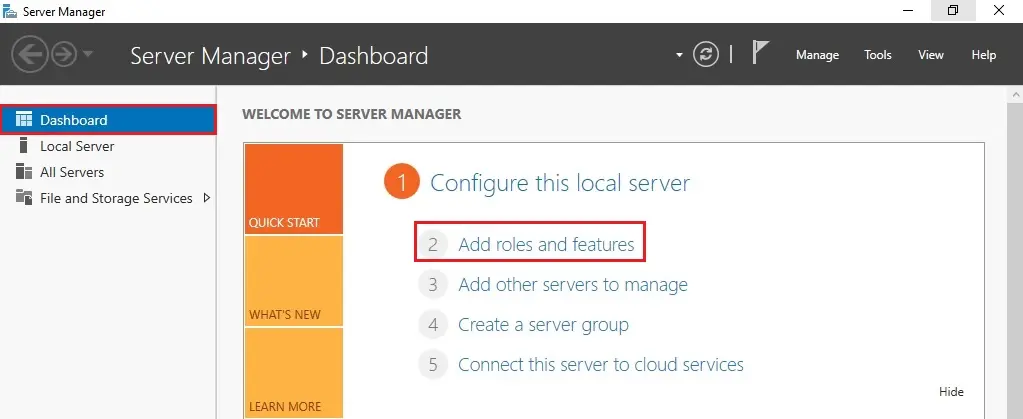
1- Click the Search button and type Server Manager and then click on the Server Manager.

2- From the Server Manager windows so, select Dashboard and under configure this local server select Add Roles and Features.
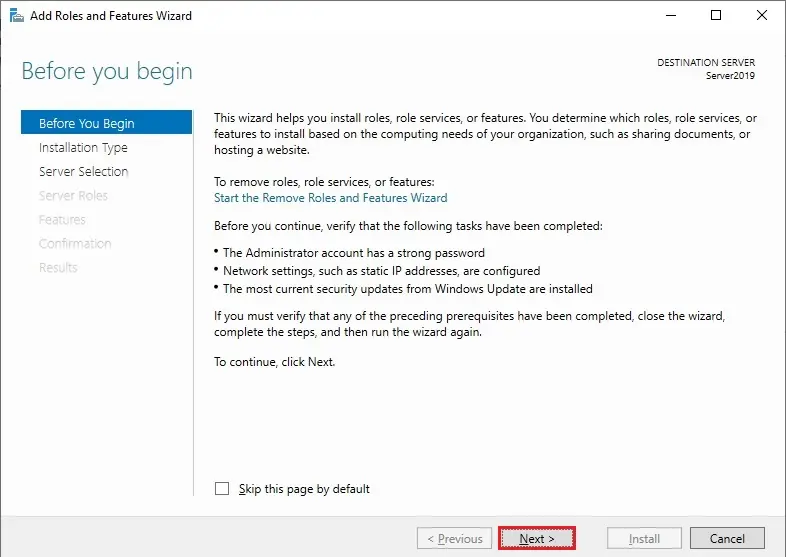
3- So, click Next.
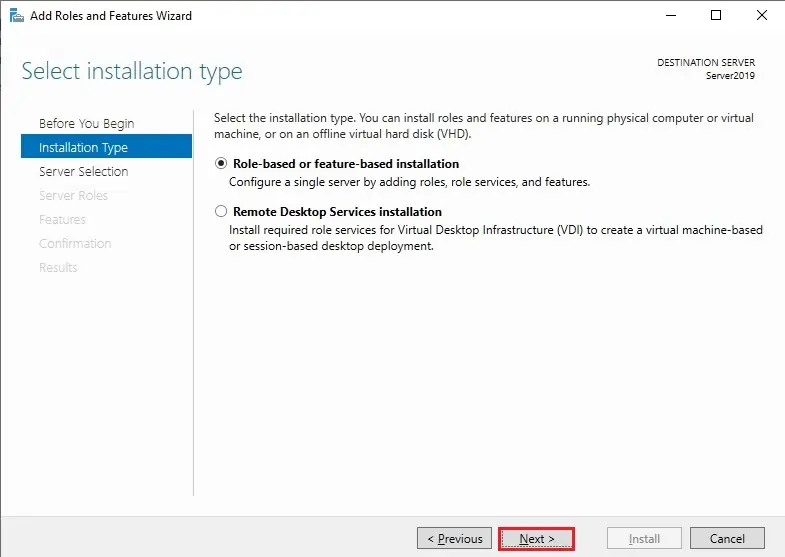
4- Under Installation Type, Select Role-based or feature-based installation and then click on next.
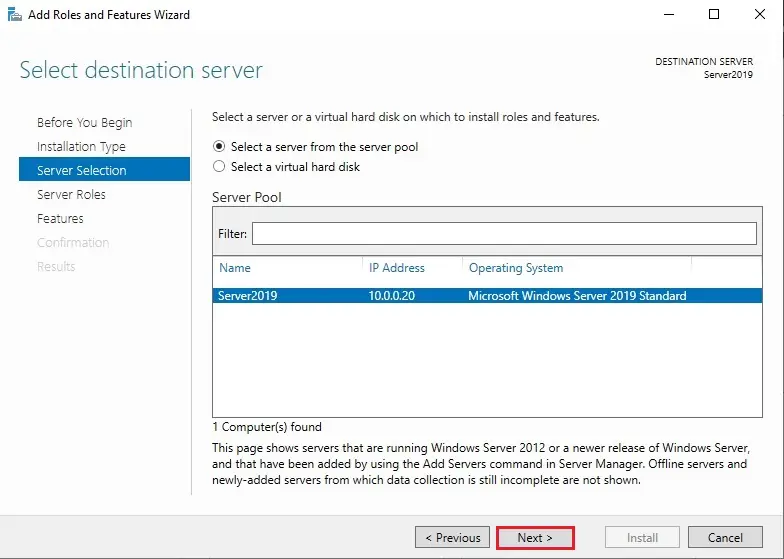
5- Select a server from the server pool on which you would like to configure AD and then click on next.
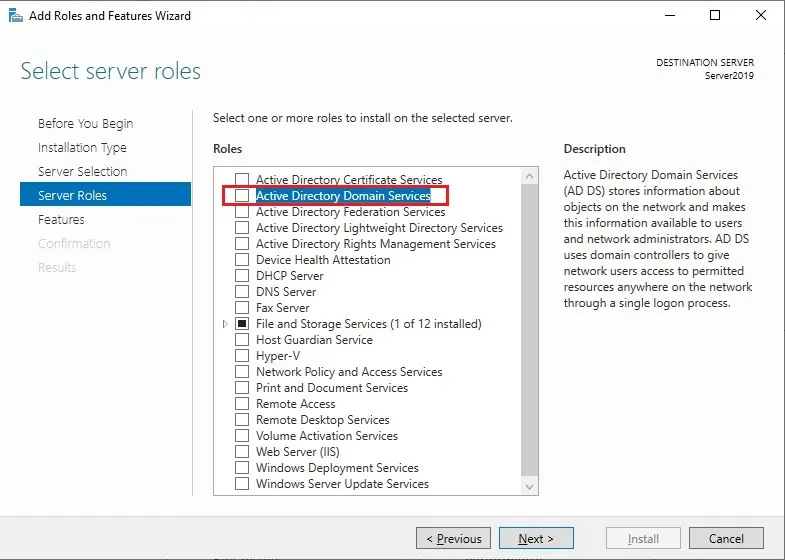
6- Now chose the Active Directory Domain Services box from the server roles page.
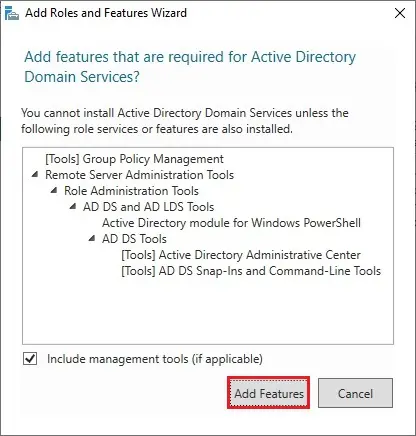
7- A Windows will popup be showing additional required features so, click on Add Features.
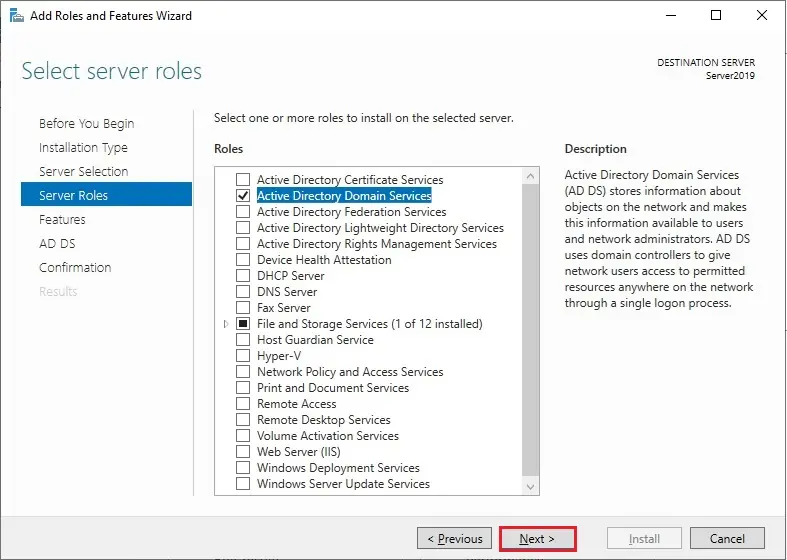
8- After adding active directory features so, click next.
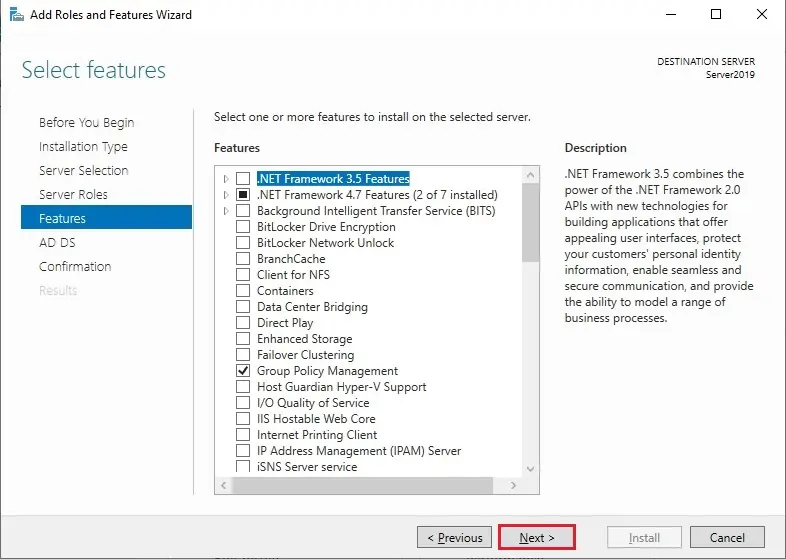
9- Default settings and then click on next.
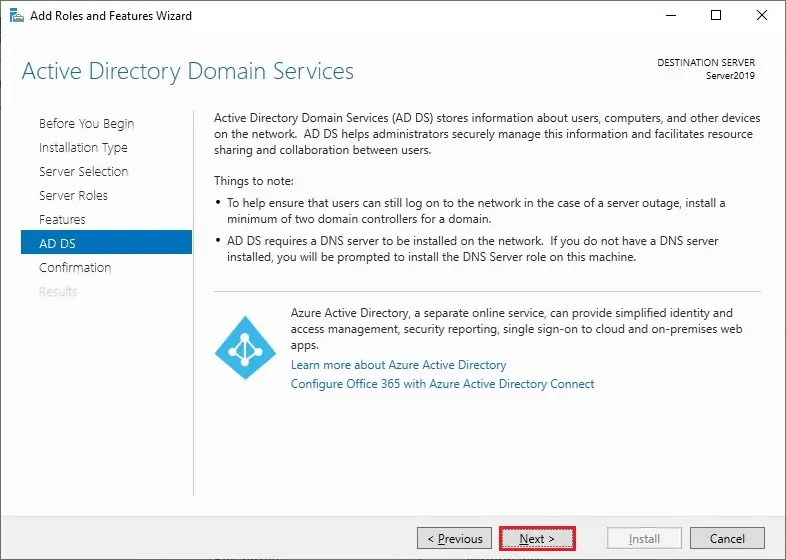
10- Review Active Directory Domain Services and then click on next.
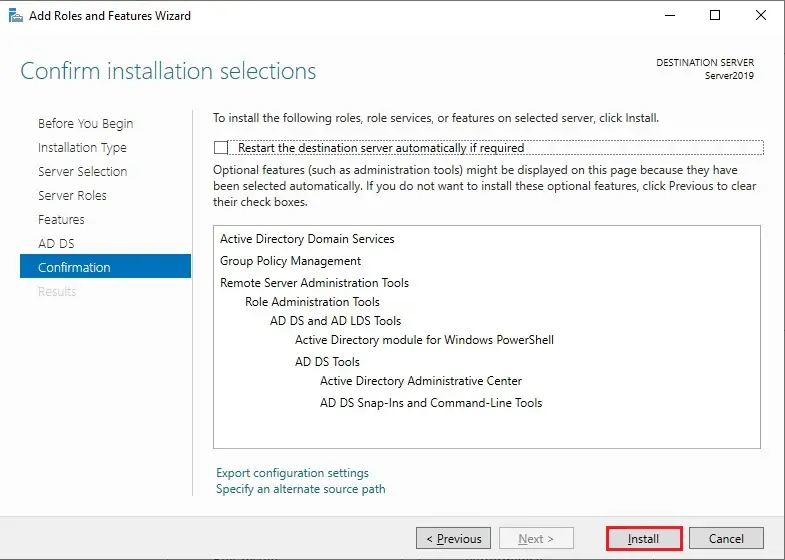
11- Review the confirmation of active directory configuration and then click on Install.
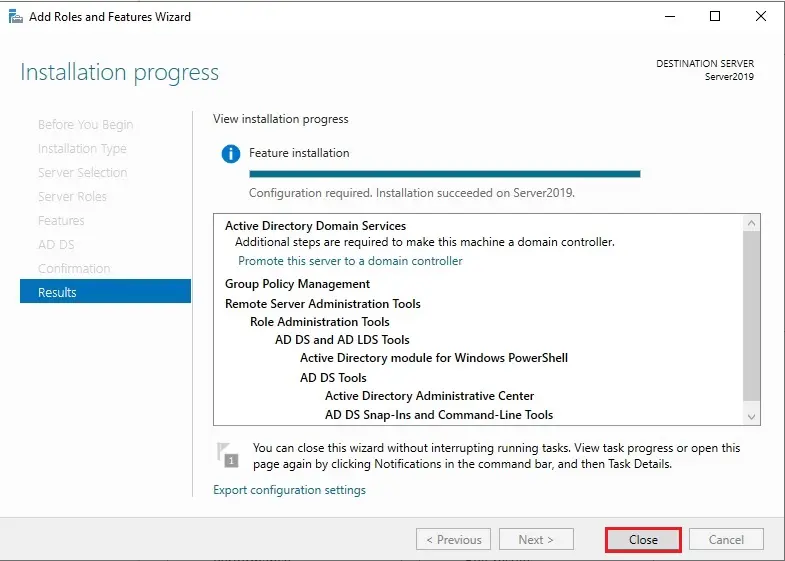
12- Active directory 2019 setup completed and then click on close.
Configuring Active Directory.
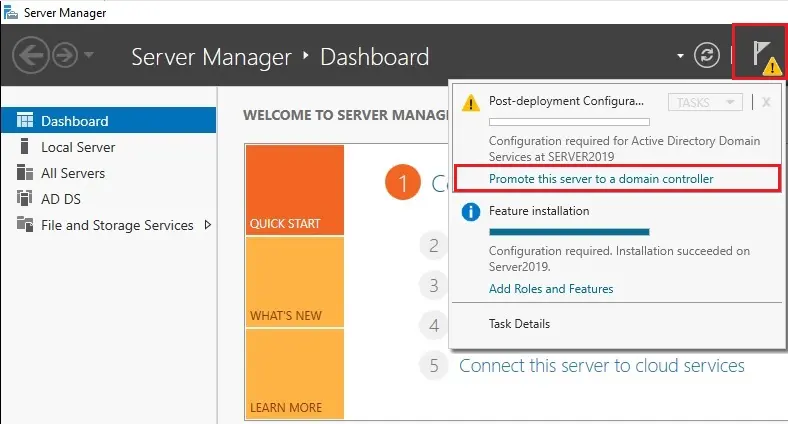
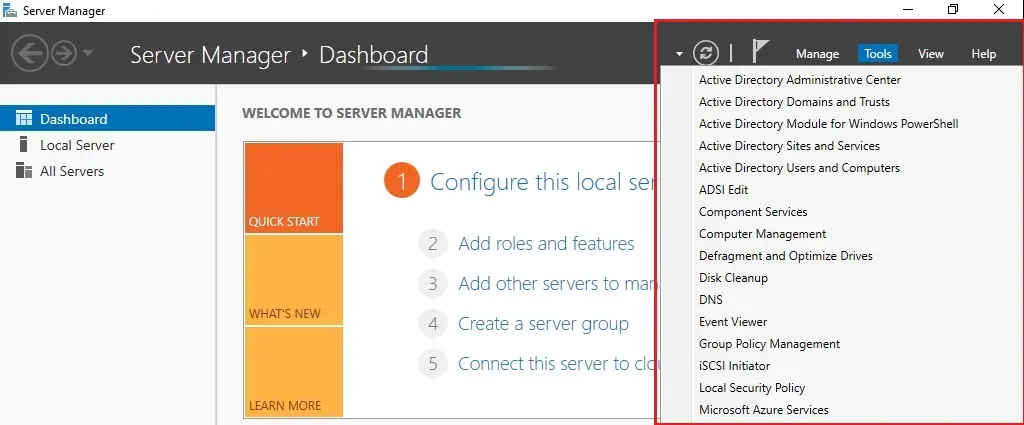
13- From Server Manager in Active Directory Configuration click on the notifications icon and then click on Promote this server to a website controller.
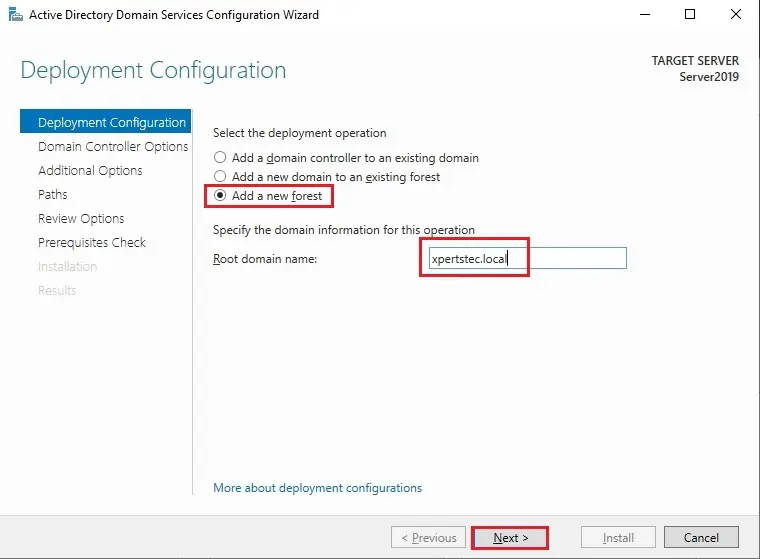
14- Now under the deployment in Setting up Active Directory, operation select add a replacement forest under the basis name and then click on next.
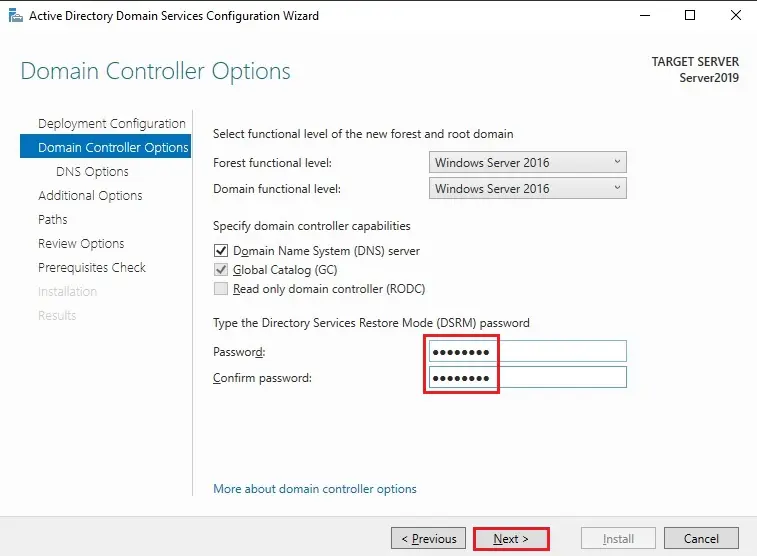
15- Keep as forest and domain functional level Windows Server 2016 because of the default level.
Keep the name System (DNS) server and Global Catalog (GC) checked and sort the active directory services restore mode (DSRM) password and then click on next.
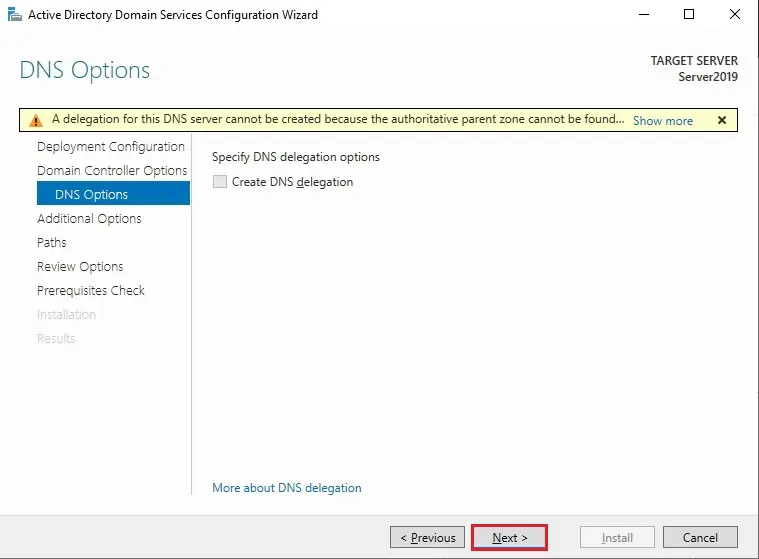
16- Ignore warnings within the DNS options window during Configuration of Active Directory and click on next.
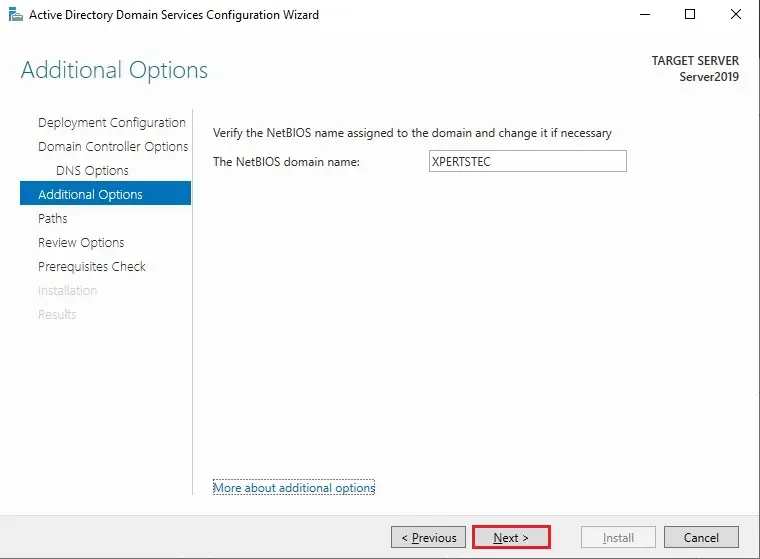
17- within the additional options During the Setup Active Directory window, verify the NetBIOS name and click on next.
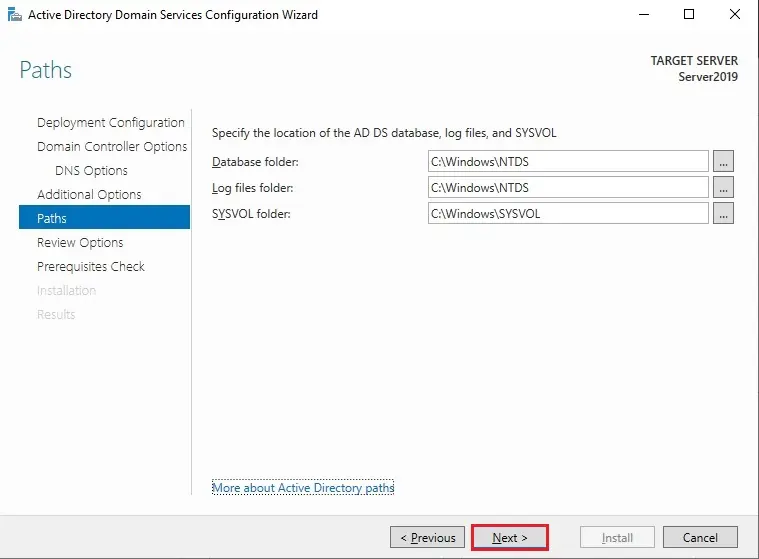
18- Specify the situation of the AD DS database, log files, and SYSVOL folders and click on next.
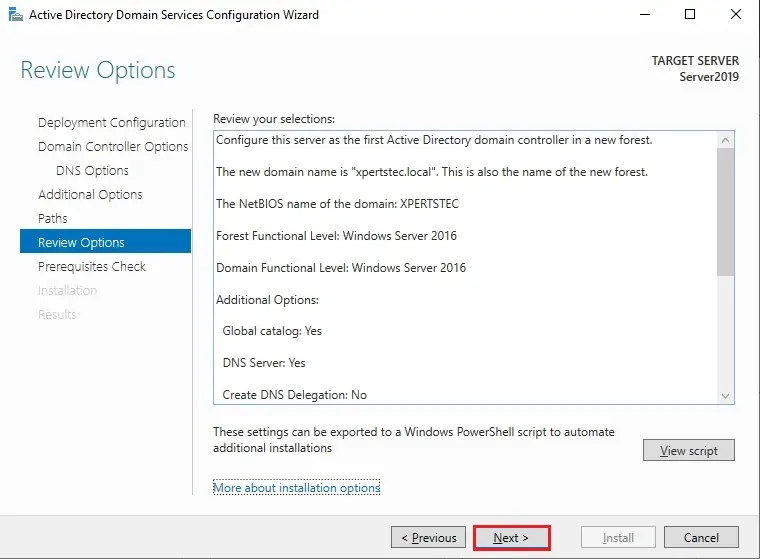
19- Within the review options window > review name, NetBIOS name, and Global catalog, etc. and click on next.
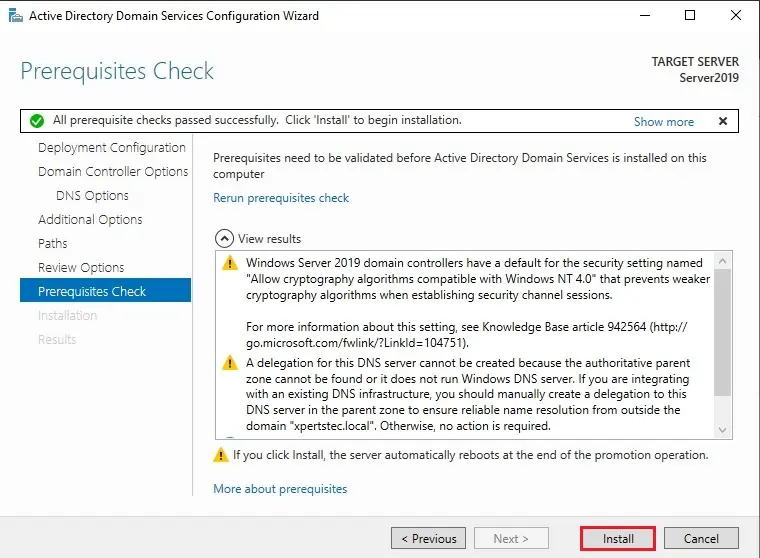
20- When all prerequisite has been successfully passed on Active Directory then click on Install.
21- When the installation completes, you’ll be prompted that your machine is successfully configured in Active Directory as a domain controller and can be rebooted automatically.
Watch our YouTube Video about how to setup Active Directory on Windows server 2019.
For more details click here
No Comments
Yeah bookmaking this wasn’t a speculative conclusion great post! .
I just want to tell you that I am just beginner to blogs and really loved your web blog. Most likely I’m likely to bookmark your website . You certainly have awesome articles. Thanks a lot for sharing with us your web-site.
Dear Veda
It’s my pleasure
Like!! Great article post.Really thank you! Really Cool.
thank you
I every time emailed this weblog post page to all my associates,
because if like to read it afterward my links will too.
I simply want to mention I am just new to blogging and site-building and seriously liked this website. Very likely I’m likely to bookmark your website . You definitely have superb posts. Appreciate it for sharing with us your webpage.
Thank you