Enable SSH on VMware ESXi, in this blog, I will go through the different way of enabling SSH on VMware ESXi 7.0 hosts. The default option SSH is disabled for security purposes. We can enable it for remote command execution in multiple ways. Access to the ESXi shell via SSH offers administrators have the ability to maintain, troubleshoot, and remediate issues by using a Secure Shell client such as PuTTY.
Enable SSH direct console user interface ESXi host 7.0
1- ESXi 7.0 DCUI screen, press F2 for login.
2- Type login name “root”, password and then press enter.
3- In the system customization screen, select the troubleshooting options and press enter.
4- Under the troubleshooting mode options, under SSH support option SSH is disable, select Enable SSH and press enter.
5- Now SSH is showing enabled.
Press ESC to go back to the main DCUI screen.
Enable SSH using vSphere Web Client Host
6- Log in to your ESXi 7 host via the Web Client. Type your username root, password, and then click on the login button.
7- After login to your ESXi host, Select Host, select Action menu, from the Actions menu select Services, and select Enable Secure Shell (SSH).
8- Select the services tab, select TSM-SSH SSH from the services list, and then click the Start button to enable SSH.
Enable SSH vCenter using vSphere Client
9- Log in to your vCenter Server 7 via the vSphere client, type your vCenter username, password, and then click on login.
10- Select host where you need to enable SSH service, select the configure tab, under system options, and then select services.
11- After selecting the Services option, select the SSH service and then click on the Start button to run the service.
12- Now SSH service is running.
Now you can access the ESXi host remotely via a Secure Shell client.
Configure vMotion VMware, vSphere, In this blog I will cover the configuration procedure of vMotion in VMware vSphere 7.0. VMware vMotion enables the live migration of running virtual machines from one ESXi host to another with zero downtime, and also allows the live migration of a running VM file system from one storage to another. Continuous service availability, and complete transaction integrity.
Configure vMotion in VMware vSphere
1- Open your web browser, type https://, type username, password and then click LOGIN.
Configure VCSA 7 Appliance as a new vCenter Server. In the first blog, I deploy vCenter 7 in VMware Workstation 15. In this second blog, I will configure the VCSA 7 Appliance as a new vCenter Server in VMware Workstation.
Deploy vCenter 7 in VMware Workstation
1- Open a browser and type the FQDN address of the VCSA followed by port 5480 (for example – https://vcenter.xpertstec.local:5480) and then press enter.
2- Once the installation of the packages is completed successfully, select the Set Up option to configure this Appliance as a new vCenter Server.
Deploy vCenter 7 in VMware Workstation, in this blog, I want to deploy VMware vCenter 7 in VMware Workstation 15, so we had to import the appliance from the.OVA template, and then configure the virtual machine as a new vCenter server. I am deploying this vCenter server 7 in a lab environment.
Step by Step Deploying VCSA 7 in VMware Workstation.
Before importing the VM from the .OVA template, first we need to create an A and PTR record in our active directory DNS server for the vCenter. If we didn’t create host a record in DNS manager then the auto-configuration of the vCenter 7 virtual machine will fail. It’s an appliance, you can’t customize the VM as you wish.
1- Open your DNS Manager Console, Expand your DNS (SRV2019-DC), Expand Forward Lookup Zones, right-click on your local domain(xpertstec.local) and then select New Host (A or AAA)…
2- Type a name and IP address that you want to assign to the vCenter Virtual Machine, Select the Create associated pointer (PTR) record box, also select the Allow any authenticated user to update DNS records with the same owner name box and then click the Add Host button.
3- vCenter Host A record successfully created.
4- Now you can see in the Reverse Lookup Zones.
5- Test your DNS entry by type vcenter.xpertstec.local
VMware vCenter Server 7 deployment procedure on VMware Workstation 15.
6- After downloading VMware 7, go to your download folder and right-click on VMware-VCSA-all-7.0 ISO file and then select Mount.
7- Deploy vCenter 7, open your DVD/CDROM drive and then open vcsa directory.
8- Deploy vCenter 7 here you can find the VMware vCenter Server Appliance 7.ova file for deployment.
9- Open VMware workstation, then click on File and select Open.
10- Select the VCSA 7 OVA file and then click open.
11- In the import Virtual Machine wizard, select I accept the terms of the license agreement and then click next.
12- Type a name for the virtual appliance; provide a path where you want to store the virtual machine files. This will be the name that we will see in the VMware Workstation inventory and then click next.
13- Here I am going to select the smallest type of appliance that can be deployed, Tiny vCenter Server with Embedded PSC because I am testing in my test lab.
vCenter Networking Configuration
14- In this import virtual machine wizard screen, we need to configure the VCSA settings. What we configure here will be passed on by VMware Workstation 15 to the guest OS, to configure the appliance. Host Network IP Address Family
Here we are using an IPv4 address or an IPv6 for VCSA 7. Host Network Mode
The configuration box where we declare if the VCSA should use a DHCP server or a static IP address. Host Network IP Address
This is the host IP address that the VCSA 7.0 will have after deployment. This must be the IP used when we created the A and PTR records in DNS. Host Network Prefix
This is the subnet mask for the VCSA. But we can’t just type the subnet mask as we do on a Windows computer. Host Network Default Gateway
Here you can type the default gateway the appliance. Host Network DNS Servers
The IP address of the DNS server the appliance will use for name resolution. Multiple IP addresses must be separated by comma. Host Network Identity
This is the FQDN of the vCenter. The name requires to match the A record we created earlier in DNS.
15- In the SSO Configuration screen, we need to provide the SSO password that we will use to further configure for the appliance.
16- In the System Configuration screen we need to type the root appliance password, this is needed when connecting to the console’s appliance for configuration or troubleshooting.
17- VCSA 7 upgrade configuration.
18- In the Miscellaneous screen, here you can select True from the CEIP enabled option.
19- In the Networking Properties options, we need to provide the FQDM domain name, the domain search path, and then click the Import button.
vCenter 7 Deploying in VMware Wrokstation
20- The import VCSA 7 process in progress, this will take just a few minutes to complete the vCenter 7 OVA.
21- Make sure you connect the Virtual Machine network adapter to the network, so it will connect with the DNS server. If no connectivity to the DNS server is found, you will be getting an error.
22- VCSA 7 deploying in progress.
23- If you want to reconfigure your VCSA appliance settings then Press F2.
24- Type Log in name, password and then press enter.
25- VCSA 7 System Customization.
How to Deploy Vcenter 7.0 in VMware Workstation Second Part
Create VMware Distributed Switch, in this blog I will show you how to create and configure a VMware distributed switch in VMware vSphere vCenter 7.0. In my lab example, vCenter 7.0 is used and three ESXi hosts of version 7.0 are managed by vCenter.
1- Log in to your vCenter server and go to the Hosts and Clusters section. You must add your ESXi hosts in the datacenter, which is a logical organization unit in vCenter. Select your datacenter, click on Action menu, select Distributed Switch and then New Distributed switch.
2- New Distributed Switch wizard, Name, and location.
3- Select version option, In this step, you should specify a distributed virtual switch version and then click next.
4- New Distributed switch wizard, Configure settings. Specified the number of uplinks ports, set the Network I/O Control, and choose the create a default port group checkbox to create a default port group. Type a port group name and then click next.
5- New Distributed Switch wizard Ready to complete. Review your settings for a new VMware virtual distributed switch and, then, click Finish to create the switch.
Add ESXi hosts to a VMware distributed switch
6- After successfully creating a distributed virtual switch, we need to add ESXi hosts to the VDS configuration to make VMware distributed switching work. In the Networking option, select your VMware distributed switch, select action menu and then click Add and Manage Hosts.
7- Add and Manager host wizard, Select task. As you want to add hosts, select Add hosts and then click next.
8- Click the New hosts button to add ESXi hosts.
9- Select new hosts Window will pop-up, select the checkboxes, and select ESXi hosts that you want to attend in VMware distributed switch. Click OK to apply.
10- The ESXi hosts are now selected and the status is showing Connected, then click next.
11- Add and Manage hosts wizard Manage physical adapters. You can select the necessary physical network adapters and then click assign uplinks.
12- Select a uplink and then click ok.
13- After assigning uplink to three hosts click next.
14- Manage VMkernel adapters, click next.
15- Migrate VM networking. If you want to migrate virtual machines to the distributed virtual switch. You can do it at this stage. In this example, no network adapters are migrated to the VDS. Click next.
16- Add and Manage hosts ready to Complete. Review the settings and then click Finish.
The ESXi hosts are successfully added to VMware distributed switch configuration. We can add VMkernel network adapters to a port group of the distributed virtual switch for using different features.
17- In the vCenter Network option, in the VMware distributed switch select the port group. Select the Action menu and then select Add VMkernel Adapters.
18- Add VMkernel Adapters wizard, Click the Attached hosts button to select ESXi hosts.
19- Select member hosts and then click ok.
20- Click Next.
21- Add VMKernel Adapters wizard Configure VMkernel adapter. Select available services (vMotion, Provisioning, Fault Tolerance logging and etc). I am selecting vSAN then click next.
IPv4 Network settings. In this step, we need to set the IP addresses for VMkernel adapters of ESXi hosts. Using static IP addresses.
ESXi-01 (10.0.0.11) – 10.0.2.11 ESXi-02 (10.0.0.12) – 10.0.2.12 ESXi-04 (10.0.0.14) – 10.0.2.14 The vSAN network will be 10.0.2.1/24
22- Click next.
23- Review the configuration and then click Finish.
24- After configuring VMkernel adapters, select the VMware distributed switch, Select Configure tab, under Settings, select Topology and view of your VDS topology.
Configure VMware vSAN Cluster, in this article I will explain to you how to use the VMware vSAN Quickstart performance of the tasks to create, configure, and expand a VMware vSAN cluster. It is easy to use configuration wizard that makes it even easier to create a production-ready vSAN cluster.
4- Add hosts wizard to add new hosts or existing hosts in vCenter. Type your ESXi hosts’ name, username, password, and then click Next.
5- ADD hosts summary of added hosts is displayed and click next.
6- Now Select the finish button to add hosts to the cluster.
7- View the recent Tasks.
8- ESXi hosts successfully added.
Configure Cluster
9- Under 3. Configure cluster option click on configure.
I already created vSphere Distributed Switches, that I will be use instead of creating a new vSphere Distributed Switch(es). Select the checkbox Configure network settings later will bypass the networking configuration. Use this setting if vSAN configurations are already configured.
10- Distributed switches, Click on USE EXISTING button to select DSwitch.
11- Select existing distributed switch and then click ok.
12- To select a Port group click on USE EXISTING button.
13- Select distributed port group and then click OK.
14- Select a physical adapter for distributed switch and then click next.
15- Network specific information such as VLAN, protocol, and network addresses for the VMware vSAN network. Click next
16- Advanced options are where you customize the cluster settings and then click next.
17- Configure VMware vSAN cluster claim disks (cache and capacity tier) select disks to contribute to the vSAN datastore and then click next.
18- The proxy settings will be configured to allow vCenter configurations that do not have direct access to the Internet to communicate with VMware for the Online Health check as well as anonymized telemetry data. Click next.
19- Review the vSAN cluster settings and then click finish.
Upgrade ESXi Host; in this article, I am going to upgrade ESXi Host 6.7 to 7. How to verify the installed ESXi Host version in the network, from the vSphere Server, select ESXi client, and then click on the host Summary tab.
1- A new baseline must be created in the Lifecycle Manager Service to easily upgrade the ESXi hosts in our network. Select the Menu tab and then select the Lifecycle Manager.
2- From the Lifecycle Manager area, select the imported iSOs tab and then click Import ISO.
3- Click on Browse button to select the ESXi 7.0 installer in ISO format downloaded from VMware website.
4- After selecting the correct image ESXi 7.0 version, it will start import automatically.
6- Type a Name and a Description to and then Click Next.
7- Select the previously imported ESXi 7.
8- Now click the Finish button to create the baseline.
9- Now you can see the new created baseline.
Attach the baseline
10- Create the baseline needed to upgrade the hosts, we need to attach this baseline to the ESXi you want to upgrade. Under the attached baselines click on the Attach section and then click Attach Baseline or Baseline Group.
Upgrade ESXi Host
11- Please select the correct baseline to attach and then click on attach.
12- Click on Check Compliance to verify host to upgrade.
Remediate hosts
13- Select the Upgrade ESXi host and click Remediate to proceed with the upgrade.
14- The installation process begins. Accept the EULA and then click on OK.
15- Select the ESXi host and click remediate.
16- The upgrade is being process.
17- When the upgrade has completed successfully, the host is reported as Compliant.
Backup VMware vCenter Server, in this blog, I will show you how to Schedule vCenter Server 7.0 Backup, How to backup VMware vCenter Server 7.0. First, we need to know what is VMware vCenter Server 7.0 backup, the is a built-in file-based backup and restore is a native backup solution that is available within the VMware Appliance Management Interface on port 5480. It supports backing up both the VMware vCenter Server Appliance and Platform Services Controller (PSC).
Before starting a backup, a backup server must be set up and configured such that the appliance has access to it. The protocols supported for Center backup are FTPS, HTTPS, SCP, FTP, NFS, SMB, and HTTP.
I am using FTP Backup Supported Protocols you can use any of the above mentions protocols supported for backup.
Create FTP Backup Server
How to Install and Configure Filezilla FTP Server click here
VMware vCenter Server 7.0 Backup Schedule
1- Open web browser type your vCenter Server 7.0 FQDN or IP address with port: 5480 (Example https://vcenter.xpertstec.local:5480/) Type Center username, password and then click on Login.
How to Schedule vCenter 7.0 Backup
2- For VCSA backup schedule, Select the Backup option and then click on configure tab.
3- Type the backup location (FTP Backup Server path), username and password, select the backup schedule when you want to backup and then click the create button.
4- After configuring VMware vCenter Server 7 backup schedule, then click Backup Now.
5- Enter your backup location, username. Password and then click on Start button
6- Now you can see the VCSA backup in progress.
7- vCenter Server backup successfully completed.
8- You can verify the backup folder in your FTP Backup server.
For more details how to backup vCenter Server 7.0 please click here
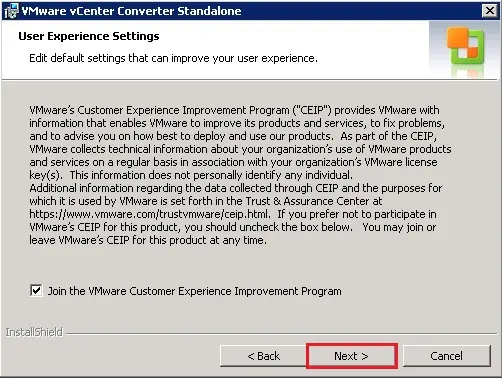
6- Select whether or not to join the VMware Customer Experience Improvement Program and then click Next.
7- Review the migrate windows VMware vCenter summary settings and then click Finish. Data will now be migrate to the VCSA
8- Once complete the Windows VMware vCenter Server will be powered off and the network settings transferred to the vCenter 7.0 (VCSA). If you urgently need to power back on the Windows server to retrieve files or such like and then do so with the vNICs disconnected, otherwise you will cause an IP/host name conflict on the network
9- View the VMware Migration Assistant progress
10- Migrate Windows vCenter Server start copy data from source to target
11- Log in to your vCenter Server type password and then click login
12- Set up target vCenter Server
13- Import copied data to target vCenter Server
14- Click close
15- Windows vCenter Server successfully migrate to VCSA
Post-Installation
16- Connect to the vCenter Server using the IP or FQDN of the vCenter. Click on Launch vSphere Client (HTML5).
17- Type vCenter Server username, password and then click on login
18- After successfully login with vCenter Server you can see Windows vCenter Server successfully migrate to vCenter Server 7.
Before we start the process if our existing Windows vCenter Server is virtual it may be useful to rename the VMware vCenter virtual machine name in the vSphere inventory to include -old or identical. Though the hostname and IP are migrated the VMware vSphere inventory name of the Virtual Machine cannot be a duplicate. The old server will be powered down but not deleted so that we need to have a backup.
Download the VMware vCenter Server 7.0 ISO from VMware
Now mount the VMware vCenter Server 7.0 ISO on your computer. The VMware vCenter Server 7.0 installer is compatible with Mac, Linux, and Windows.
Please copy the migration-assistant folder to the Windows vCenter Server. If the Platform Services Controller (PSC) is running on a different Windows server then you must run the Migration Assistant on the Platform Services Controller (PSC) server first and then following the below instructions, then complete the similar process on the Windows vCenter Server.
1- Double click on VMware-Migration-Assistant to start.
2- Type the SSO Administrator credentials to start running pre-checks.
If all the checks successfully completed the Migration Assistant will finish at waiting for migration to start.
3- Use a different computer from your Windows vCenter & PSC servers open the vcsa-ui-installer folder that file is located on the VMware VCSA ISO. Double click on Installer to run the file.
Migration Process
4- The vCenter Server 7.0 Installer will open and click on Migrate.
5- Migrate – stage 1: deploys vCenter Server, Stage 2: migrates data & network settings over to the new appliance and shuts down the Windows vCenter server. Start the migration click next.
6- Migrate Windows vCenter Server, accept the VMware license terms and then click next.
7- Type the details of the Windows vCenter Server to migrate and then click next.
8- Windows vCenter Server SSL certificate click yes
9- Type the IP address or FQDN of the ESXi host, or vCenter upon which you need to deploy the new vCenter Server 7. Type the root username, password and then click next.
10- Untrusted SSL certificate ESXi message click Yes to continue.
11- Type the vCenter Server VM name, the host name of the vCenter Server will automatically migrate. Click Next.
12- Migrate Windows vCenter Server, Select the deployment size for your environment and then click next.
13- Select the datastore for the vCenter Server to deploy and then click next.
14- Configure the temporary network settings for the vCenter (VCSA). These settings only used throughout the migration of the data, once complete the temporary network settings are discarded and the VCSA assumes the identity, including IP settings, of the Windows vCenter Server. Click Next.
15- Review the settings of Migrate vCenter Server page and then click Finish.
16- Migrate – Stage 1: Deploy vCenter Server, deploying the vCenter server
17- Now VCSA successfully deployed the vCenter server. Click the Continue button to start the 2nd stage of the migration.
How to Migrate Windows vCenter Server to VCSA Part-02
Access ESXi through vCenter console or direct vSphere Web client
Step by Step Procedure to deploy a new Virtual Machine
Login to your vCenter Server using vSphere Client.
1- Right click on the host where you want to create a VM, select Action menu and then click on new VM It will open New Virtual Machine Wizard.
2- Select a creation type option, Select Create a new VM and then click Next.
3- Type a name for the new Virtual Machine and Select Datacenter to create the new VM in and then click next.
4- Select ESXi host where you want to deploy this Virtual Machine, compatibility checks succeeded and then click next.
5- Select a Datastore in which you want to store the Virtual Machine configuration files and folders and then click next.
6- Select Compatibility for this Virtual Machine and then click on next.
7- Choose the Guest OS Family option (Windows/Linux/Other), select guest OS version that will be installed on the virtual machine and then click next.
8- Configure the Virtual Machine Hardware as per operating system requirement and then click next.
9- Review the new virtual machine configuration and click finish to complete the New Virtual Machine Wizard.
10- A new Virtual Machine has been deployed in ESXi 7 Host, to install Operating System on this VM, Right Click on Virtual Machine and select Edit Settings.
11- To mount your ISO for specific OS, click on client device and select Datastore ISO file.
12- Expand your datastore, select the operation system the one you want to install and then click ok.
13- After selecting OS, select connected checkbox and then click ok.
14- Select newly created Virtual Machine and then click Power On icon.
15- Select VM and select Launch Console.
16- Choose launch console option and then click launch
17- Now Windows operating system ready to install.