Cloud Tier store long-term data retention
Cloud Tier is a feature available in Veeam Backup & Replication that allows administrators to store long-term data retention on cost-effective storage cloud solutions.
Veeam Cloud Tier capability takes advantage of Object Storage Repository configured as Capacity Tier Extent in the Scale-out Backup Repository providing a very scalable repository.
Veeam Backup & Replication provides the capability to securely transfer on-premises backups to Azure Object Storage offering a scalable storage infrastructure.
For more details visit Veeam
Create Account Wasabi S3 Bucket
Configure long-term data retention with Azure repository
Add a new Backup Repository
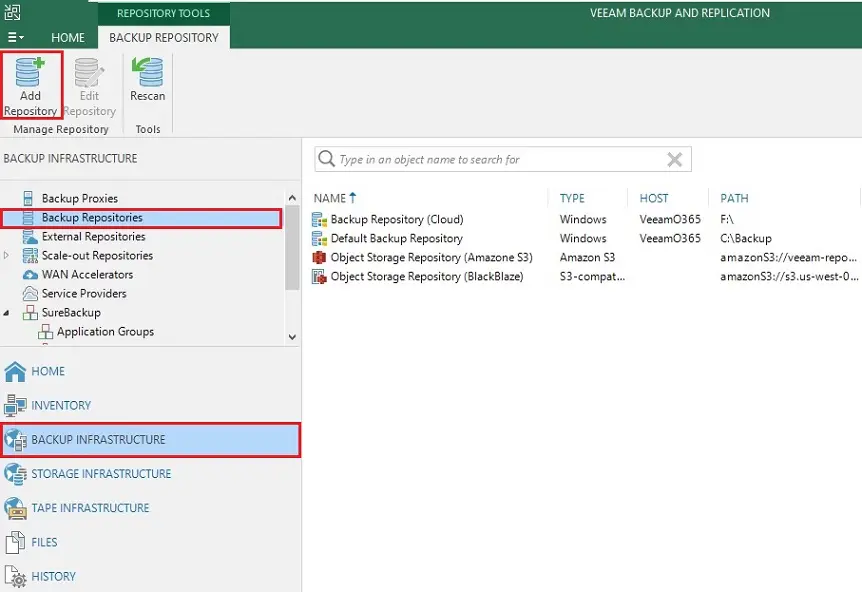
1- Open Veeam, select the Backup Infrastructure tab, and select the Backup Repositories section. Click Add Backup Repository.
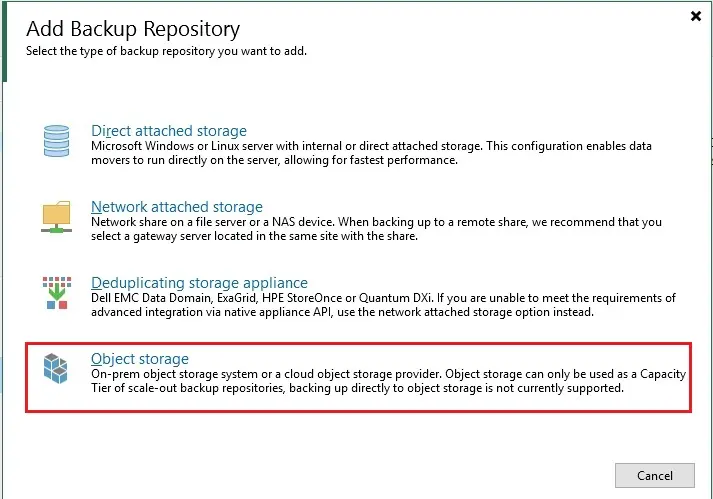
2- Add backup repository wizard, select Object storage as backup repository type.
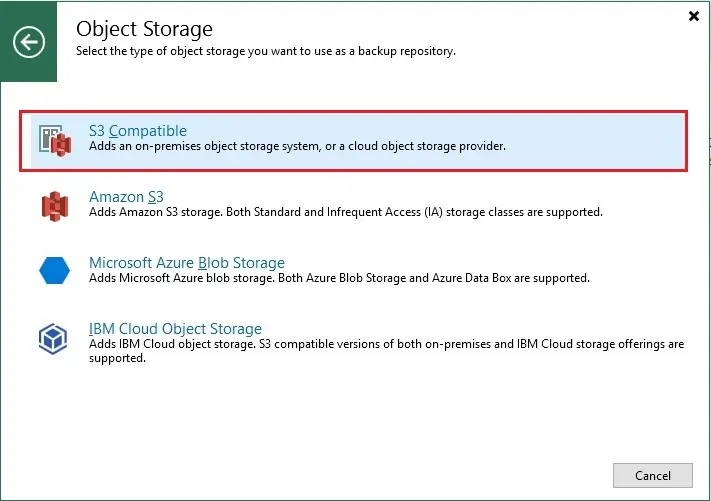
3- Object storage. Select S3 Compatible item.
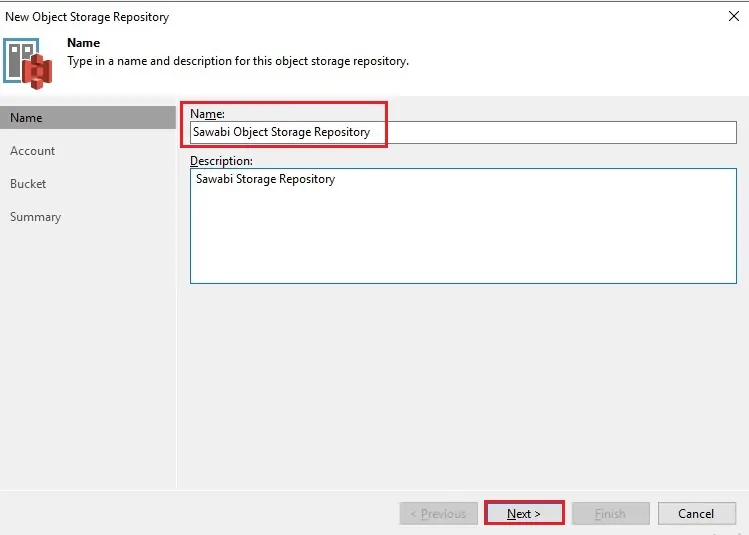
4- Type repository Name, Description then click Next.
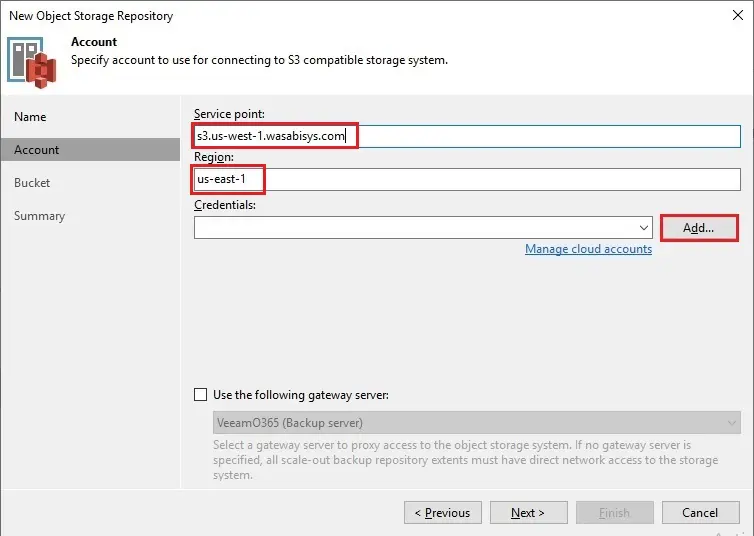
5- Account, Insert Service Point address, and select Region by selecting between the available Wasabi datacenters.
s3.us-west-1.wasabisys.com
For credentials click Add
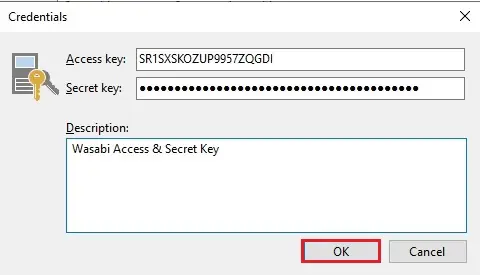
6- Enter your Wasabi “Access key” and the “Secret Key” retrieved from the Wasabi Management Console then click OK.
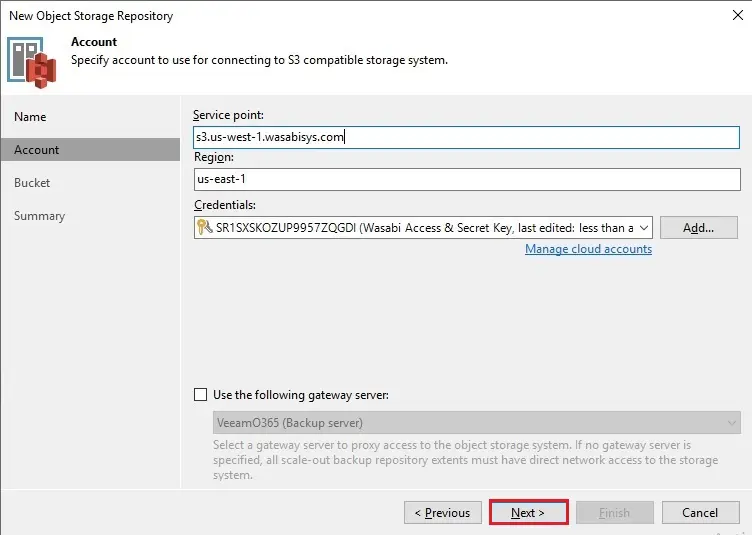
7- Click Next.
8- Bucket, based on specified credentials, Veeam fetches the Bucket you have configured in Wasabi (wasabibuckets3). Select Browse to select an existing folder
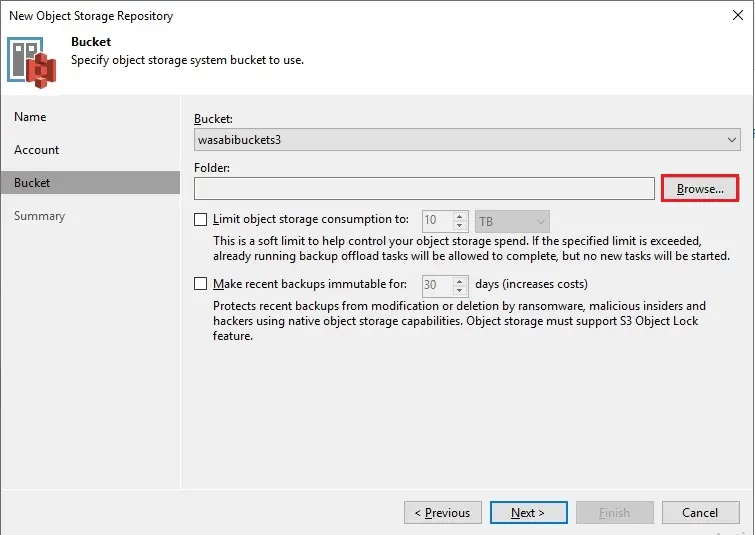
9- To create a new folder, click on New Folder button type a folder name to store your backups and then click OK.
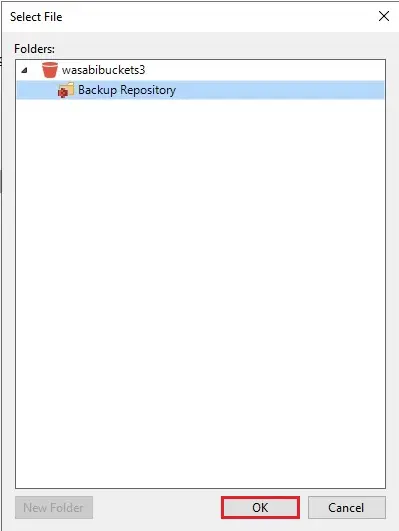
10- Enable Limit object storage consumption to & specify the limit to 1TB. When the limit is surpassed, no new tasks will be executed. Choose recent backup immutable and then click Next.
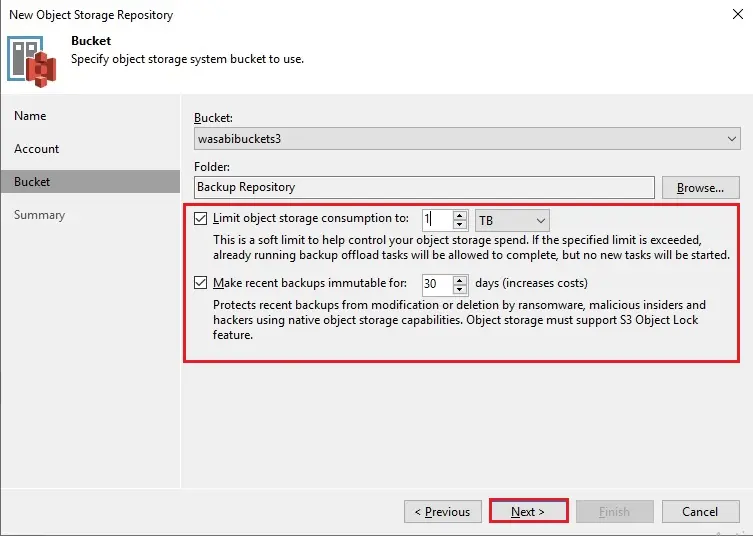
11- Click finish to create the Wasabi Backup Repository.
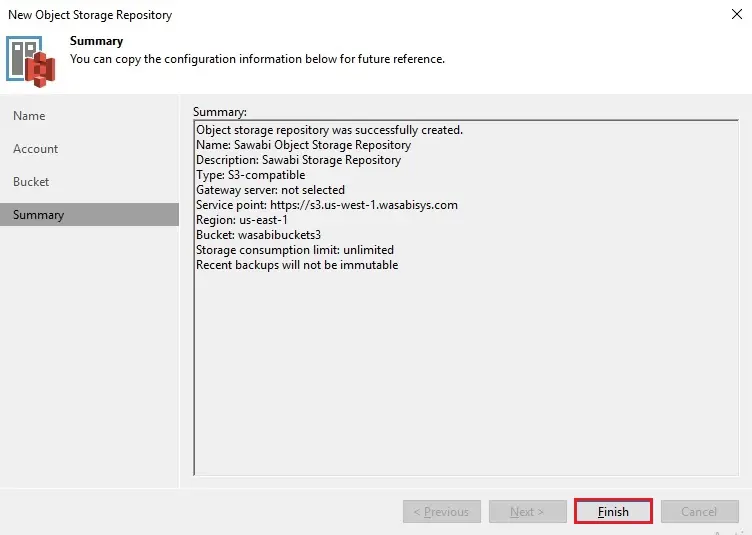
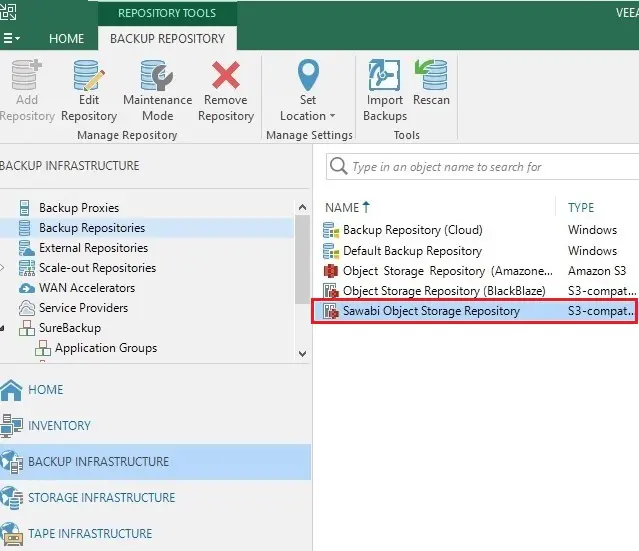
12- The new Wasabi Bacup Repository has been created successfully.
Create a new local Backup Repository
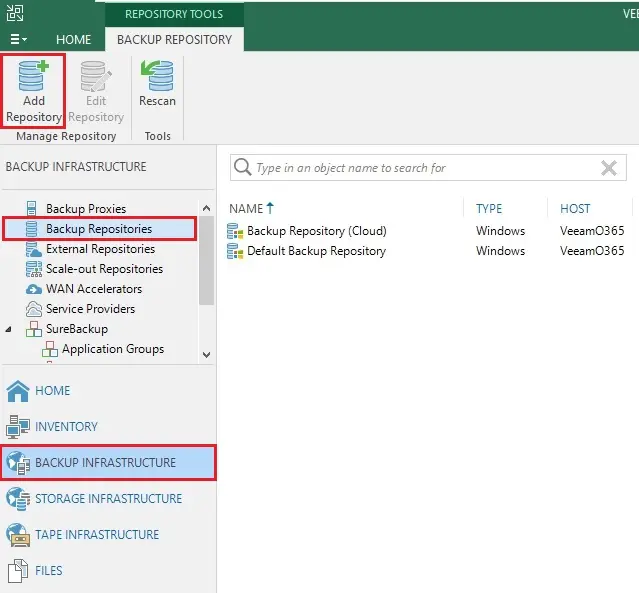
1- Select the Backup Repositories section and then select Add Backup Repository.
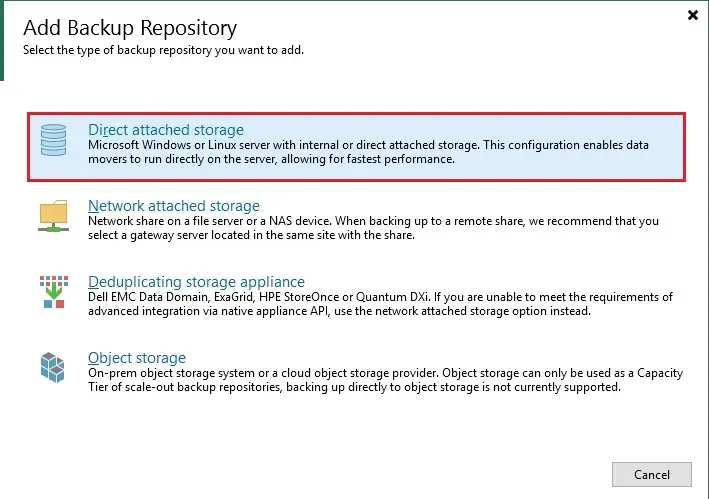
2- Select director attached storage as backup repository type.
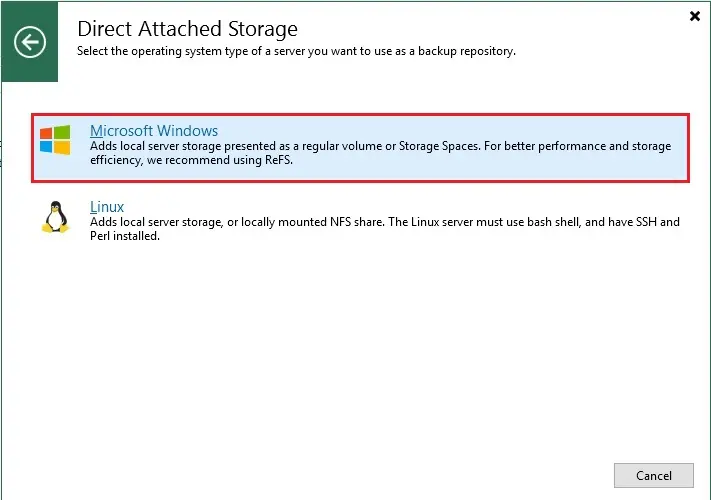
3- Select Microsoft Windows.
4- Type the repository Name, Description and then click Next.
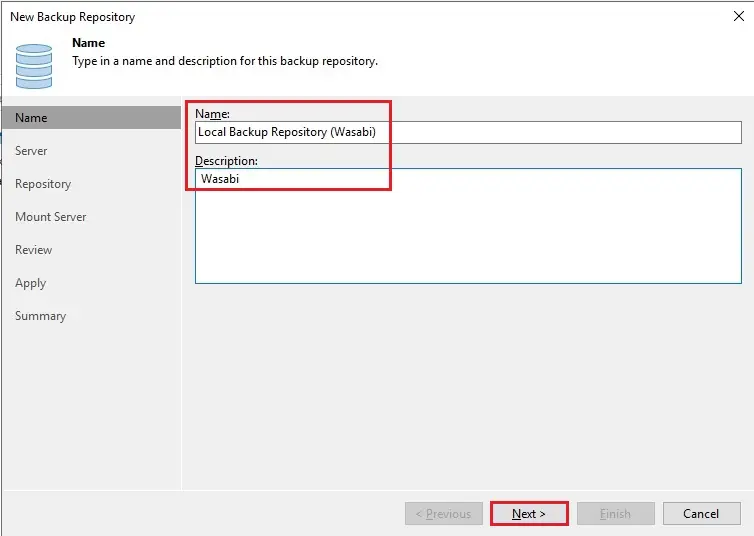
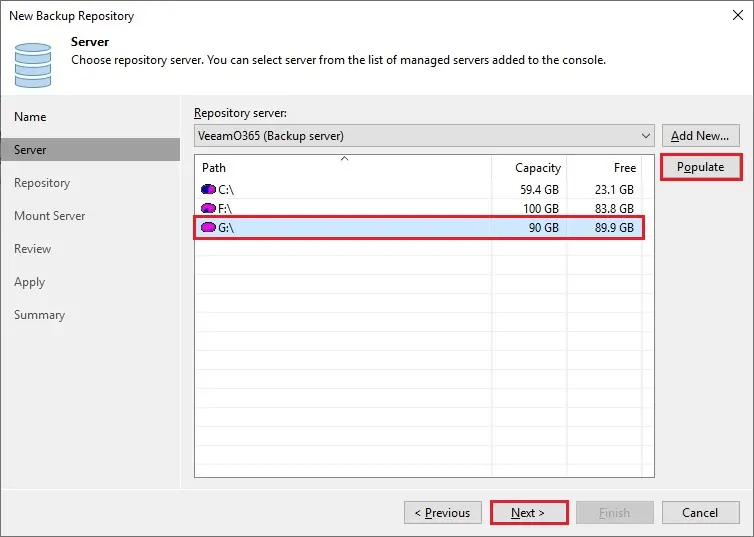
5- Select the Populate button, select a drive you want to use as a backup repository, and then click Next.
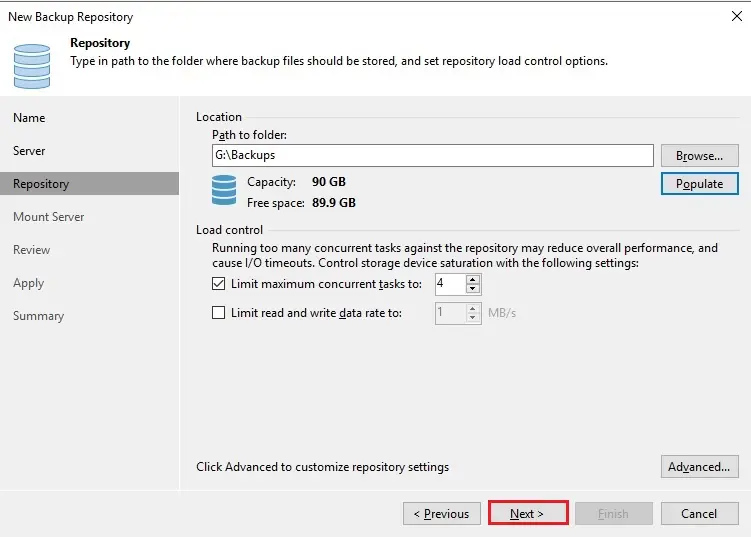
6- Click Next.
7- Click Yes.

8- Click next.
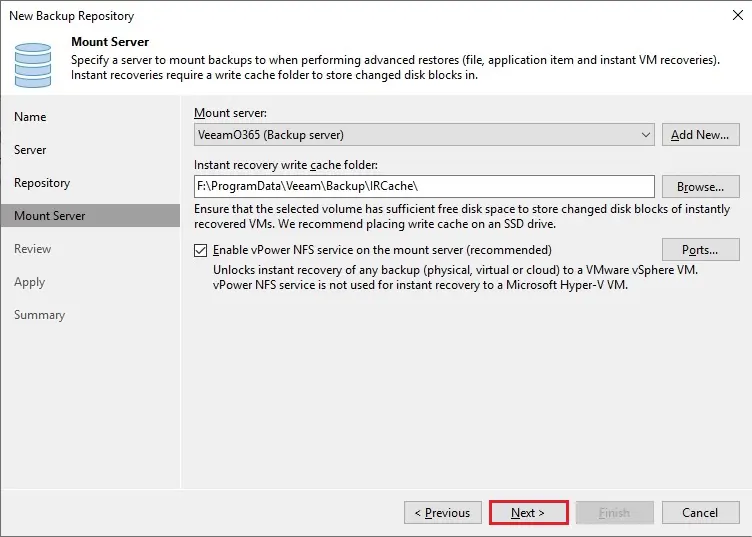
9- Click Apply.
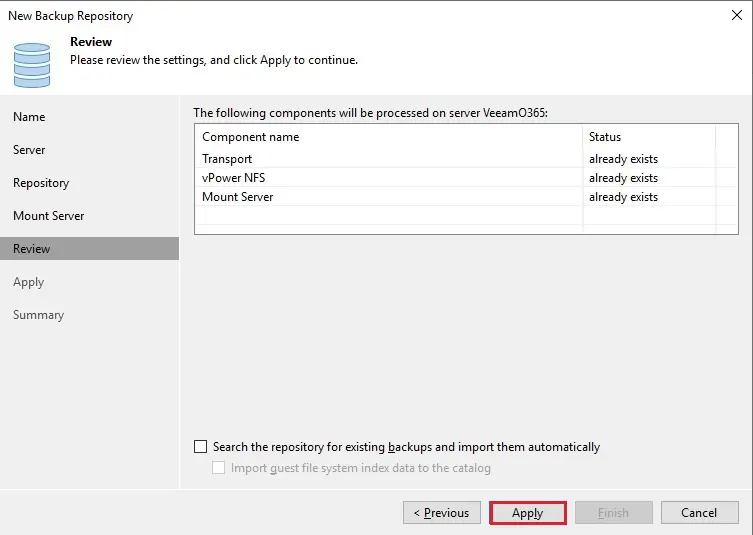
10- Click next
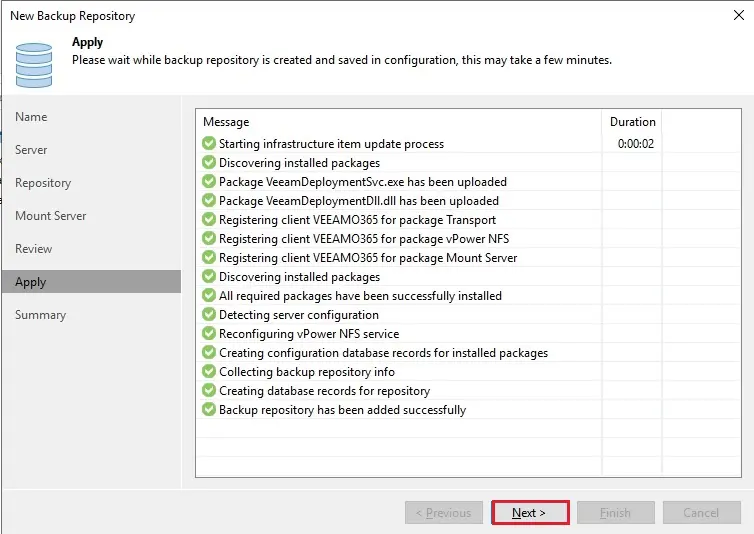
11- Click Finish to create the local Backup Repository.
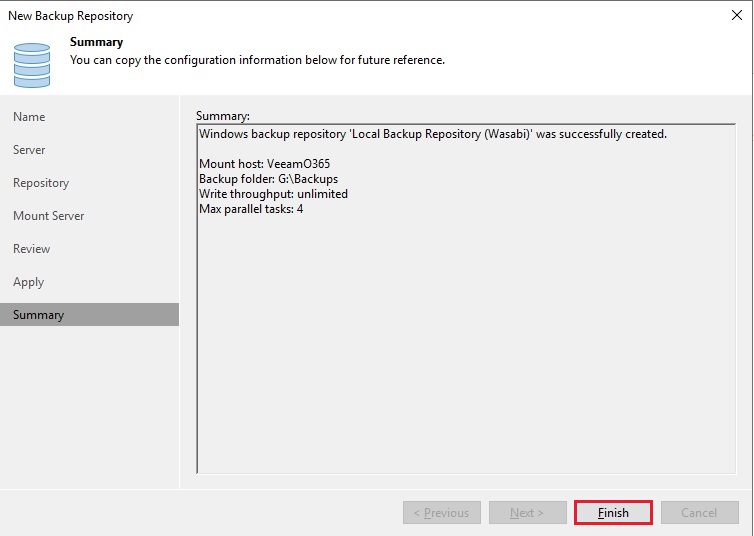
12- The new local Backup Repository has been created successfully.
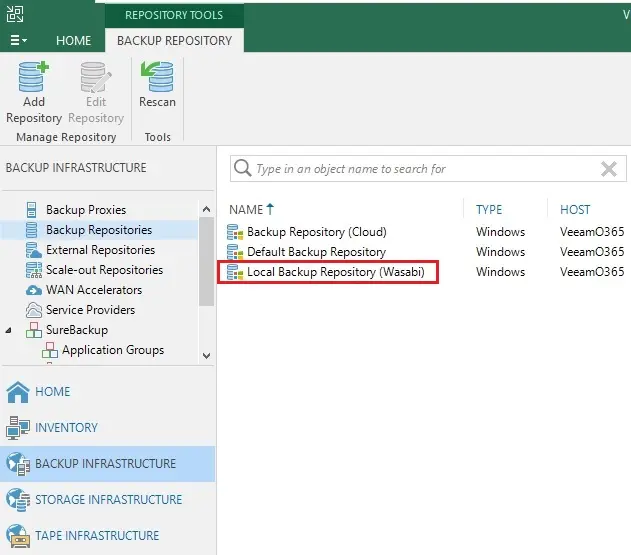
Create a new Scale-out Repository
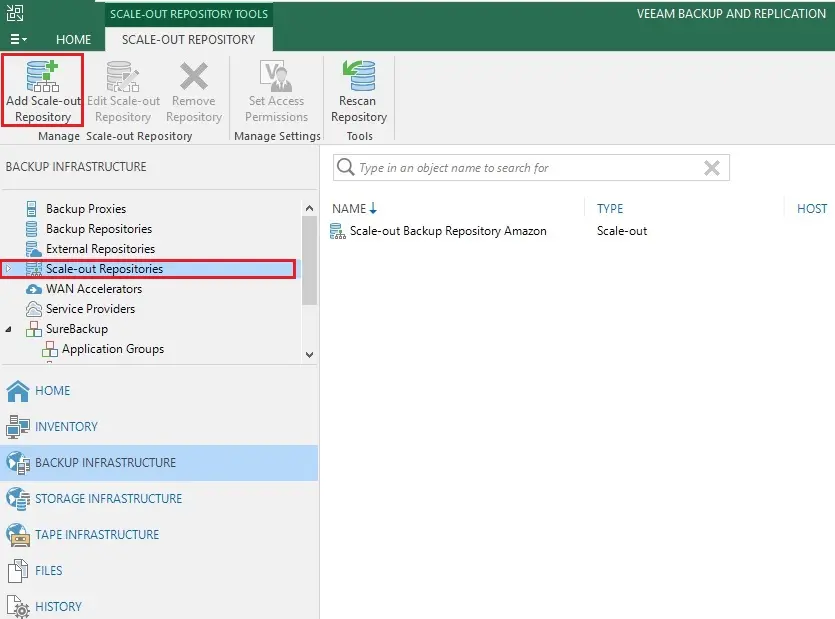
1- Select Scale-out Repositories and then Select Add Scale-out Backup Repository.
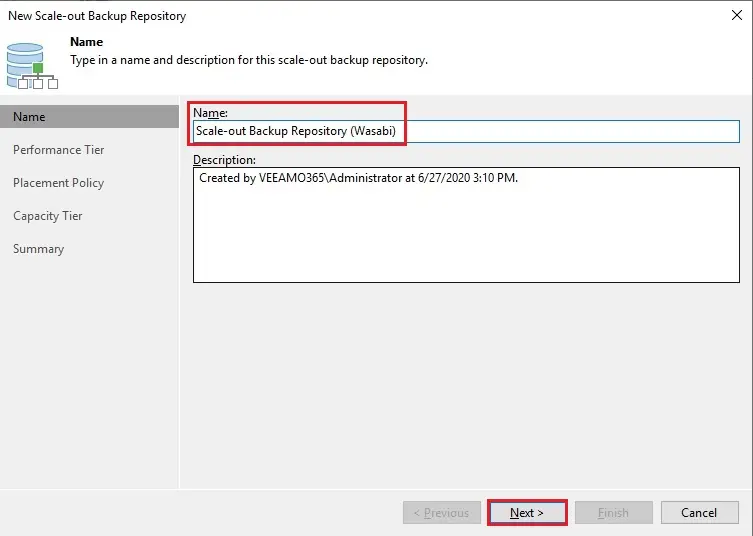
2- Type a Name, Description for the new Scale-out Backup Repository and then click Next.
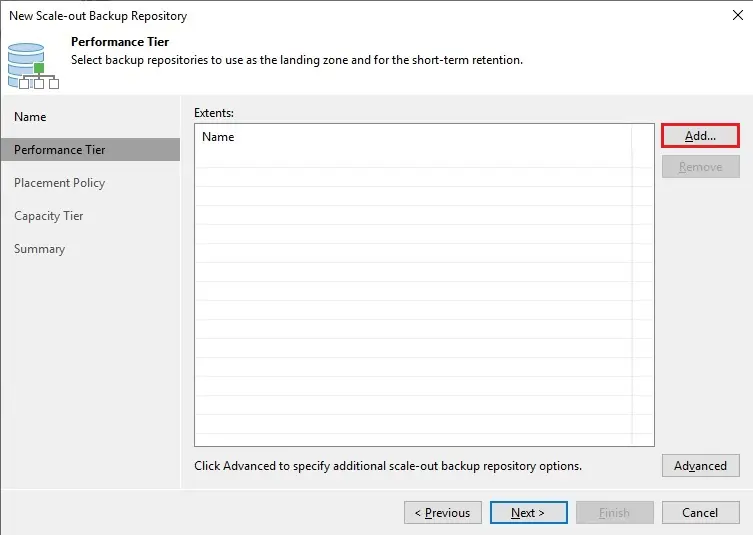
3- Click the Add button to add a local Extent used as a Performance Tier to store metadata.
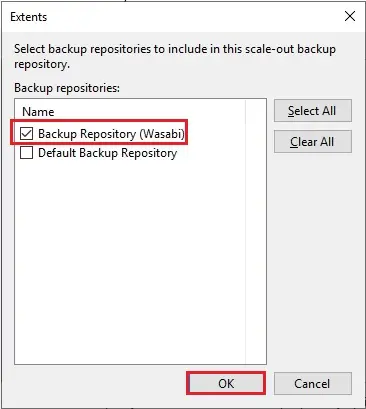
4- Select the backup repository and then click OK to confirm.
5- Click Next.
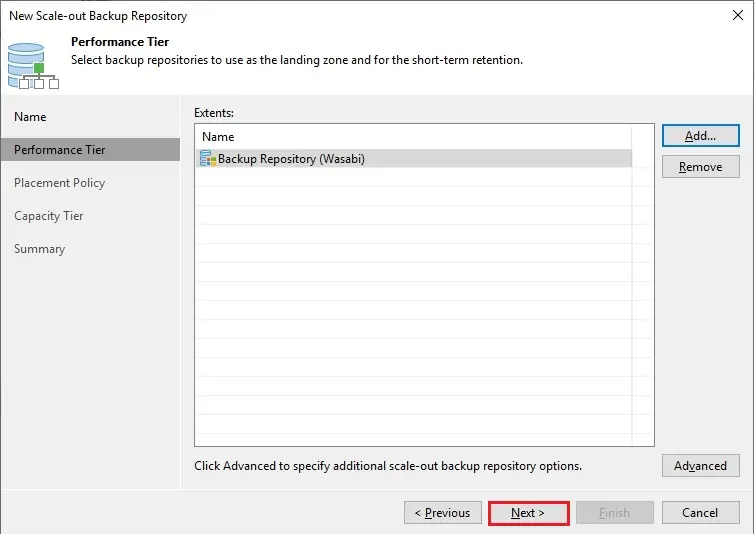
6- Select the Data Locality option and then click next.
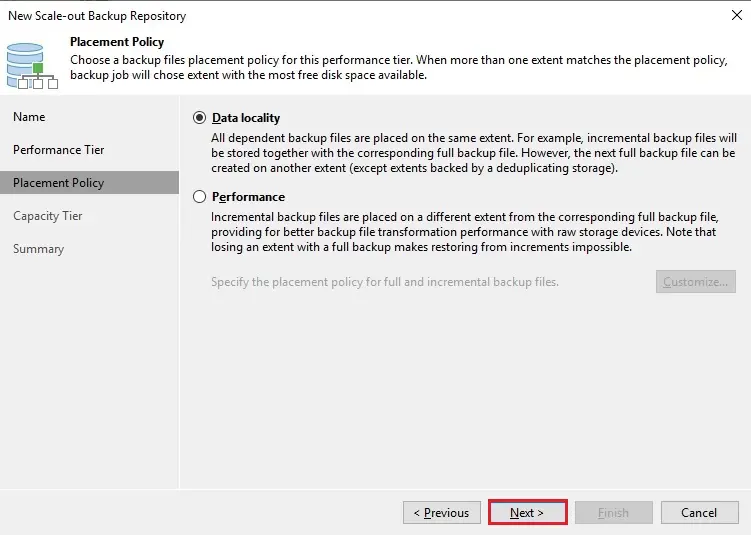
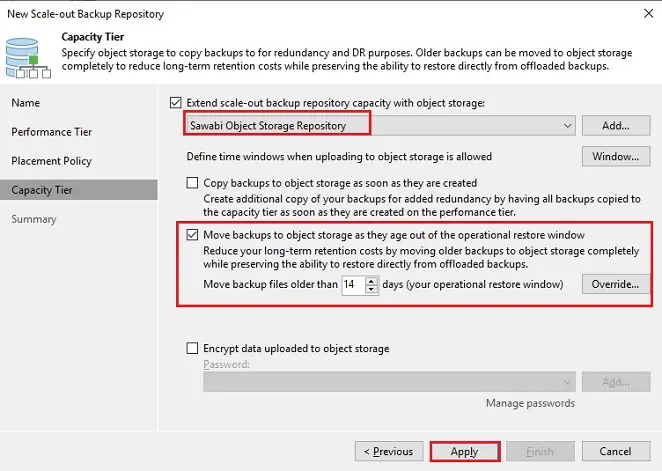
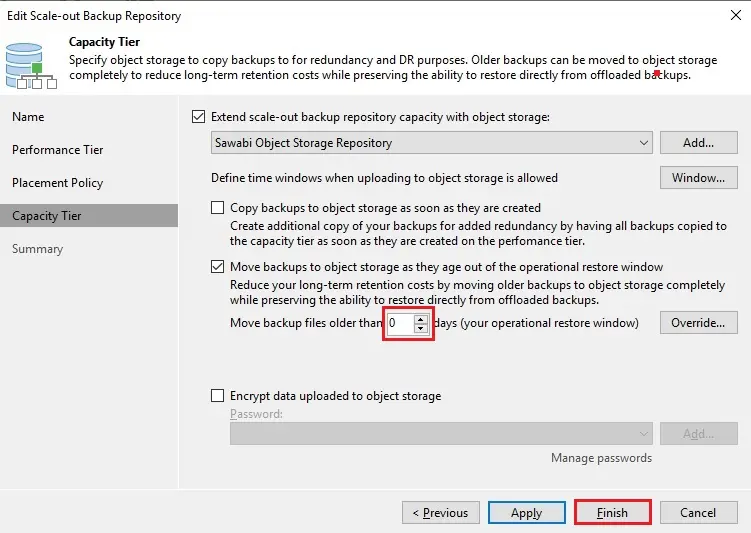
7- Select checkbox Extend scale-out repository capacity with object storage option by specifying the Wasabi repository previously created. Define also the time/age when old backups can be moved to the object storage (Wasabi object storage repository) for long-retention archival purposes. You can set the value click Apply.
8- Click finish to create the Scale-out Repository.
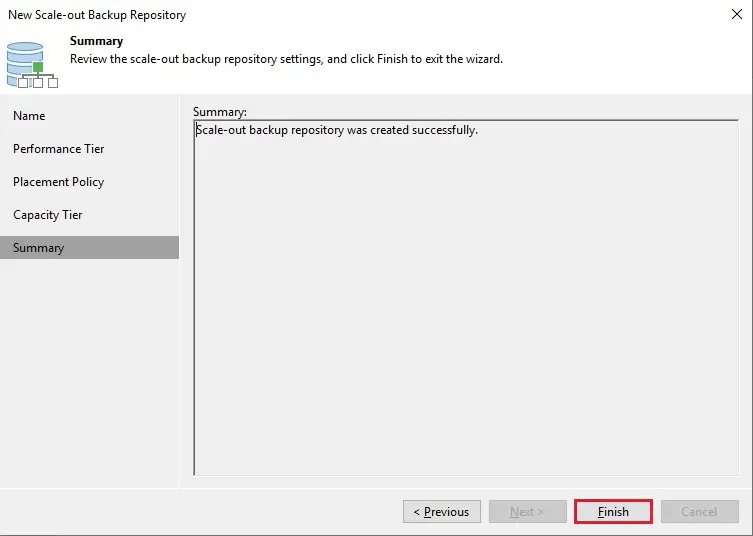
9- The Scale-out Repository has been created successfully.
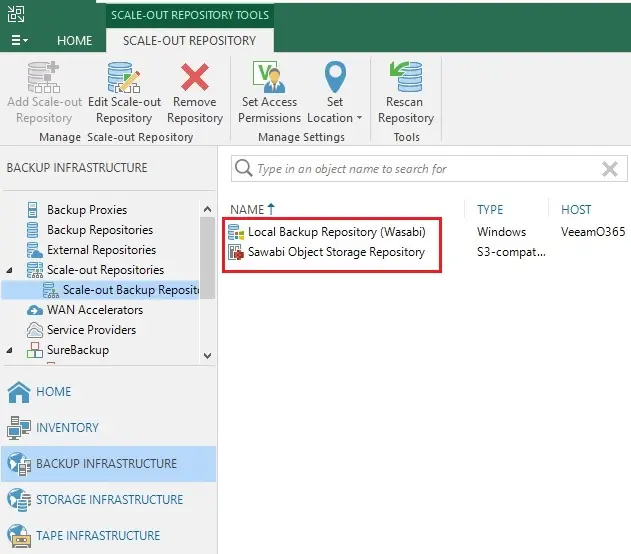
Create a Backup Job
Create a new backup job to take advantage of the immutability feature.
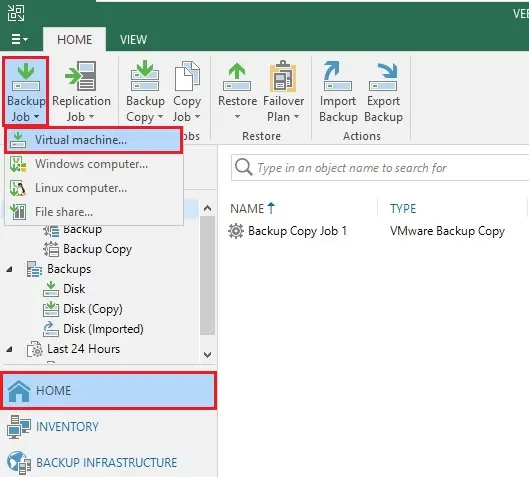
1- Select the home tab, select the backup job, and then virtual machine.
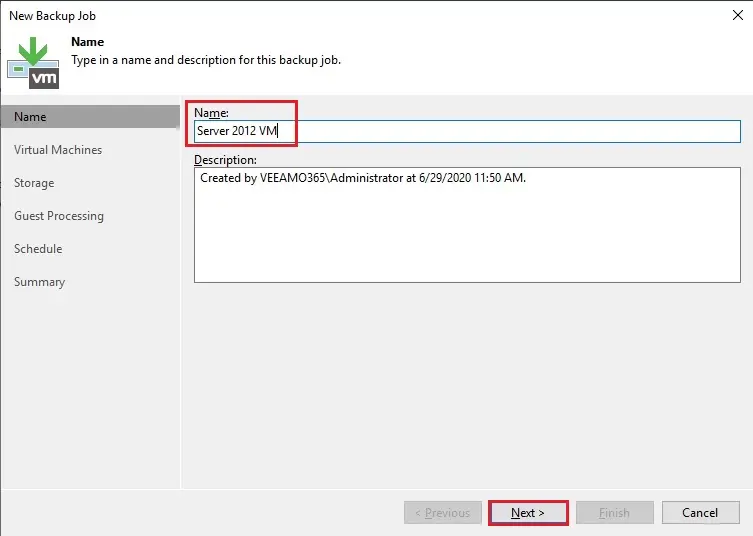
2- Type the backup job name and then click next.
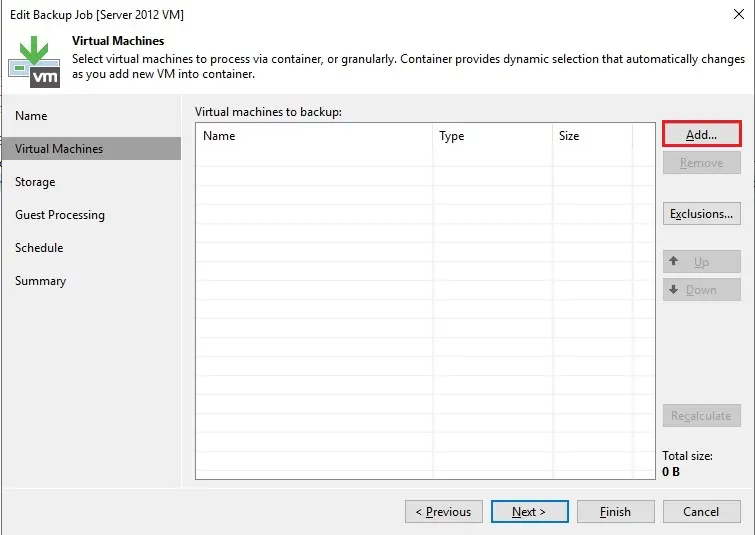
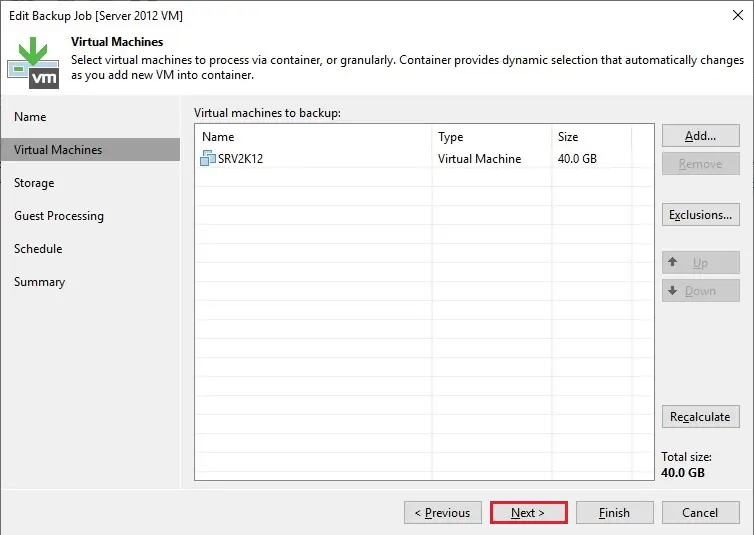
3- Virtual machine to backup, click the add button
4- Select the object to backup and then click add.
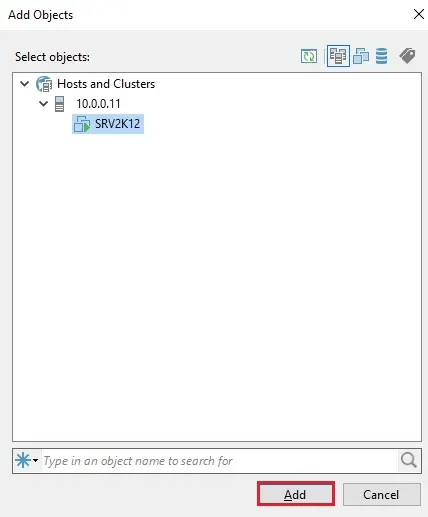
5- Click next
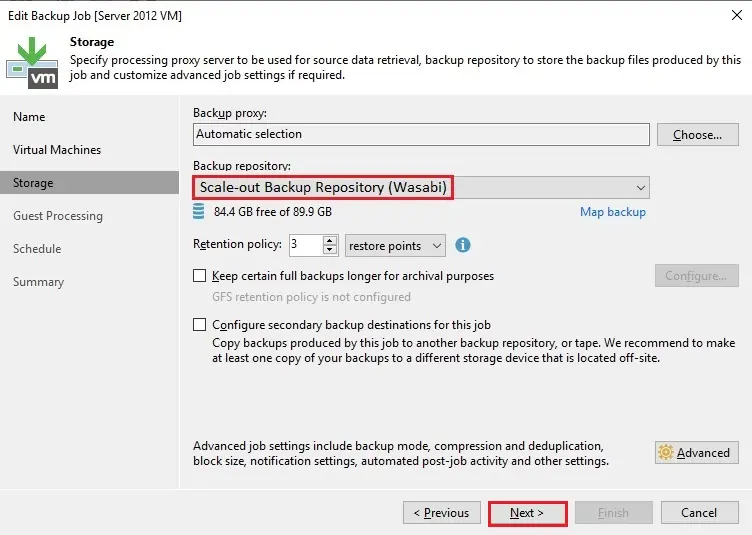
6- In the configuration wizard select from the Backup repository drop-down menu the just created Scale-out Repository (local backup repository Wasabi) and then click next. Follow the below instructions and finalize the Backup Job configuration.
7- Click next
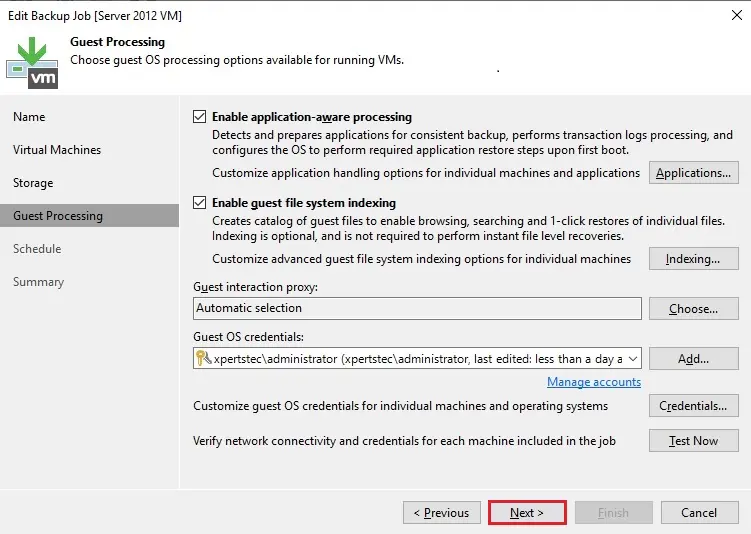
8- Click next
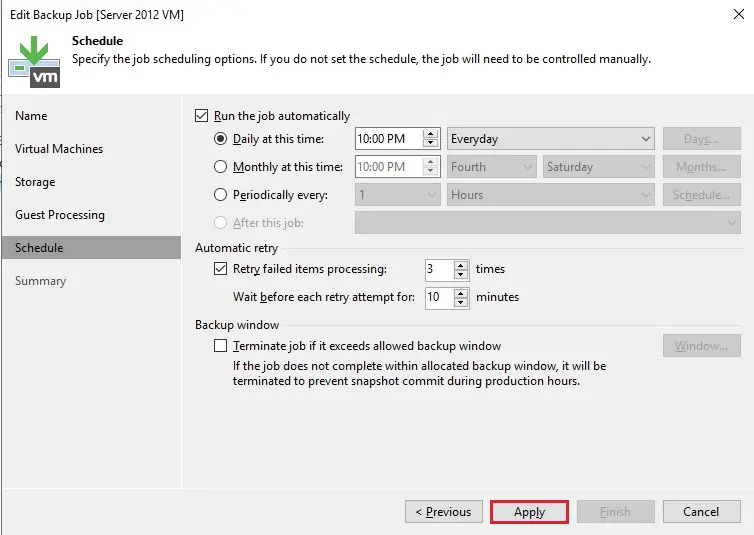
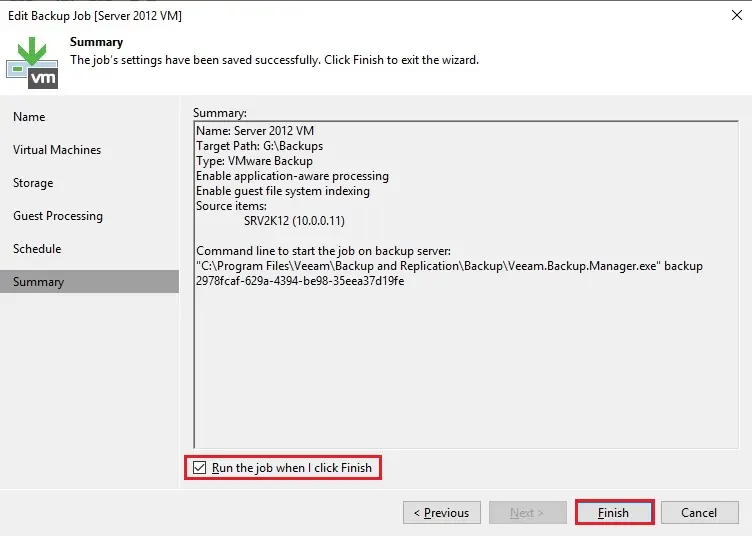
9- Click finish
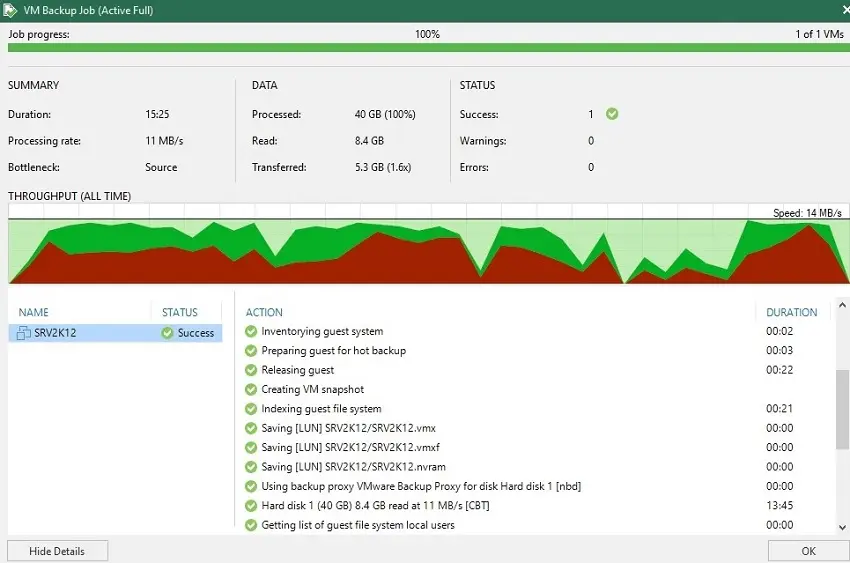
10- During the first performance, a Full Backup is being performed.
Move backups to Wasabi Object Storage
If you are willing to test the archival process into the protected bucket, after the initial Full Backup you must perform some additional backups. At least 3 to 4 additional Incremental Backups and one another Active Full Backup.
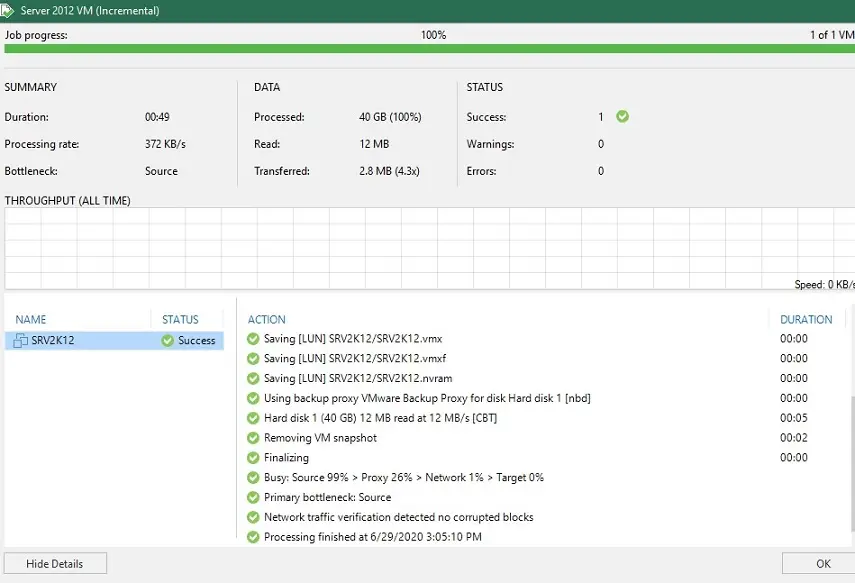
In this picture, you can find 2 full backups 3 incremental backup

1- To move backups immediately to the selected Wasabi Object Storage. Select your scale-out repository and then click edit scale-out repository.
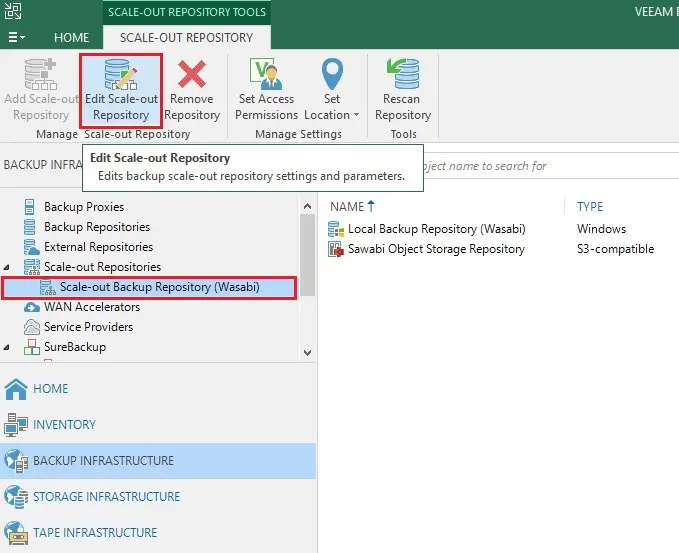
2- Select Capacity Tier option, select Move backup files older than field set to 0, and click finish.
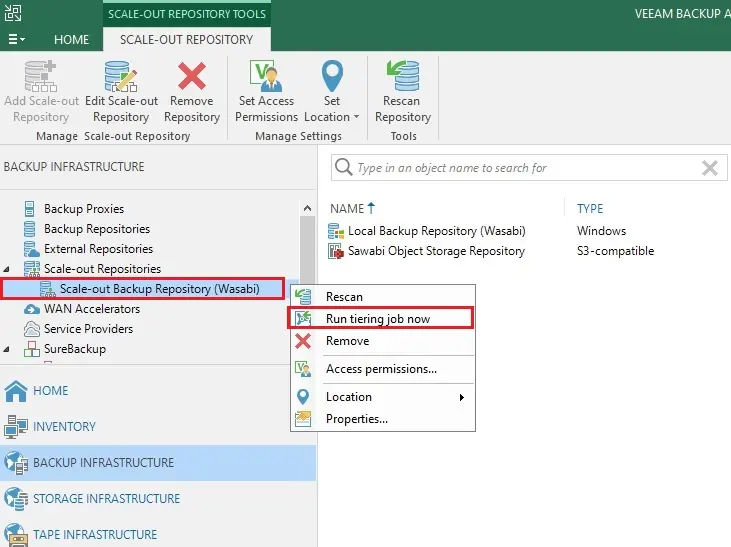
3- Keep the CTRL button and right-click on your Scale-out Backup Repository (Wasabi) and then select Run tiering job now.
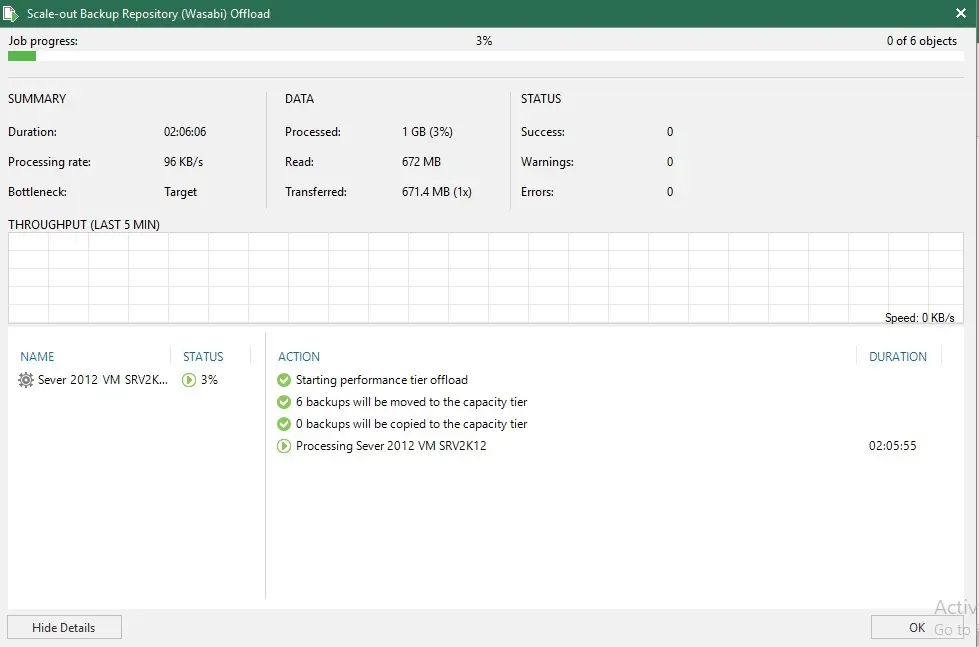
4- The offload process is performing and backups are moved to Wasabi Object Storage. I am testing in my test lab so I am stopping it.
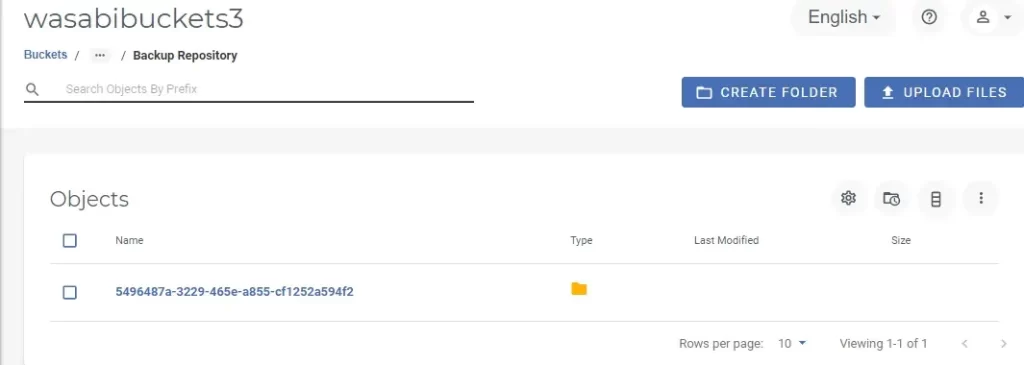
5- Login to Wasabi Console and access the Bucket used as Backup Repository. As expected, backup files have been stored in the configured Bucket.
