How to Login Automatically With Windows 10

Login Automatically With Windows, by default, when a user logs into Windows 10, they must enter their credentials in order to proceed further as a security measure to prevent unauthorized access. Although, circumstances vary & many of us do not want to key in the password every time we turn the computer/laptop on or if we have a Virtual Machine setup on our computer.
In Windows 10, the process to automatically log in is very easy and there are two methods to do this. If you are using Windows 10 at your home or in a small office setup where your computer is not a part of Domain, then follow the below steps.
Before starting with the article, there are few things to note. You should have access to the Windows administrator account to makes changes and you must login as the administrator and if you ever decide to change password for the account set to automatically login, then you will want to re-do the steps.
How to remove windows user password
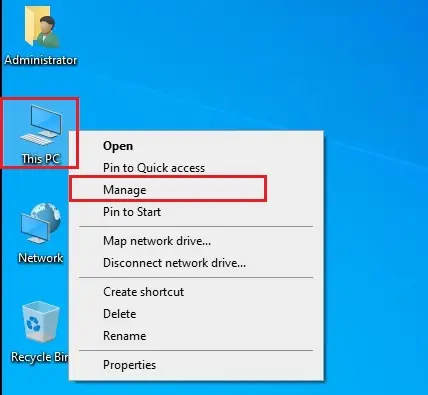
1- From your desktop, right-click on this PC and then select Manage.
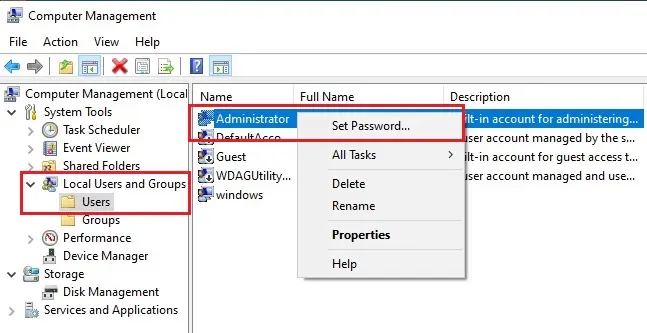
2- Expand local users and groups, select Users
Right click on the user and then select a set password
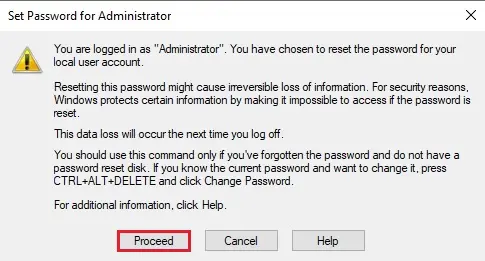
3- Select proceed
4- Click OK without typing passwords
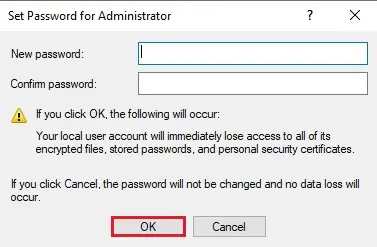
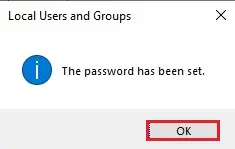
5- Click OK
Allow Automatic Login via User Accounts
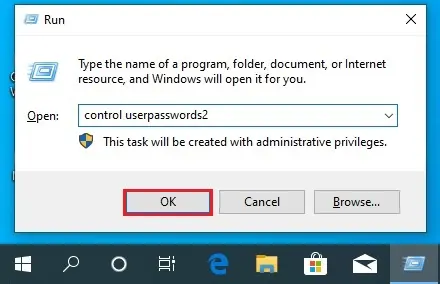
1- Log in with your administrator account. Hold Windows key + R. In the run dialog, enter control userpasswords2 and then Press Enter. Click Yes if you get User Account Control warning message appears.
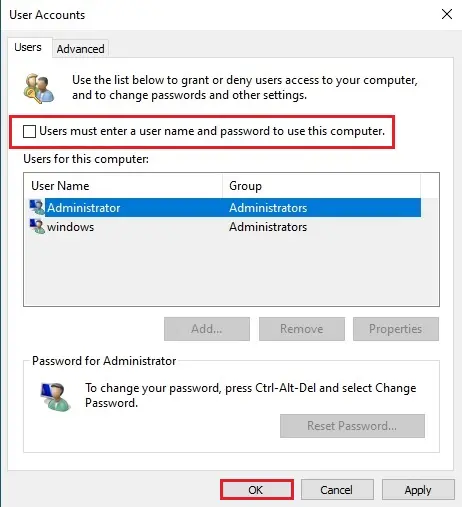
2- In the User Account window, uncheck the checkbox Users must enter a user name and password to use this computer and click OK
3- Click OK
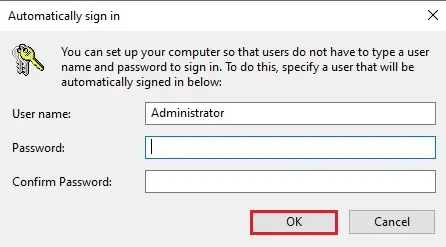
The specific account will now automatically login when your turn your computer on.
For more details automatically logging in with Windows, please visit Microsoft.
Read more: Enable or disable Windows 10 Secure Sign-In.


