How to Create VMware Distributed Switch
Create VMware Distributed Switch, in this blog I will show you how to create and configure a VMware distributed switch in VMware vSphere vCenter 7.0. In my lab example, vCenter 7.0 is used and three ESXi hosts of version 7.0 are managed by vCenter.
ESXi-01 – 10.0.0.11 (management interface)
ESXi-02 – 10.0.0.12
ESXi-04 – 10.0.0.14
vCenter – 10.0.0.22
Step 1 – Create VMware distributed switch
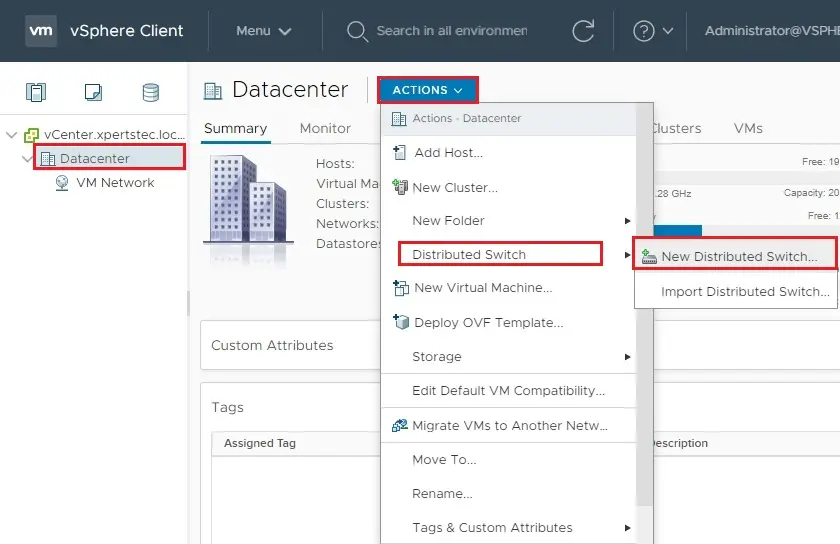
1- Log in to your vCenter server and go to the Hosts and Clusters section. You must add your ESXi hosts in the datacenter, which is a logical organization unit in vCenter. Select your datacenter, click on Action menu, select Distributed Switch and then New Distributed switch.
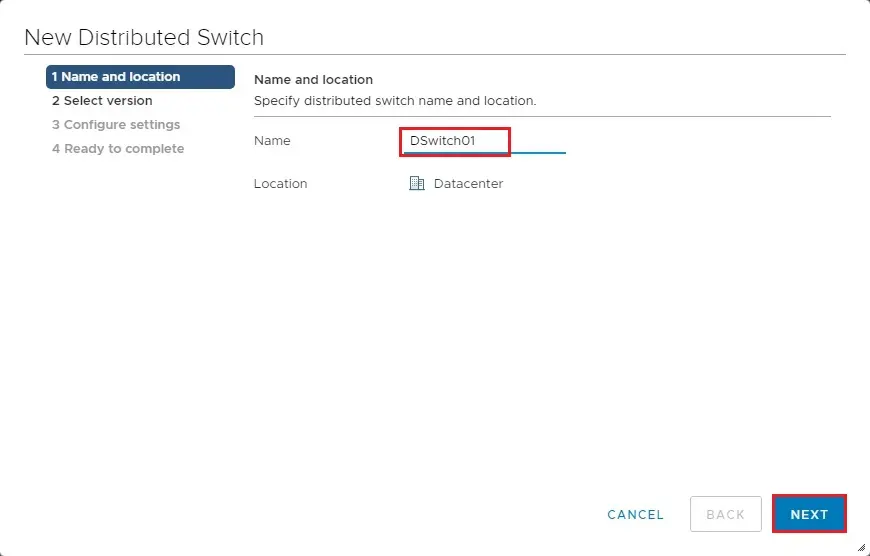
2- New Distributed Switch wizard, Name, and location.
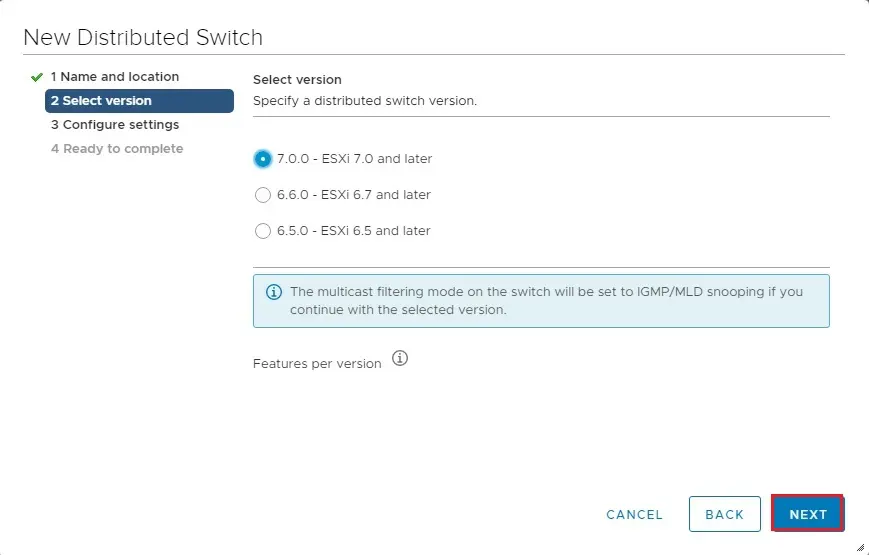
3- Select version option, In this step, you should specify a distributed virtual switch version and then click next.
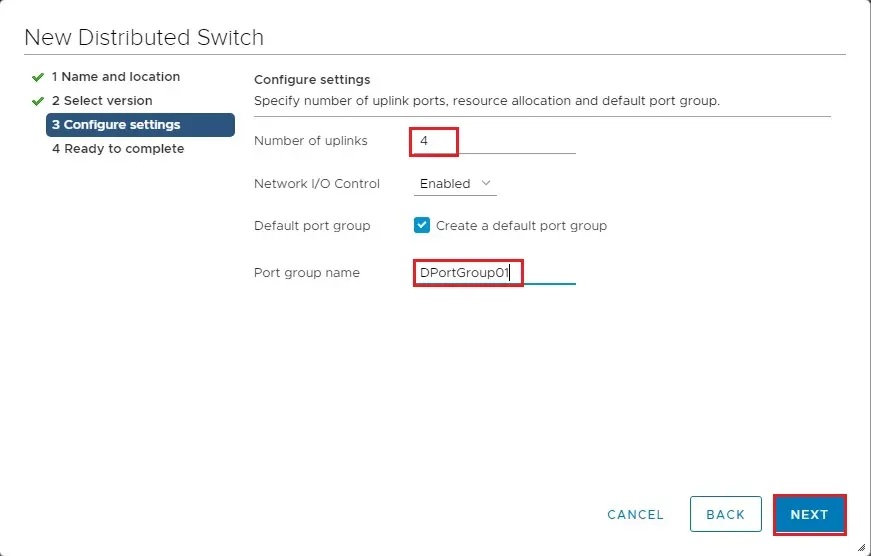
4- New Distributed switch wizard, Configure settings. Specified the number of uplinks ports, set the Network I/O Control, and choose the create a default port group checkbox to create a default port group. Type a port group name and then click next.
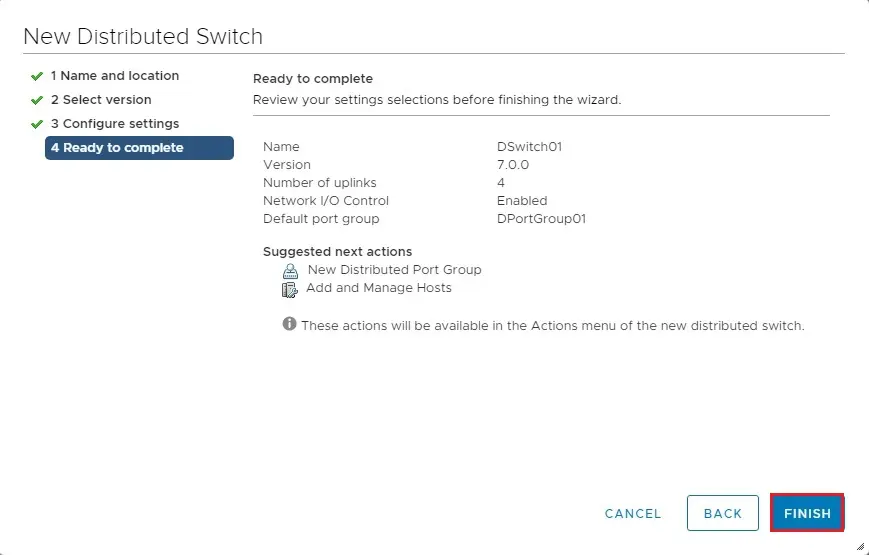
5- New Distributed Switch wizard Ready to complete. Review your settings for a new VMware virtual distributed switch and, then, click Finish to create the switch.
Add ESXi hosts to a VMware distributed switch
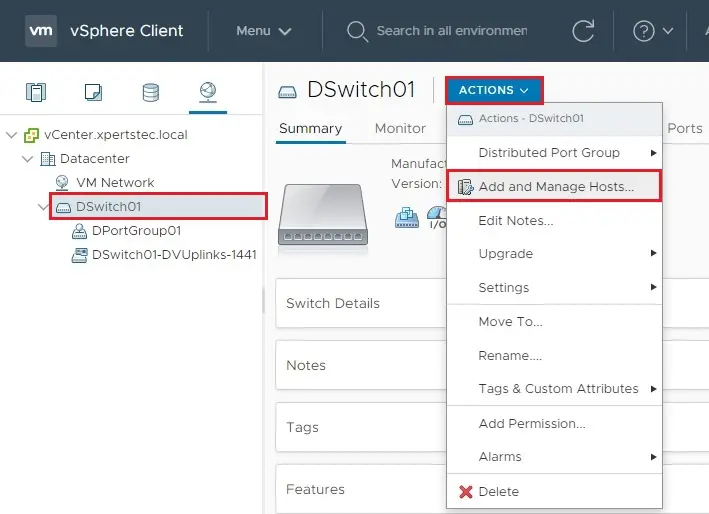
6- After successfully creating a distributed virtual switch, we need to add ESXi hosts to the VDS configuration to make VMware distributed switching work. In the Networking option, select your VMware distributed switch, select action menu and then click Add and Manage Hosts.
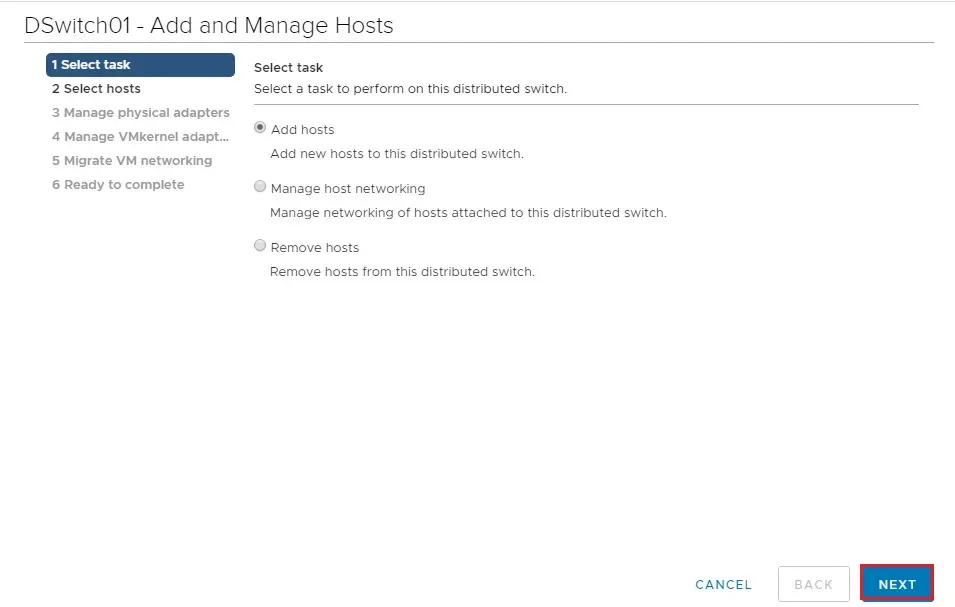
7- Add and Manager host wizard, Select task. As you want to add hosts, select Add hosts and then click next.
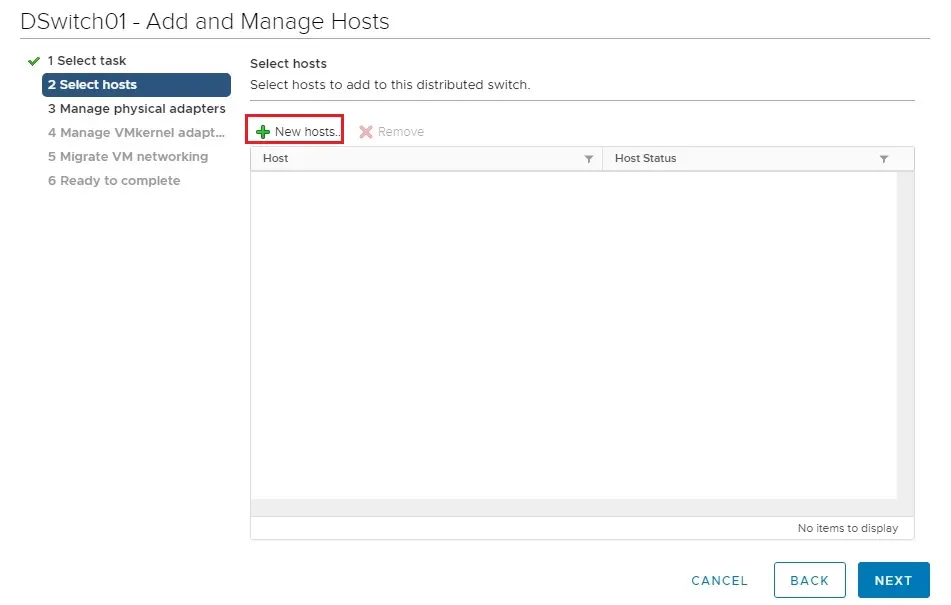
8- Click the New hosts button to add ESXi hosts.
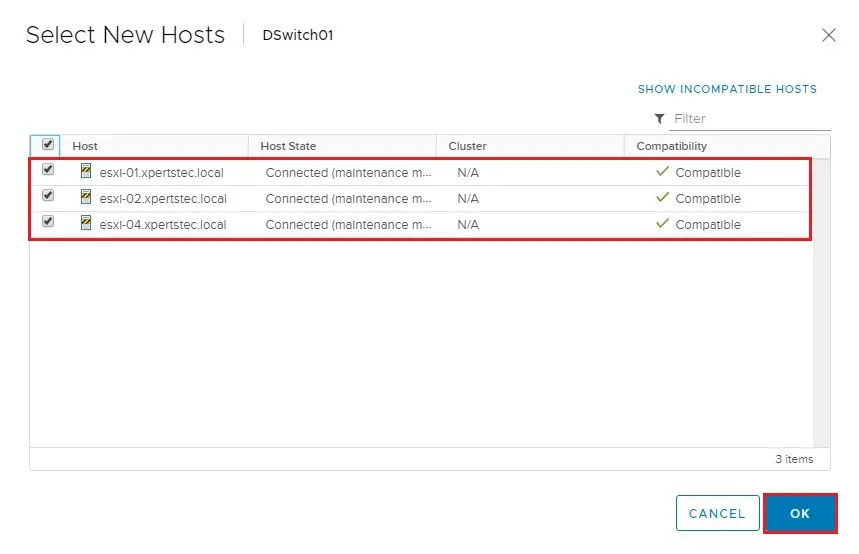
9- Select new hosts Window will pop-up, select the checkboxes, and select ESXi hosts that you want to attend in VMware distributed switch. Click OK to apply.
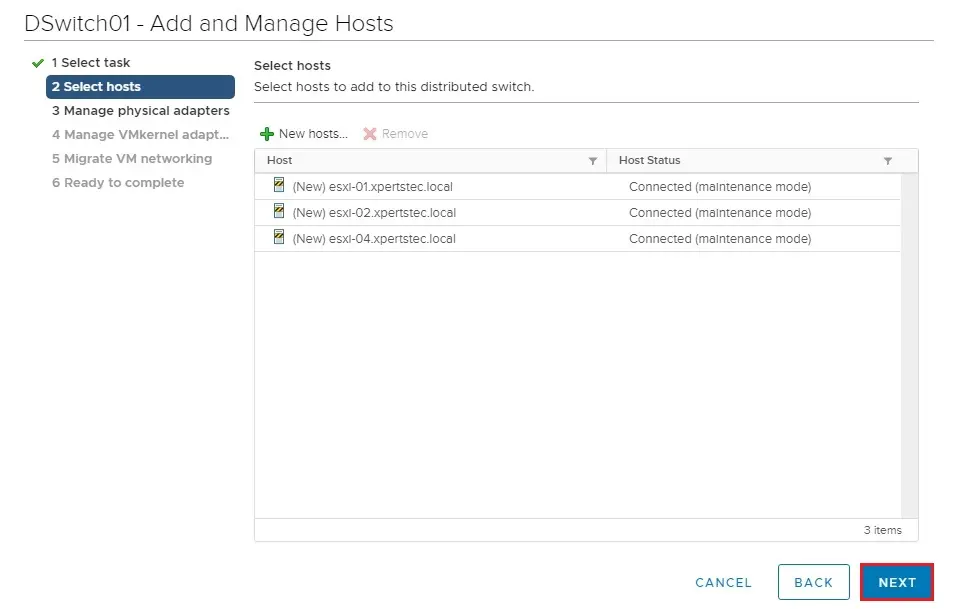
10- The ESXi hosts are now selected and the status is showing Connected, then click next.
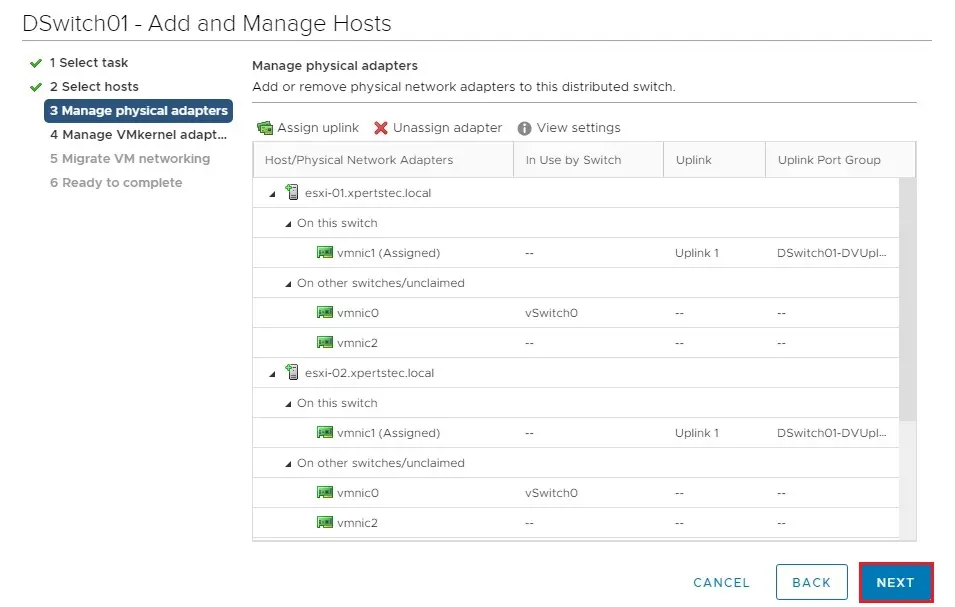
11- Add and Manage hosts wizard Manage physical adapters. You can select the necessary physical network adapters and then click assign uplinks.
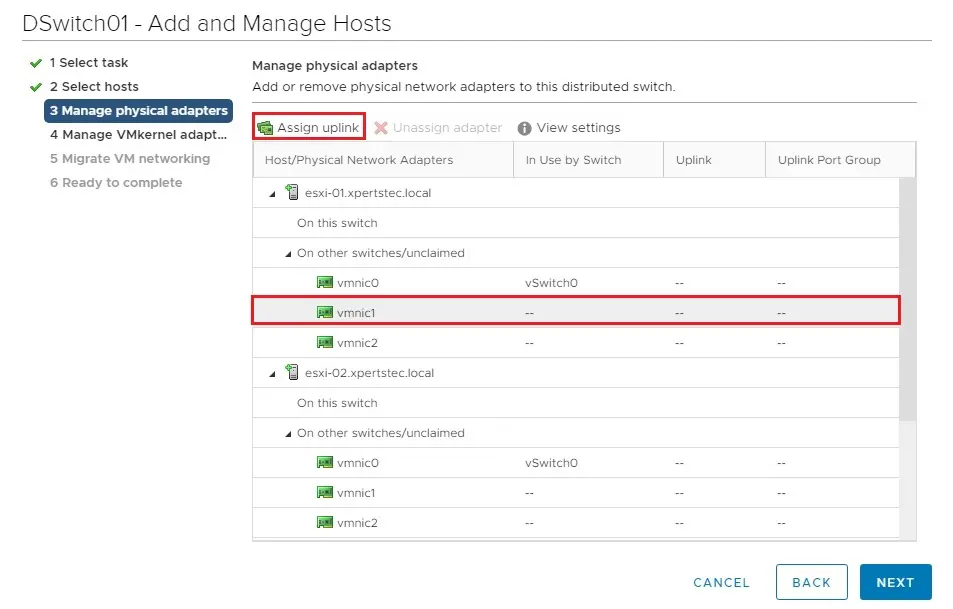
12- Select a uplink and then click ok.
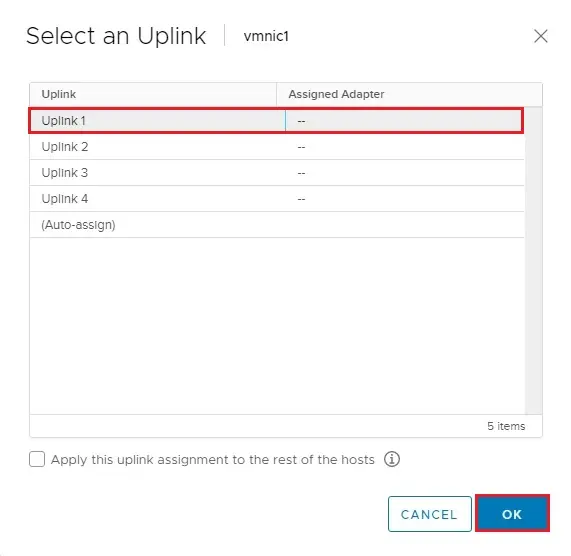
13- After assigning uplink to three hosts click next.
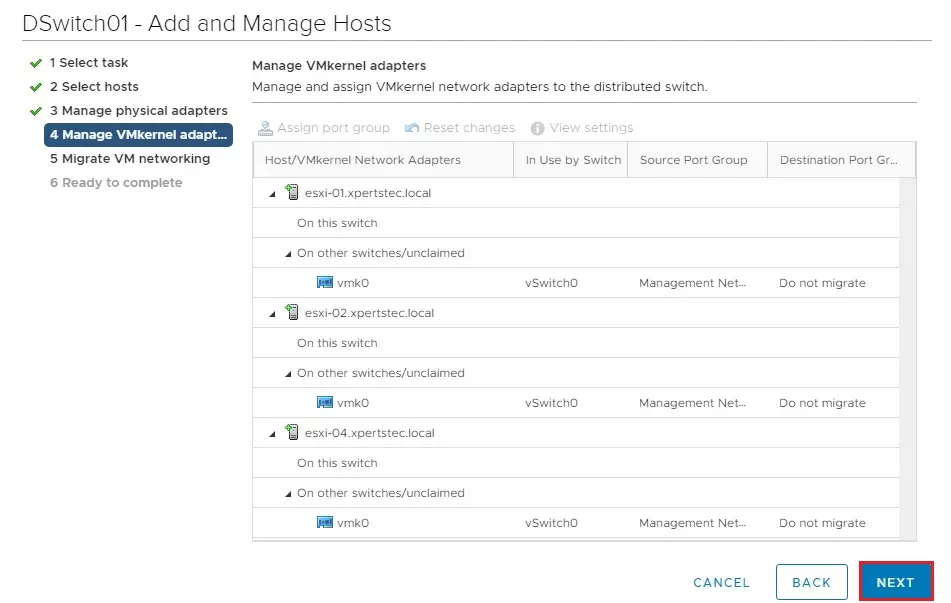
14- Manage VMkernel adapters, click next.
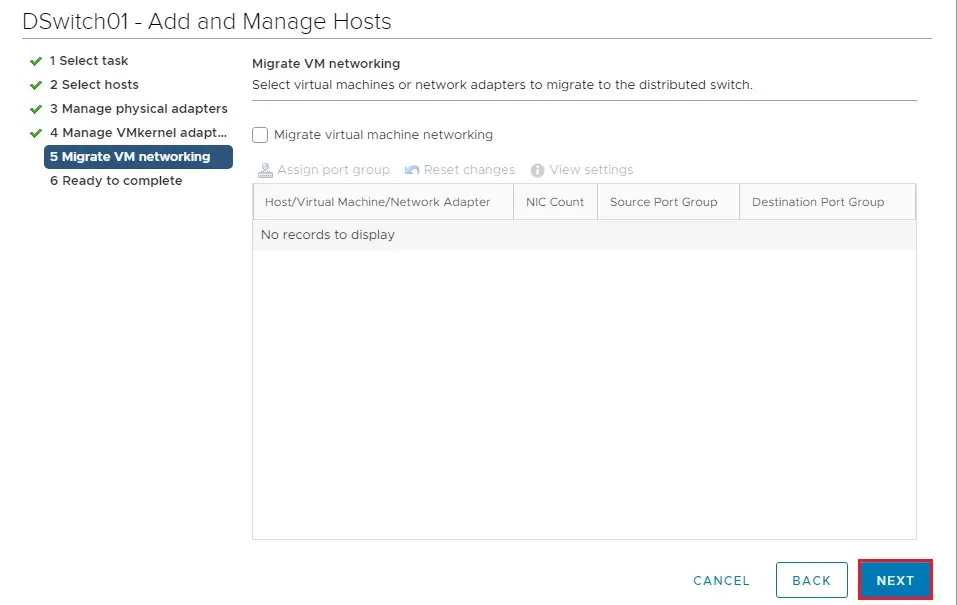
15- Migrate VM networking. If you want to migrate virtual machines to the distributed virtual switch. You can do it at this stage. In this example, no network adapters are migrated to the VDS. Click next.
16- Add and Manage hosts ready to Complete. Review the settings and then click Finish.
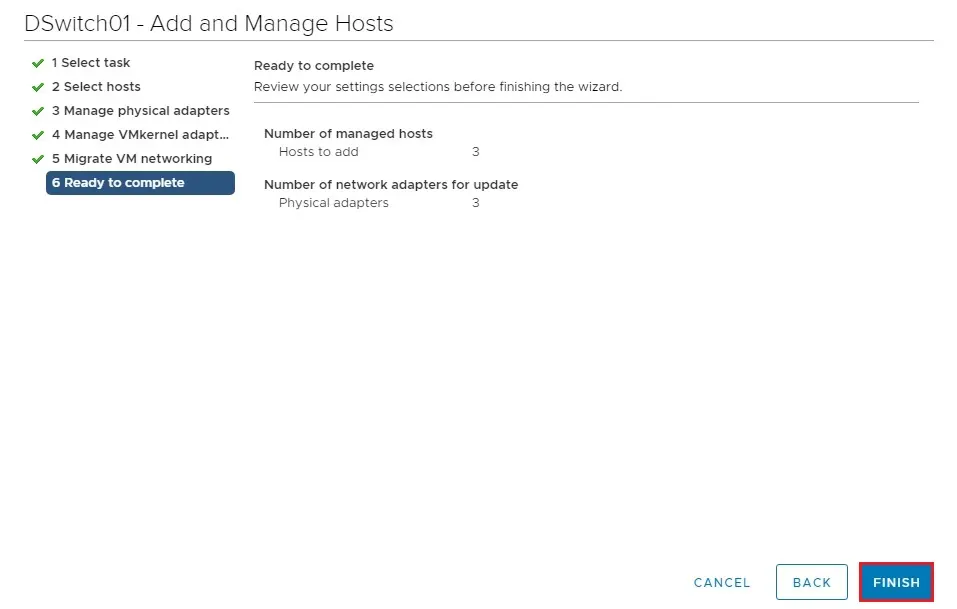
The ESXi hosts are successfully added to VMware distributed switch configuration. We can add VMkernel network adapters to a port group of the distributed virtual switch for using different features.
Add VMkernel adapters
17- In the vCenter Network option, in the VMware distributed switch select the port group. Select the Action menu and then select Add VMkernel Adapters.
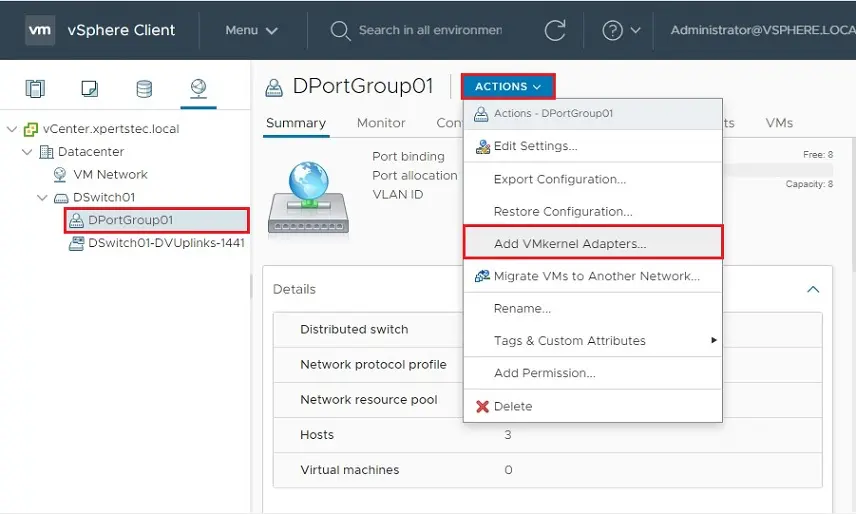
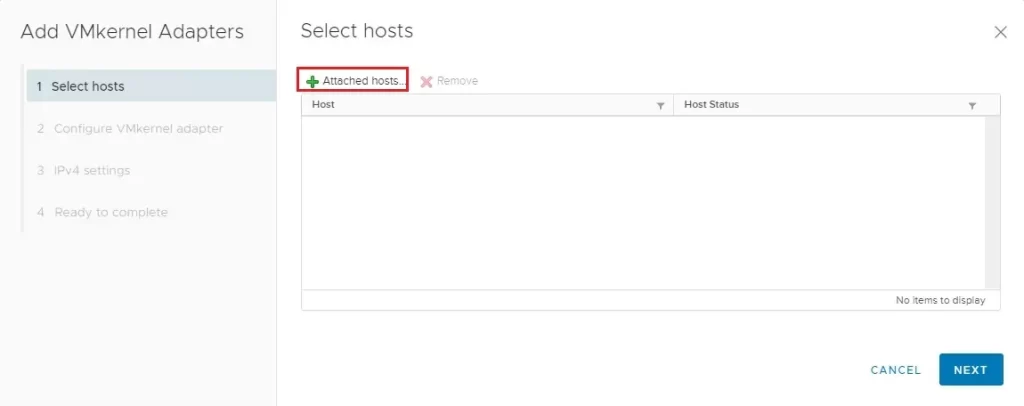
18- Add VMkernel Adapters wizard, Click the Attached hosts button to select ESXi hosts.
19- Select member hosts and then click ok.
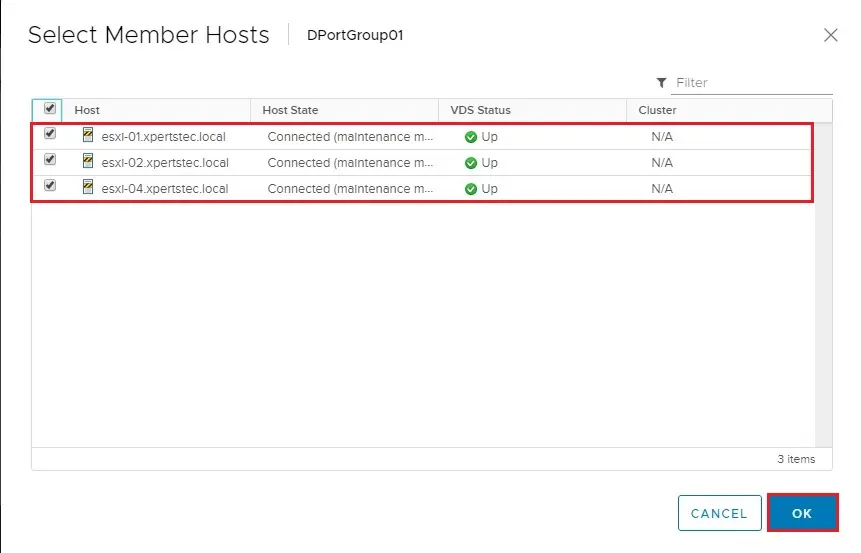
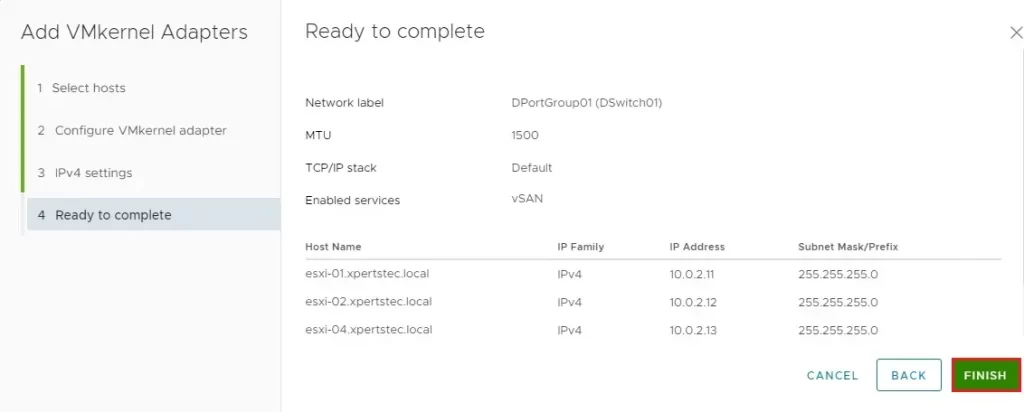
20- Click Next.
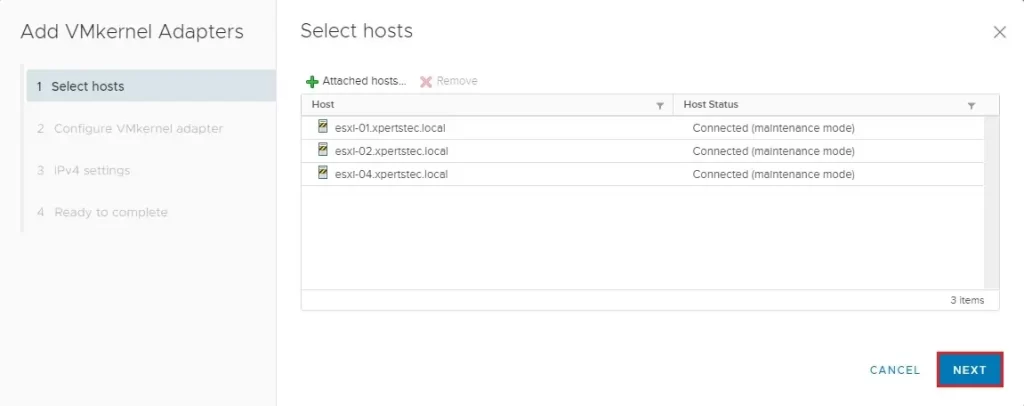
21- Add VMKernel Adapters wizard Configure VMkernel adapter. Select available services (vMotion, Provisioning, Fault Tolerance logging and etc). I am selecting vSAN then click next.
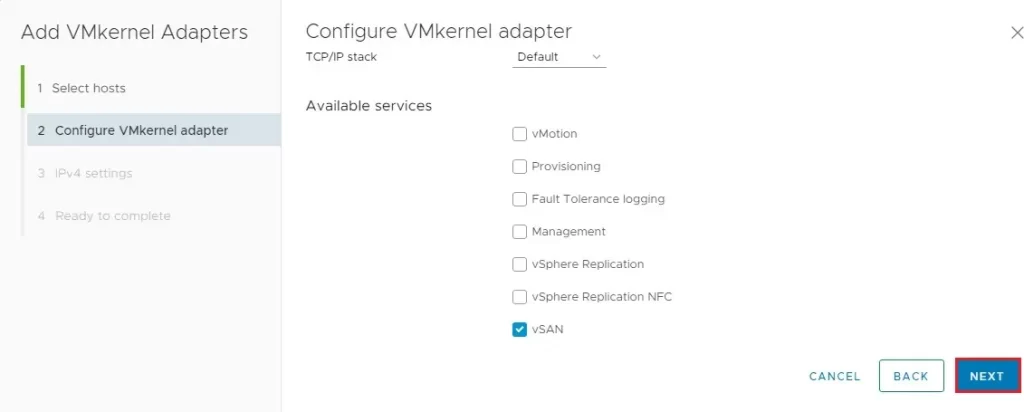
IPv4 Network settings. In this step, we need to set the IP addresses for VMkernel adapters of ESXi hosts. Using static IP addresses.
ESXi-01 (10.0.0.11) – 10.0.2.11
ESXi-02 (10.0.0.12) – 10.0.2.12
ESXi-04 (10.0.0.14) – 10.0.2.14
The vSAN network will be 10.0.2.1/24
22- Click next.
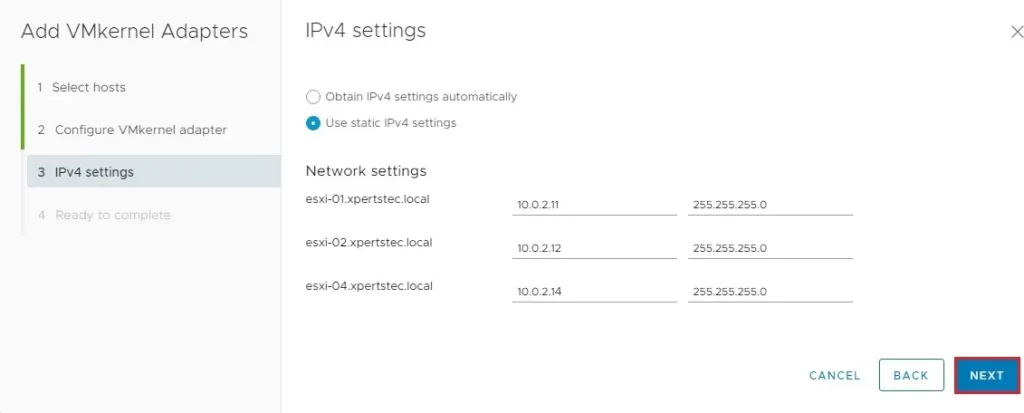
23- Review the configuration and then click Finish.
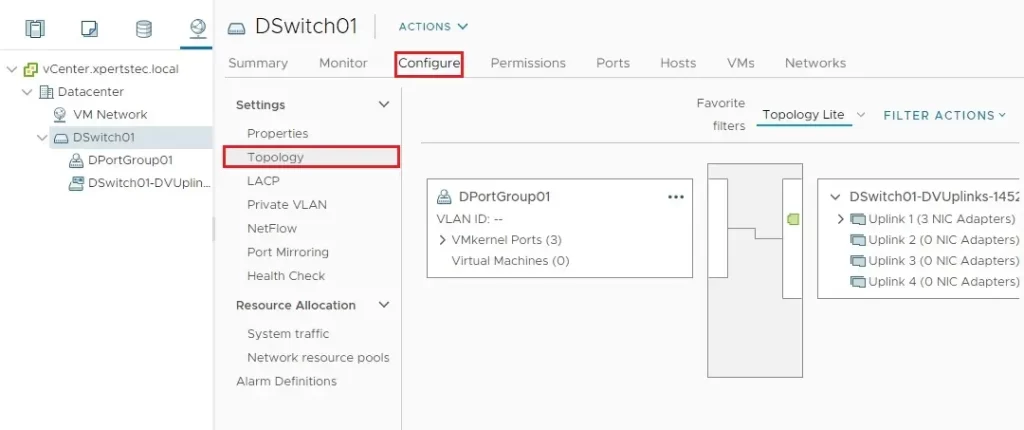
24- After configuring VMkernel adapters, select the VMware distributed switch, Select Configure tab, under Settings, select Topology and view of your VDS topology.
For more information visit VMware

