We all come across the need to transfer files between our devices like our Mobile or Laptop. This article will show you the best possible methods or ways to transfer your files, photos, or contacts from iPhone to Laptop or Laptop to iPhone.
Sharing Files between iPhone and Mac:
METHOD 1: Using Data Transfer Software:
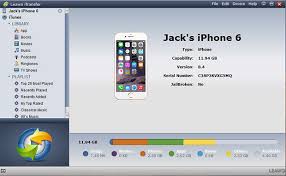
If you want reliable software to transfer files from your iPhone to Mac or from Mac to iPhone, use EaseUS MobiMover. With this software, you can share a single as well as multiple files between an IOS device and the Mac.
How to Use EaseUS MobiMover:
Step 1:
Connect your iPhone to your Mac via a USB cable and tap “yes” or “Trust this device” when a pop-up appears for authentication. Launch EaseUS MobiMover software and select Mac to phone or Phone to Mac on the user interfaces whatever you desire.
Step 2:
Now select and browse the files you want to transfer and follow the instructions.
METHOD 2: Using AirDrop Utility:
AirDrop is a built-in Utility for files sharing available on IOS and Macs devices. Using Air-Drop you can send data between Mac and IOS devices over Wi-Fi or Bluetooth. Use AirDrop to transfer files between iPhone and Mac as follows:
Step 1:
Turn on AirDrop using the control centre on your iPhone and set the status to be discovered by “Everyone” or “Contacts Only”.
Step 2:
Turn on AirDrop on your Mac and set the option “Allow to be discovered by” as “Everyone” or “Contacts Only”.
Step 3:
Now share the files between your IOS and Mac device or your two IOS devices.
METHOD 3: Share files from Mac to iPhone to iPhone to Mac Using Email
You can share files via attachments in your email from iPhone to Mac as well as Mac to iPhone. Follow the steps as stated below to share files via email:
Step 1:
Compose a new Email on your Mac or iPhone.
Step 2:
Attach the files via browsing to your email attachment.
Step 3:
Send to the recipient’s email address.
NOTE: It is recommended to share smaller files via email as larger files might take a long time depending on your Internet connection and the file size.
METHOD 4: Sync files using iCloud drive between iPhone and Mac.
You can sync all your files to iCloud Drive and access them from iCloud.com, PCs, Mac, and IOS devices whenever you want. Accessing these files is easy from the iCloud drive on all the devices having the same Apple ID.
Follow the below steps to sync flies between Mac and IOS devices using iCloud drive:
Step 1:
Turn on the iCloud Drive on your both Mac and IOS devices.
Step 2:
Upload all the files you want to transfer to iCloud drive from your Mac or IOS device.
Step 3:
Lastly, download the files in iCloud drive in the desired device.
METHOD 5: Use Dropbox to transfer files between iPhone and Mac
You can also use other cloud storage services other than iCloud drives available like Google Drive and Dropbox. To use Dropbox to transfer files between IOS and Mac devices follow the following steps:
Step 1:
Download and Install Dropbox on your both Mac and IOS device and log in to the app.
Step 2:
Share files from Mac to iPhone after uploading the files to Dropbox from Mac or to share from iPhone to Mac, upload the files from iPhone to Dropbox cloud storage service.
Step 3:
Check your other device in which you want the files and download them.
Note: Ensure stable internet connections on both devices.
METHOD 6: Share files between Mac and IOS devices via Synching:
If you are a user of the latest macOS Catalina on your Mac device, you can share files between iPhone and Mac using the USB cable or WI-FI connection by synching without any issues.
Using WI-FI Connection to share files between iPhone and Mac
Follow the below steps to share files between two devices of iPhone and Mac
Step 1: Set up your Wi-Fi syncing on the Mac. To set-up Wi-Fi syncing, follow the below steps:
- Use USB to connect your IOS device to the Mac.
- Go to Finder and select your iDevice.
- On the “General” tab, check the box “Show this [device] when on Wi-Fi”.
Step 2: Set the syncing settings by your need and click “Apply”.
Step 3: Now; you can select the iPhone and sync it.
Using USB to share files between iPhone and Mac
Follow the below steps to share files between two devices of iPhone and Mac
Step 1:
Connect both devices via USB cable.
Step 2: Visit “Finder” and select your iDevice
Step 3: Select the type you want to share that includes many types like Music, files, Movies, and more.
Step 4: Lastly, drag and drop files to the app from Finder to start sharing files.
METHOD 7: Use iTunes file sharing service to transfer files between iPhone and Mac.
You can also share files between your Mac and iPhone via apps that support file sharing. Check the documentation of an app to see if it supports this feature or not. Follow the below steps to use the iTunes files sharing service.
Step 1: Connect your iPhone to your Mac.
Step 2: Click the “Device” button in the iTunes app on your Mac device.
Step 3: Select “File Sharing”.
Step 4: Choose the app in the list available on the left and transfer file to or from the app.
Step 5: Start transferring files between your Mac and iPhone devices.
- To copy files from Mac to iPhone:
1. Click “Add”
2. Choose the file you want to transfer
3. Lastly Click “Add” to add the file.
- To send files from iPhone to Mac:
1. Select the file you want to transfer.
2. Select where you want to save that file.
3. Lastly Click “Save To” to save the file.
I hope among all the seven methods I have explained above,there must be one to satisfy you, you would now be able to transfer files between the two devices. I hope this article has resolved your confusion.