


This article shows, how to enable Hyper-V in Windows 11 desktop to run guest machines or virtual machines inside Windows 11.
Hyper-V is a built-in Windows feature that permits anyone to create a virtualized environment on the host machine (physical machine) to run virtual machines in Windows 11. Windows Hyper-V feature allows you to create virtual machines on your computer without any software or additional hardware support. You can create several virtual machines, each one with its own Operating System, in case you work on several operating systems. You can have virtual switches, hard drives, and other stuff on an individual virtual machine.
Enabling Hyper-V on Windows 11, follow the below steps
Here are several ways to enable the Hyper-V feature in Windows 11 to run virtual Operating Systems on your system.
Table of Content
- Why do I Need Hyper-V?
- Enable Hardware Virtualization in BIOS
- Turn on Hyper-V in Windows 11
- Enable Hyper-V using PowerShell in Windows 11
- Enable Hyper-V using Command Prompt
- Create Virtual Machines in Windows 11 Hyper-V
Why do I Need Hyper-V?
There are multiple positions where Hyper-V could be your go-to option. Here are some of them.
If your work demands you to operate several Operating Systems, Hyper-V would help you to create virtual machines and install different OS on each.
If you have designed software and you want to test them all on the same system by installing a different OS.
You can run often the software which doesn’t run on the current Operating System, by installing the capable one.
Now we recognize the concept of Hyper-V and its lots of benefits, let’s have a look at how to enable it in Windows 11.
Watch Video: How to Enable Hyper-V in Windows 11
How to Enable Hardware Virtualization in BIOS
First, you need to check if Hardware Virtualization is enabled in BIOS. In case if it’s disabled, the option to enable Hyper-V or its components will be hidden.
Hyper-V Platform greyed out.
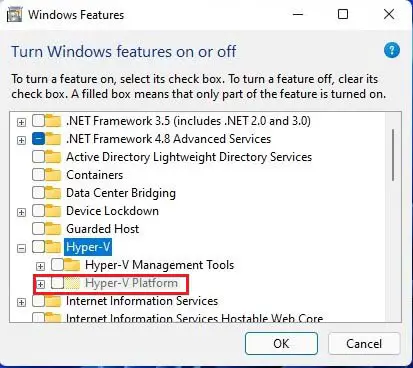
Enable Hardware Virtualization in BIOS
Note: These steps are for an HP Elite 8300 desktop and the interface, terms, and keyboards inputs may different for other manufacturers, though the idea remains the same. We recommend you either read your system manual or visit the web to find out the process for your computer.
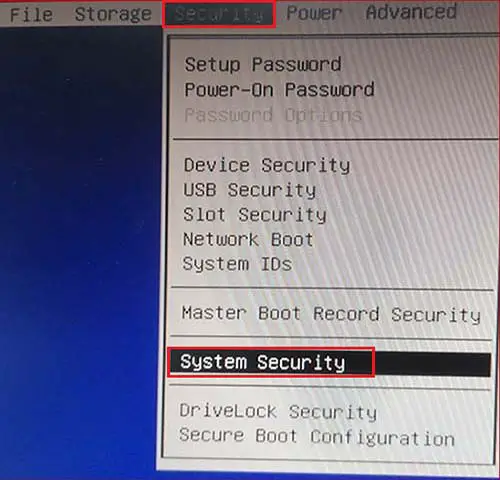
First, Shut down your computer and then power on. Now, press the F10 key to enter the BIOS Setup.
In the BIOS Setup, navigate to the Security tab at the top and then select system security.
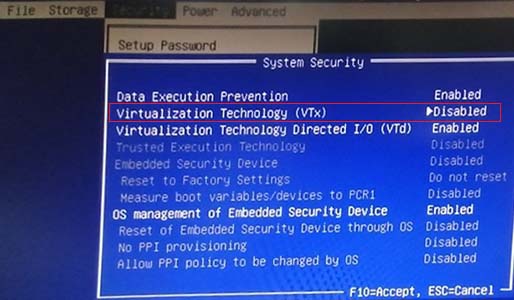
Find the Visualization Technology (VTx) option, and press the right arrow key to enable Hardware Visualization.
Now the Virtualization technology VTx is enabled, Press F10 to save the changes.
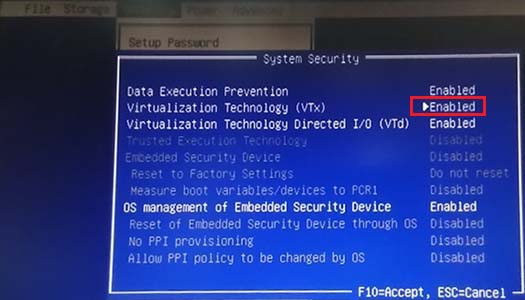
Under File, tab select save changes and exit.
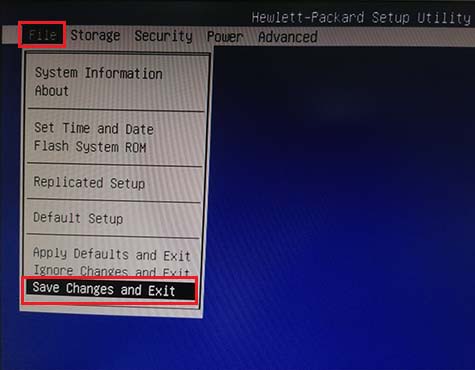
Select Yes to confirm the changes.

After saving the changes, exit the BIOS settings.
It will take a few minutes to complete, wait for the changes to come into effect. Once it’s done, Windows will boot automatically.
You can enable Hyper-V either from the Control Panel, Windows PowerShell, and Command Prompt. In this blog, we have discussed each under a separate section for your understanding.
How to turn on Hyper-V in Windows 11
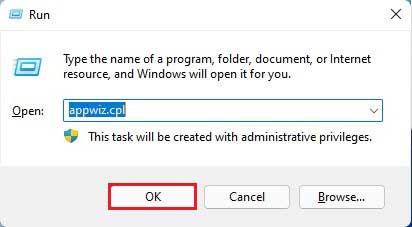
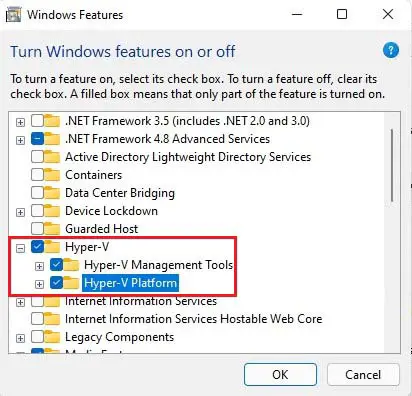
To Turn Windows features on or off, open the run box type appwiz.cpl and then click ok to open Windows Control panel features pane.
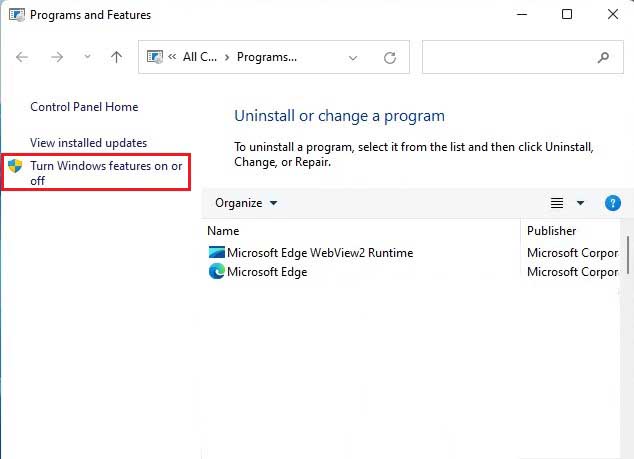
Select Turn Windows features on or off.
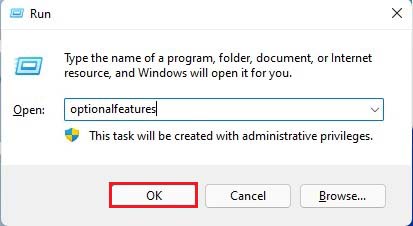
Or you can type optionalfeatures in the run box to launch turn Windows features on or off a window.
In the Windows Features screen, scroll down and then choose the checkbox next to Hyper-V (Hyper-V Management Tools and Hyper-V Platform).
Click OK.
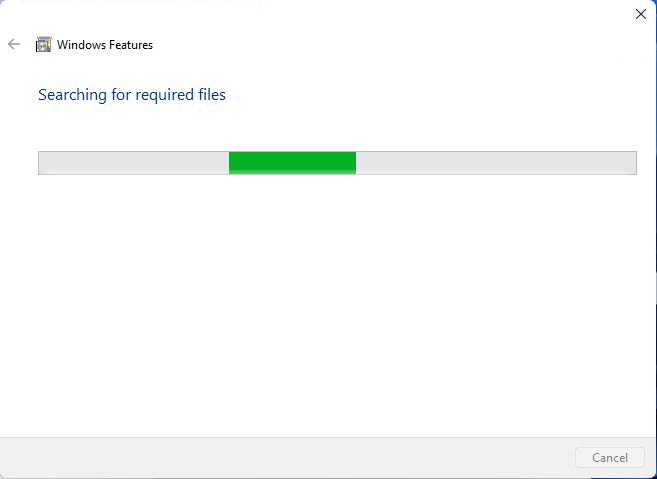
Windows features, searching for required files.
Select restart now.
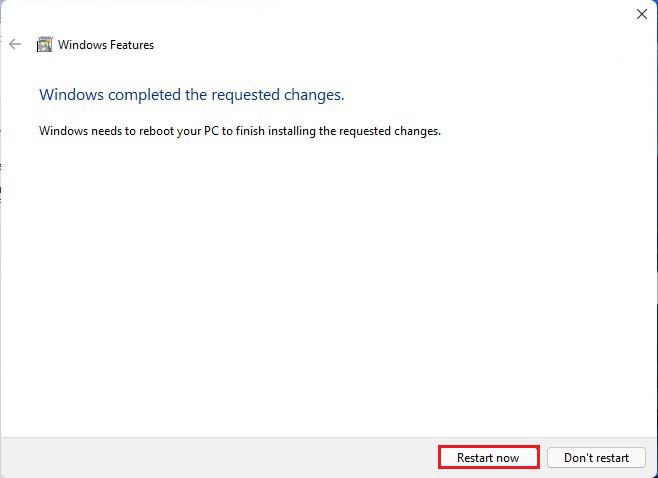
After rebooting the computer, the Hyper-V feature should start enabling, and once done you can start creating virtual machines to run other operating systems on.

How to Enable Hyper-V using PowerShell in Windows 11
Here is another way to enable Hyper-V on Windows 11. If the above methods are not working for you, launch Windows PowerShell and then install it from there.
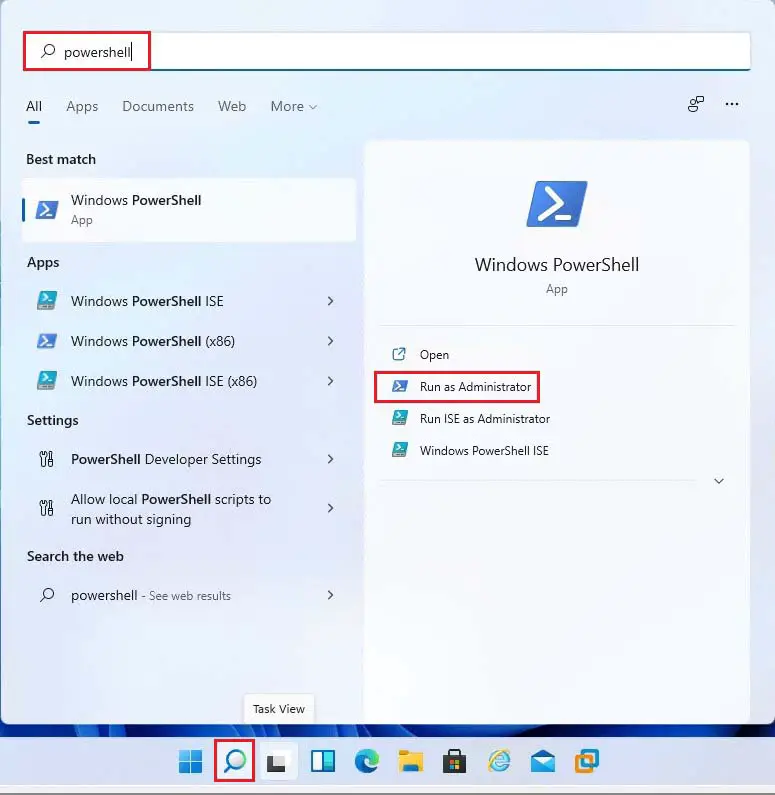
Click the search button, type PowerShell as shown below in the image.
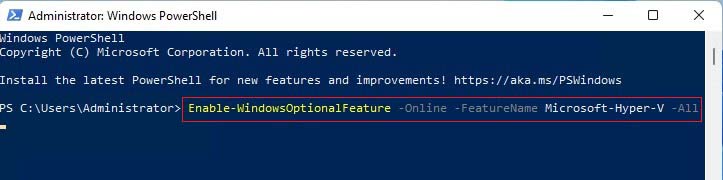
Note: You need to run Windows PowerShell as administrator.
After launching Windows PowerShell, enter the command below to enable Hyper-V.
Enable-WindowsOptionalFeature -Online -FeatureName Microsoft-Hyper-V -All
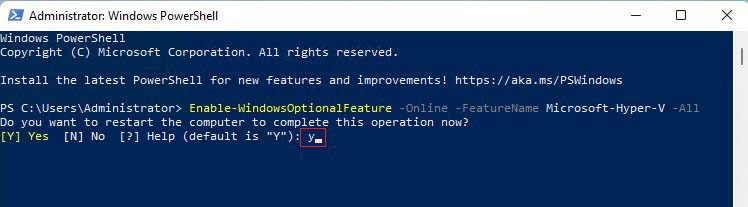
This command will download packages and enable Hyper-V.
Type y and then hit enter to restart the computer.
Once completed, Hyper-V must be enabled and ready to use.
How to Enable Hyper-V using Command Prompt
Here are another ways to install Hyper-V is using Windows Command Prompt. If the above steps aren’t right for you, simply use the command prompt way below to install and enable Hyper-V.
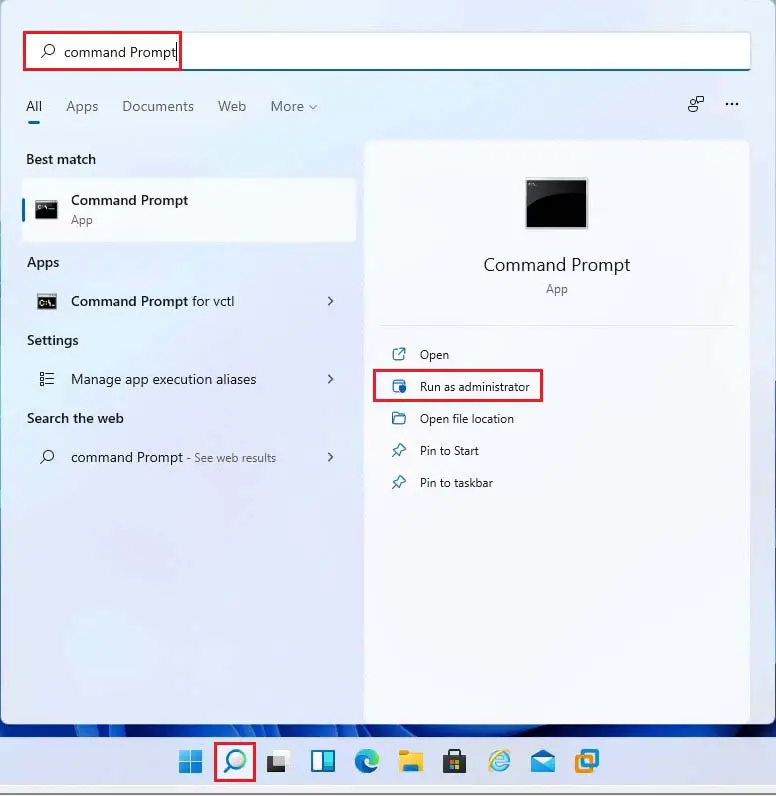
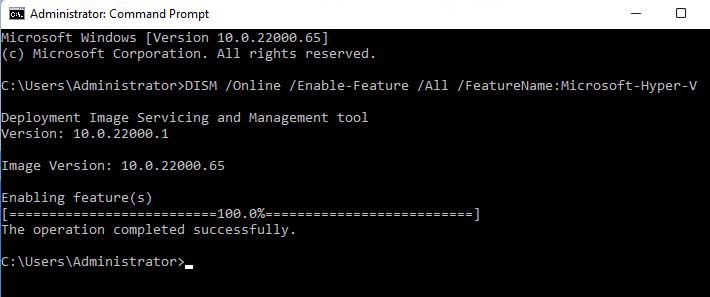
Run the Windows Command Prompt as administrator. Click on the search button and then type Command Prompt, open it as administrator.
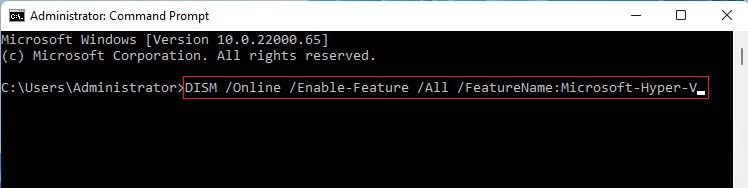
Once Command Prompt opens, copy and paste the below command and then hit Enter.
DISM /Online /Enable-Feature /All /FeatureName:Microsoft-Hyper-V
Restart your system and Windows Hyper-V should be installed and enabled.
How to Create Virtual Machines in Windows 11 Hyper-V
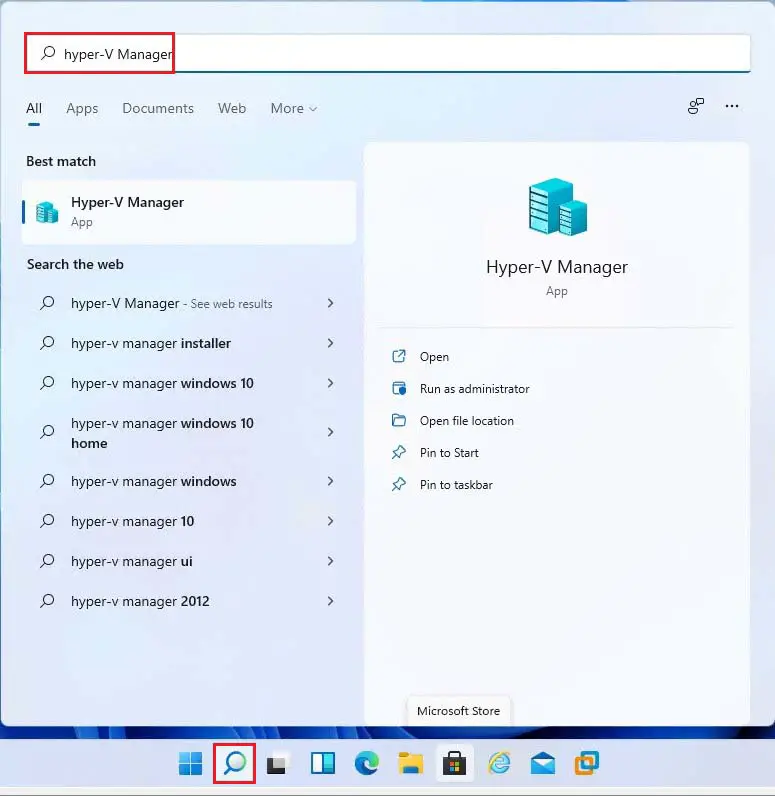
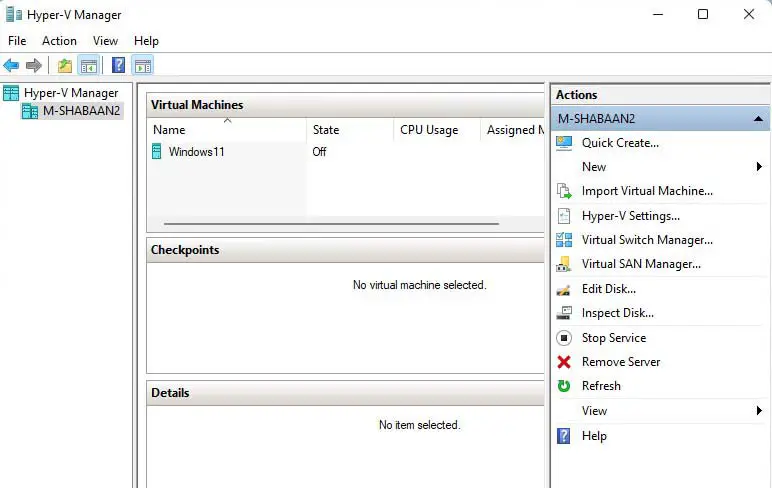
Now that Hyper-V is enabled and installed, type Hyper-V Manager in the search bar after clicking on the search button as shown in the image below. Open it
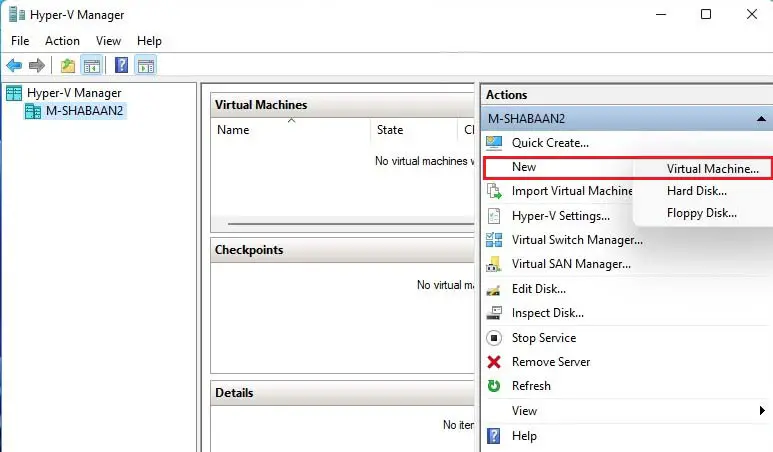
Under the Action menu, select New and then Virtual Machine.
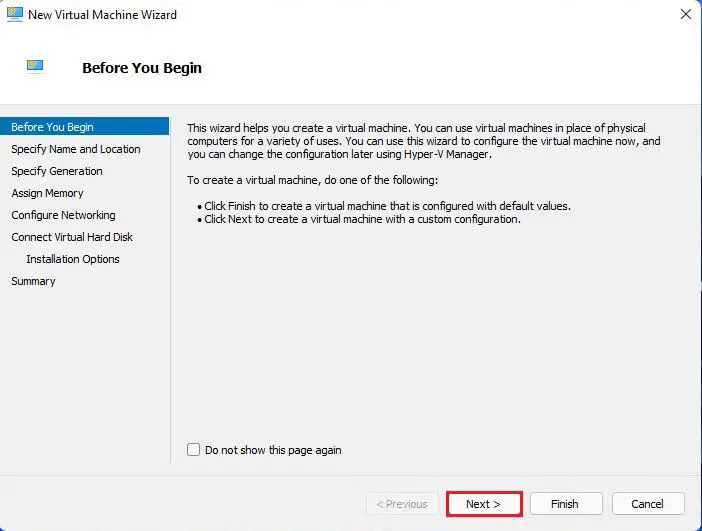
New virtual machine wizard, click next.
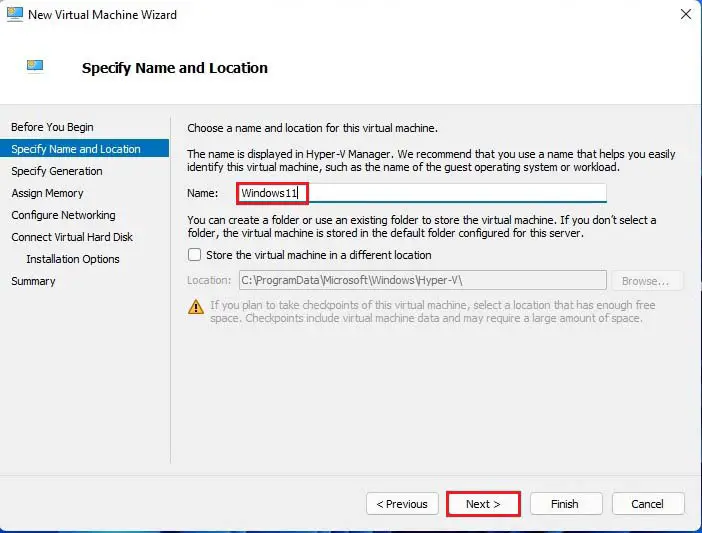
Specify name, location and then click Next.
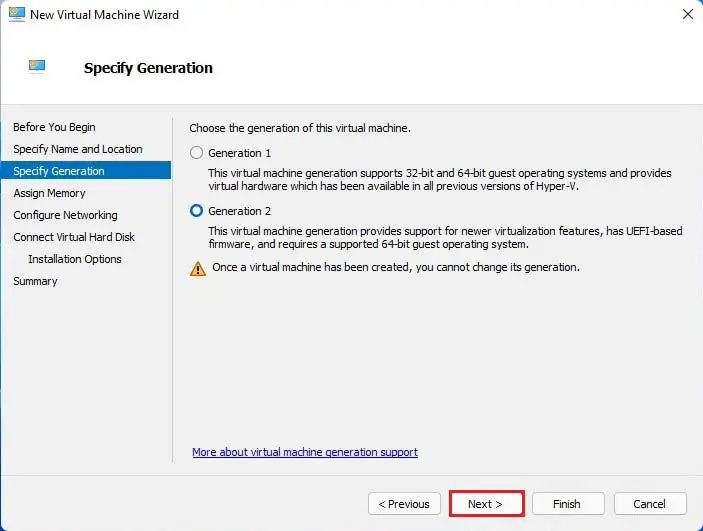
Select Generation 2 and then click Next.
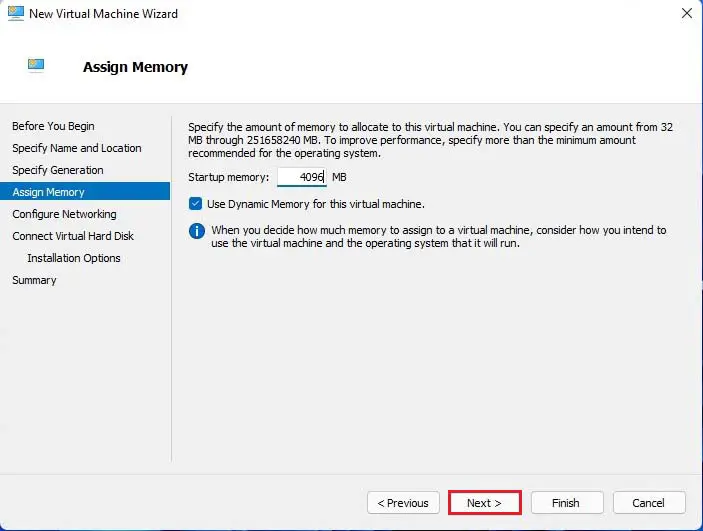
Assign virtual machine memory and click next.
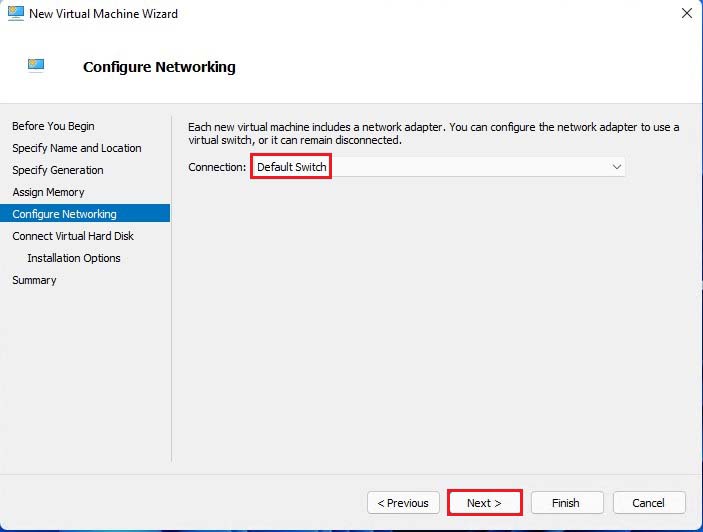
Configure networking, select default switch, and click next.
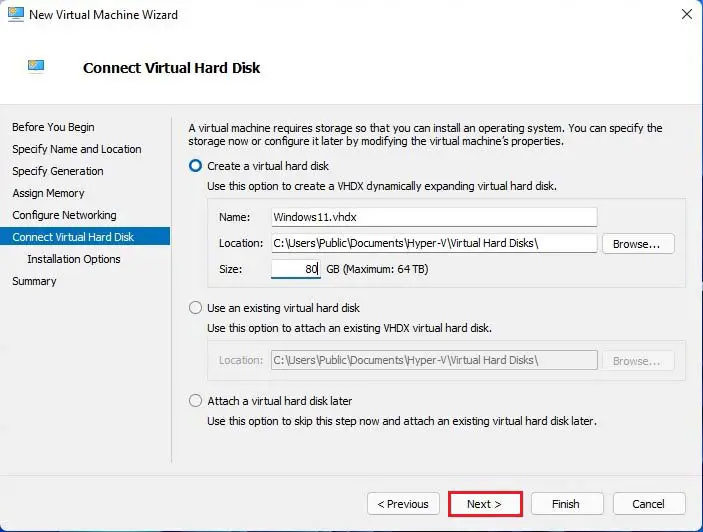
Select create new virtual machine option, saved location, disk size, and click next.
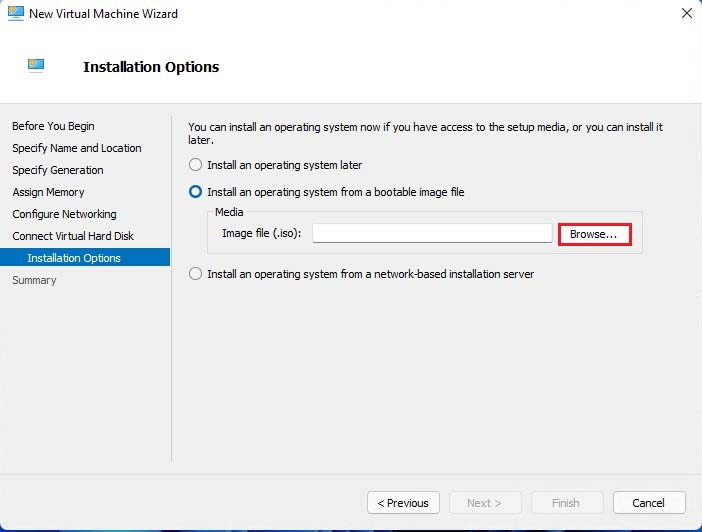
Installation options, select an operating system from, and click on the browse button to select operating system ISO.
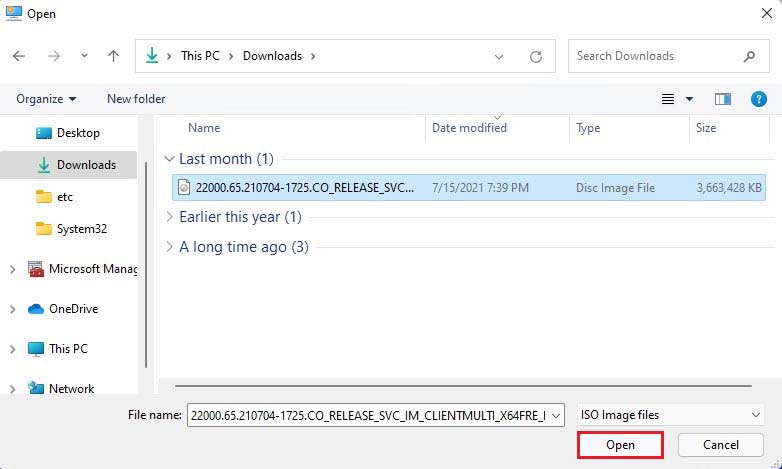
Select Windows 11 ISO and click ok.
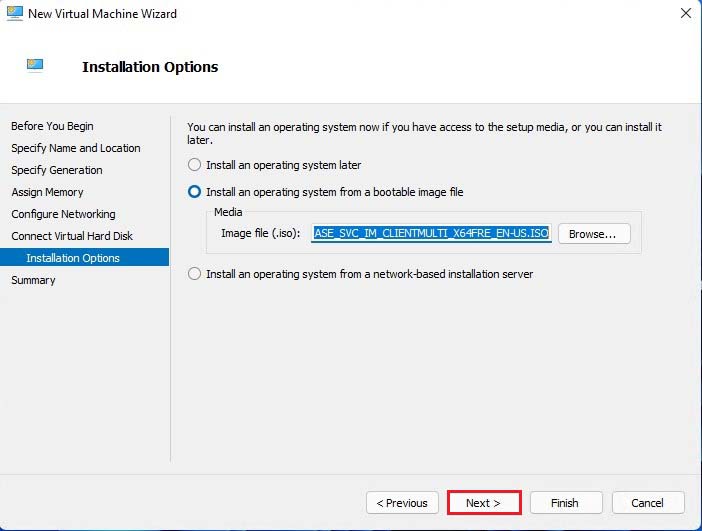
Click next.
Review the new virtual machine summary and then click next.
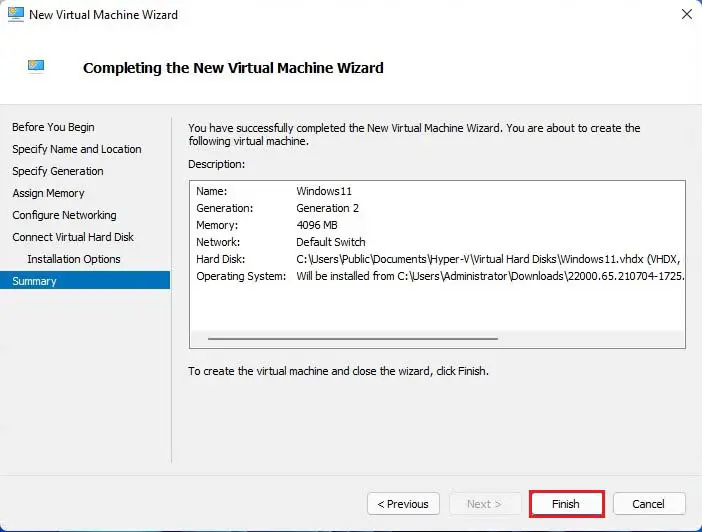
Now a virtual machine was successfully created.
Conclusion:
This guide showed you how to enable and use Hyper-V in Windows 11. If you find any fault above, please write a comment to report.