

Here is the guide for you on how to change username in Windows 11. Though it’s very simple to change the username in Windows 11. I am here to help you to solve the problem that you are facing with changing the username in Windows 11. Below are some easy methods to change the Windows 11 account name without any trouble. These same steps can be followed to do the same in Windows 8, 10.
Why Do We Need to Change Username in Windows 11
It is not compulsory to change the user account (login username) on your system. It’s just up to the user. If a computer is used by more than one user and giving a unique username can help differentiate the account.
Windows User account names show up at the login screen, settings, and at different places on the Windows 11 computer. There are lots of reasons why you might need to change the user account name. For example, you recently changed your PC username and you need to consider this change in Windows 11 as well or you might need to display your nickname rather than the actual name or you entered your full name during the Windows 11installation or for security reasons.
There are 2 types of accounts in Windows 11 (Microsoft user account or any variant for a specific country) and synced with other systems and Microsoft apps. The second one is an offline local account that works only on the computer.
Watch Video: How to Change Username in Windows 11
Change Window 11 Username that Linked Microsoft Account Online
If you are using a Microsoft account to sign in, then you can change your username on Microsoft’s website. For this procedure to work, you should have signed into your system with your Microsoft account.
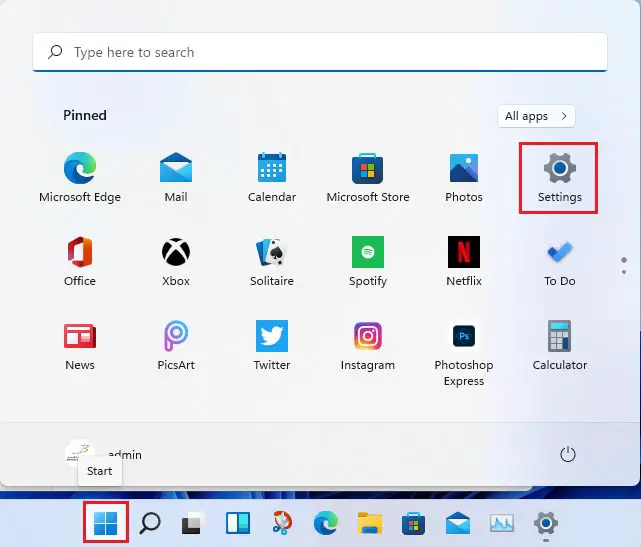
Open Settings by pressing the Windows+I key, or select the start bar and then select settings.
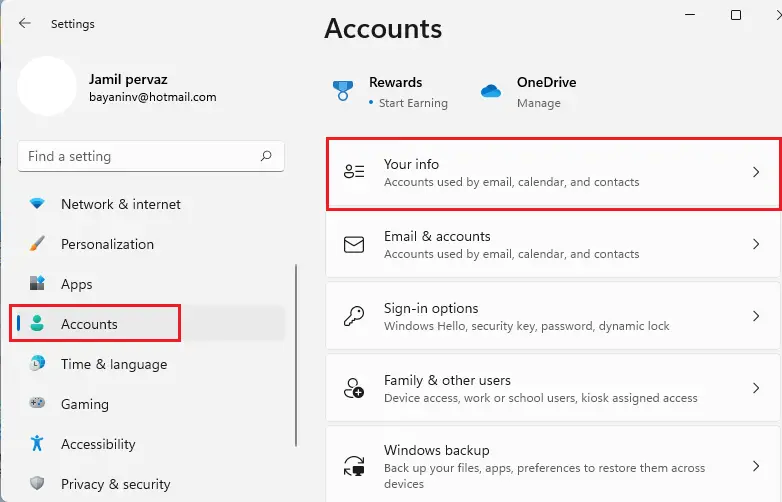
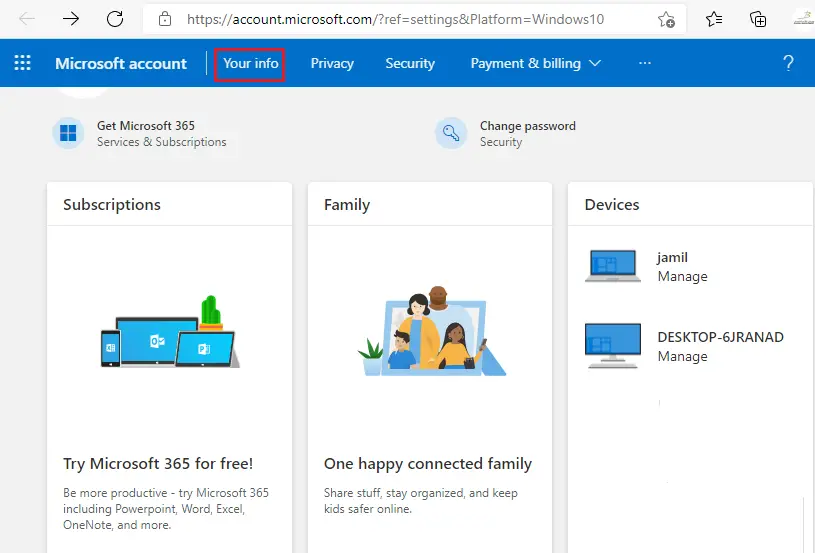
Under the settings on the left side, select accounts, and then from your right side select Your info.
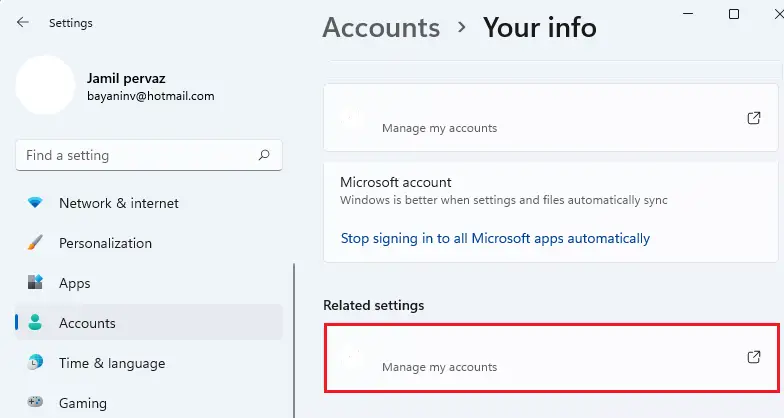
Select manage my accounts, it will open up the Microsoft account on the default browser.
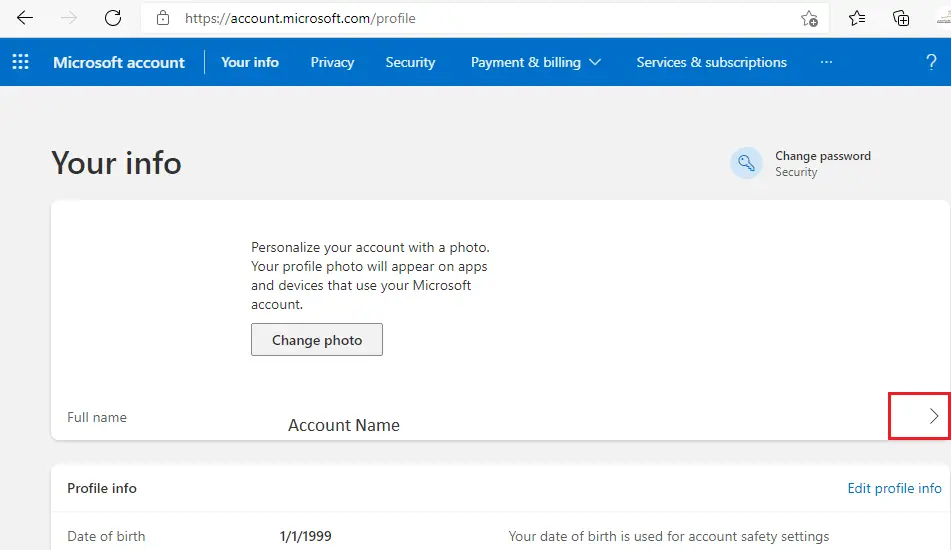
Select Your info tab.
Choose the arrow button next to your account name.
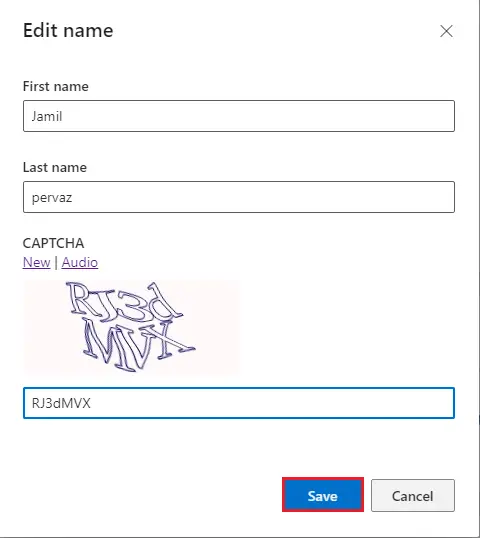
The Edit name window will pop up. Here, you can change the new account name as per your requirements and then fill in the captcha box for verification. Click the Save button.
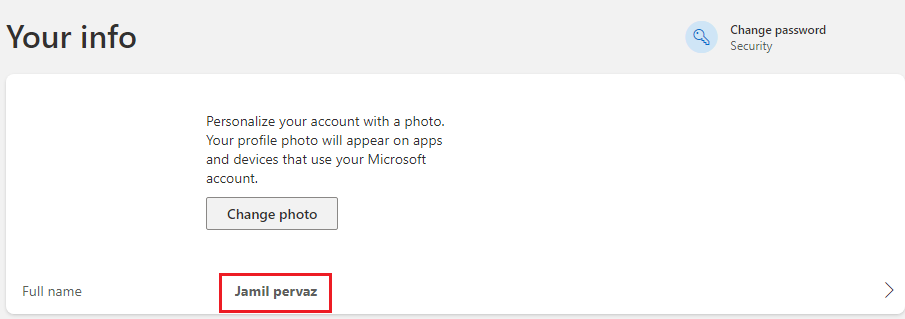
The username has been changed to the “Your info page” and a system reboot is required for the change to take effect on the PC.
How to Change Username in Windows 11
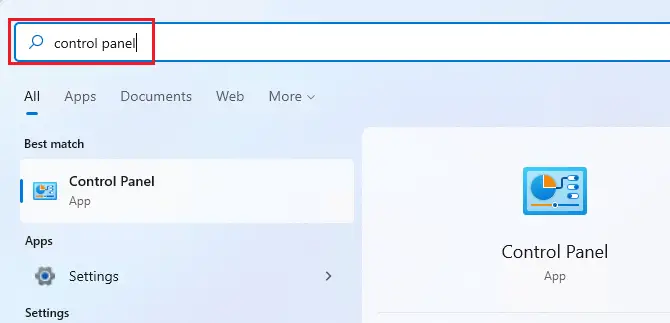
Select the search button on the taskbar.
Enter the control panel in the search bar and then click on the Control Panel to launch.
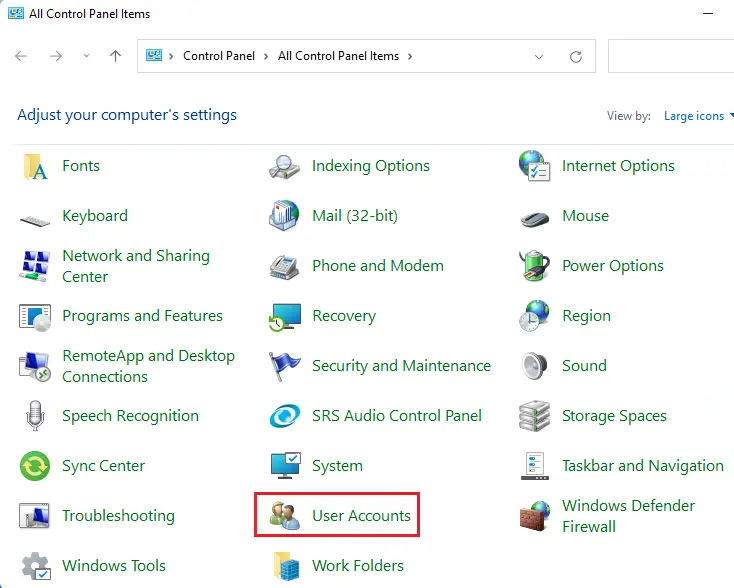
Select User Accounts as shown in the control panel items.
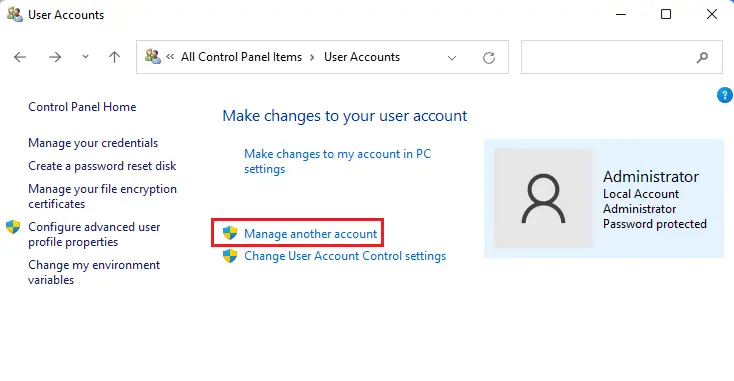
Note: You can’t change your local Administrator account.
Select manage another account.
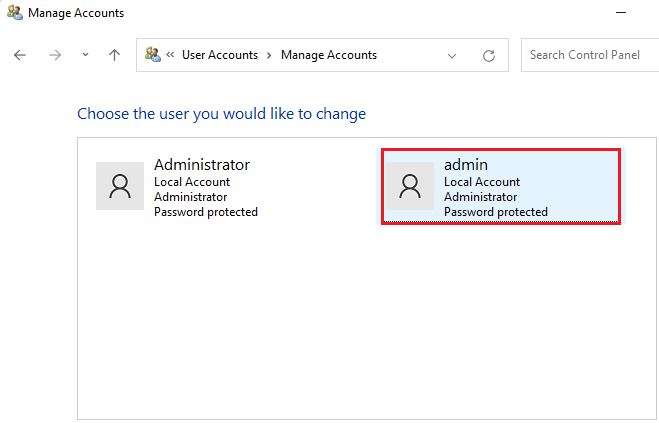
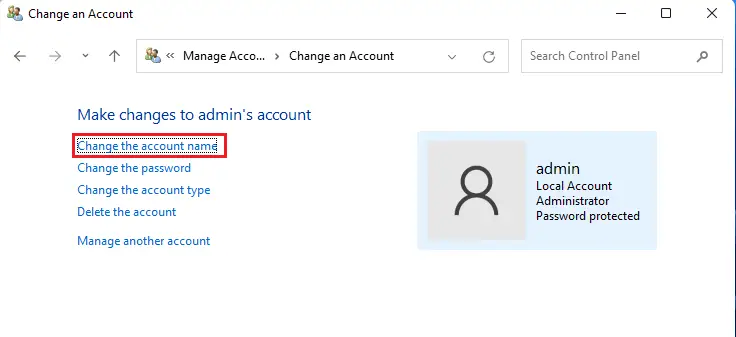
Click on the user account you want to change.
Click on Change the account name.
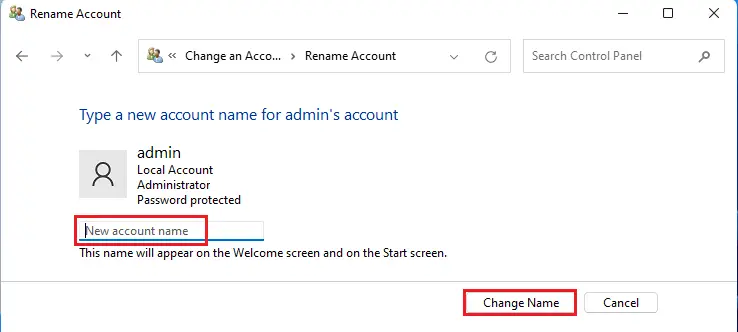
Enter a new account name that you need to replace with the old one and then click on the Change Name button.
Change Account Name using Netplwiz Command
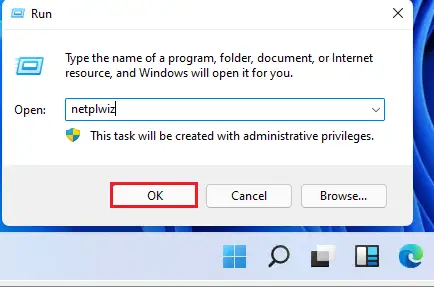
Press the Windows+R key to open the Run-dialog box, type netplwiz in the open box, and then click OK.
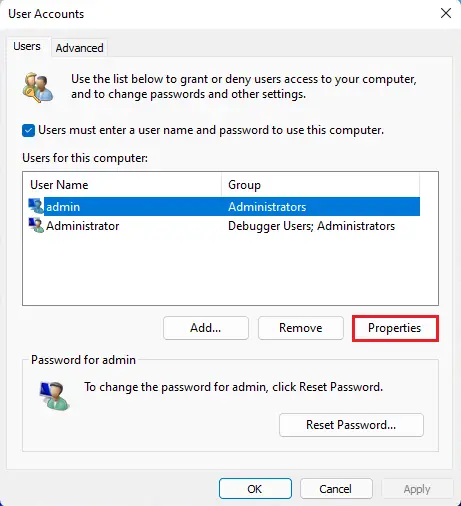
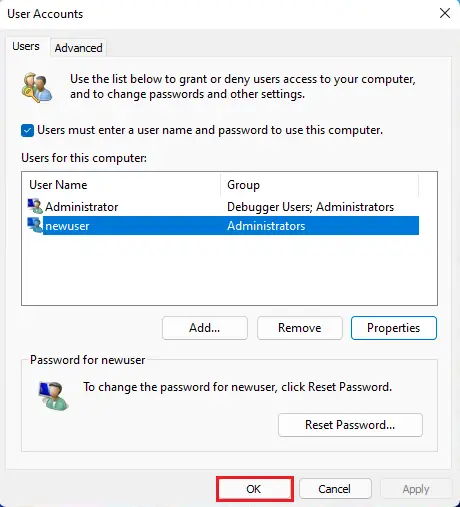
User Accounts window will open, select Users tab, here you can see the list of the user accounts. Select the account you want to rename and then select Properties.
Under the General tab, change the user name. You can also type the (Full name, Description which is optional). Select OK.

Now the username has been changed, click OK.
Change Local Username via Command Prompt in Windows 11
Windows 11 user names for a local account can also be changed using the command prompt. In the Windows 11 Search bar type cmd and then select Run as administrator.
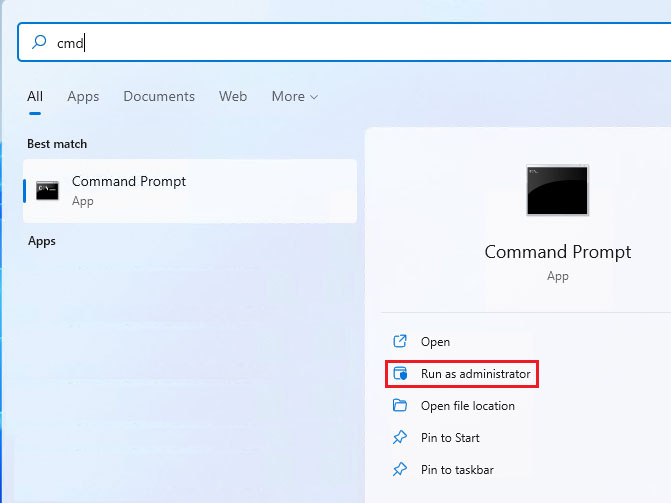
Note, the command prompt must be open as an administrator or it won’t work.
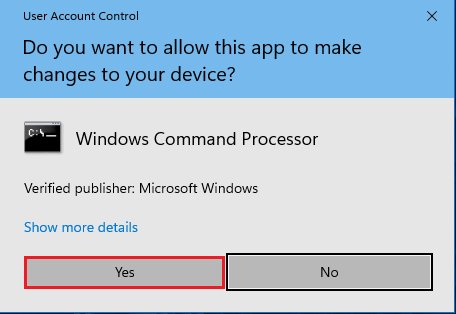
Click Yes.
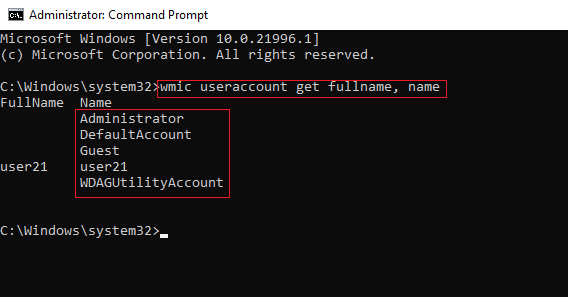
In the command prompt, enter the below command to view all the local user account.
wmic useraccount get fullname, name
Type the below command to change the user account name. Replace “Current User Name” with the name of the account you need to change and “New User Name” with the new username you want to give. Please put Usernames within double quotes (” “).
wmic useraccount where name=”Current User Name” rename “New User Name”
Example command:
wmic useraccount where name=”user21″ rename “newuser”
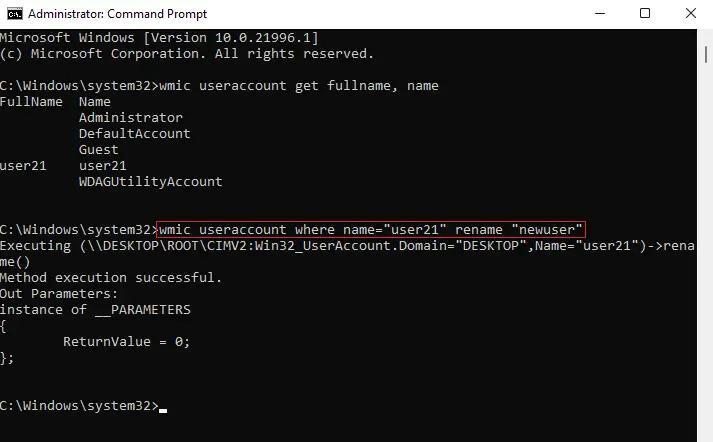
Restart required to implement the changes.
Change Local Account Username via PowerShell in Windows 11
Windows PowerShell app is most powerful and advanced than the traditional Command Prompt. For those who wish to change username using PowerShell command, this is how we can:
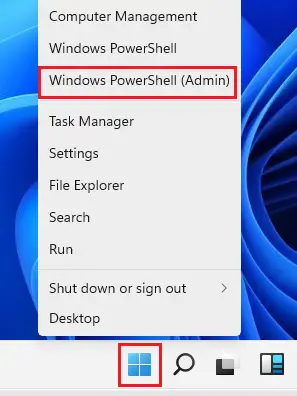
Right-click on the Windows 11 start button and then select Windows PowerShell (admin).
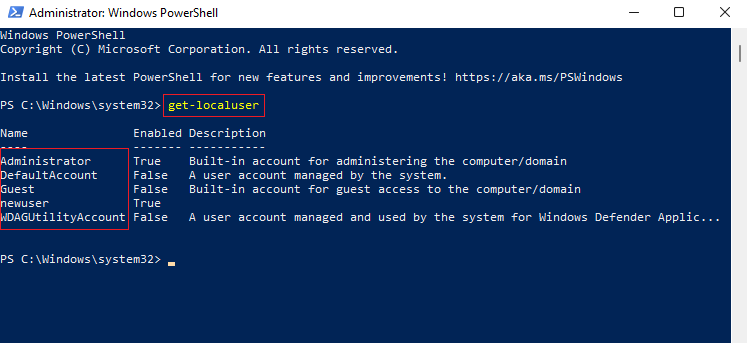
Enter the below command to list all user account names on the PC and then note the username you want to change:
Get-LocalUser
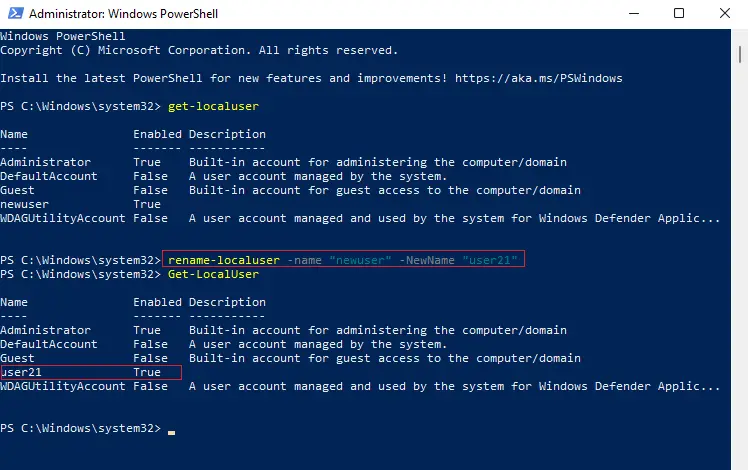
Now, type the below command to change the account name and change “Current Username” and then “New Username” accordingly,
Rename-LocalUser -Name “Current Username” -NewName “New Username”
Example Command:
Rename-LocalUser -Name “newuser” -NewName “user21”
Now, type Get-LocalUser commands again, you will see the username is changed.
You need to restart your computer to apply the changes.
Change the Built-in Administrator account name using Local Security Policy
When Windows has been installed, there are some built-in hidden users accounts (example Administrator, Guest) are created by the Windows for backup & security purposes.
Change the name of the administrator account using the Local Security Policy.
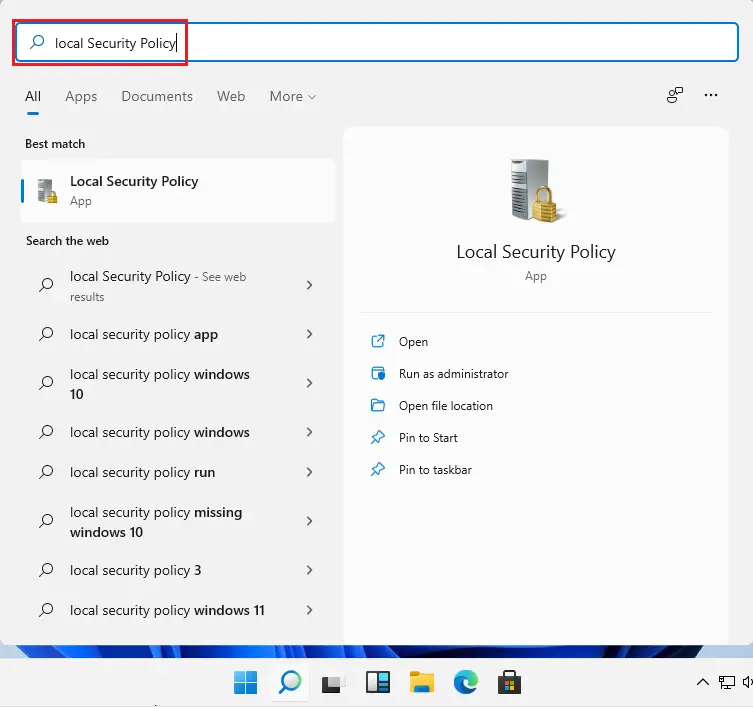
Type local security policy in the search bar then opens it. Or type secpol.msc in the Run command to open it.
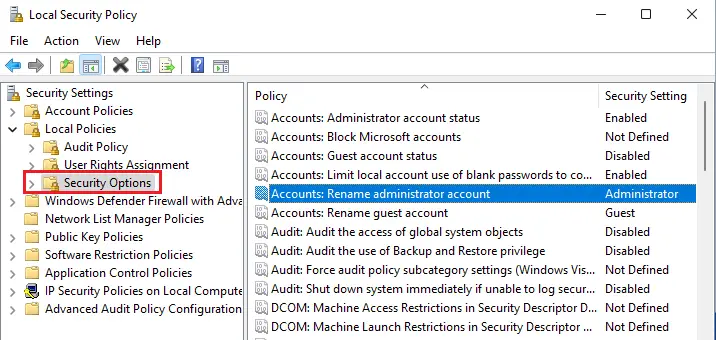
In the Local Security Policy, expand the Local Policies and then select Security Options.
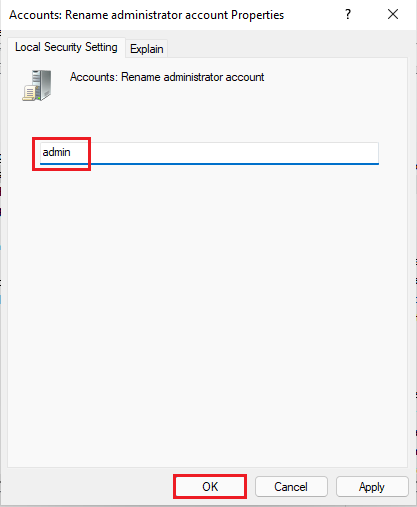
On your right-side panel, double click on ‘Accounts: Rename administrator account’ to open its properties.
Here you can change the (default Administrator account) name to any other name you wish to use and then select OK.