In the article, we will be seeing the concept of how to create an internal load balancer in Microsoft Azure in between two VM which are hosted in the same network. The reason behind the creation of a load balancer in the VM is to handle the huge number of requests which are given to a virtual machine when it becomes difficult for the VM to handle these.
1- Create Virtual Network (VNet)
2- Create Virtual Machine
3- Internal load balancer
4- Test load balancing
Once we create two different virtual machines in the same virtual network, proceed to create and configure the load balancer with its set of rules.
Internal Load Balancer in Microsoft Azure
Azure internal load balancer is used to manage & divert the requests from the clients to different virtual machines (VMs) which are discovered in the same network. When a virtual machine receives many requests from the client, there will be some conjunction happening in the VM. To control this conjunction, we can make use of the internal load balancer conception where the requests from the users will be reciprocally shared in between the two different virtual machines which are configured in the VNet. The appeal will be shared in between the VMs position on the configuration set by us when we design a load balancer.
Create virtual networks
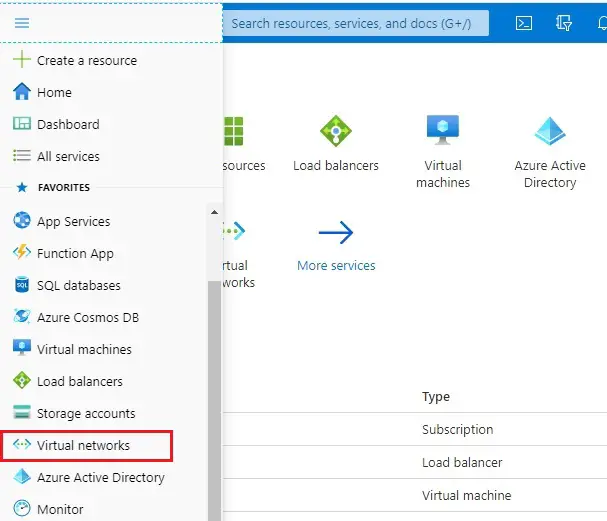
1- Log in to the Azure portal
On the Azure portal, select Azure menu bar and then select Virtual Network.
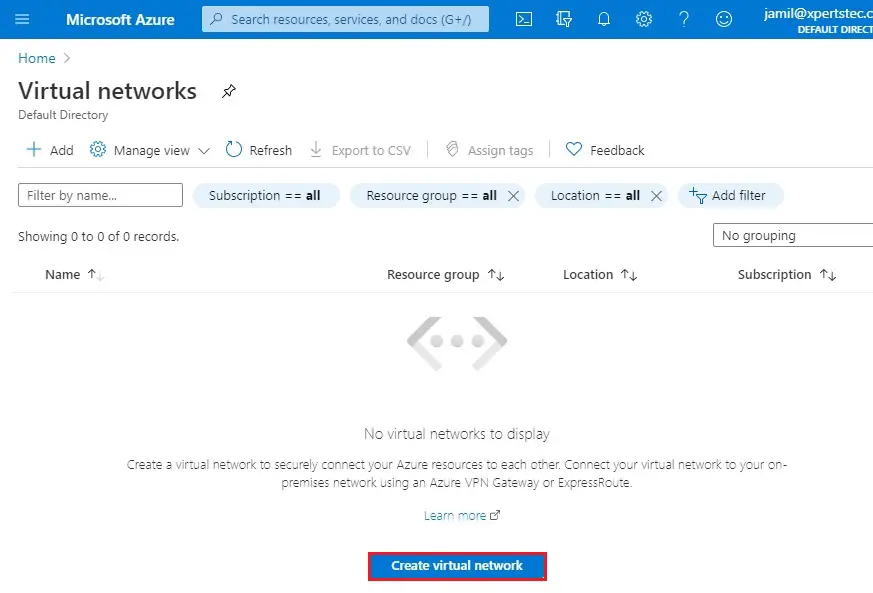
2- Click on create virtual network.
3- Select your subscriptions, to create a resource group then click on create new.
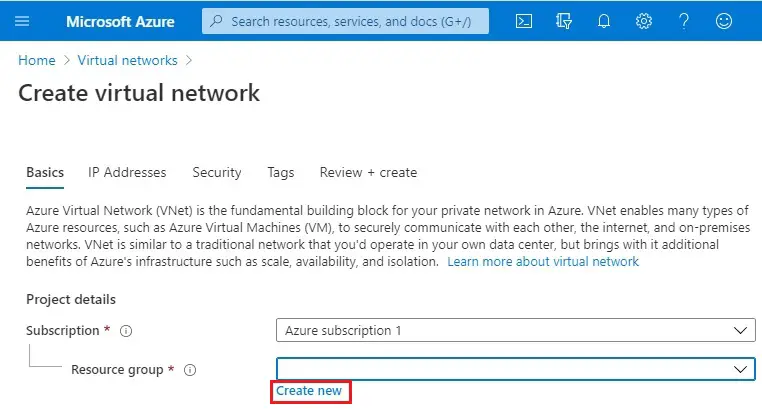
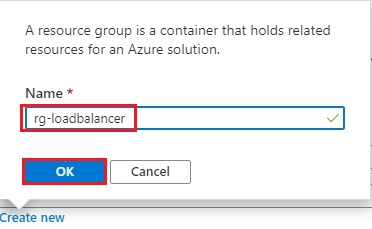
4- Type a recourse group name (rg-loadbalancer) and then click ok.
5- Instance details type a virtual network name (myvnet) select regions (east US) and then click Next : IP Address >.

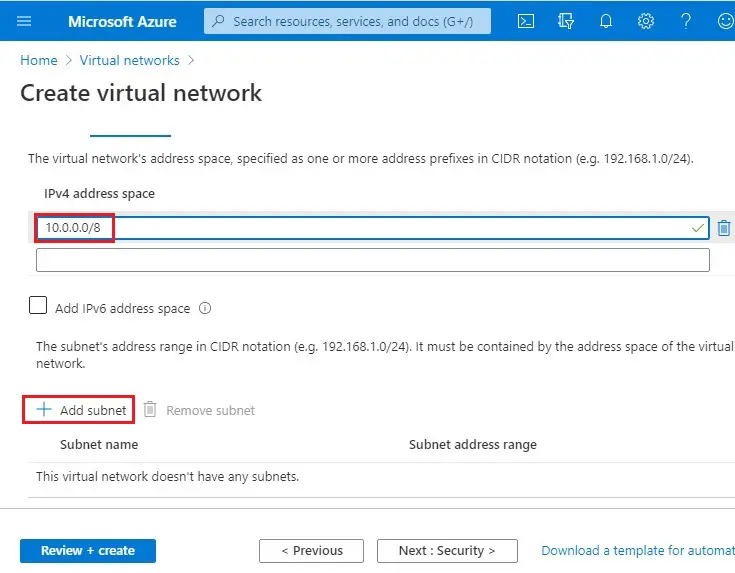
6- IP Addresses tab, enter 10.0.0.0/8 for the IPv4 Address Space field. Click the + Add subnet button below.
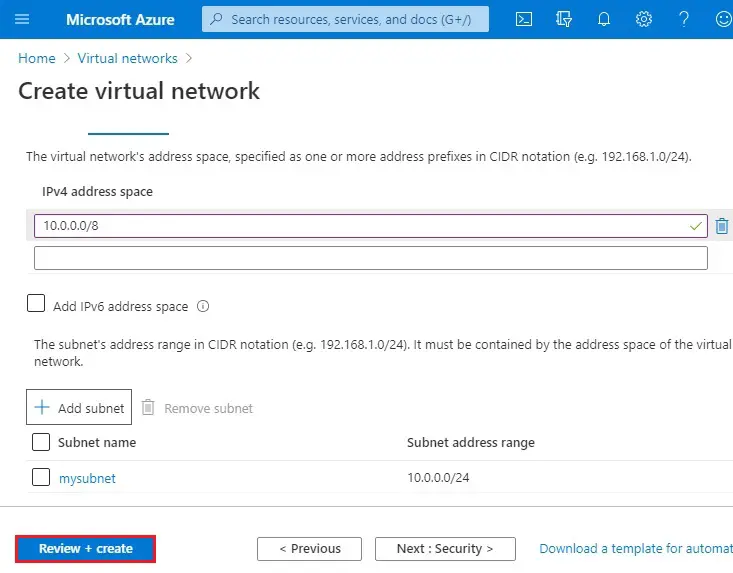
7- Add subnet wizard; enter a Subnet Name (mysubnet) and type 10.0.0.0/24 for Subnet Address range and then click Add.

8- Select Review + Create.
9- Select Create.
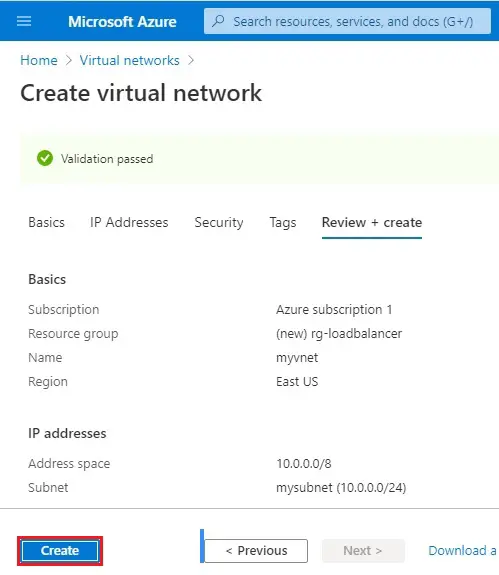
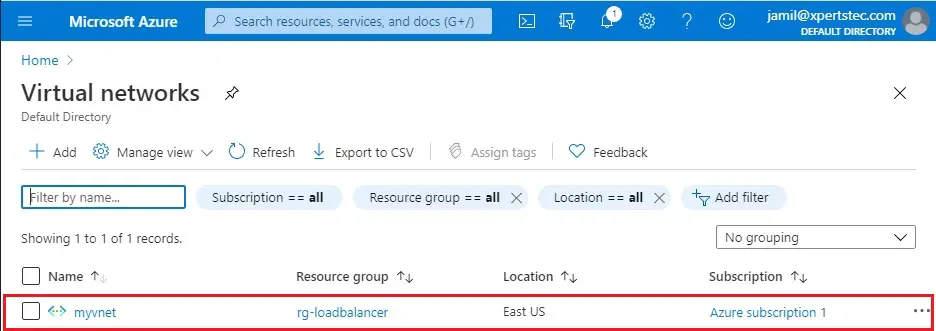
10- Virtual network successfully created.
Create Virtual Machines
Create a VM in the virtual network so that we can communicate between them.
1st VM
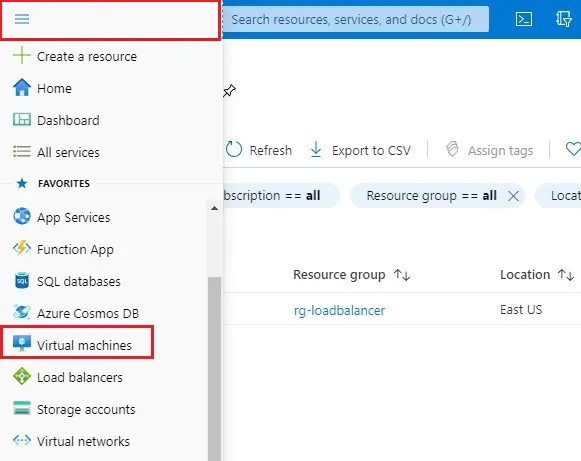
1- Azure portal menu tab and then choose Virtual machines.
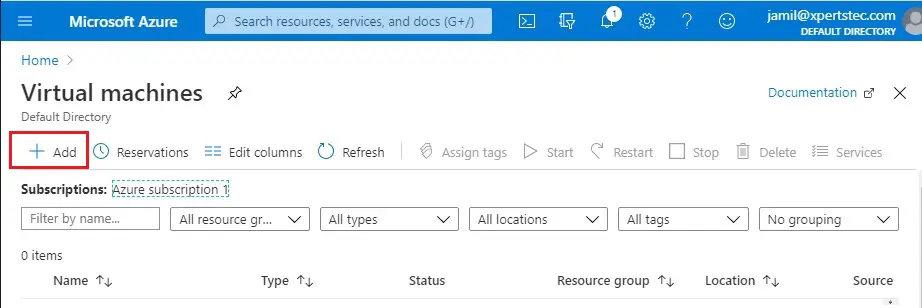
2- Select the + Add button to create virtual machine.
3- Resource group select (rg-loadbalancer).

4- Instance details
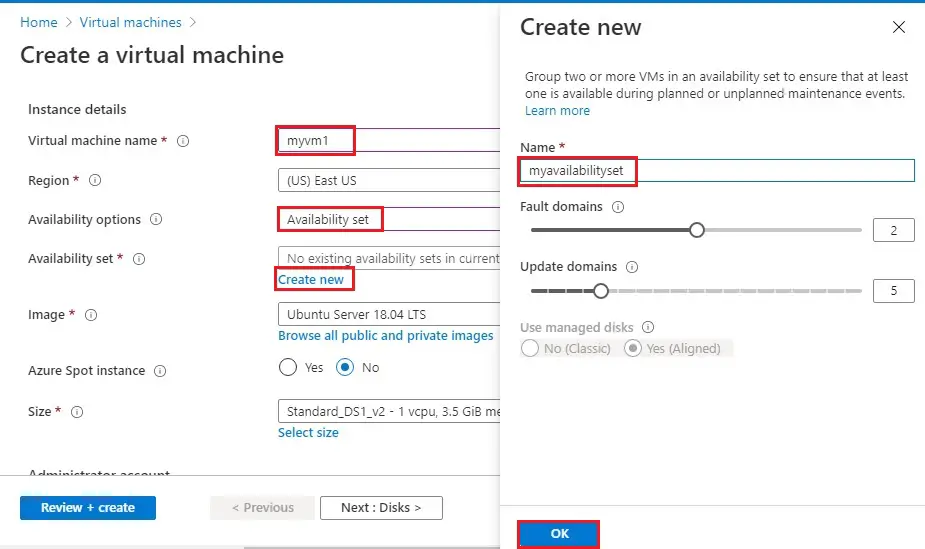
Enter a virtual machine name (myvm1)
Region select (East US)
Availability options select Availability set.
Availability set select to create new.
Type a name (myavailabilityset) and then click ok.
5- Image select Windows Server 2019 Datacenter. You can choose a different operating system, but the remaining steps assume you selected Windows Server 2019 Datacenter.

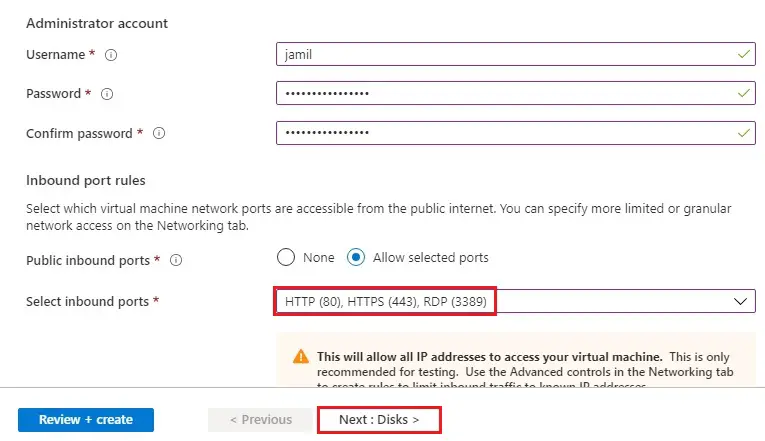
6- Administrator account
Enter a username (jamil), Password.
Public inbound ports choose to allow selected ports.
Select inbound ports (HTTP, HTTPS, RDP)
Click Next : Disks > and then click Next + Management >
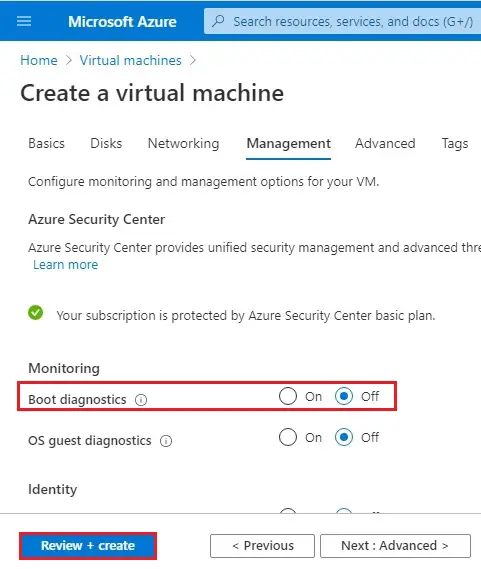
7- Choose boot diagnostics (off) and then click Review + create.
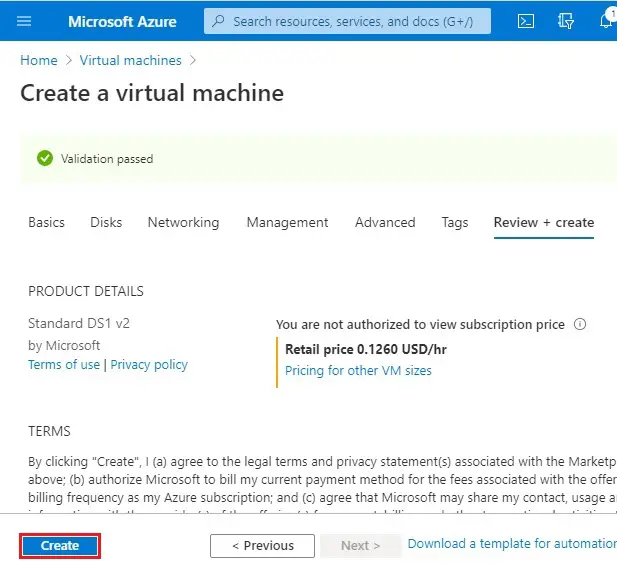
8- Select create.
Create the second VM
Complete steps 2-8 again, with the following changes.
| Name | Value |
| Resource group | rg-loadbalancer |
| Virtual machine name | myvm2 |
| Region | (US) West US |
| Availability options | Availability set |
| Availability set | myavailabilityset |
| Image | Windows Server 2019 Datacenter |
| Administrator account | username password |
| Public inbound port | allow selected ports |
| Select inbound ports | HTTP, HTTPS, RDP |
| Management | boot diagnostics off |
| Create |
Create the third VM
Complete steps 2-8 again, with the following changes.
| Name | Value |
| Resource group | rg-loadbalancer |
| Virtual machine name | myvmtest |
| Region | (US) West US |
| Availability options | Availability set |
| Availability set | myavailabilityset |
| Image | Windows Server 2019 Datacenter |
| Administrator account | username password |
| Public inbound port | allow selected ports |
| Select inbound ports | HTTP, HTTPS, RDP |
| Management | boot diagnostics off |
| Create |
The VMs take a few minutes to complete. Now the VMs (myvm1, myvm2, myvmtest) successfully created.

Now we need to install Web Server IIS roles on VMs (myvm1, myvm2).
How to Install Web Server IIS.
Creating the load balancer
The next step after creating three different VMs in the same VNET is creating a new load balancer.
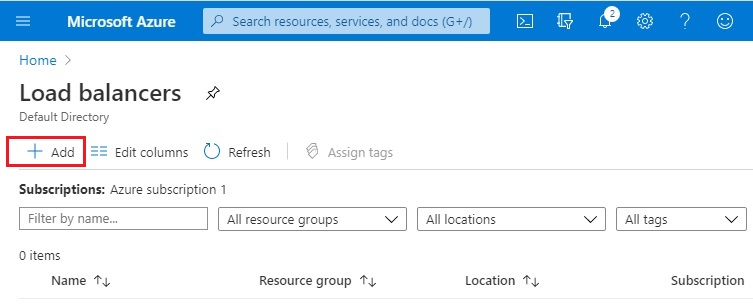
1- Select Azure menu bat and then select Load Balancers.

2- Select the + Add button to create load balancer.
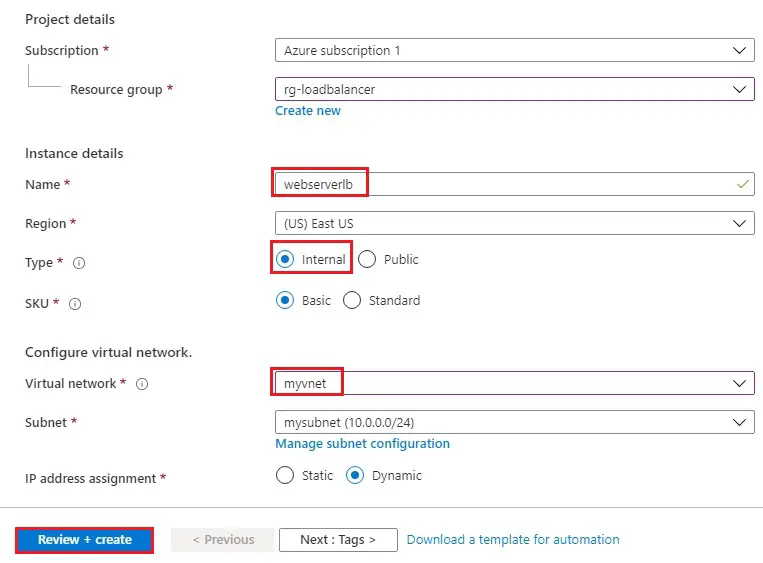
3- Select resource group (rg-loadbalancer).

4- Project details
Enter the name of Load Balancer (webserverlb)
Region (East US)
Type Internal and SKU Basic.
Virtual network (myvnet)
IP address assignment (dynamic)
Select Review + create >.
5- Click on Create.

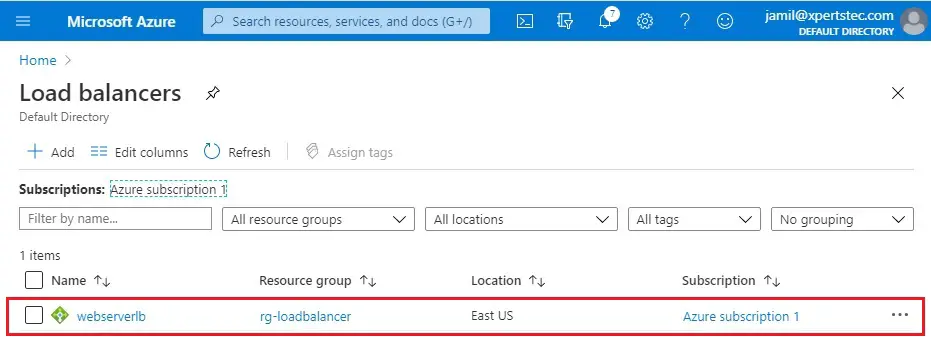
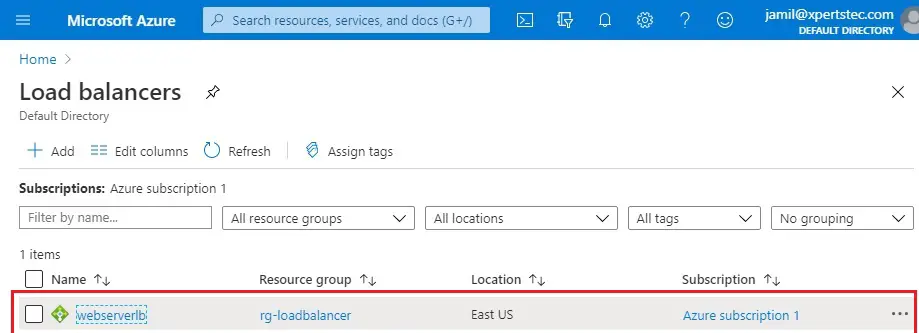
6- Now you can see load balancer successfully created, select your load balancers.
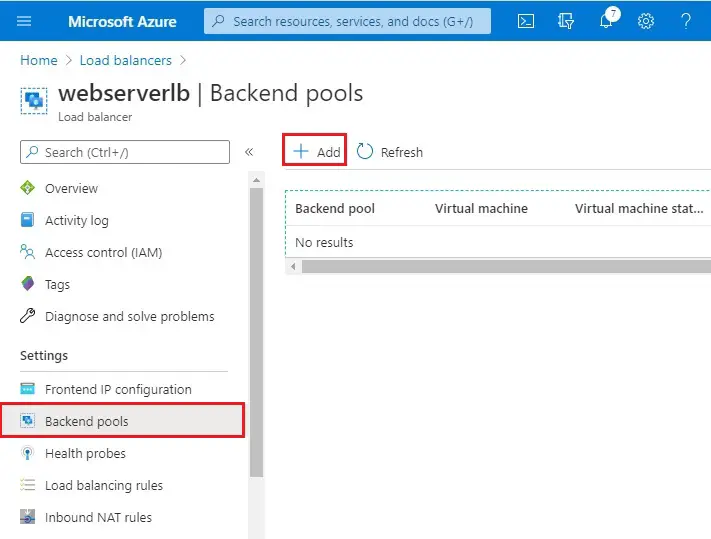
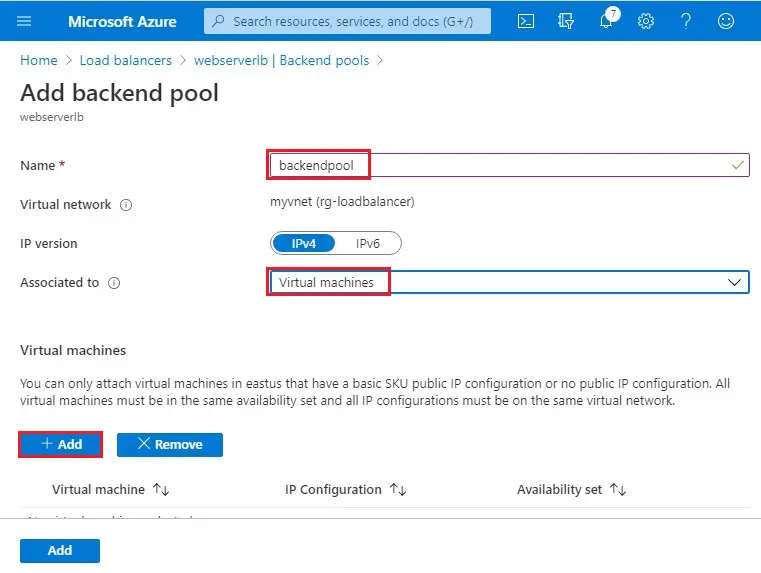
Backend Pools
1- Now click on Backend Pools and then click on + Add.
2- Add backend pool wizard, Type a name
Virtual network (rg-loadbalancer)
Associate to select virtual machines and then click the add button under a virtual machine.
3- Add virtual machine to backend pool wizard; Select the VMs (myvm1, myvm2) and then click add.
The third VM (myvmtest) is for testing Internet load balancing.
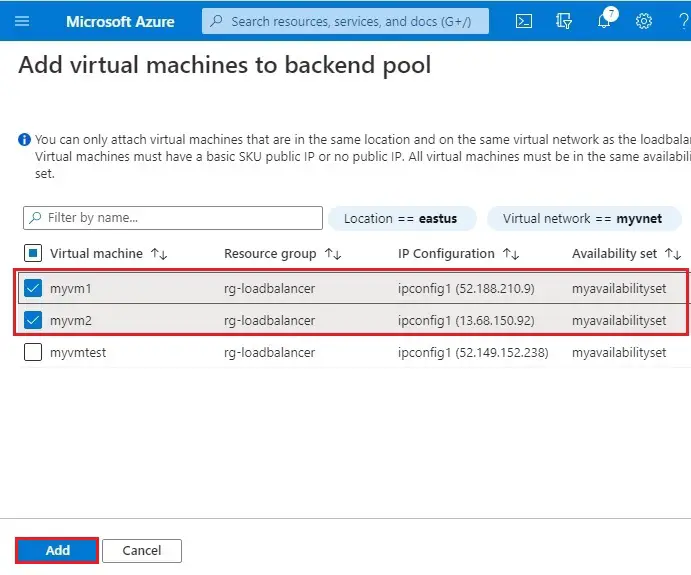
4- After selecting the virtual machine, then click on Add.
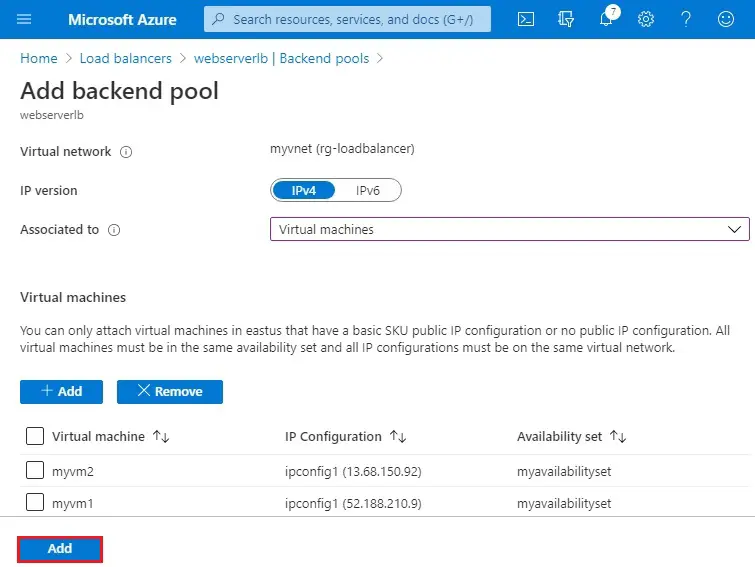
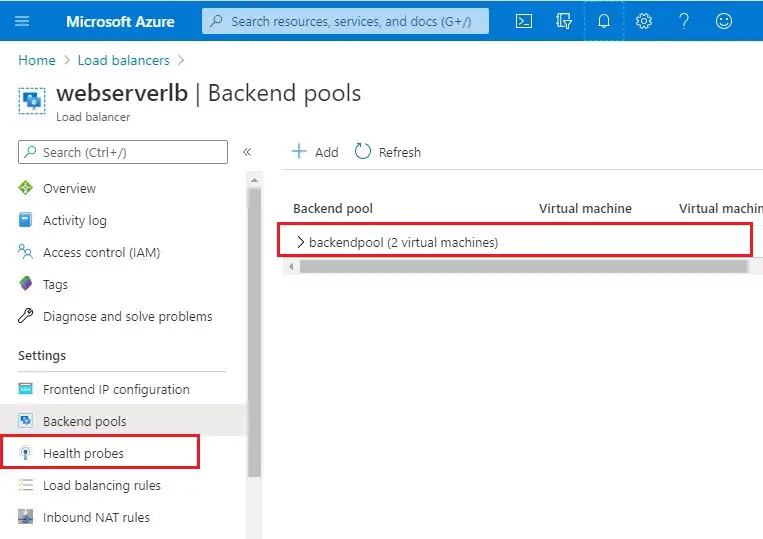
5- So the backend pool has been configured successfully. Then inside Load Balancer, select Health Probes.
Health Probe
1- Click on + Add.
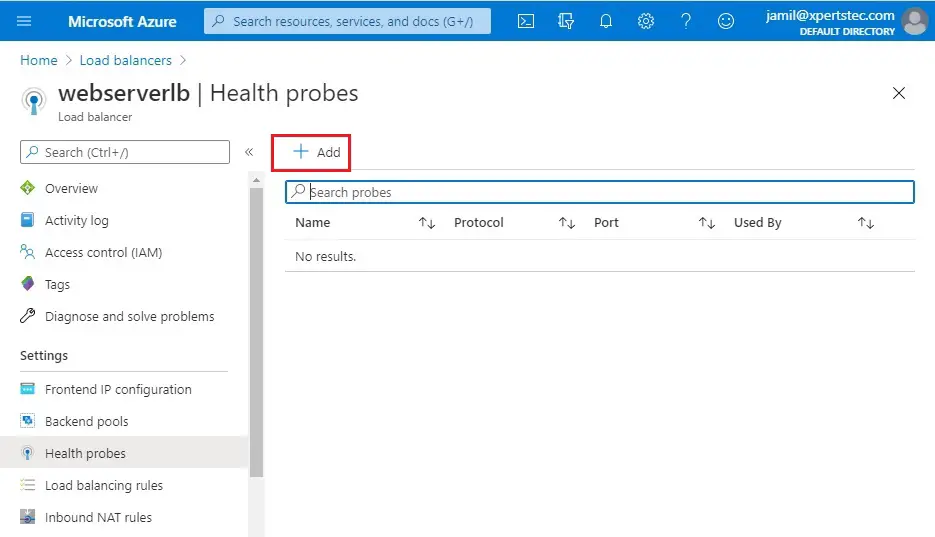
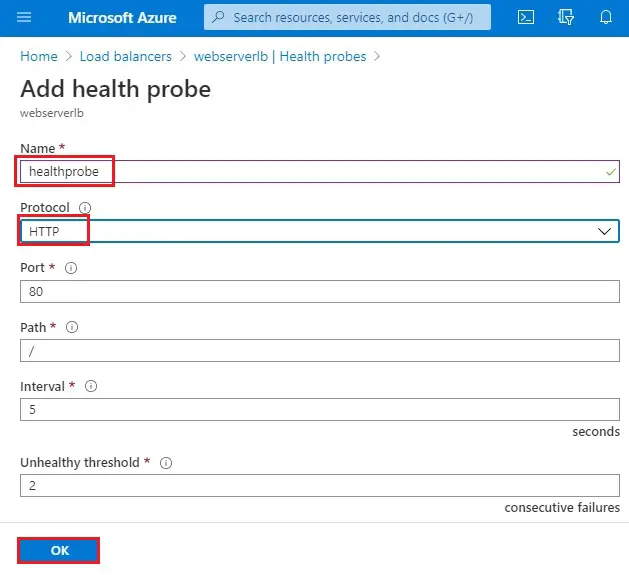
2- Enter a name to the Health Probe.
Protocol (HTTP)
The interval shows that it is going to make a probe attempt at 5-second intervals. And the unhealthy threshold shows that after 2 failed probe attempts, it is going to declare it as an unhealthy server.
Click ok.
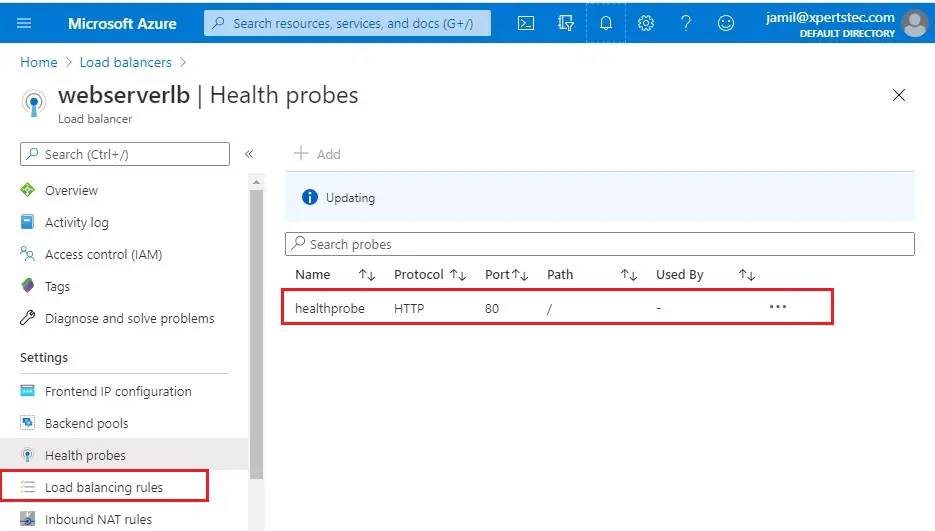
3- Health probe successfully created, click on Load Balancing Rules.
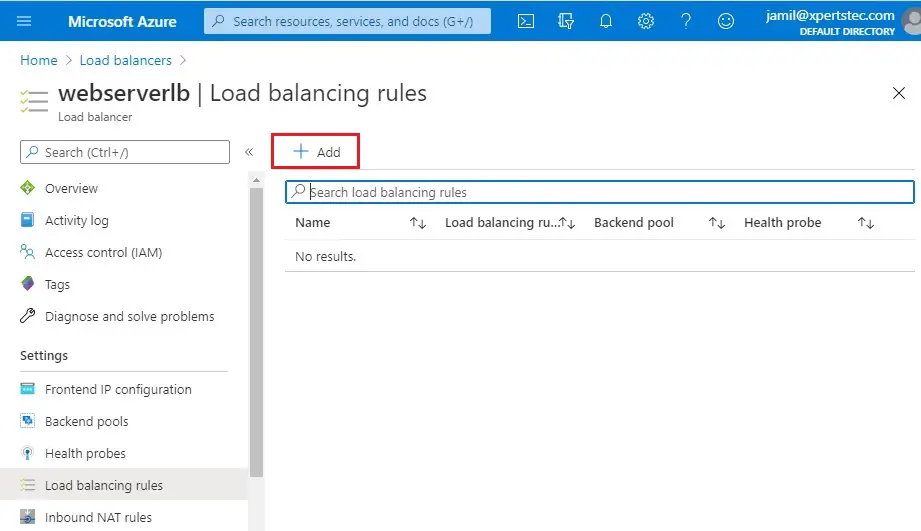
Load Balancing Rules
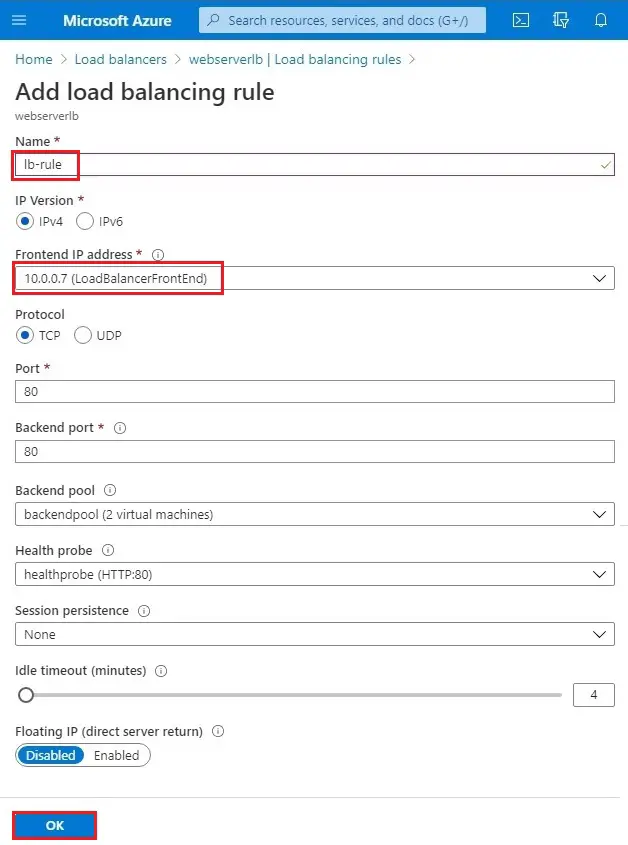
1- Click on + Add button
2- Add load balancing rule wizard, enter a name
The IP version is IPv4
Select frontend IP Address
Protocol is TCP, port number is 80
Backend port 80, backend pool is the one that we have just created & the health probe is the one that we have just created.
By default Session persistence is none & idle timeout is 4 minutes. Floating IP disabled. Click on OK.
Test Internal Load Balancer in Microsoft Azure
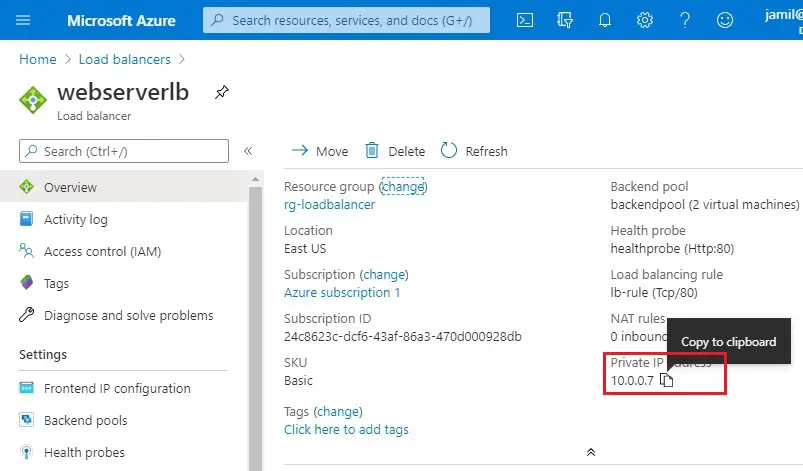
1- Click on load balancer (webserverlb)
2- In the Load Balancer, I have my Private IP address. Copy it and then paste it in the explorer address bar using the third VM (myvmtest).
3- On the first hit, it has taken me to myvm1 server.

4- Wait for 4 minutes then hit enter again, it is take you to myvm2 server.