In this article, I will explain how to Restore Windows Server using Acronis Echo Enterprise Server 9 Bootable Disk
Restore Windows Server Acronis Echo Enterprise Server 9 Bootable Disk
1- Insert Acronis bootable disk into CD/DVD drive and then choose system boot from CD/DVD.

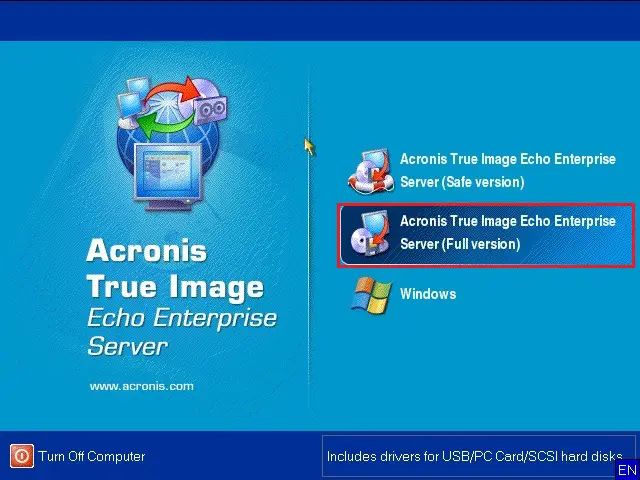
2- Select the Acronis True image echo enterprise server (full version) option.
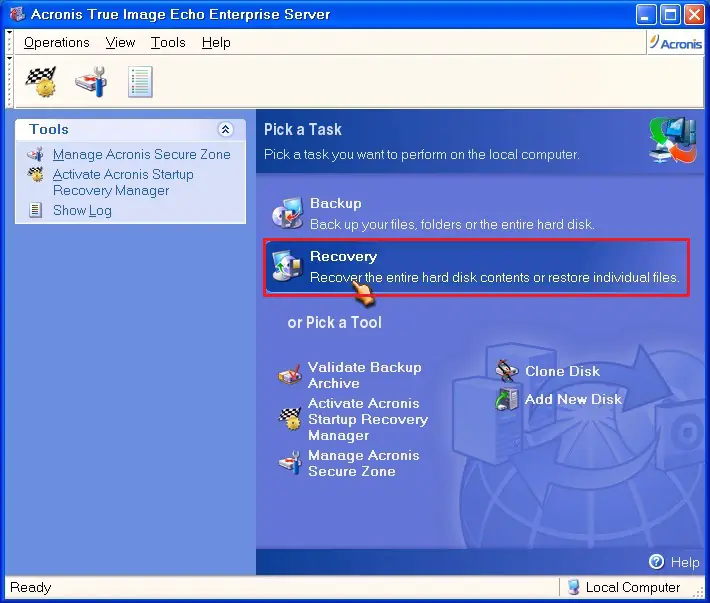
3- Acronis true image echo enterprise server wizard, under pic a task so select Recovery option.
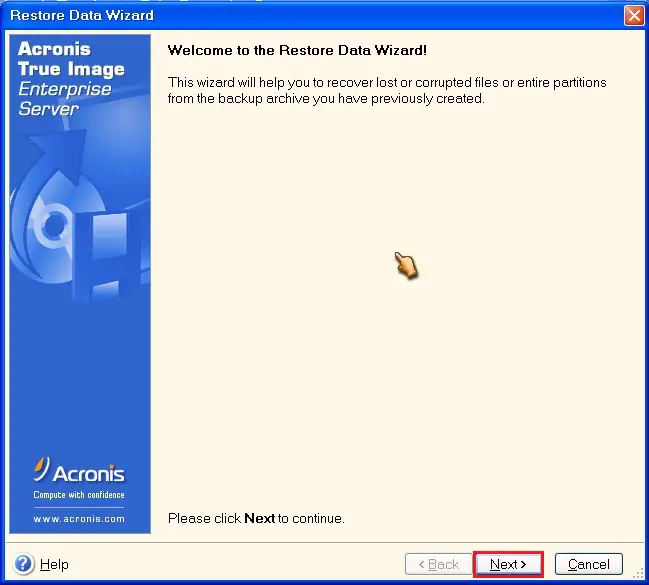
4- Welcome to the Acronis restore data wizard, then click the next button.
5- Select a backup archive that contains data you want to restore .tib file desired to be restored and then click next.

6- Acronis restoration type selection, select restore disk or partition and then click next.

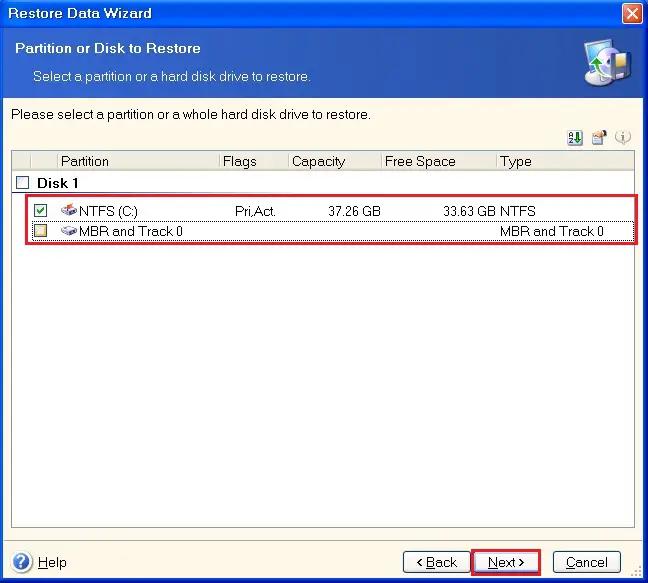
7- Select a partition or a hard disk to restore, click next.
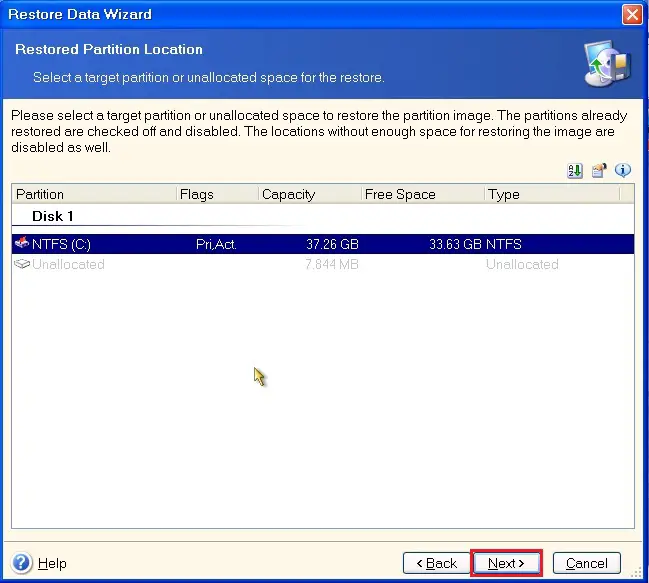
8- Acronis restore, select a target partition for the restore and click next.
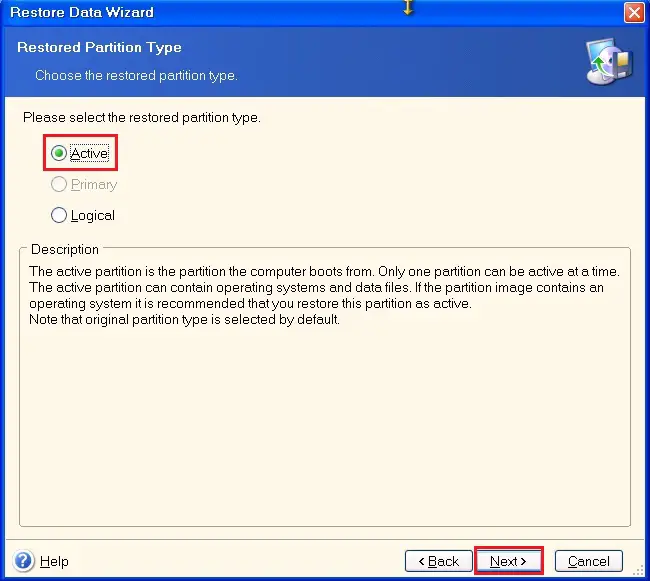
9- Acronis restore wizard, select the restored partition type Active and then click next.
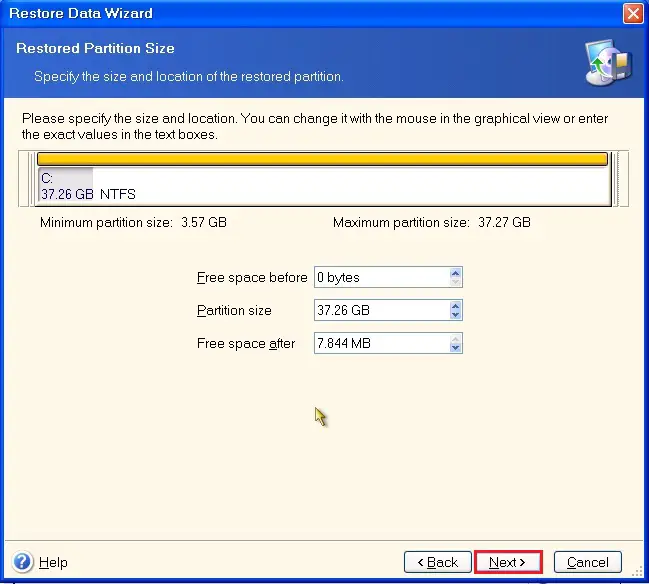
10- Acronis restore data wizard, specify the hard disk size and you can change the partition size as you want and click next.
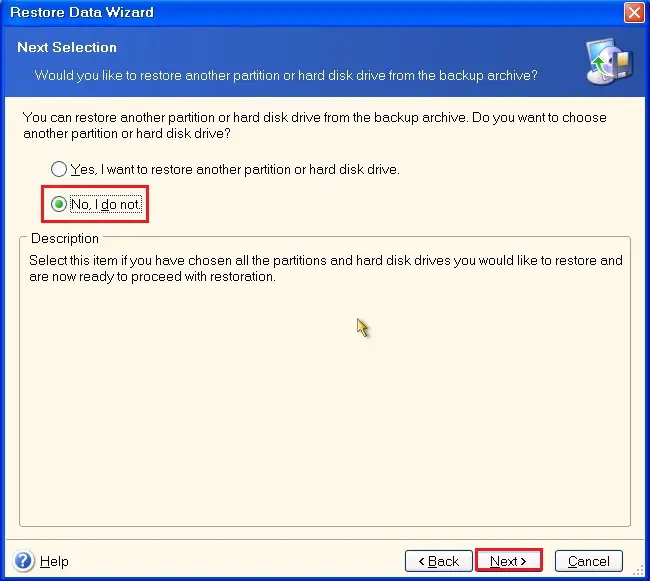
12- If you want to restore another hard disk or partition I Selected I do not and click next.
13- Acronis universal restore, click ok.

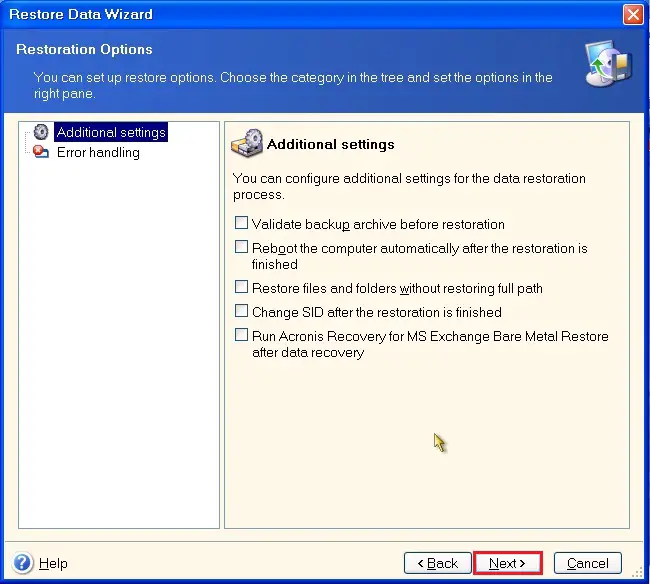
14- Acronis backup restoration, Addition Settings, click next.
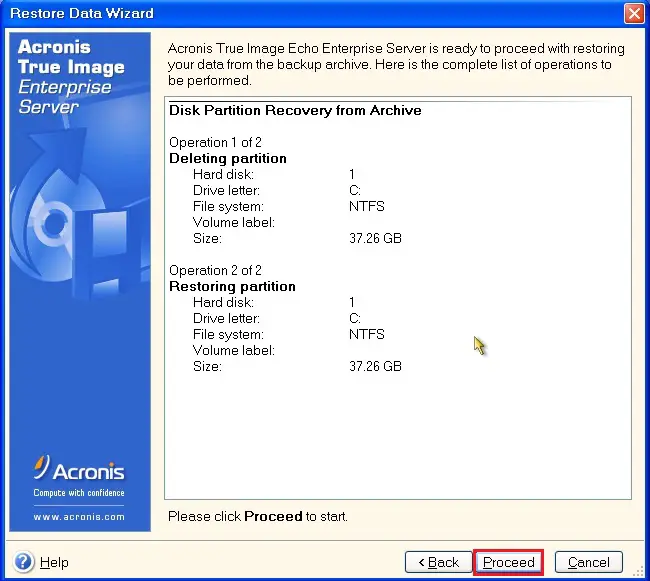
15- Review the disk partition recovery from archive backup details and click Proceed to start backup.
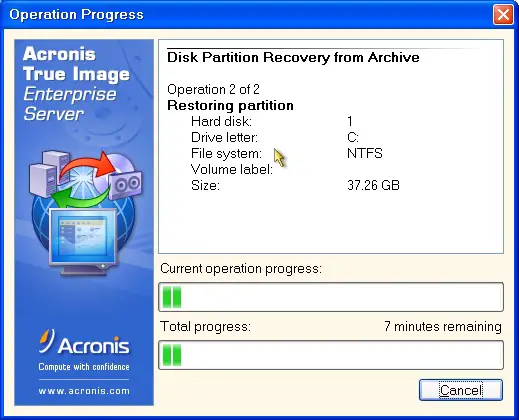
16- Acronis true image restoring partition operation in progress.
17- Acronis Backup restoration completed successfully, click ok.

For more details click here
