Windows Server backup using Acronis true image echo enterprise server 9 bootable disk.
Server Backup Acronis Echo Enterprise Server 9 Bootable Disk
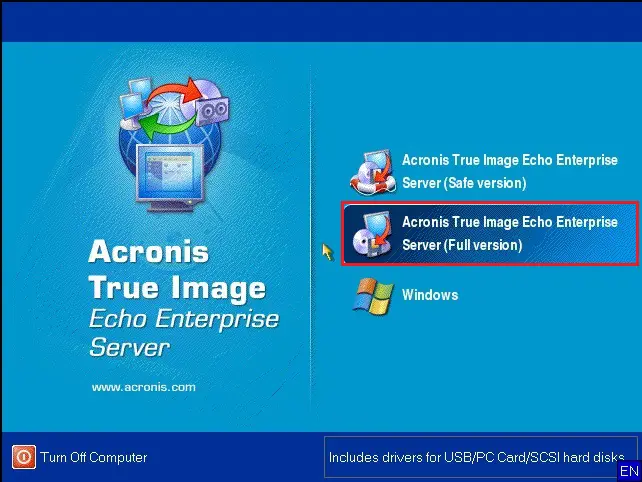
1- Insert Acronis bootable disk into your CD/DVD drive and then change the computer boot option to CD/DVD after booting select Acronis true image echo enterprise server (full version).
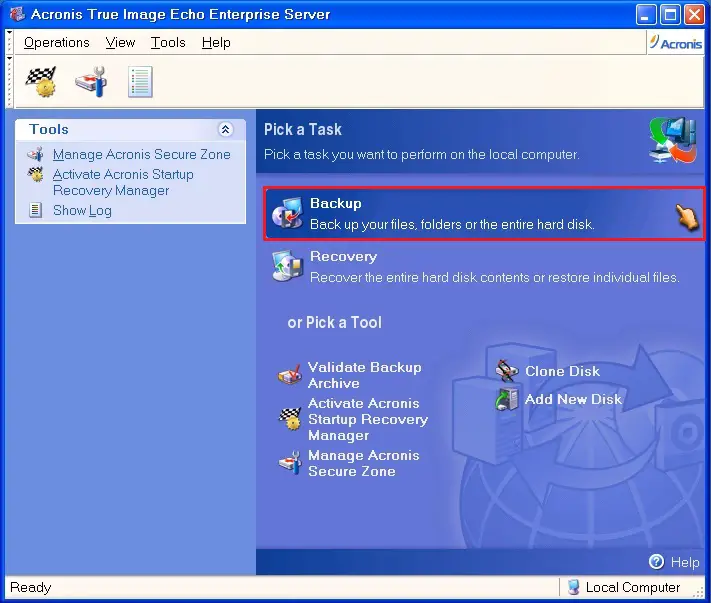
2- Acronis true image echo server wizard, so select backup (back up files, folder, entire hard disk.
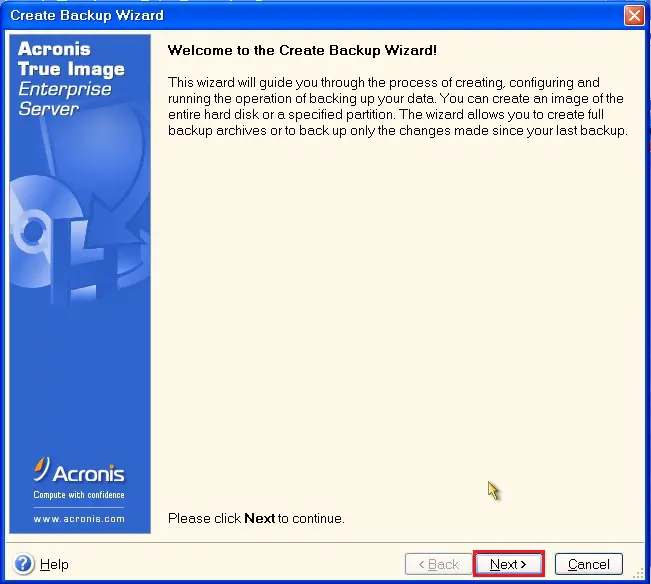
3- Acronis create backup wizard, so click next.
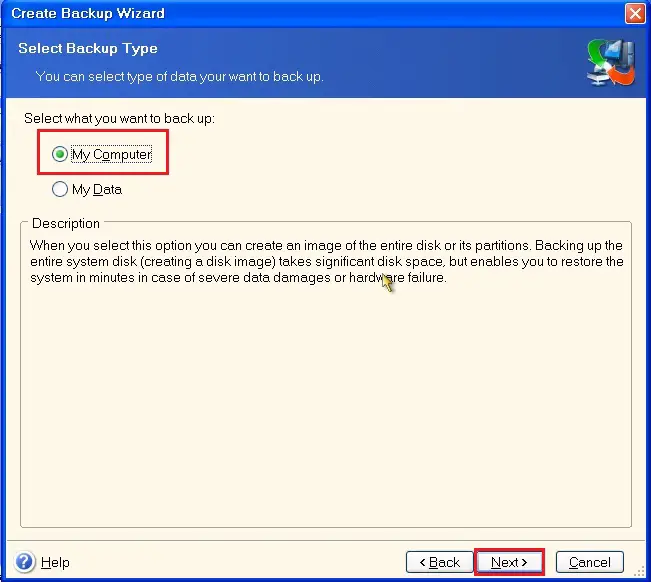
4- Select the Acronis Backup type (My Computer) and then click on next.
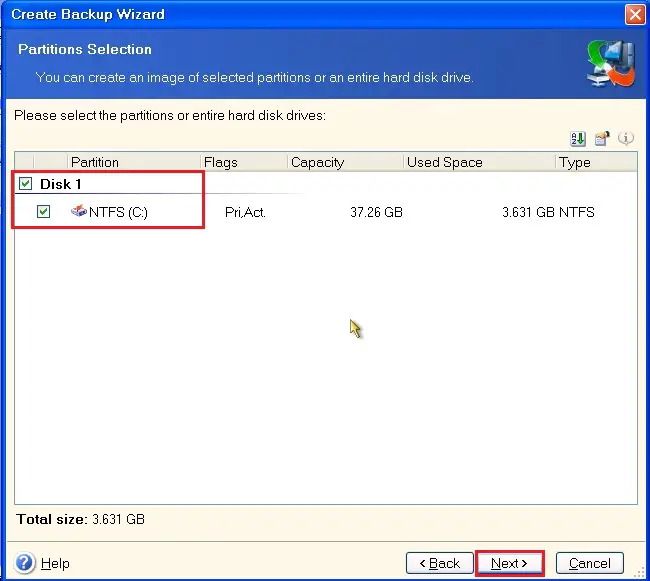
5- Acronis backup partitions selection Select Disk 1 C drive and then click next.
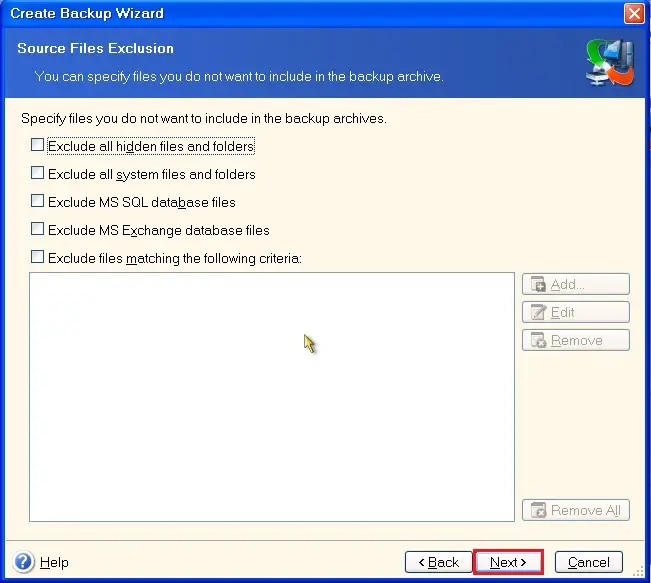
6- Select Source Files Exclusion you want to include in the Acronis backup archive and then click on next.
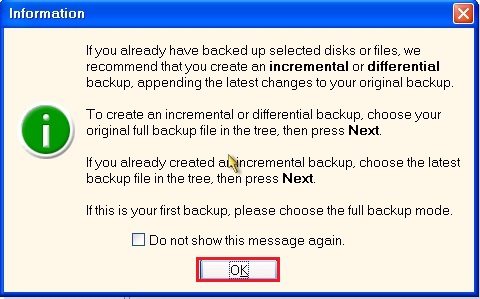
7-Acronis disks or files backup information, click ok.
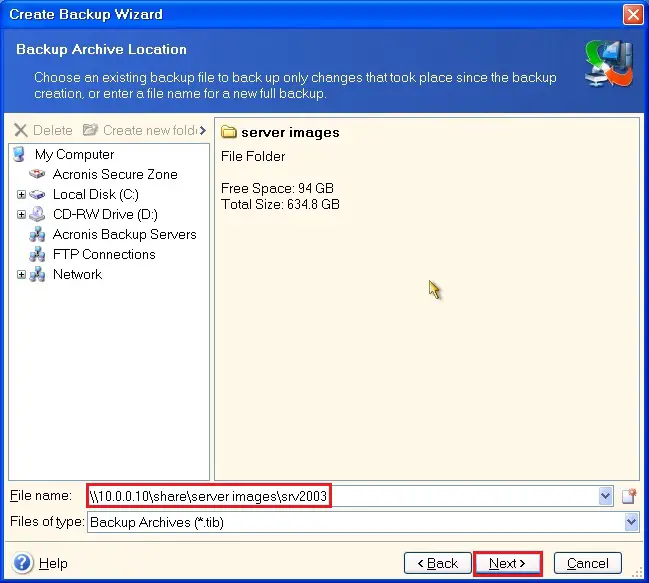
8- Choose an existing backup archive location, you can save it to an external drive or network drive, type backup name and click next.
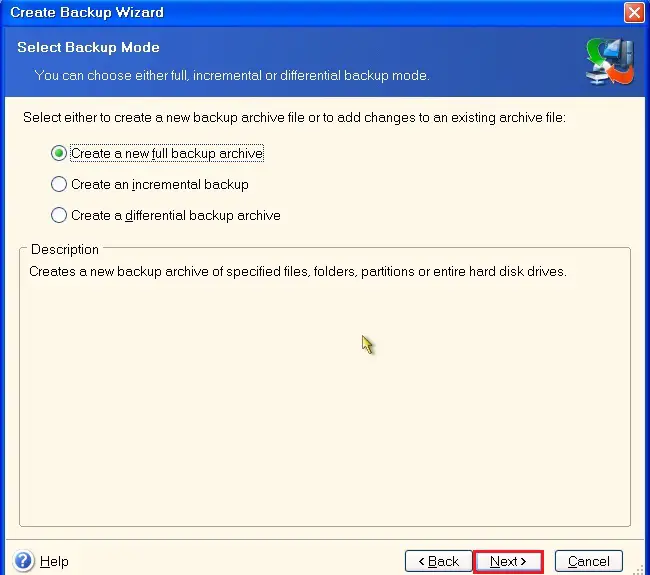
9- Select Acronis backup mode, Select create a new full backup archive and click next.
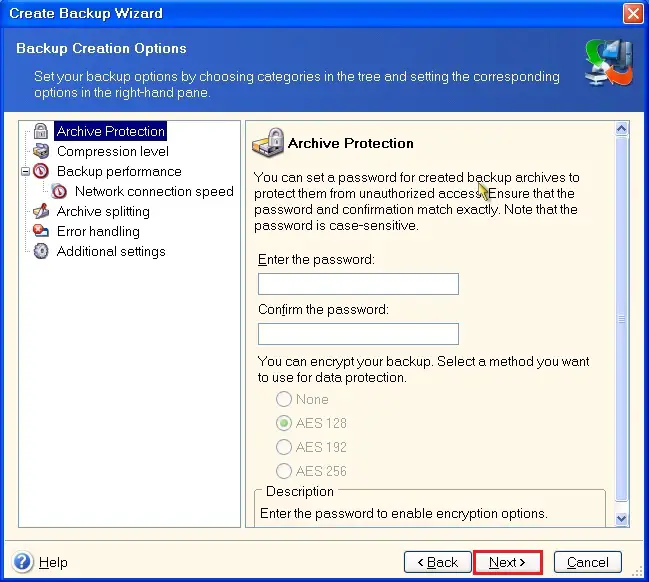
10- Here you can enter a password for active backup protection and click next.
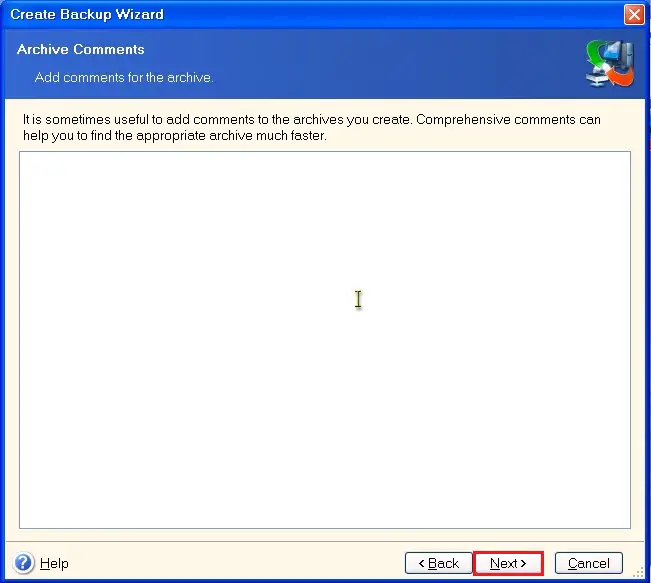
11- Acronis backup wizard type comments and click next.
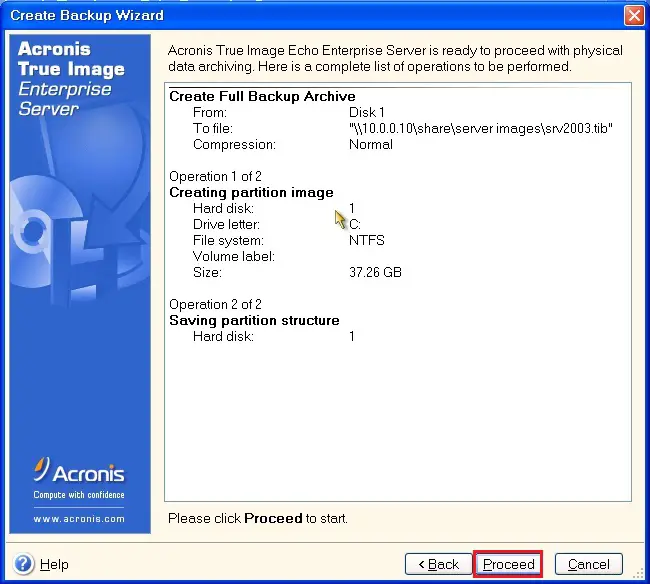
12- Acronis true image enterprise server, review the created one backup details and click Proceed to start back up.
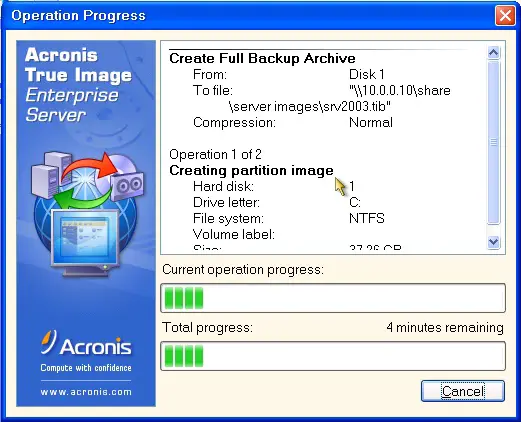
13- Acronis backup Job operation progress.
14- Acronis backup archive creation completed successfully, click ok.

For more details click here
