
In this blog, I am going to Install and Configure VMware ESXi 5.5
Install and Configure VMware ESXi 5.5
Requirements:
Ram 4GB.
Minimum of two cores.
1 Gigabit or More
Requires the NX/XD bit to be enabled for the CPU within the BIOS
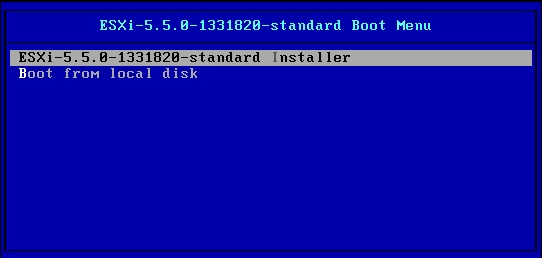
1- Boot from USB or DVD and select Esxi-5.5.0-1331820-standard installer – Press Enter.
2- This screen detects all the hardware and then loads the drivers.

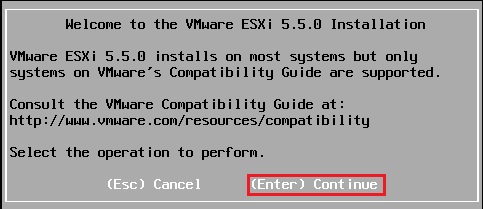
3- Press Enter to start the installation.
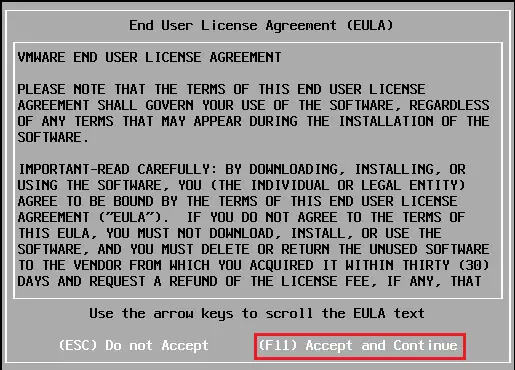
4- Press (F11) to Accept and continue.
5- Select the correct storage device to install ESXi on and then press Enter to continue.

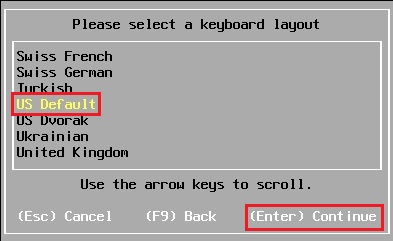
6- Select the keyboard layout US Default and then press (Enter).
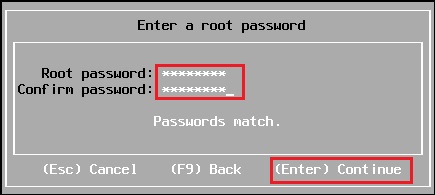
7- Type a secure password for the root account and then Press (Enter).
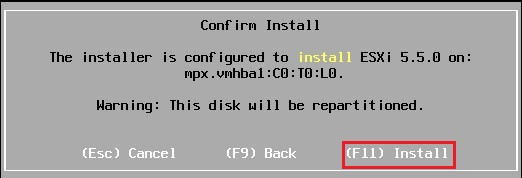
8- Press (F11) to start installing ESXi 5.5.
9- This will take several minutes to complete.

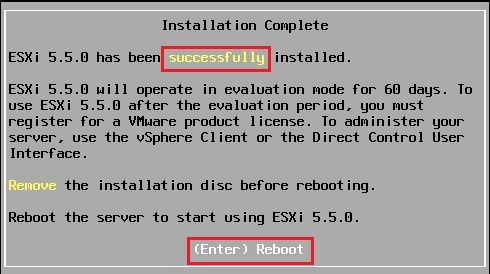
10- Installation completed press (Enter) to reboot the ESXi 5.5 server.
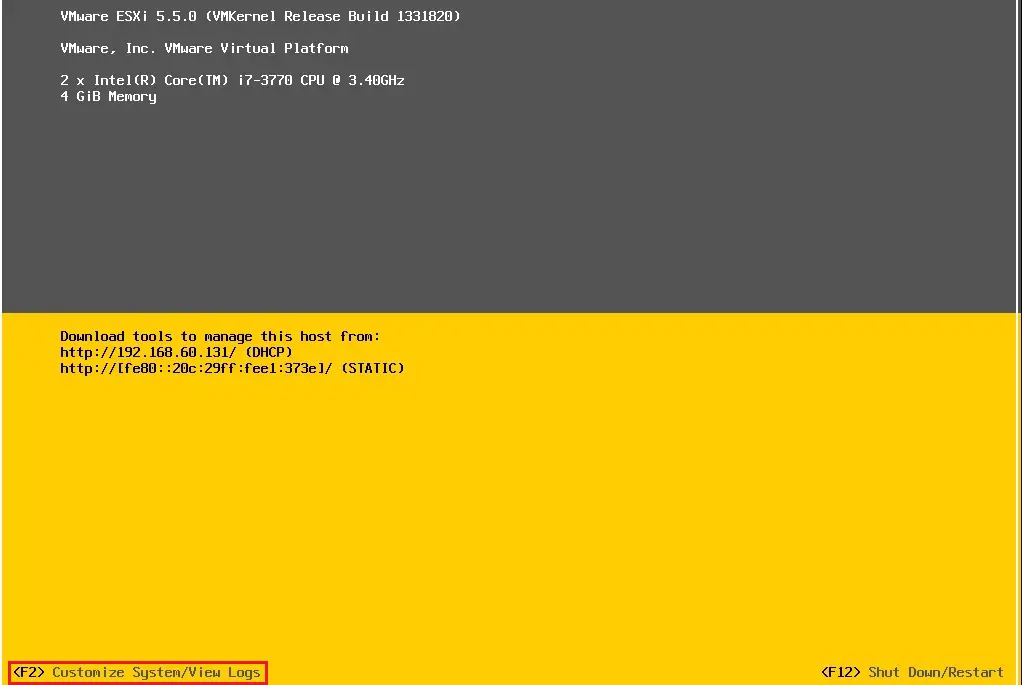
11- Once the ESXi 5.5 server has booted, it will receive a DHCP (if applicable) you can now manage this with the vSphere client or continue to set a static IP for management (recommended) so Press F2.
Configure ESXi 5.5
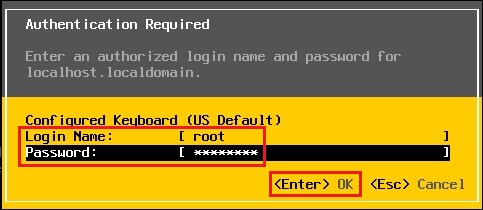
12- Type your root username, password and then press enter.
13- Select Configure management network.

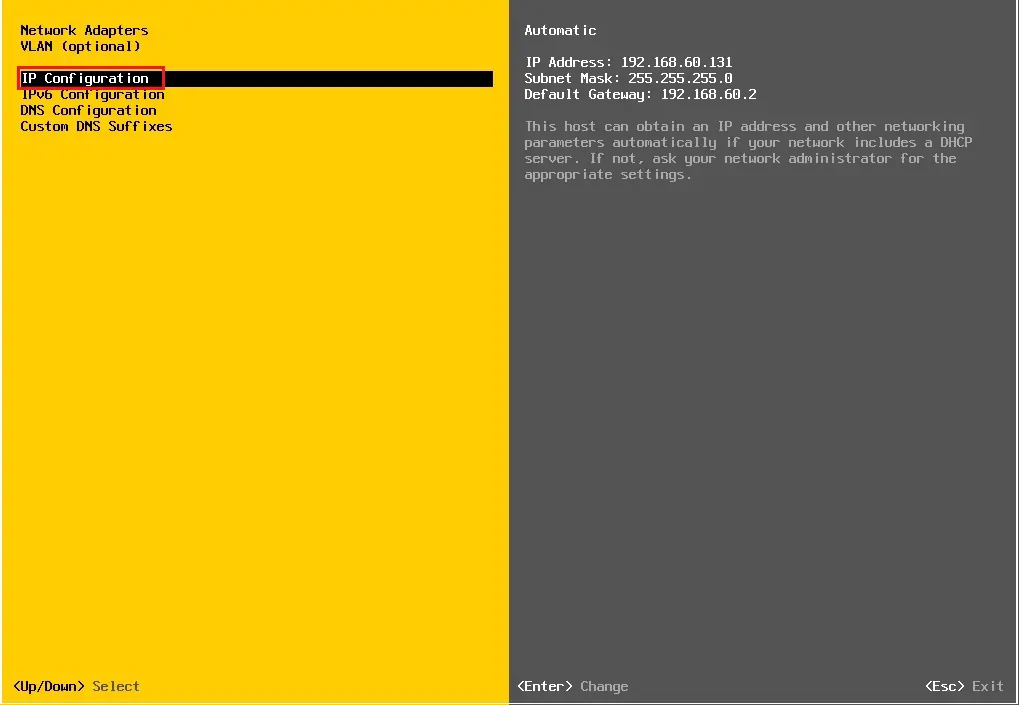
14- Select the IP Configuration.
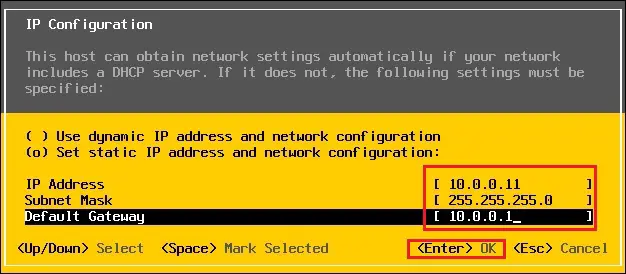
15- Change to Static IP
Enter your IP address, mask, gateway and then Press Enter.
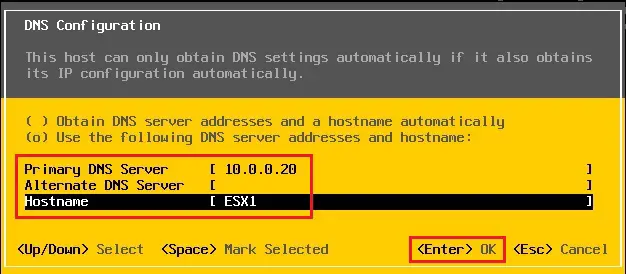
16- Now select DNS Configuration.
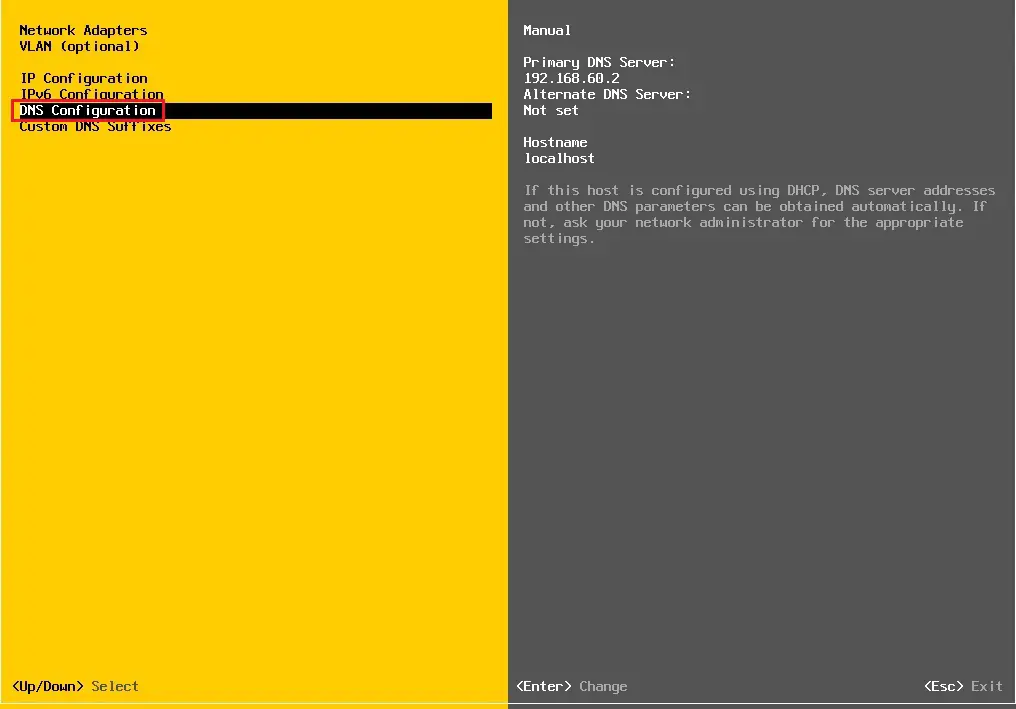
17- Enter your DNS information and then press (Enter) to OK.
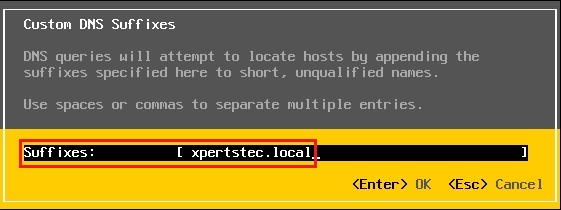
18- Now select Custom DNS Suffices and type your DNS name. then press (Enter) to OK.
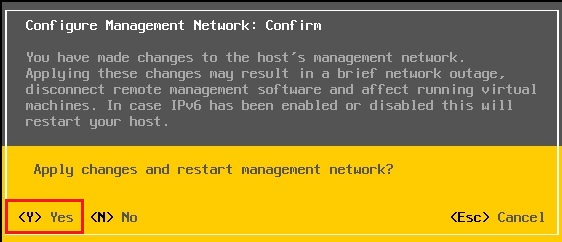
19- Press ESC to get back to the main menu. You will be asked to Apply changes and restart the management networks? so Press (Y) to yes.
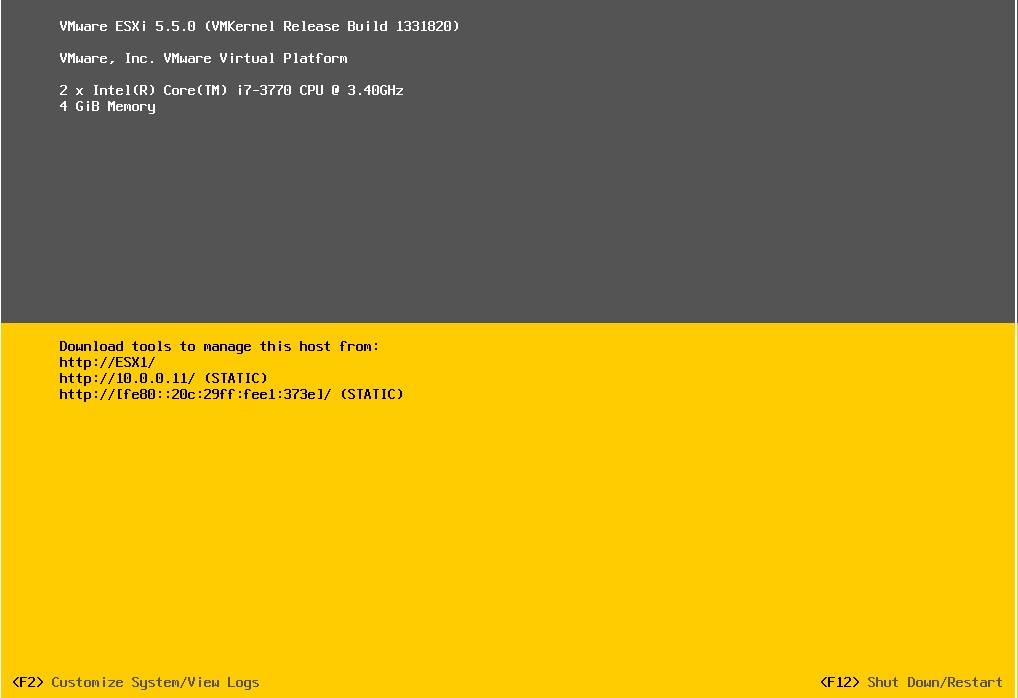
20- Now test your network. you ought to have created A records on your DNS server for your ESXi 5.5 servers.
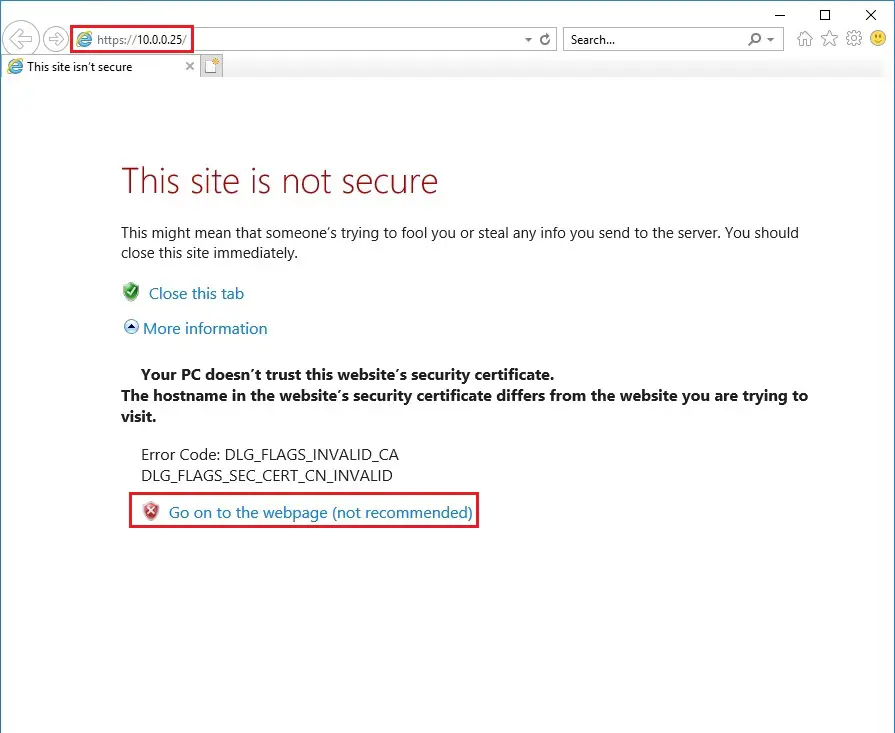
21- The initial configuration portion of your ESXi 5.5 host is now complete. For our final step, we are going to go to our browser and enter in the IP and press enter you will be presented with an unsafe connection and then click Go on to the webpage (not recommended)
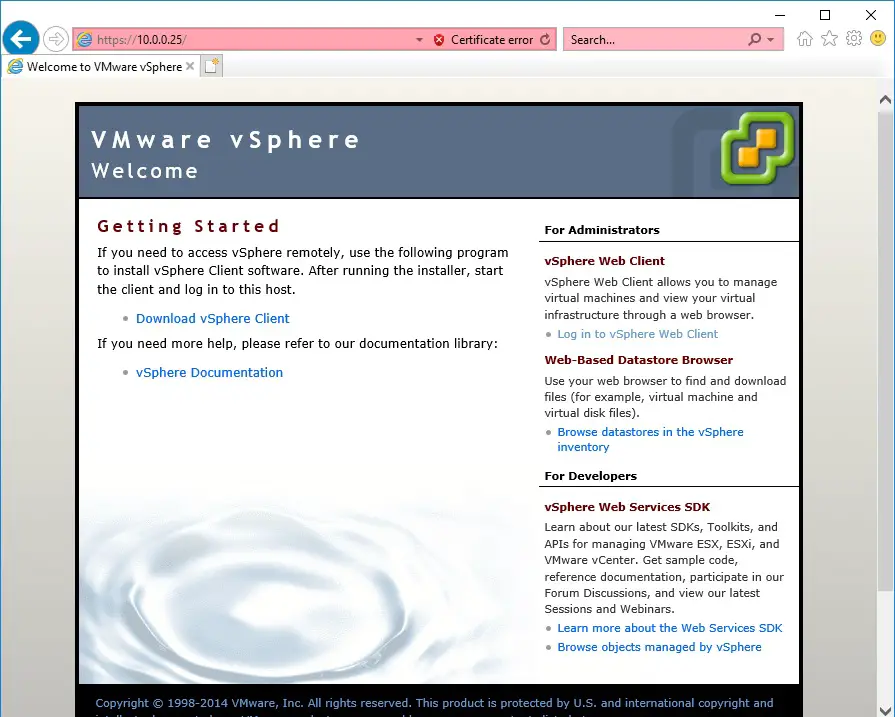
22- Congratulations VMware vSphere Welcome.
For more details click here
VMware vCenter 5.5 Installation and Configuration
