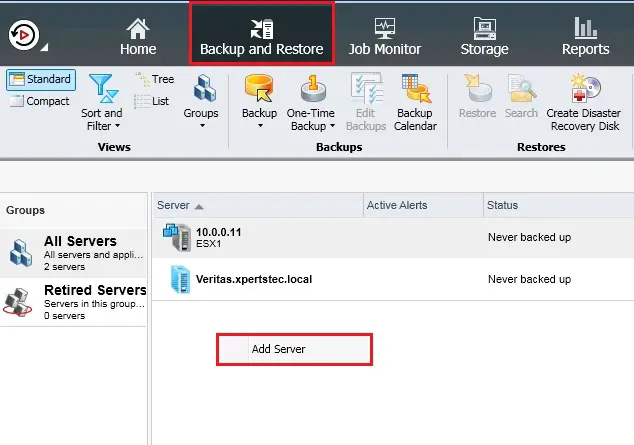
Add vCenter Backup Exec, You can use the Add Server Wizard to feature VMware vCenter Server and install the Agent.
1- On the Backup and Restore tab menu within the Servers and Virtual Hosts group right-click and click Add Server.
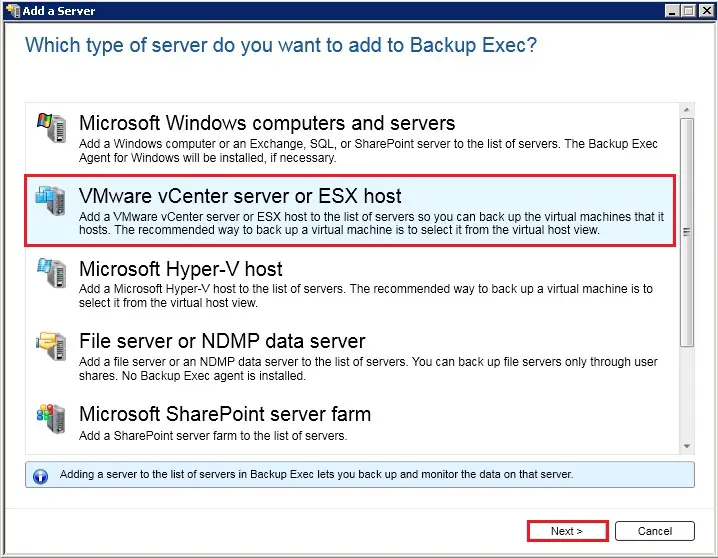
2- Select VMware vCenter servers or host and click on next.
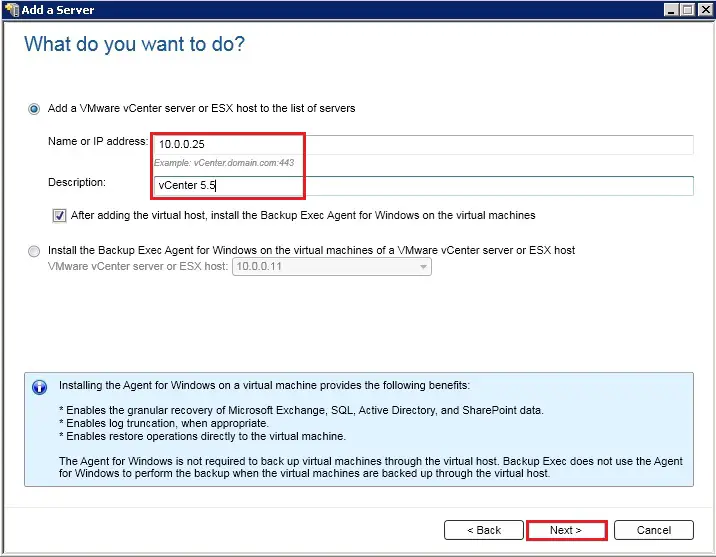
3- Add your VMware vCenter Server or ESX host detail (Name or IP address)
Select after adding the virtual host, install the backup exec agent for windows on a virtual machine and click next.
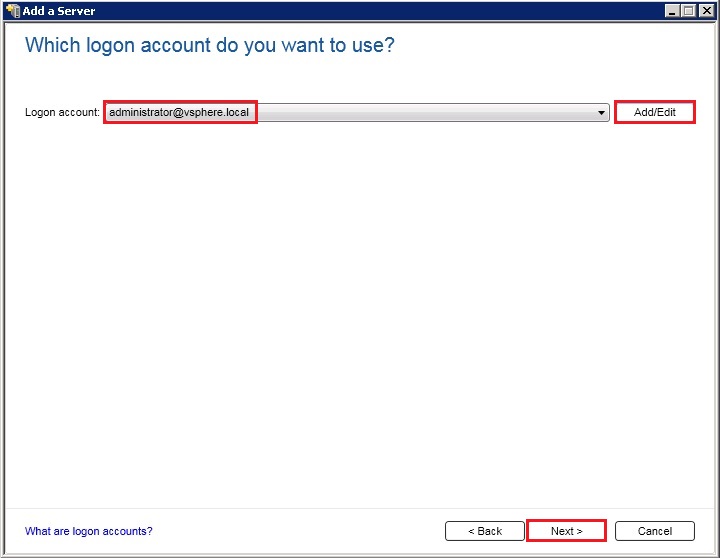
4- In the Logon Account field, select the login account that you want to use to access each server and click next.
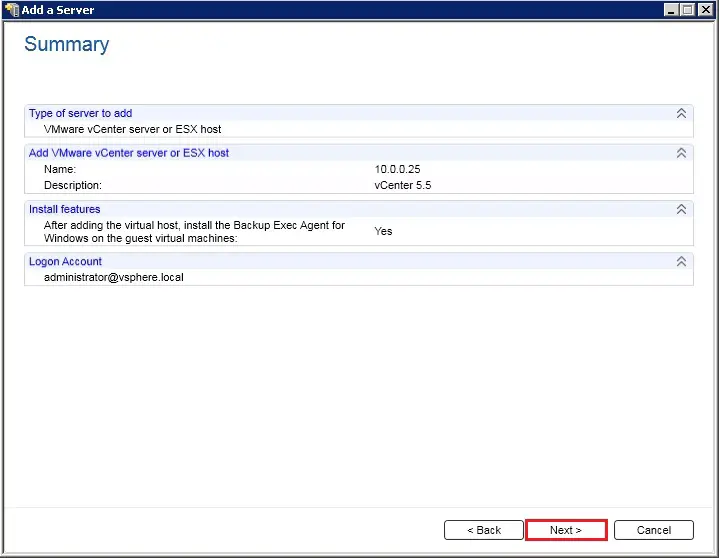
5- Review the details and click next.
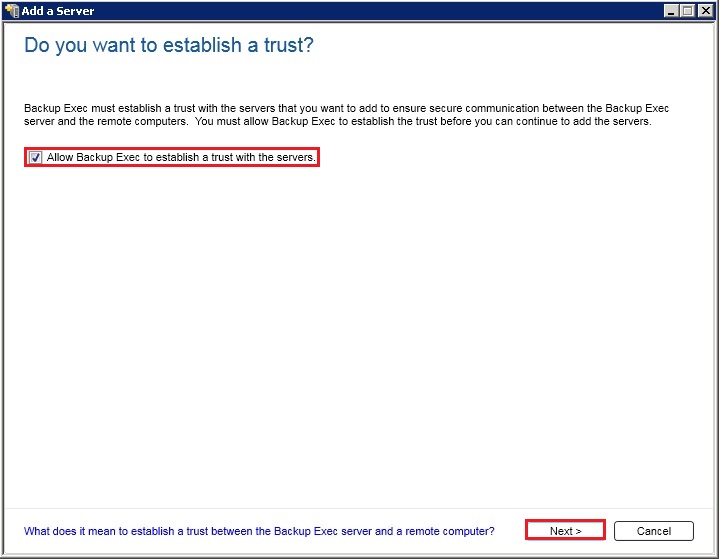
6- Select Allow Backup Exec to establish a trust with the Servers and click Next.
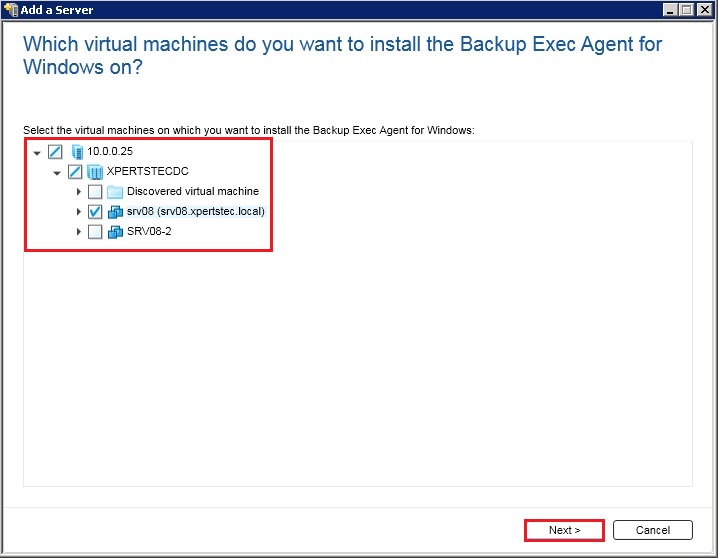
7- Select the servers on which you want to install the Agent for Windows and then click Next.
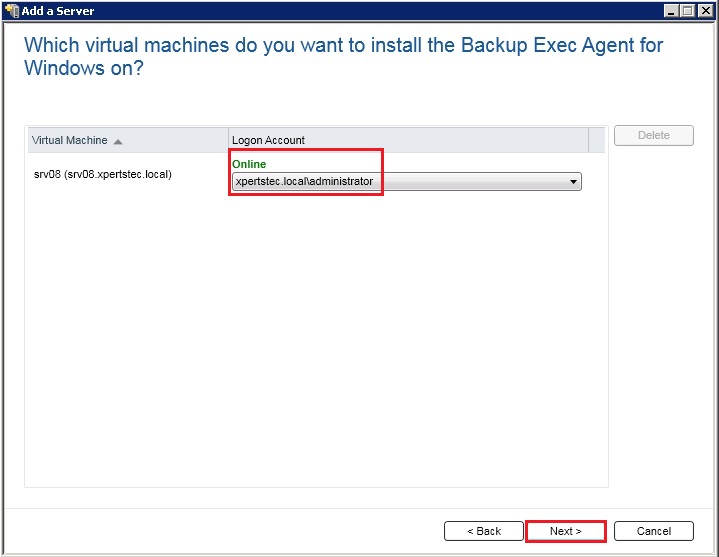
8- Select the Admin account for the server and then click Next.
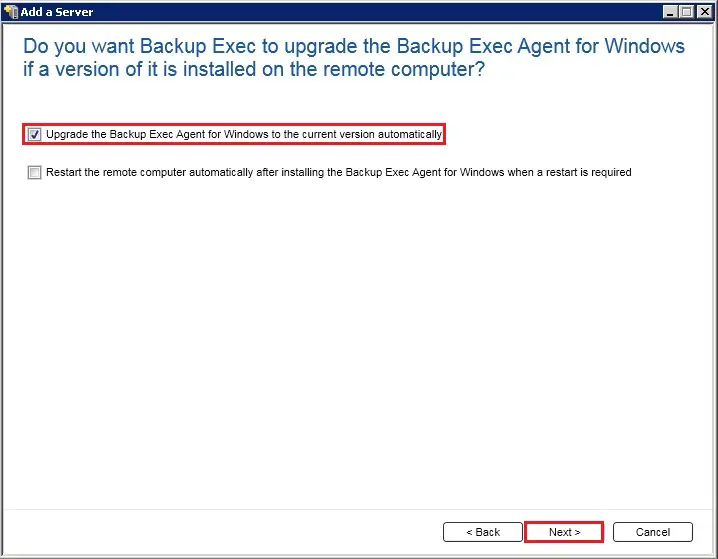
9- Select Upgrade the Backup Exec Agent for Windows to the current version automatically and then click Next.
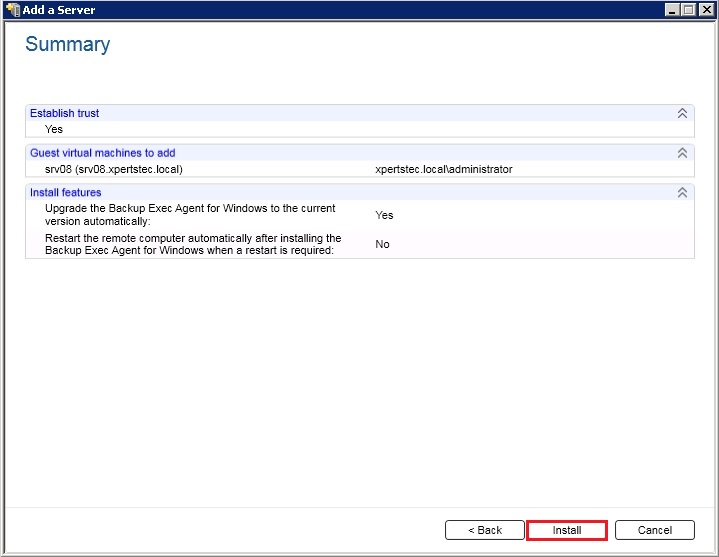
10- Review the Summary and then click Install.
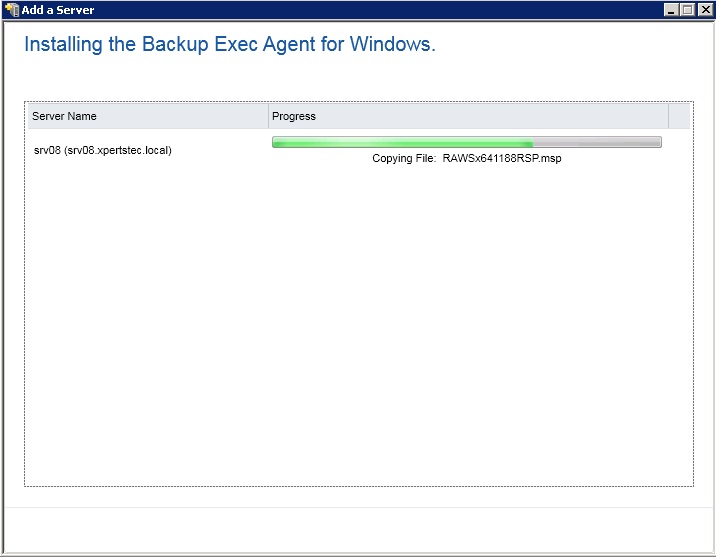
11- Installing backup exec agent for windows Started.
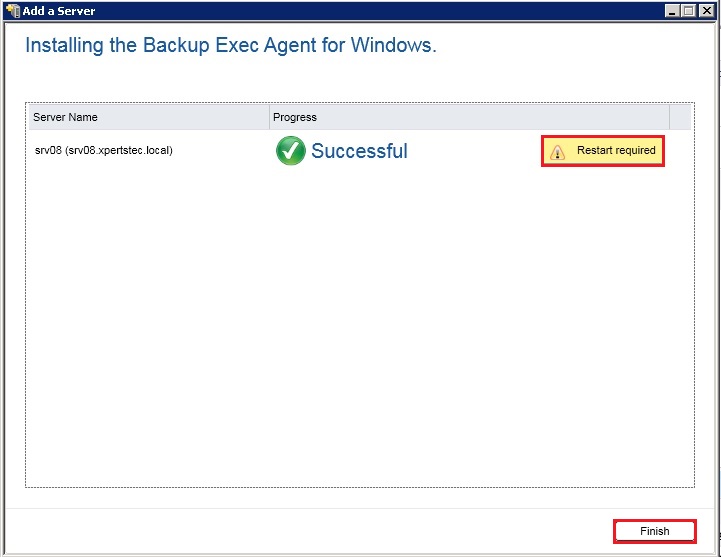
12- Installation Completed, click Finish and then Restart Required Server.
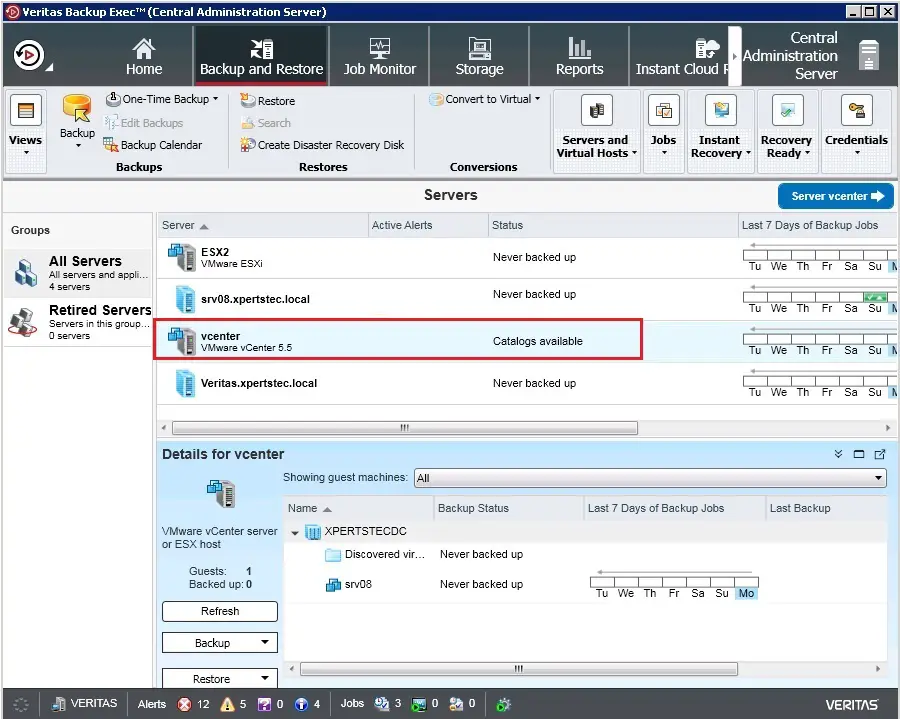
13- After installing the Agent for Windows the vCenter server is added to the list of servers in Backup Exec.
For more details click here

