In this guide, I will explain how to change the computer name in Windows Server 2019 by GUI. You can rename your windows computer from the instruction using WMIC Powershell. if you want to know how to install windows server 2019 click here
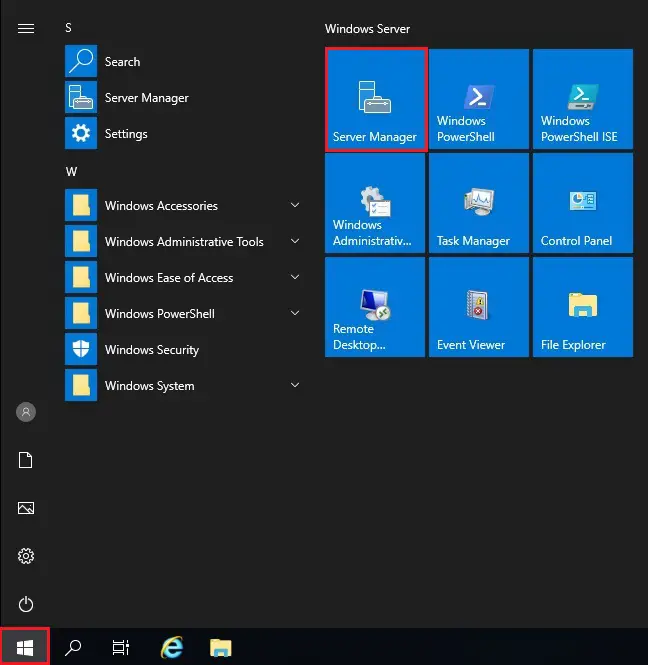
To change the pc name using Server Manager
1- Select the beginning button then click on the Server Manager
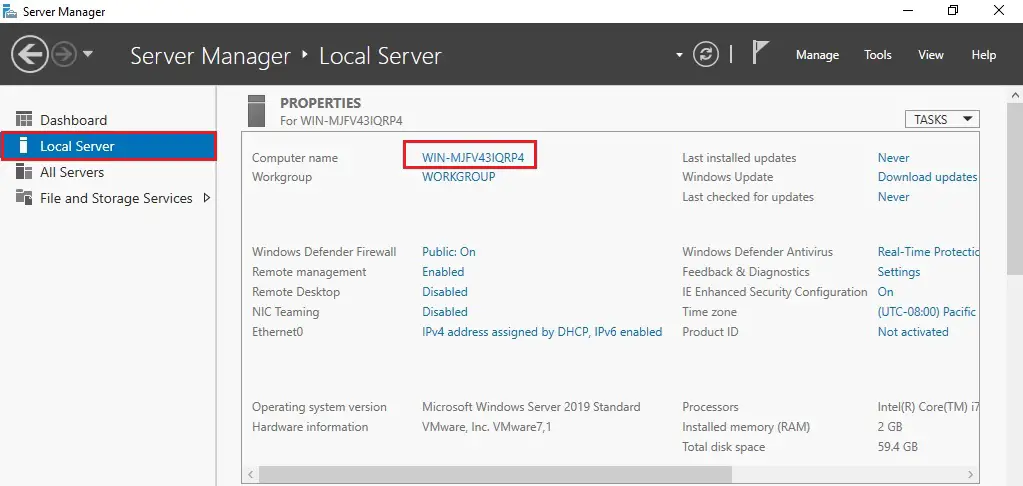
2- After opening Server Manager > on your left side select Local Server > under Properties and click on computer name.
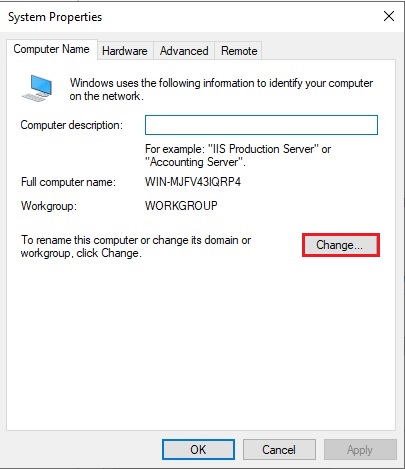
3- System Properties will open and click on change.
4- Type-A name under the pc name and click on ok.
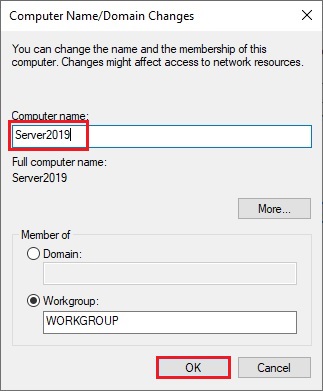
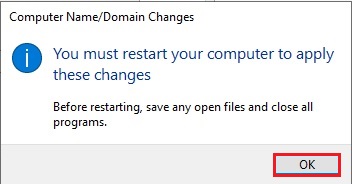
5- Click OK.
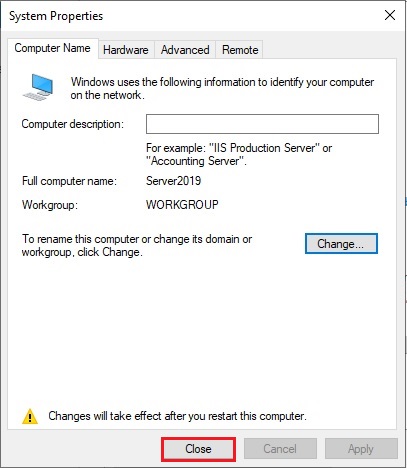
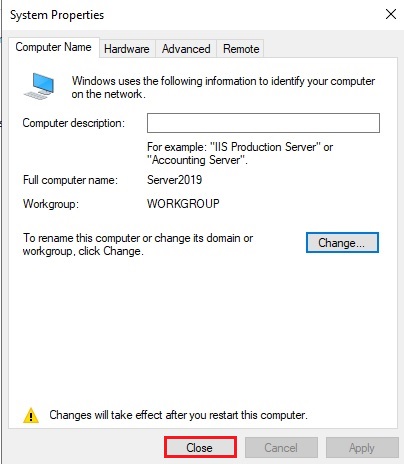
6- Click Close.
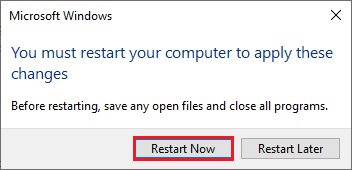
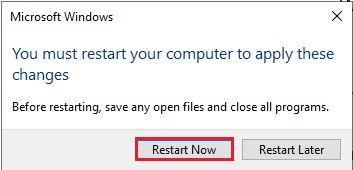
7- Click Restart Now.
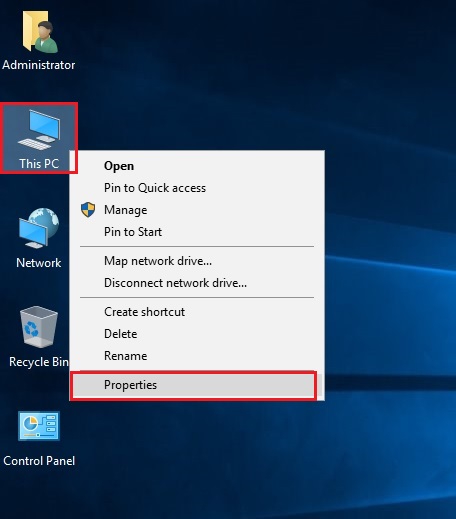
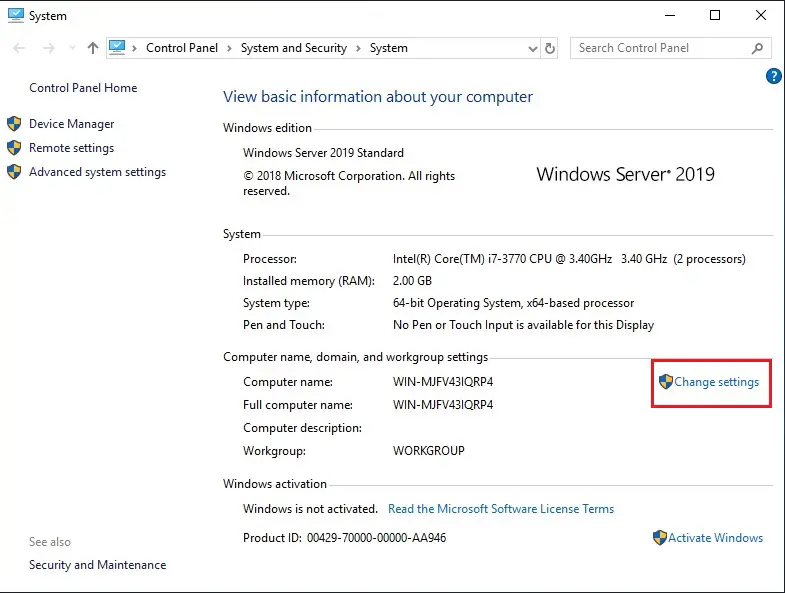
8- To rename the pc using Computer Properties, right-click on this PC and choose properties.
9- Under Computer name, domain and workgroup settings and click on Change Settings.
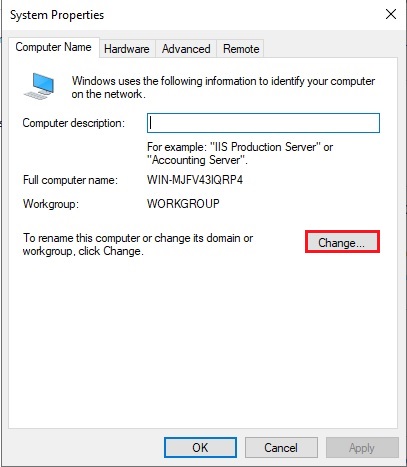
10- PC System Properties window will open, click on the change button to rename Server name.
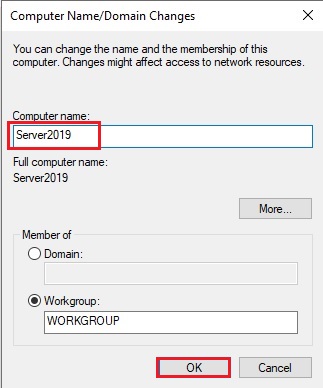
11- Under Computer Name, type the server name and click on ok.
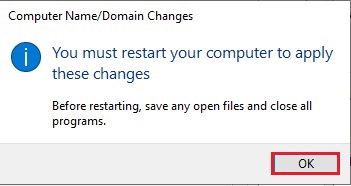
12- Click ok to restart PC.
13- Click Close.
14- Click Restart Now.
Change computer name from the command prompt
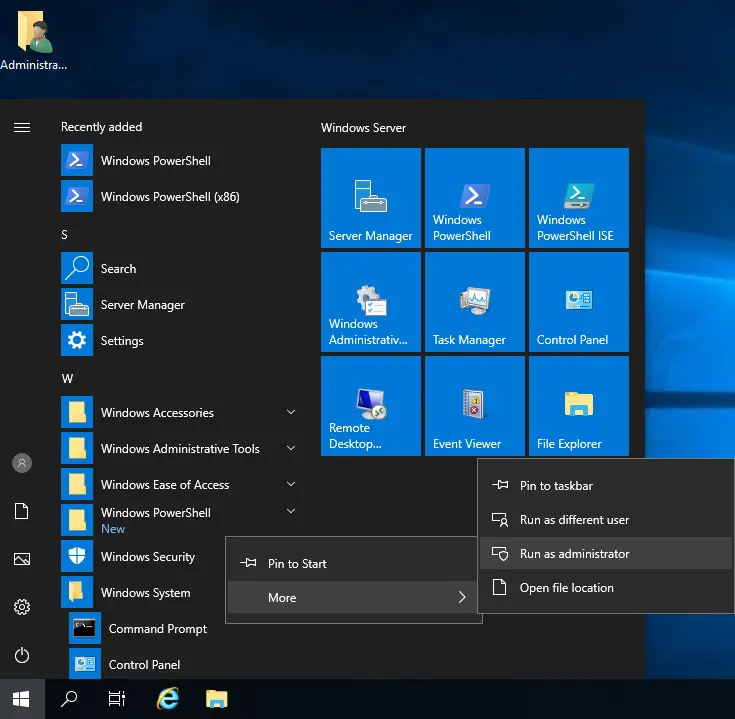
15- Select Windows button, select Windows system, right click on command – prompt and then click Run as administrator
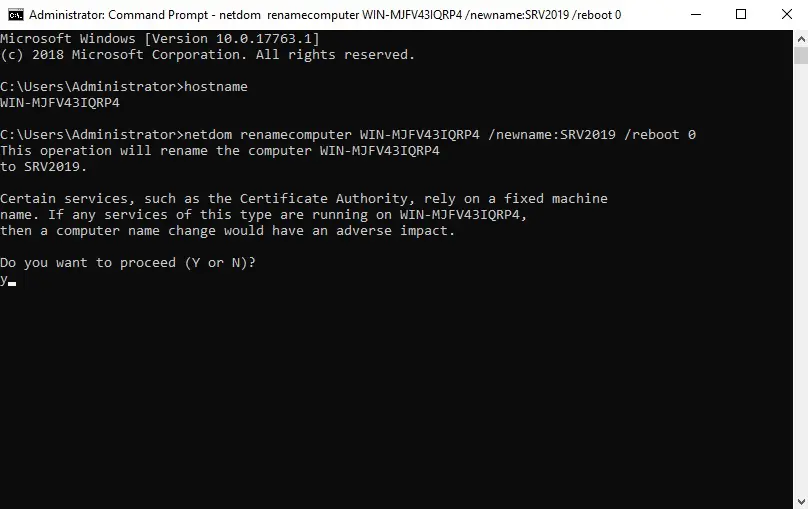
16- Type hostname command to know the current computer name
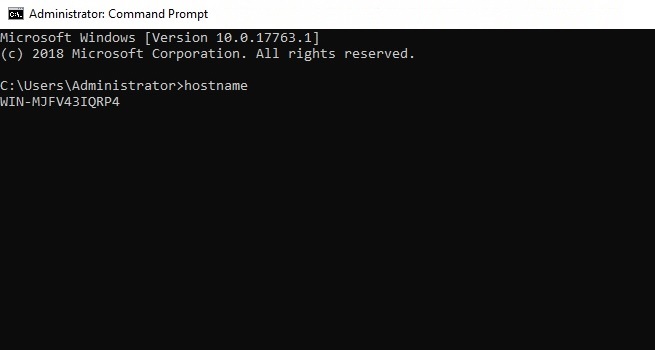
17- You can rename your windows computer from WIN-MJFV43IQRP4 to SRV2019 we will use the below command.
netdom renamecomputer WIN-MJFV43IQRP4 /newname:SRV2019 /reboot 0
Press Y to reboot computer
18- After renaming successful you the computer is restarting.

For more information click here
