


In this article, I will explain How to create a single database in Azure. We will use the Azure portal, a PowerShell script, or an Azure CLI script to create a single database in Azure SQL Database. We will then query the database using Query editor in the Azure portal.
A single database is the simplest and quickest option for Azure SQL Database. We manage a single database inside a server, which is within an azure resource group in a specified Azure region.
We can create a single database in the server or provisioned less compute tier. A purvey database is pre-allocated a determined amount of compute resources, including memory, CPU and uses one of two purchasing models.
Create a single database in Azure
Create a single database in Azure portal:
Sign in to the Azure portal
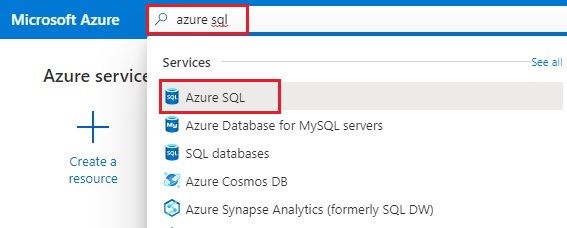
1- In the Azure search bar, enter azure sql and then select Azure SQL.
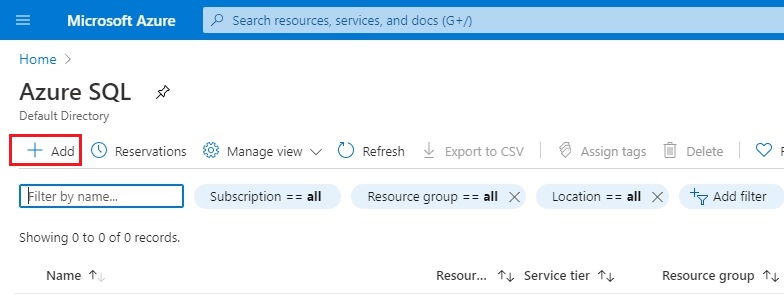
2- On the Azure SQL page, select + Add.
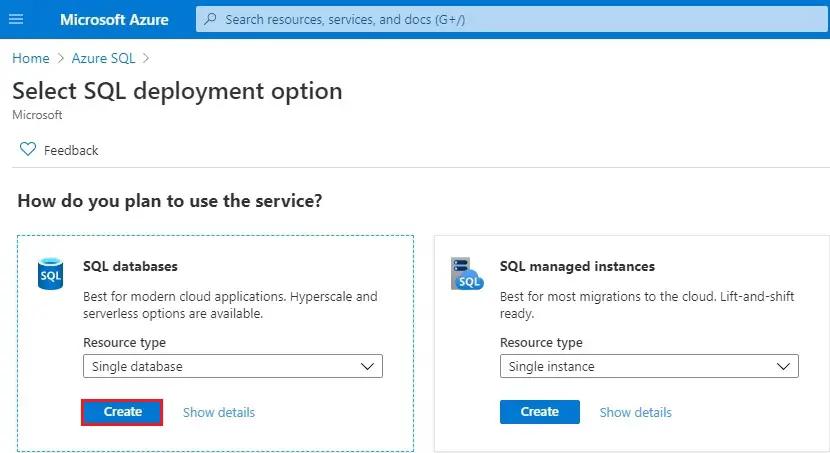
3- In the select SQL deployment option window, choose the SQL databases tile, with Single database. Choose Create.
4- Create SQL database Basics tab under Project details,
Select the Azure Subscription
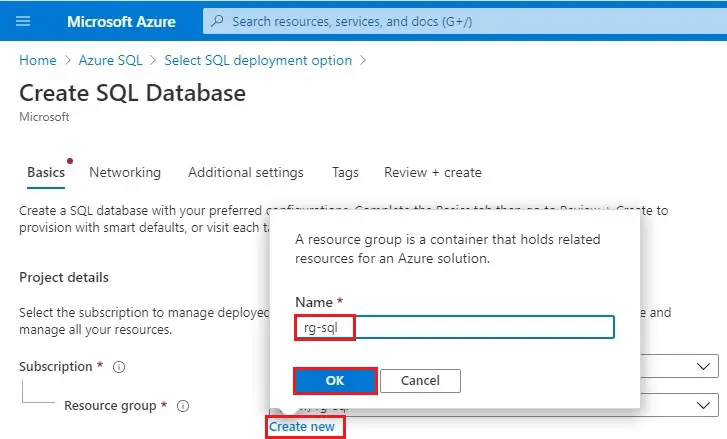
Under Resource group, click on Create new, type a resource group name (my-sql), and then select OK.
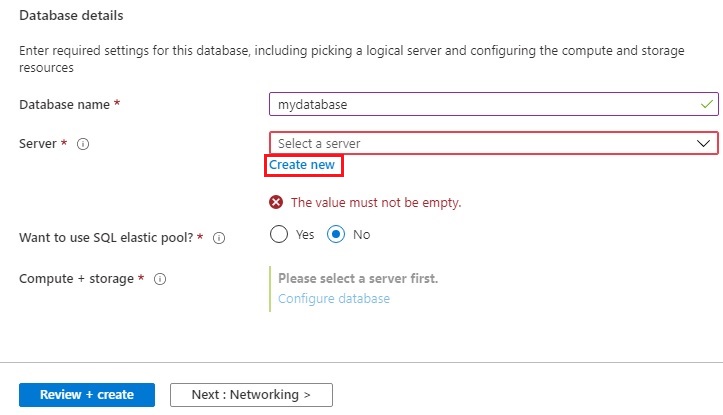
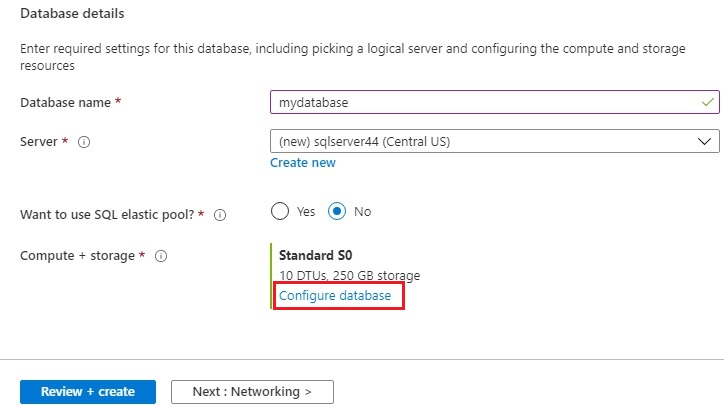
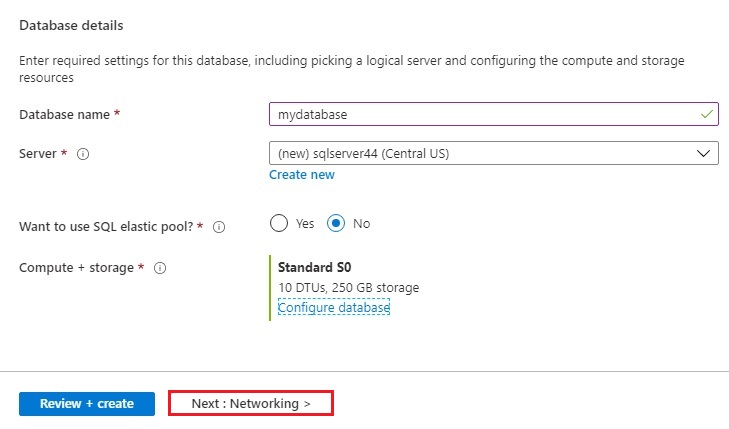
5- Database details; enter a Database name (mydatabase).
For Server, click ok Create new.
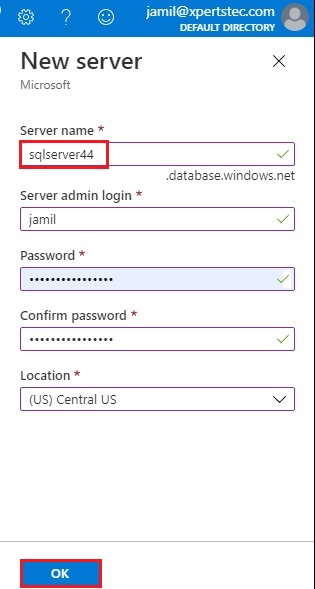
New Server
6- Server name – Type a name (sqlserver44)
Server admin login: Enter username (jamil).
Password – Type a password that meets requirements and type it again to confirm password.
Location – Choose a location (US) Central US.
Select OK.
7- Record the server admin login & password so we can login to the server and then its databases. If you forget the login or password, we can get the login name or reset the password on the SQL server page after database creation. To open the SQL server page, choose the server name on the database Overview page.
Under Compute + storage, if you need to reconfigure the defaults, choose Configure database.
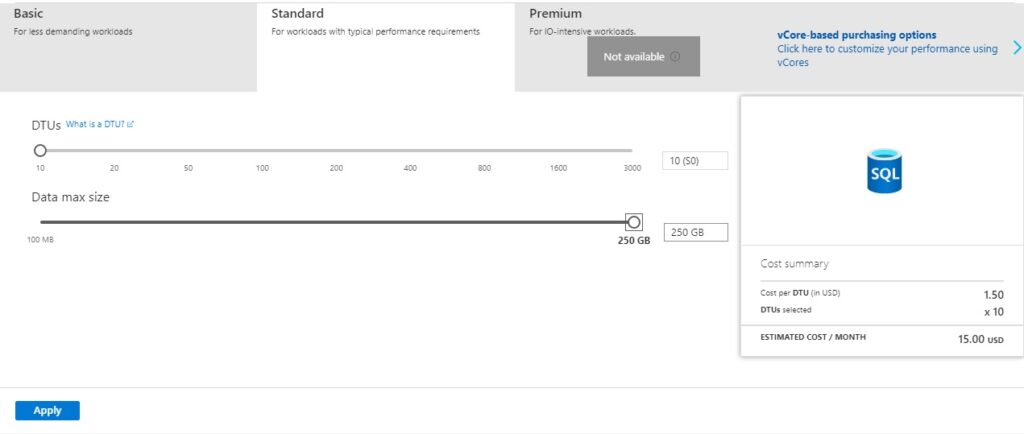
8- On the Configure page, you can optionally:
After making any changes, select Apply.
9- Select Next: Networking >.
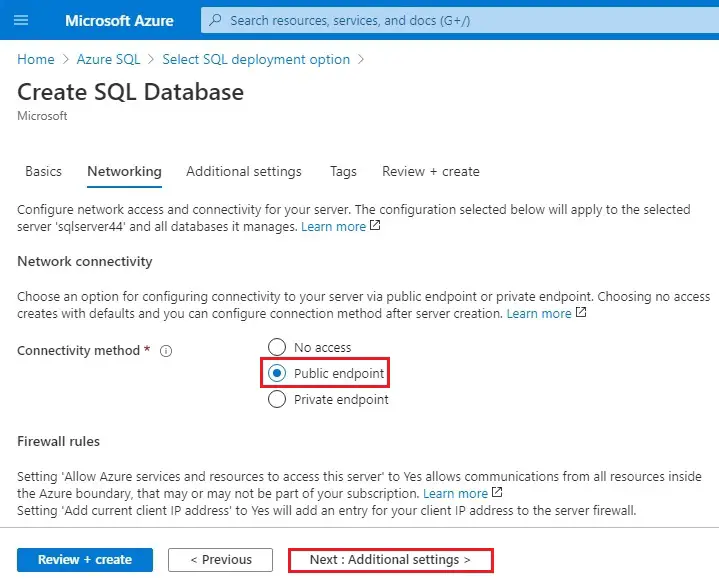
10- Networking tab, under Connectivity method, choose Public endpoint.
Choose Next: Additional settings >.
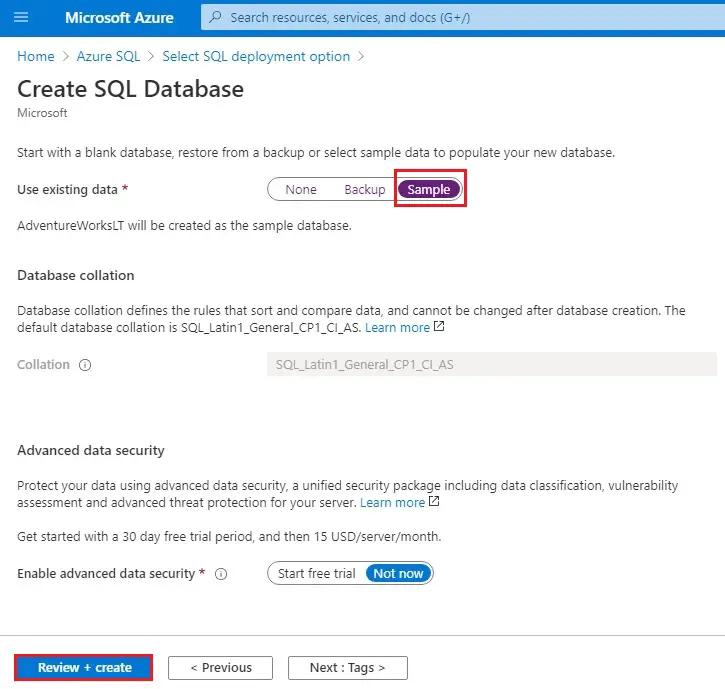
11- Additional settings tab, in the Data source section, for Use existing data, choose Sample. Select Review + create
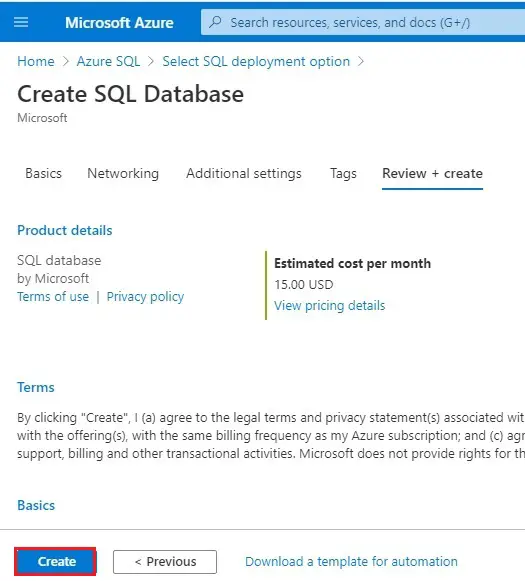
12- Select Create.
Query the database
Once the database is created, we can use the built-in Query editor in the Azure portal to connect to the database & query the data.
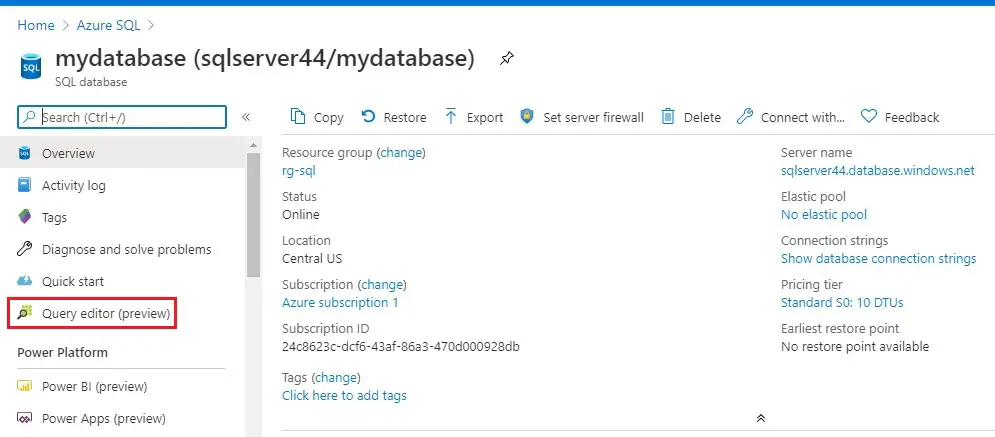
13- In the portal, search for, select SQL databases, and then choose your database from the list.
Choose Query editor (preview) in the left menu.
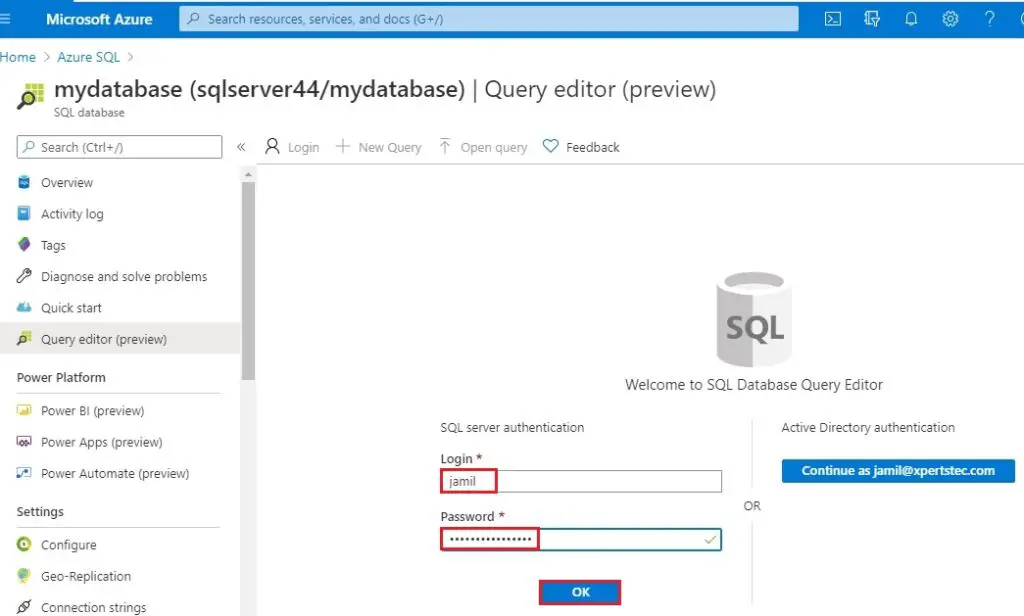
14- Type the server admin login information, and then select ok.
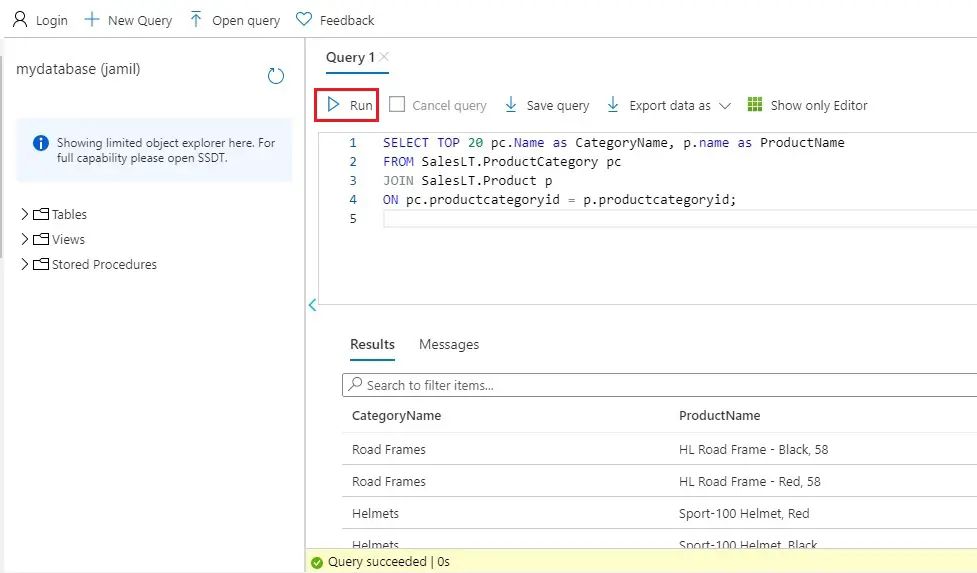
15- Type the below query in the Query editor pane.
SQL Copy
SELECT TOP 20 pc.Name as CategoryName, p.name as ProductName
FROM SalesLT.ProductCategory pc
JOIN SalesLT.Product p
ON pc.productcategoryid = p.productcategoryid;
Choose Run, and then review the query results in the Results pane.
Close the Query editor page, and then select OK when prompted to discard your unsaved edits.
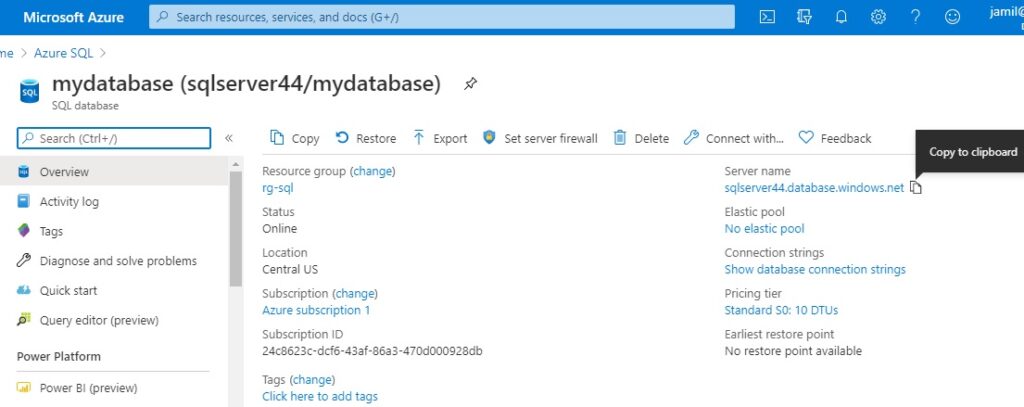
16- Copy database server name.
To connect to use SSMS and query Azure SQL Database or Azure SQL Managed Instance
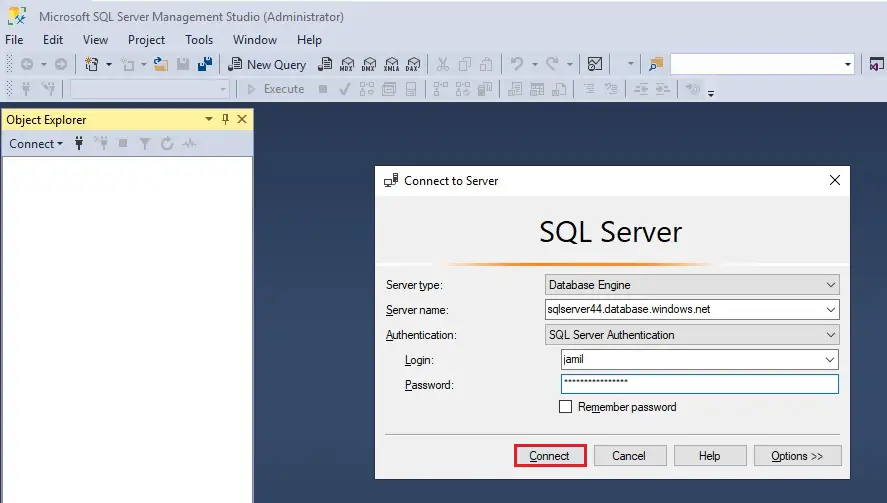
Connect to your database
In SSMS, connect to your server.
Important
A server listens on port 1433. The firewall must have this port open to connect to a server from behind a corporate firewall.
1- Open SQL Server Management Studio.
The Connect to Server window box appears
Server type – Database engine
Server name – type your SQL Database URL (example sqlserver44.database.windows.net)
Authentication – SQL Server Authentication
Login – username
Password – type your password
Select Connect The Object Explorer window opens.
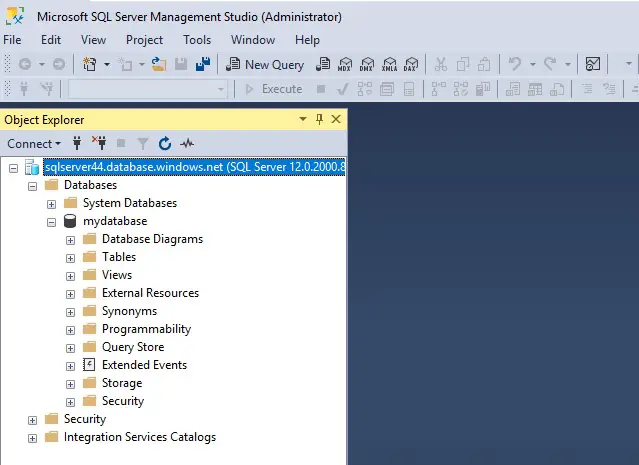
2- To view the database objects, expand the Databases and then expand your database node.
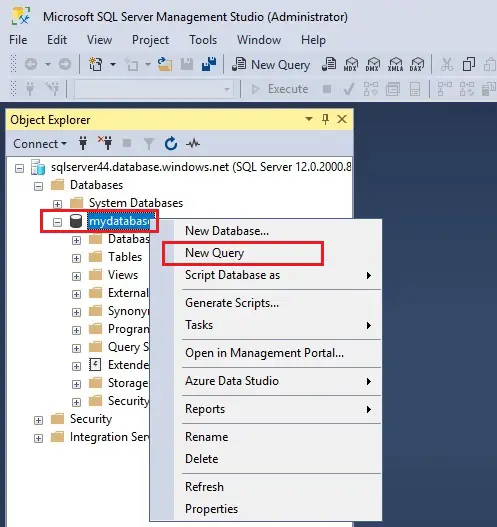
Query data
3- In Object Explorer, right-click mydatabase and select New Query.
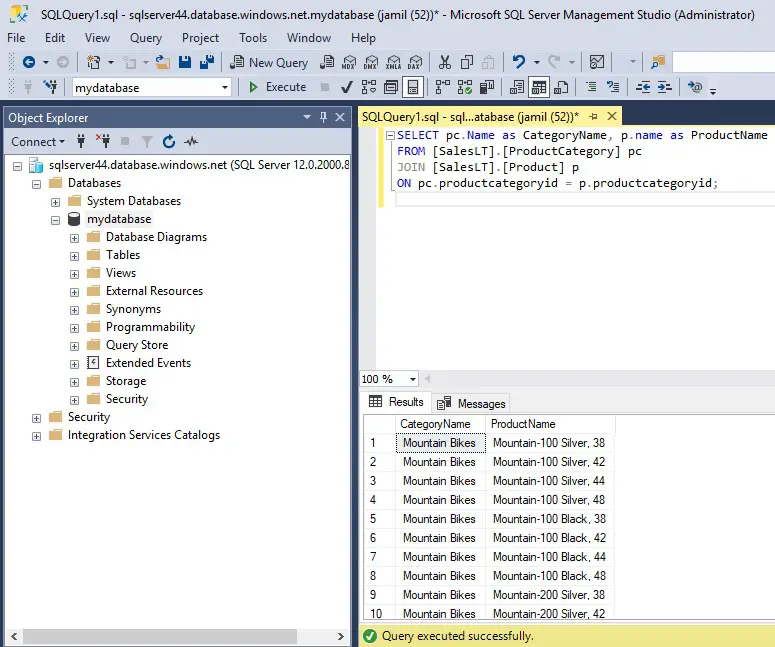
4- In the query window, paste the below SQL query:
SQLCopy
SELECT pc.Name as CategoryName, p.name as ProductName
FROM [SalesLT].[ProductCategory] pc
JOIN [SalesLT].[Product] p
ON pc.productcategoryid = p.productcategoryid;
From the toolbar, choose Execute to run the query and then retrieve data from the Product and ProductCategory tables.
