


Modern Authentication with Veeam, In this article I will explain how to configure the modern authentication with Veeam Backup for Office 365.
What is Modern Authentication visit Microsoft
Veeam Office 365 Modern Authentication
The release of version 4 of Veeam Backup for Office 365, now we are able to use the so-called modern authentication. This means using service accounts enabled for MFA (multi-factor authentication).
We need an Azure Active Directory custom application and a service account that has MFA (Multi-Facture Authentication) enabled. The custom application (App application) registered in Azure Active Directory will allow Veeam Backup for Office 365 to access the Microsoft Graph API. With this access, we can pick up the data from the “Microsoft Office 365 organization tenant”.
In this strategy, the service account will be used to connect to the EWS and PowerShell services.
Preparation
In instance, we want to use modern authentication with Veeam Backup for Office 365.
The below steps should be done for using the modern authentication.
Register a custom application in Azure Active Directory
Collect your Application ID and Secret
Create a new client secret
Create a new service account in Azure Active Directory
Enable Multi-Factor Authentication (MFA) on this service account
Assign roles to the service account
Grant a service account required roles and permissions
Get App password for an MFA-enabled service account
Add tenant to Veeam with the service account
Create Storage account in Azure
Add Azure Blob Storage Repository
Register a custom application in Azure Active Directory
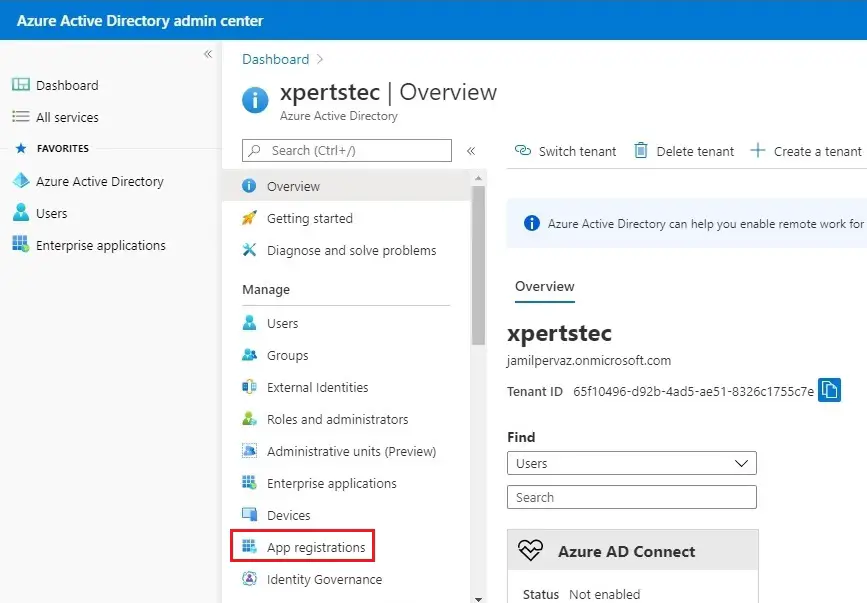
1- Open your Azure Active Directory admin center under the Manage tab and then select App registration.
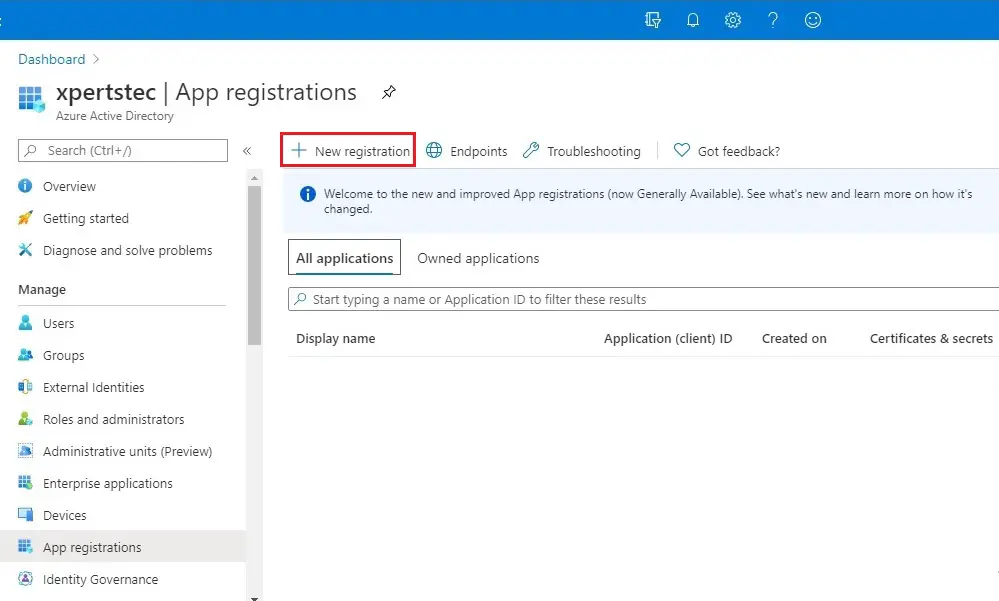
2- Click on + new registration Under App registrations tab.
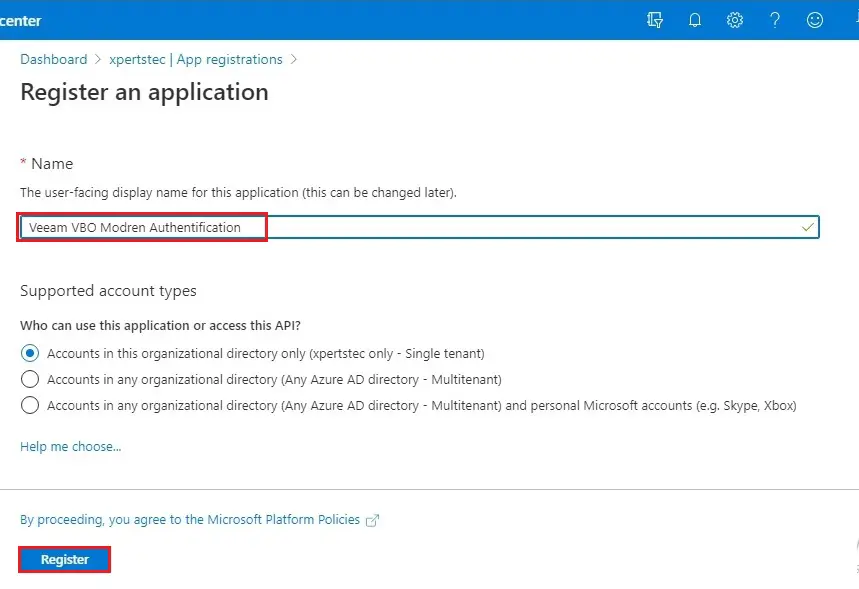
3- Enter new custom application a name; select the supported account type and then click on the register button.
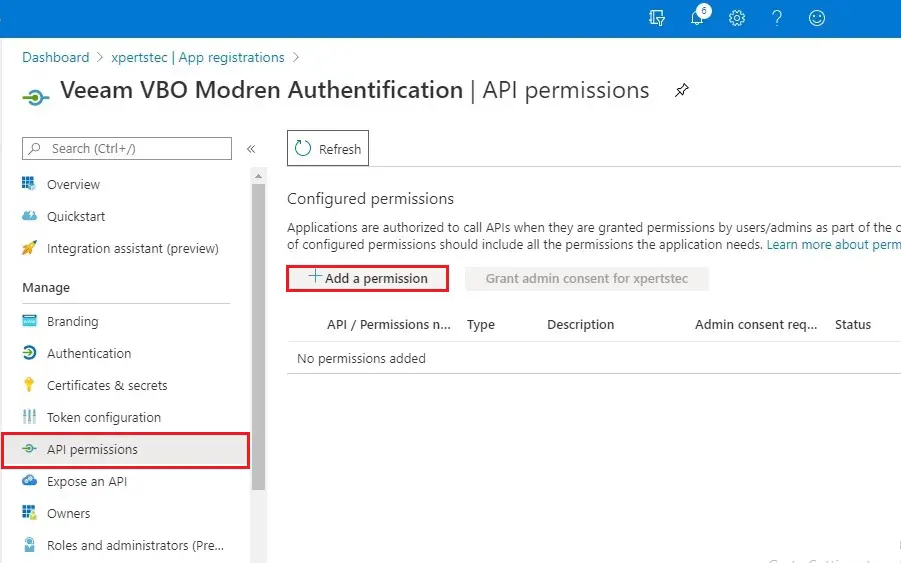
4- After creating a new custom application, we need to provide it with some permission. For that go to your newly created app application and then select the + API Permissions button.
5- Now we need to add Microsoft Graph permissions to our custom app application.
In the request API permissions wizard and then select Microsoft Graph.
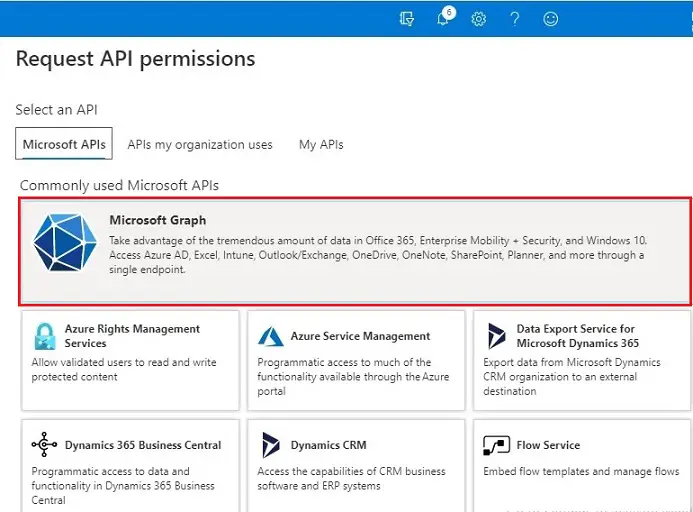
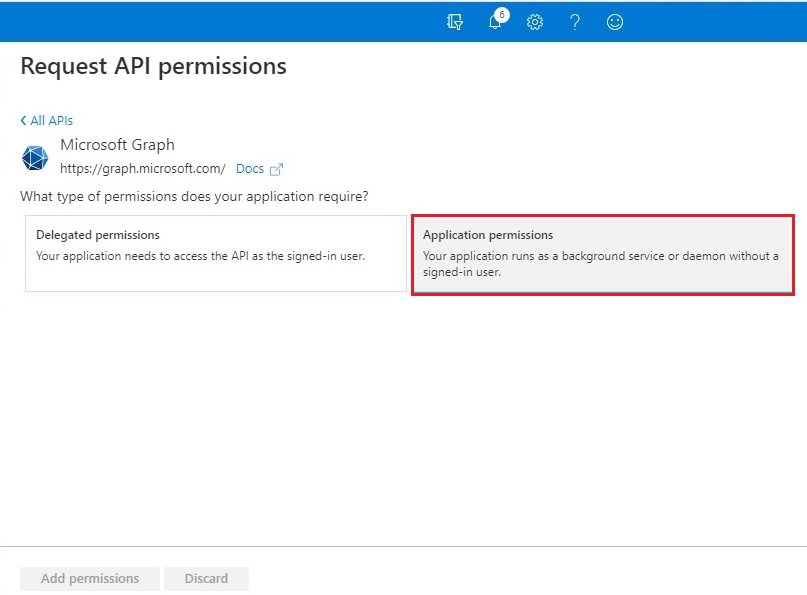
6- Select Application permissions.
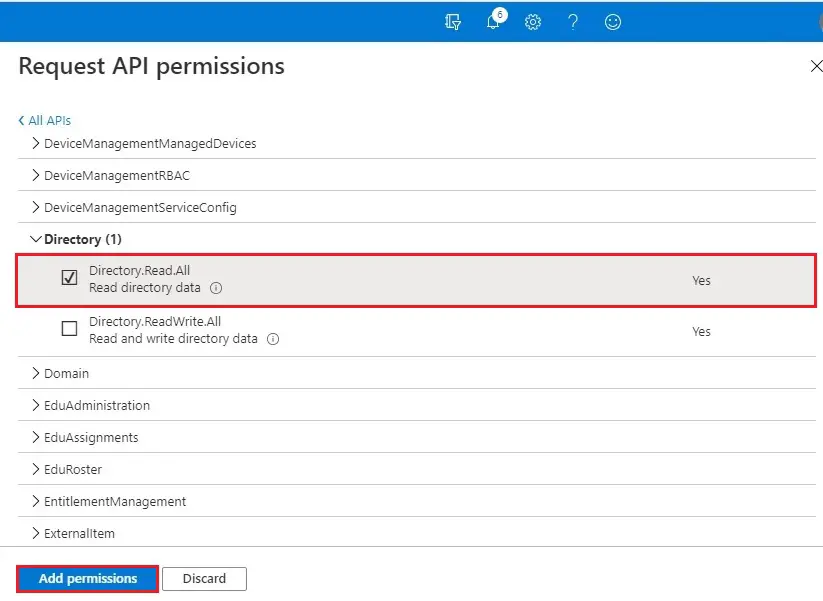
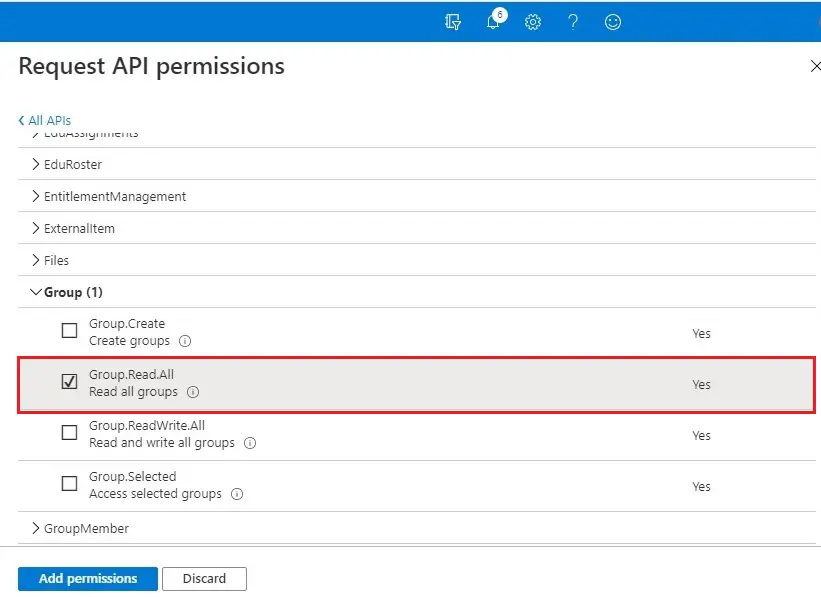
7- Expand Director Option and select Directory.Read.All. Expand Group option and select Group.Read.All from the list of available permissions, and then click Add permissions
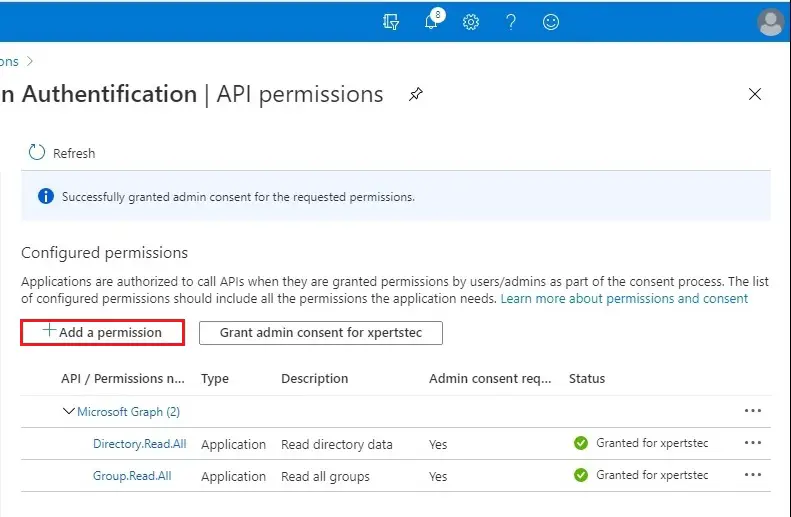
1- Directory.Read.All
2- Group.Read.All
These two permissions are needed to access the organization tenant.
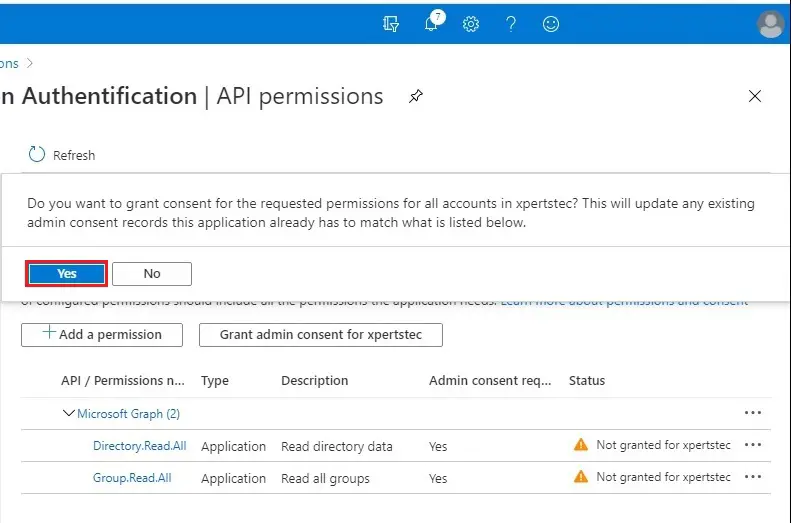
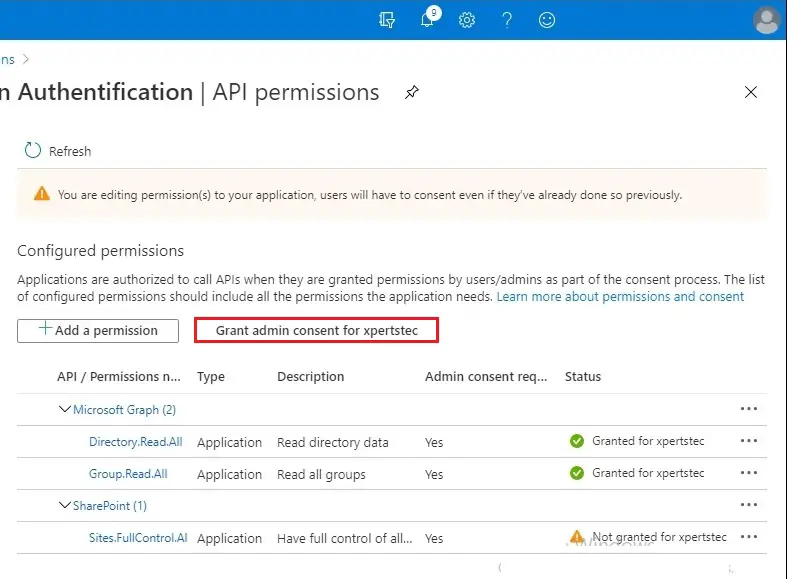
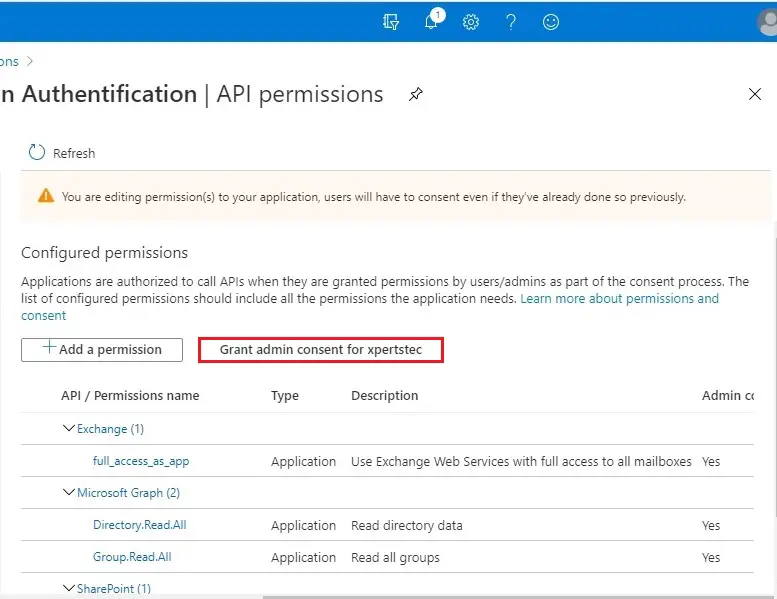
8- This type of permission requires administrator consent. To grant administrator consent, click on Grant admin consent for (tenant name).
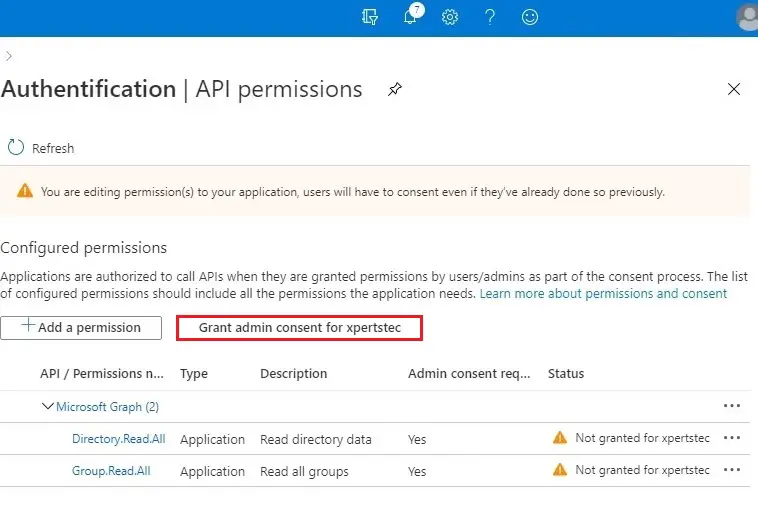
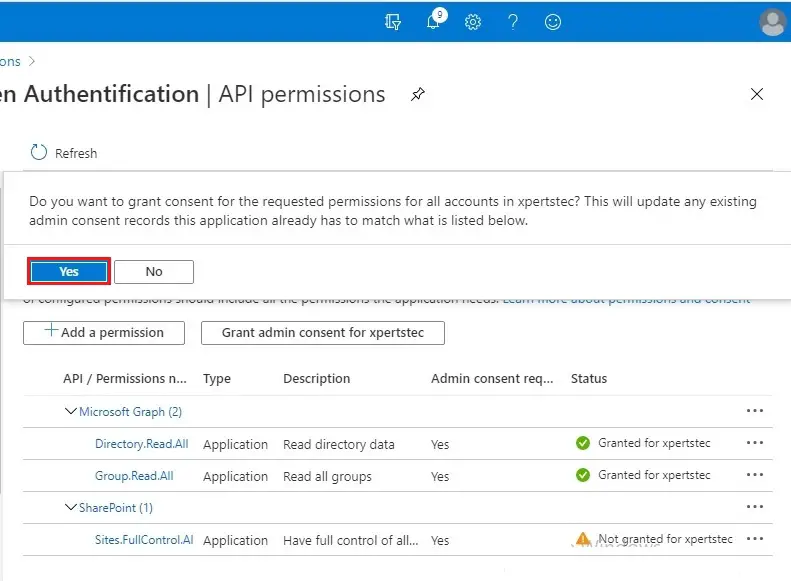
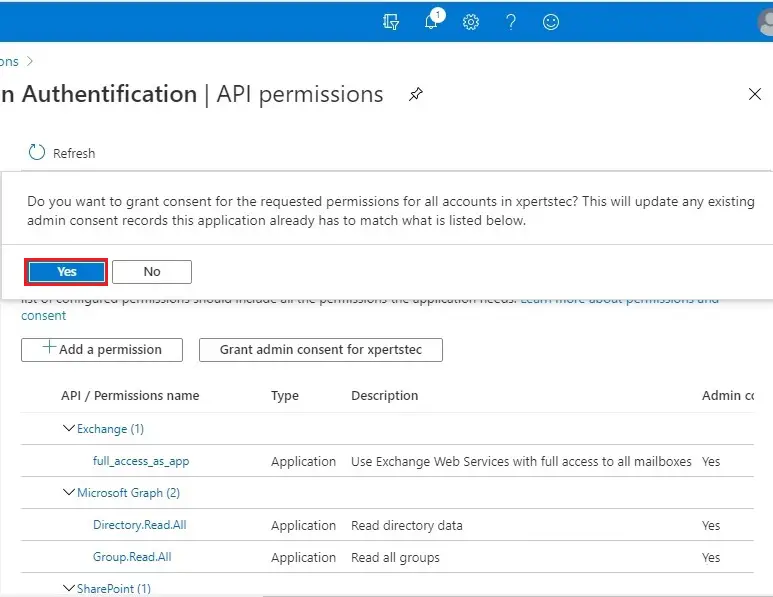
9- Click Yes to confirm granting permissions
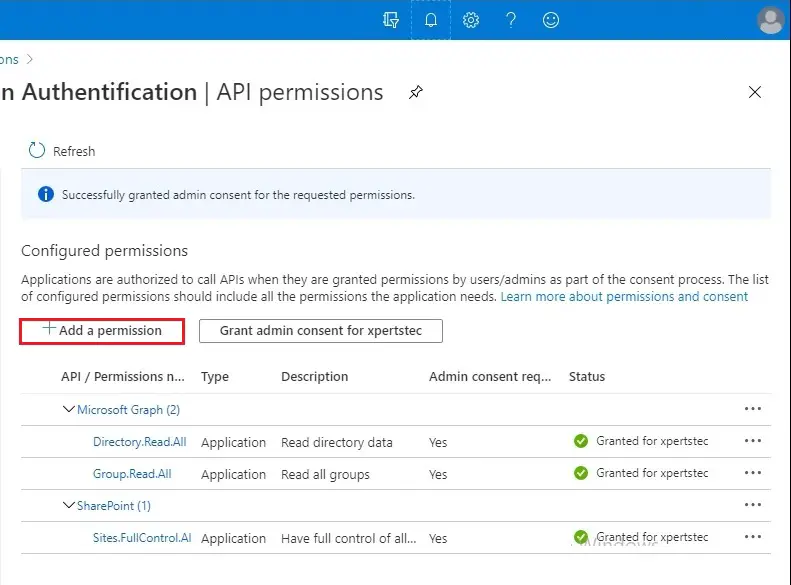
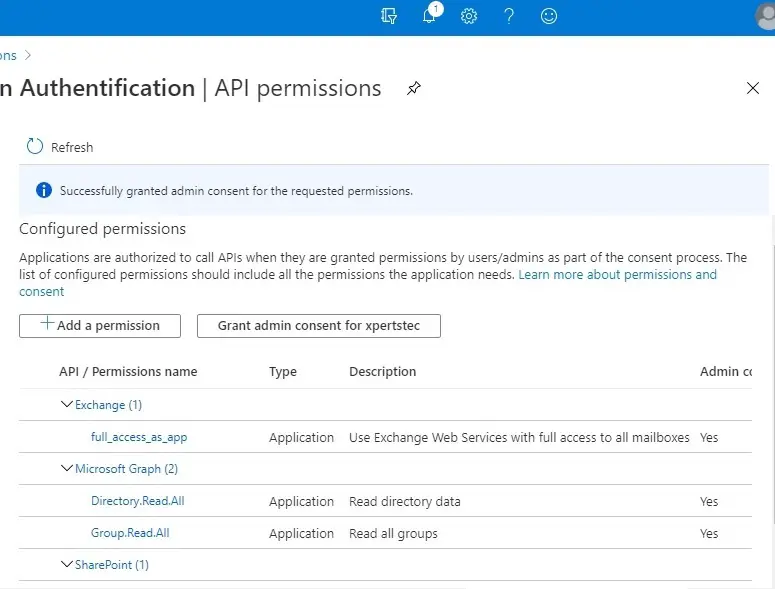
10- Successfully granted admin consent for the request permission, Click + Add a permission button.
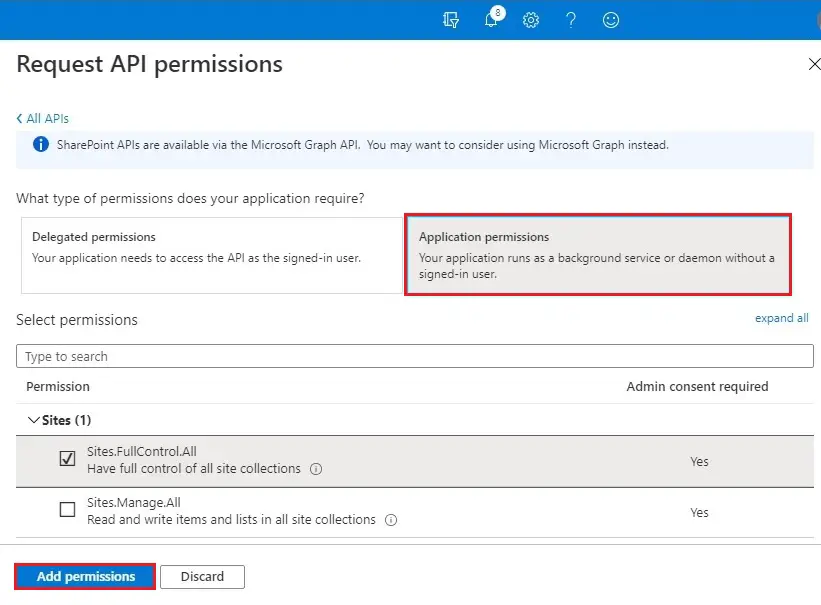
11- Scroll down and then select SharePoint.

12- Select Application permission and expand sites, select Sites.FullControll.all and then click on add permission.
13- Click on Grant admin consent for (tenant name)
14- Click Yes to confirm granting permissions
15- Successfully configured permissions click on + Add a Permission button.
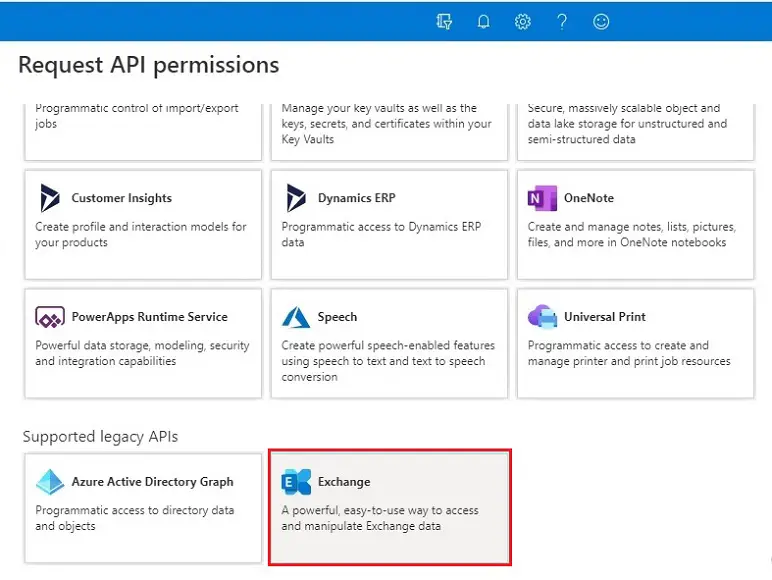
16- Scroll down and then select exchange options
17- Choose Application permissions.

18- Click on Grant admin consent for (tenant name)
19- Click Yes to confirm granting permissions
20- We have successfully registered a custom application in your Azure Active Directory and you have successfully set the required permissions.
How to get your Application secret
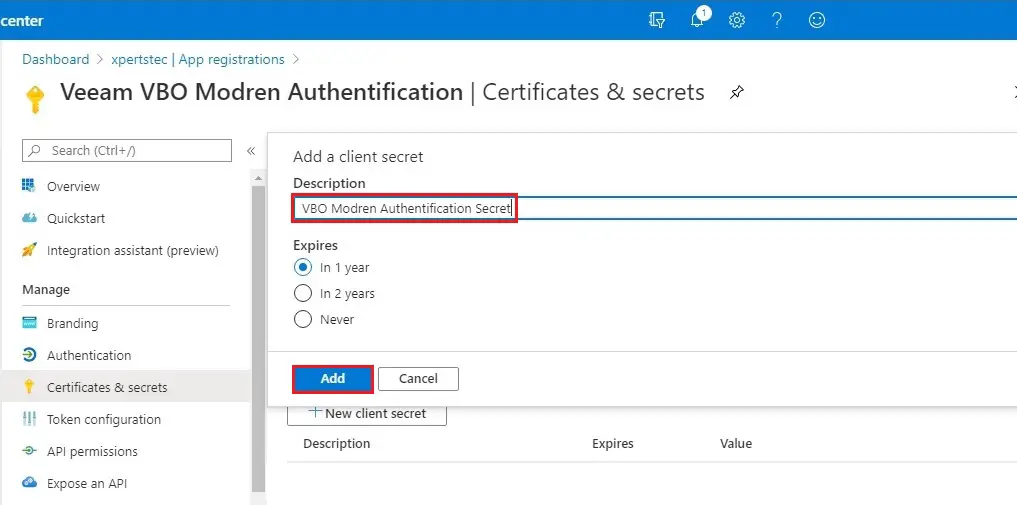
Create a new client secret
1- To create a new client secret for our newly created custom application. Under Manage select Certificates & secrets and then click on + New client secret button under client secrets.
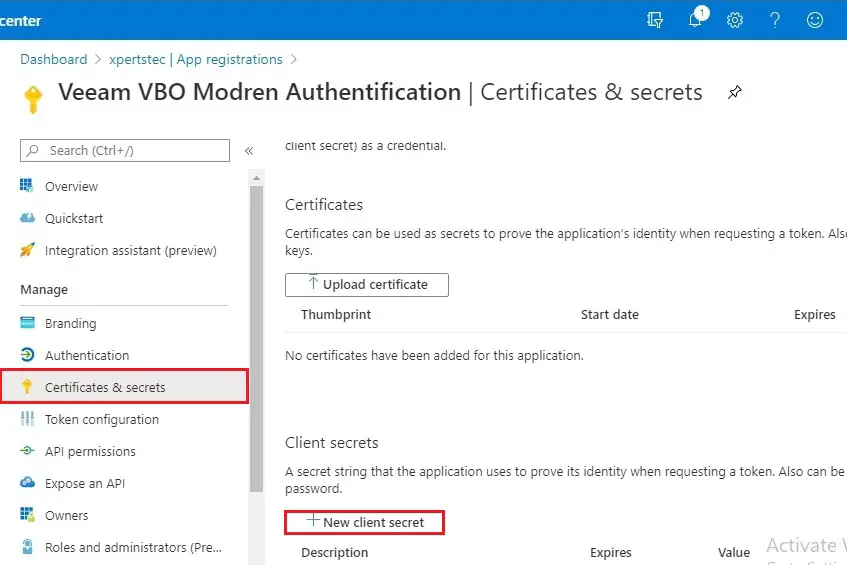
2- Add a New client secret wizard, specify a description, an expiration date, and then click Add button.
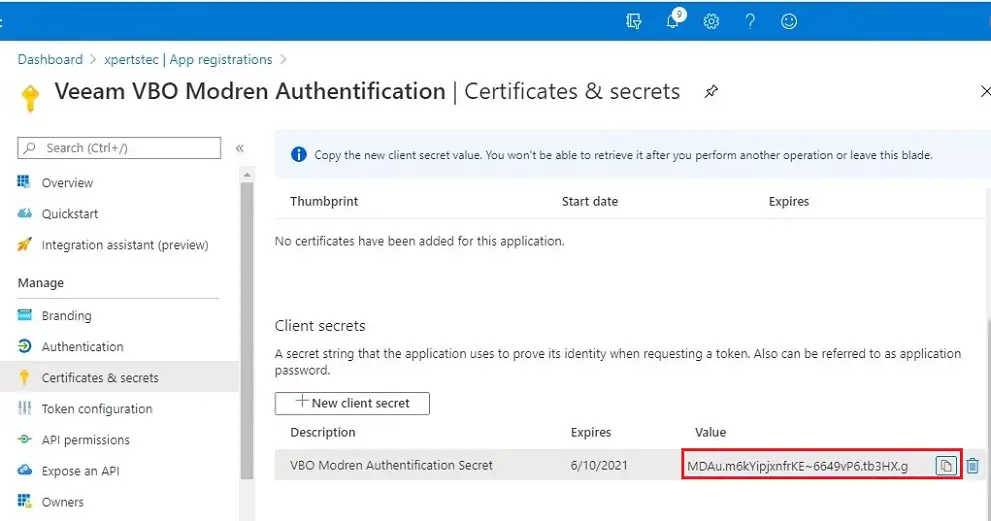
We have successfully created your application secret. The secret can be reviewed in the main settings area of your custom application under the Certificates & secrets options.
Collect Application Secret
3- To collect application secrets, go to the Certificates & secrets settings within your custom application and copy and then save it in note pad the value of it.
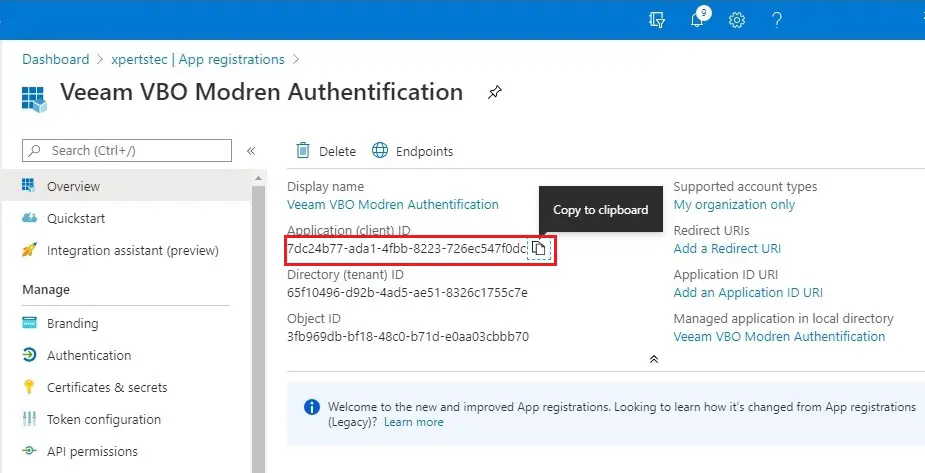
Collect Application ID
4- The first thing you need to collect the application ID. If you go back to the main site of the app registrations, copy application (client) ID and then save it in a note pad.
How to create a new service account in Azure Active Directory
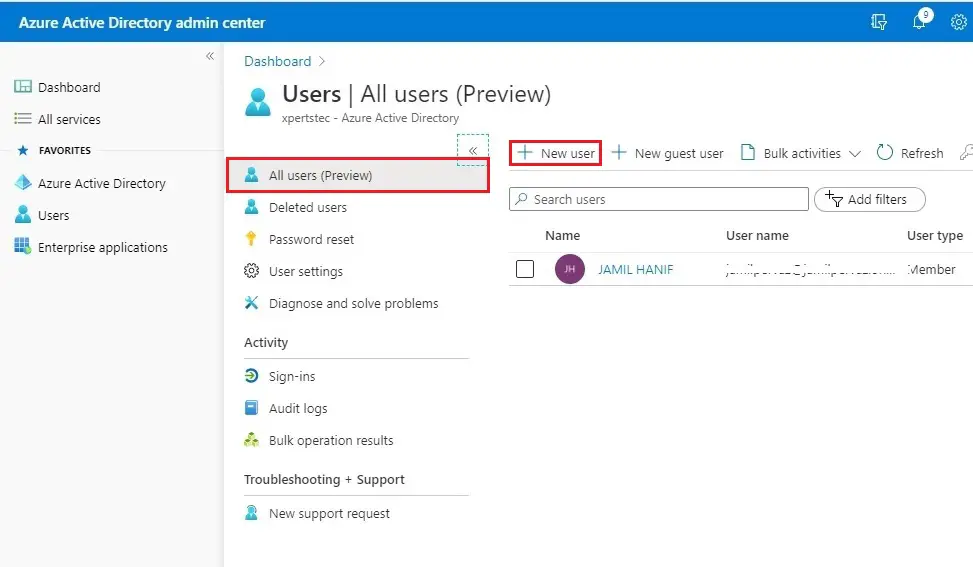
1- Now we need to create the service user, which will connect from Veeam Backup for Office 365 to your tenant. In the Office 365 admin center, click on + new user to create a user without a product license.
2- The user which we are going to create will be our service user for MFA (Multi-Factor Authentication). Type a name, initial password and then click on create

How to configure an MFA-enabled service account
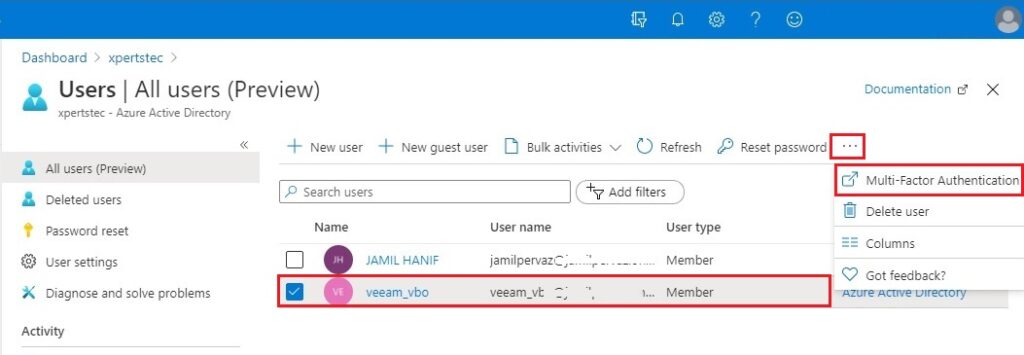
After successfully created a service user, now we can proceed with activating MFA for it. Go back to the all users overview within your azure active directory admin center.
3- Select your newly created service user. Select … On the top right of the ribbon, and then select Multi-Factor Authentication.
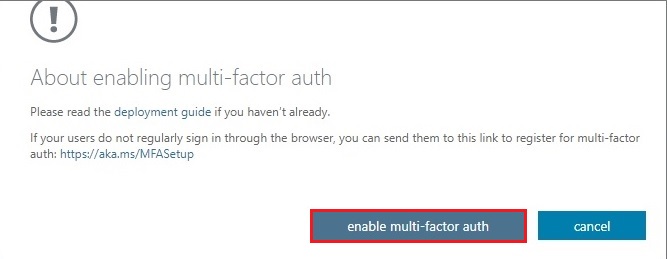
4- Select your service user on the left side and then click enable (MFA) on the right side under quick steps.

5- Click on enable multi-factor auth button.
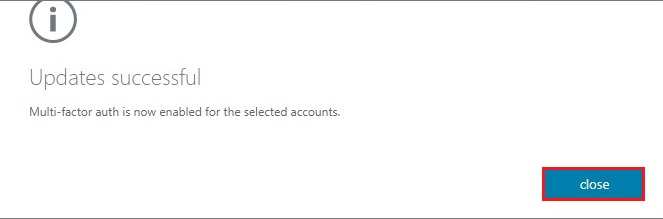
6- The account is successfully enabled for MFA. Click close.
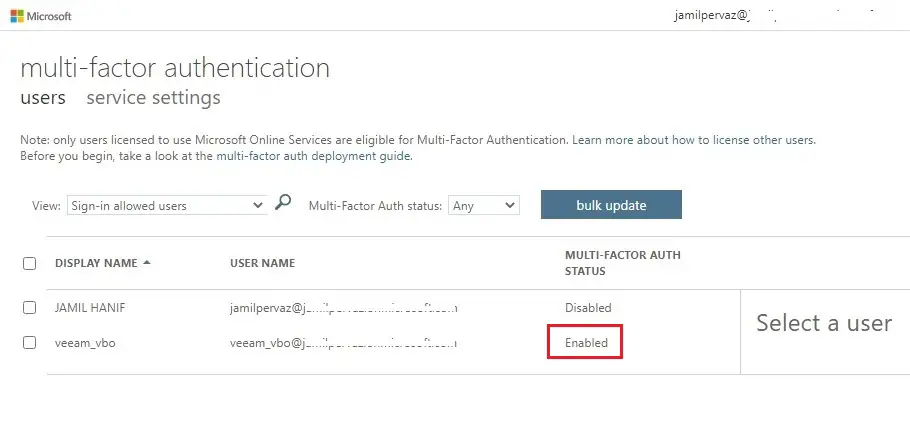
7- Now you can review your user which is now enabled for MFA.
Assign roles to the service account
The user needs the correct permissions and roles to backup Exchange Online and SharePoint Online. We have the choice to do this via the Exchange Admin Center.
For Exchange Online (Global Administrator or Exchange Administrator) role. Additionally, you need the ApplicationImpersonation role.
For SharePoint Online (Global Administrator or SharePoint Administrator) role.
I have this as testing purposes and for this blog post. I would not recommend assigning the Global Administrator in a production environment. Either uses the Exchange Administrator and the SharePoint Administrator role.
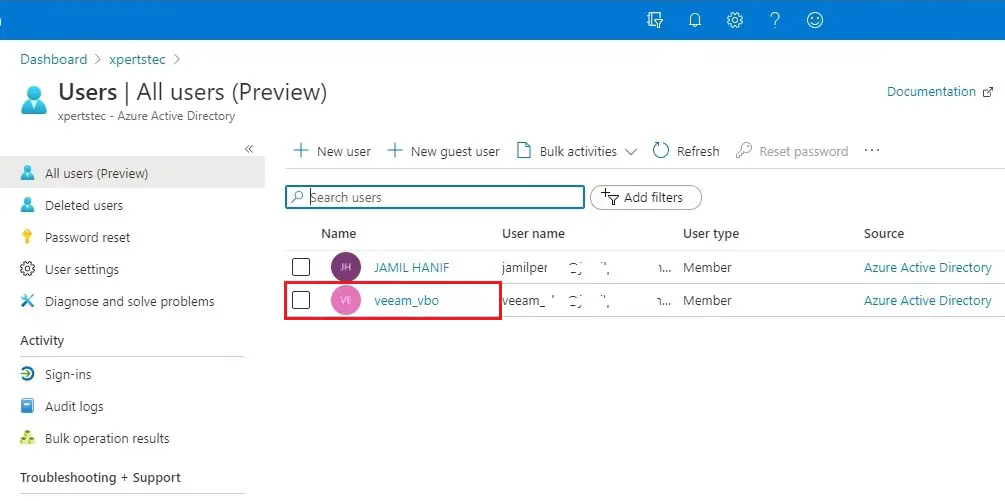
1- Select user account (veeam_vbo).
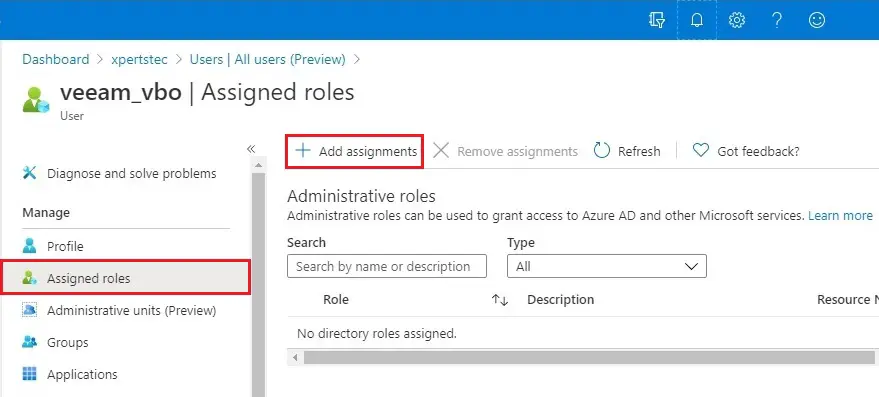
2- Click on Assigned roles under manage and then click on + Add assignments.
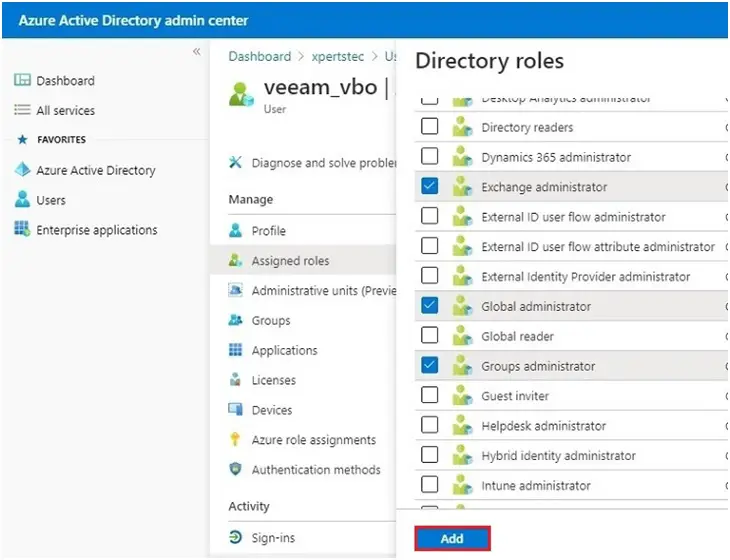
3- Select the role in the Directory role wizard on the left hand side and then click add.
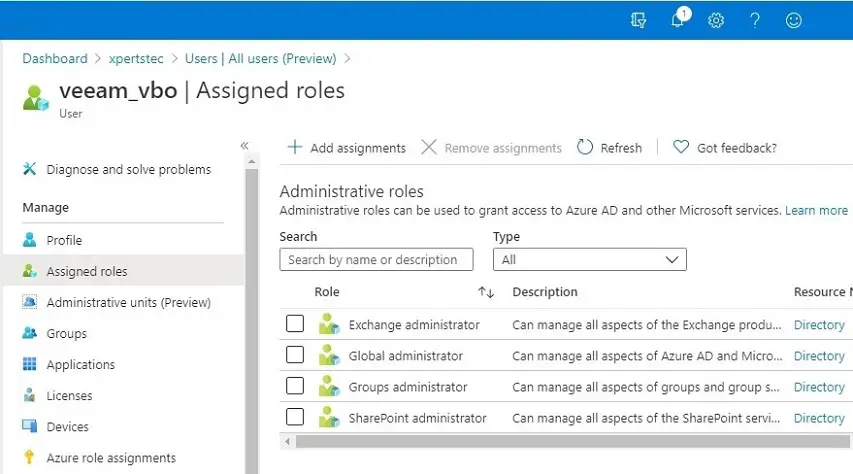
4- Successfully assigned the roles.
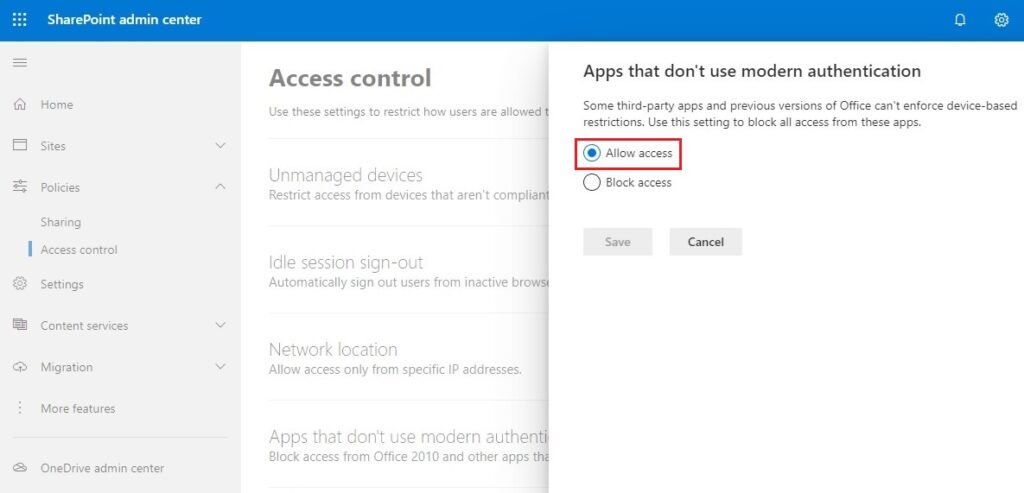
SharePoint Admin Center
1- Login with SharePoint Admin Center, select access control, and then Apps that don’t use modern authentication.

2- Verify allow access is selected.
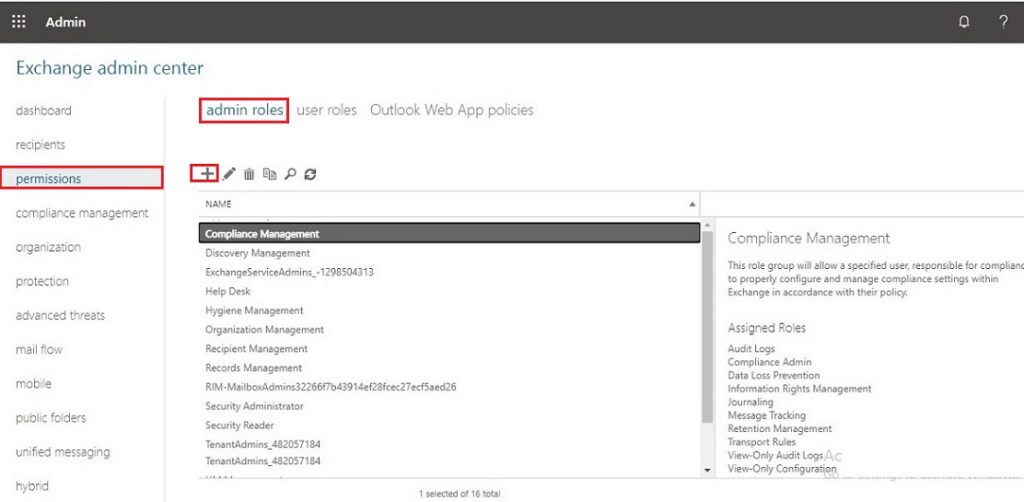
How to grant a service account required roles and permissions
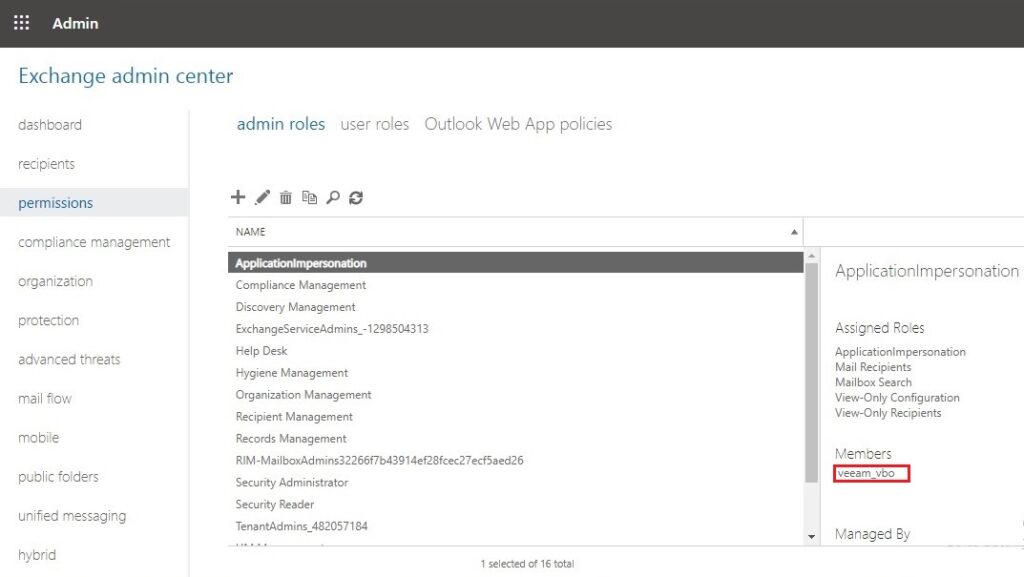
1- Add ApplicationImpersonation role via the Exchange Admin Center. Select the permission tab on the left-hand side. Under admin, roles click the + button to add a new role.
2- Type a role group name and description. Select the Write Scope to default and then click the + button.
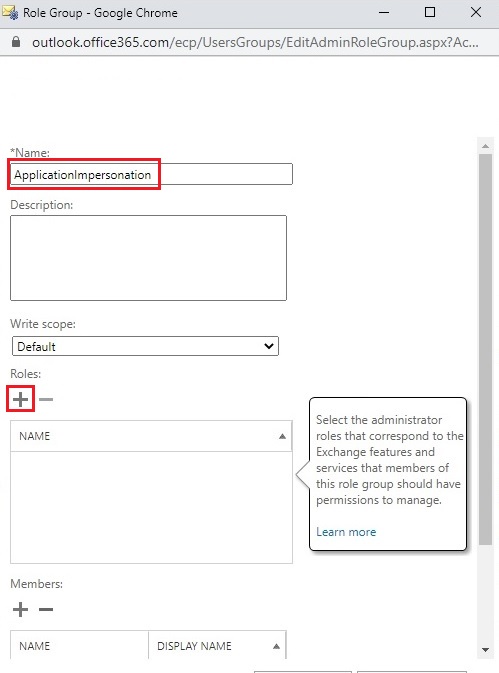
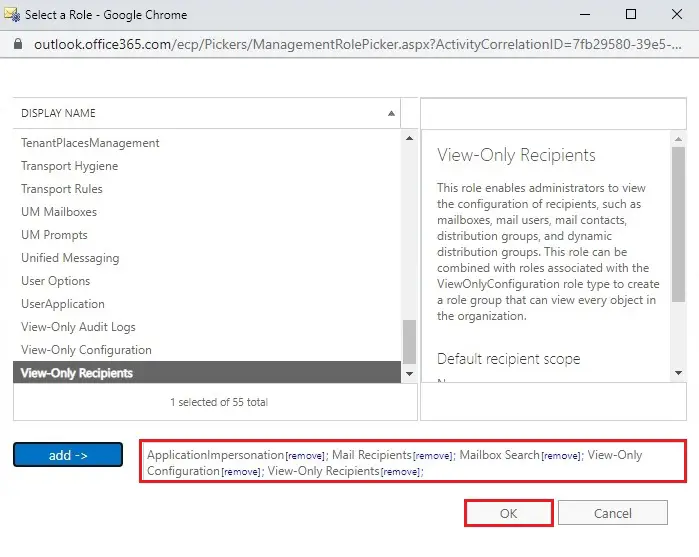
3- Under Roles to add the ApplicationImpersonation, Mail Recipient, Mail Search, View only configuration, View only recipient role from the list, and then click ok.
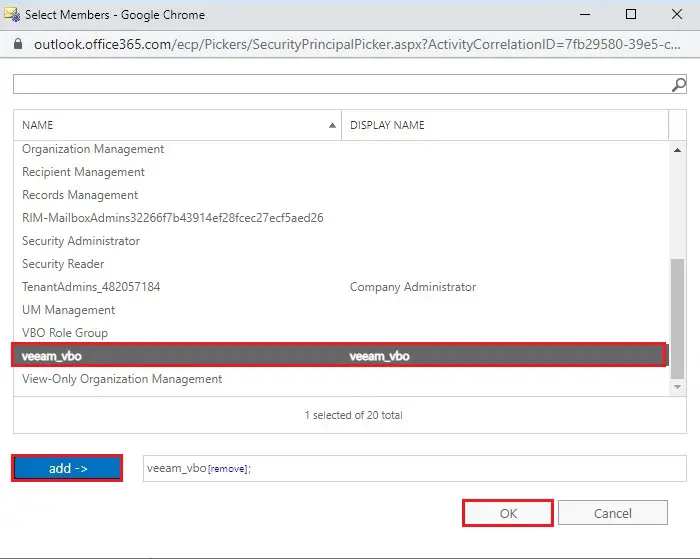
5- Add a member, it means our service account for this new role group. For that click on the + button under Members.
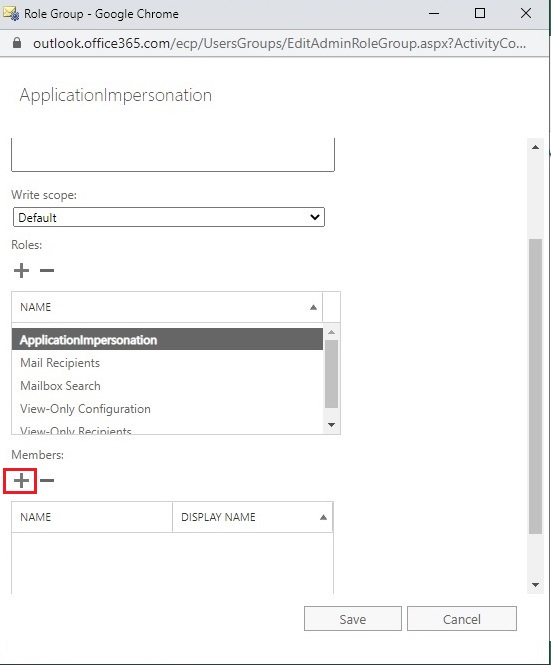
6- Select your newly created service user, click on add button and then click OK.
7- Click on save button.

8- The user has been granted the ApplicationImpersonation role.
To get an app password for an MFA-enabled service account
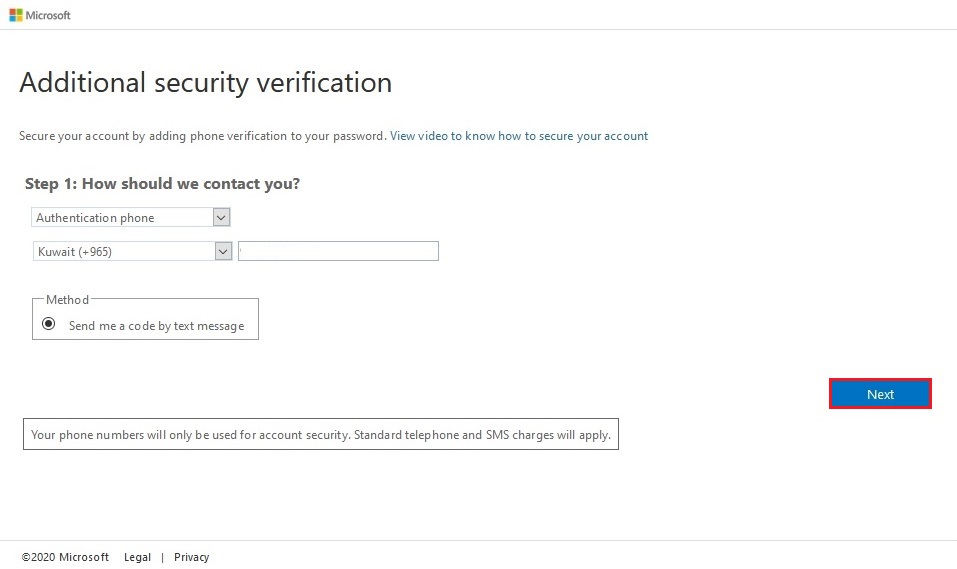
1- The last thing we need to do before adding our tenant to Veeam Backup for Microsoft Office 365 is to collect your app password. Login with new user account & go through the additional security verification methods for this new account.

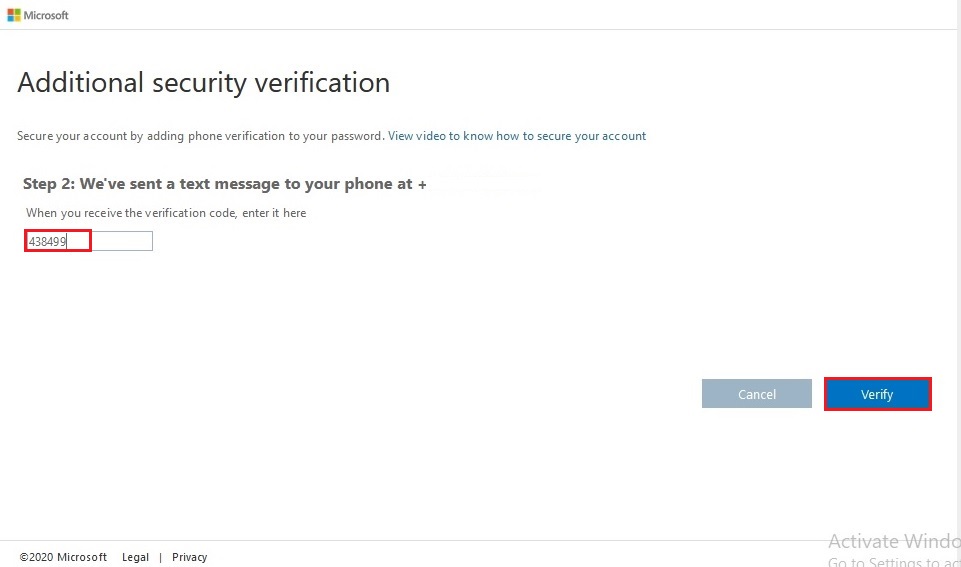
2- Now we need to select if we would like to receive text messages or if Microsoft calls you within the configuration of the phone verification. I am going to select an Authentication phone option (country code phone number) and select send me a code by text message and then click Next.
3- Type the verification code and then click on verify button.
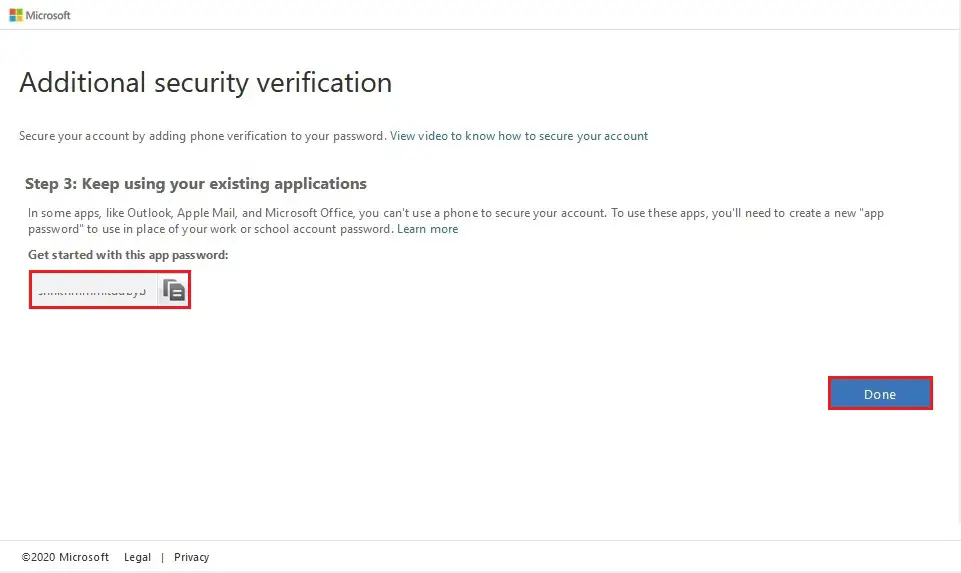
4- This app password is wanted within the Tenant configuration in Veeam Backup for Office 365. Copy it in notepad or save it for our later use. Click on the done button.
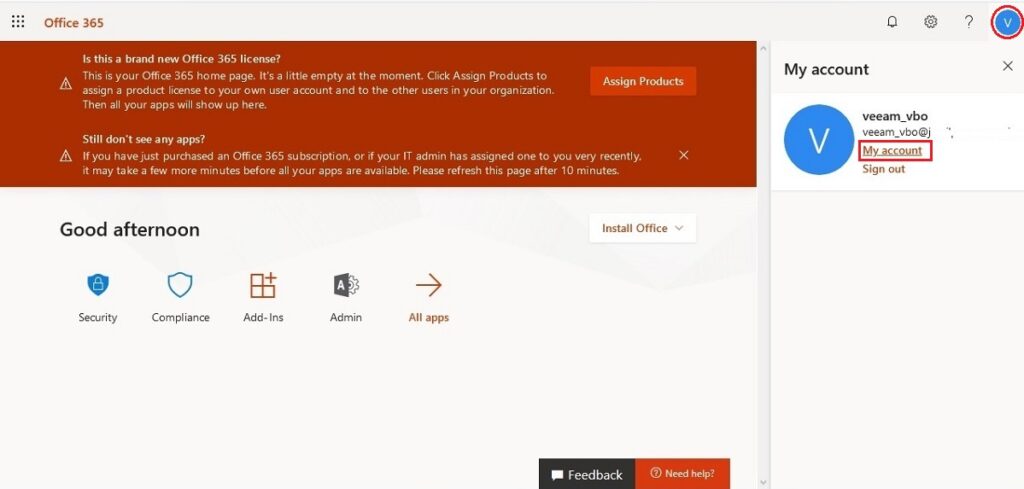
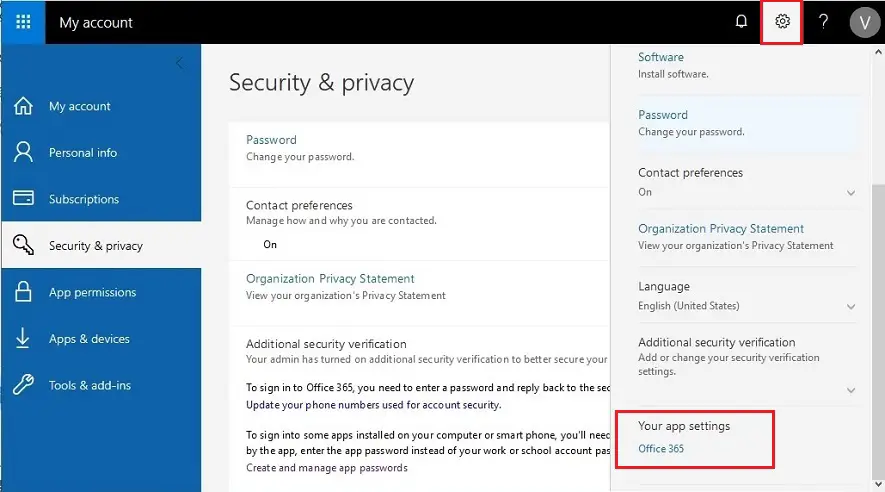
5- After login to user office 365 account, click on my account icon and then click my account
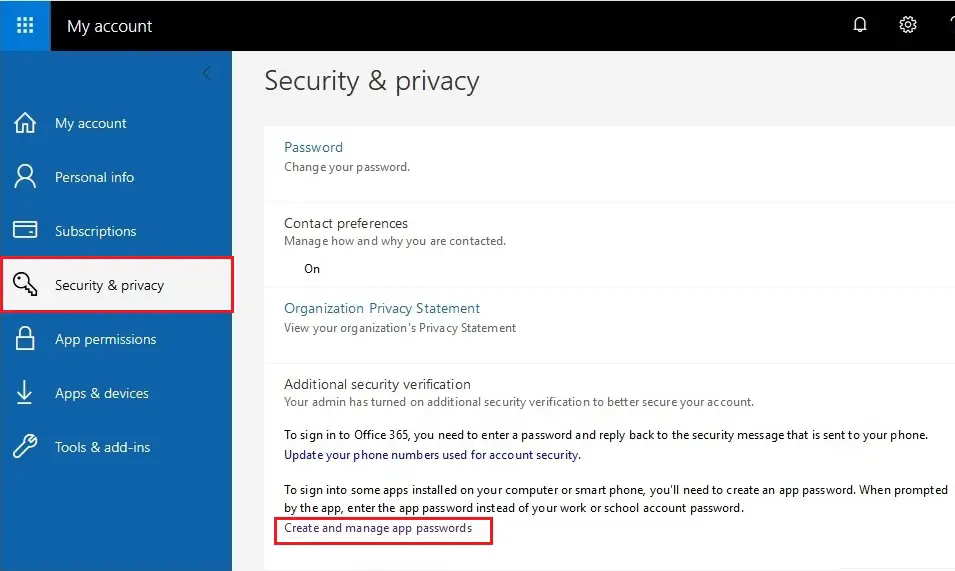
6- You will be redirected to https://portal.office.com/account. Under my account select the Security & Privacy tab to create and manage your passwords. Click on create and manage passwords.
7- Additional security verification (app passwords) click on create button.
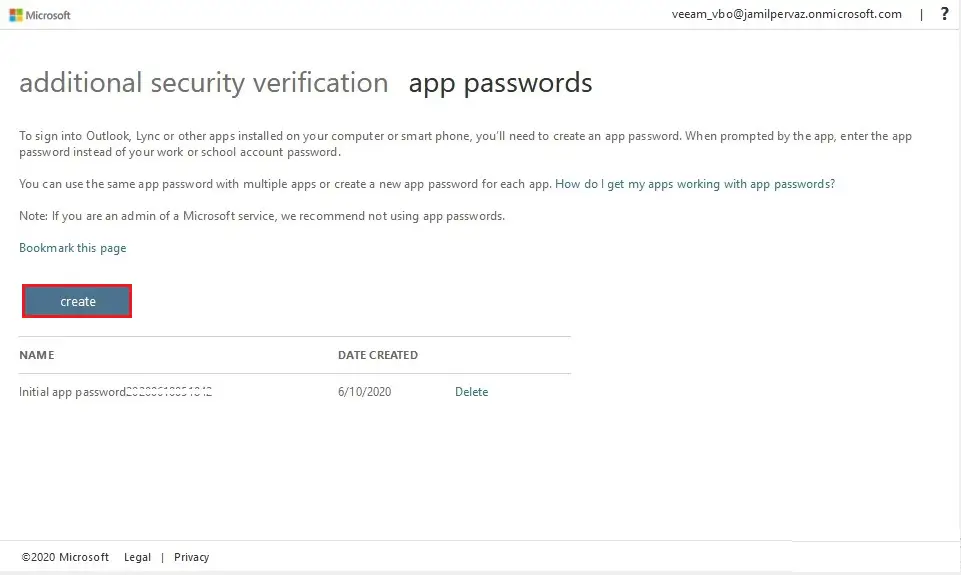
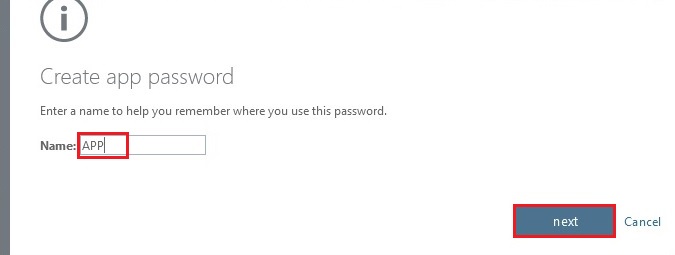
8- Enter a name and then click next.
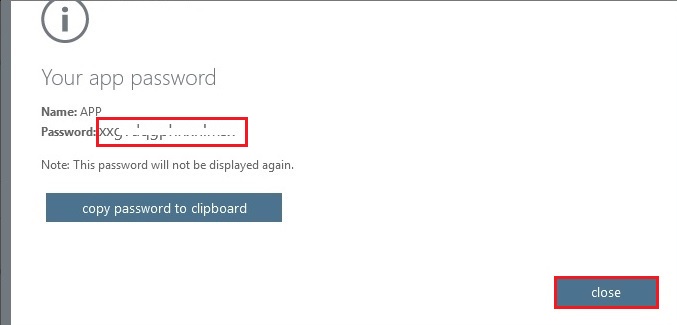
9- Copy your password and save it in notepad and then click close.
10- You will need to sign in with this user if you have an existing service account. In the right-hand upper corner, select the settings and then your app settings (Office 365).
I have created a new user, so I don’t want to do that here.
Add Office 365 organization using modern authentication
Create Storage account in Azure
Add Azure Blob Storage Repository
For more details please visit Veeam
Good post. I learn something totally new and challenging on blogs I StumbleUpon everyday. It’s always useful to read through articles from other authors and use something from other web sites. |
Dear Johnnie, thank you
We’re a bunch of volunteers and opening a brand new scheme in our community. Your site provided us with valuable information to work on. You’ve done an impressive task and our whole neighborhood will likely be grateful to you.|
Very good post! We are linking to this particularly great content on our website. Keep up the great writing.
Thank you for linking the content, I appreciate